


25
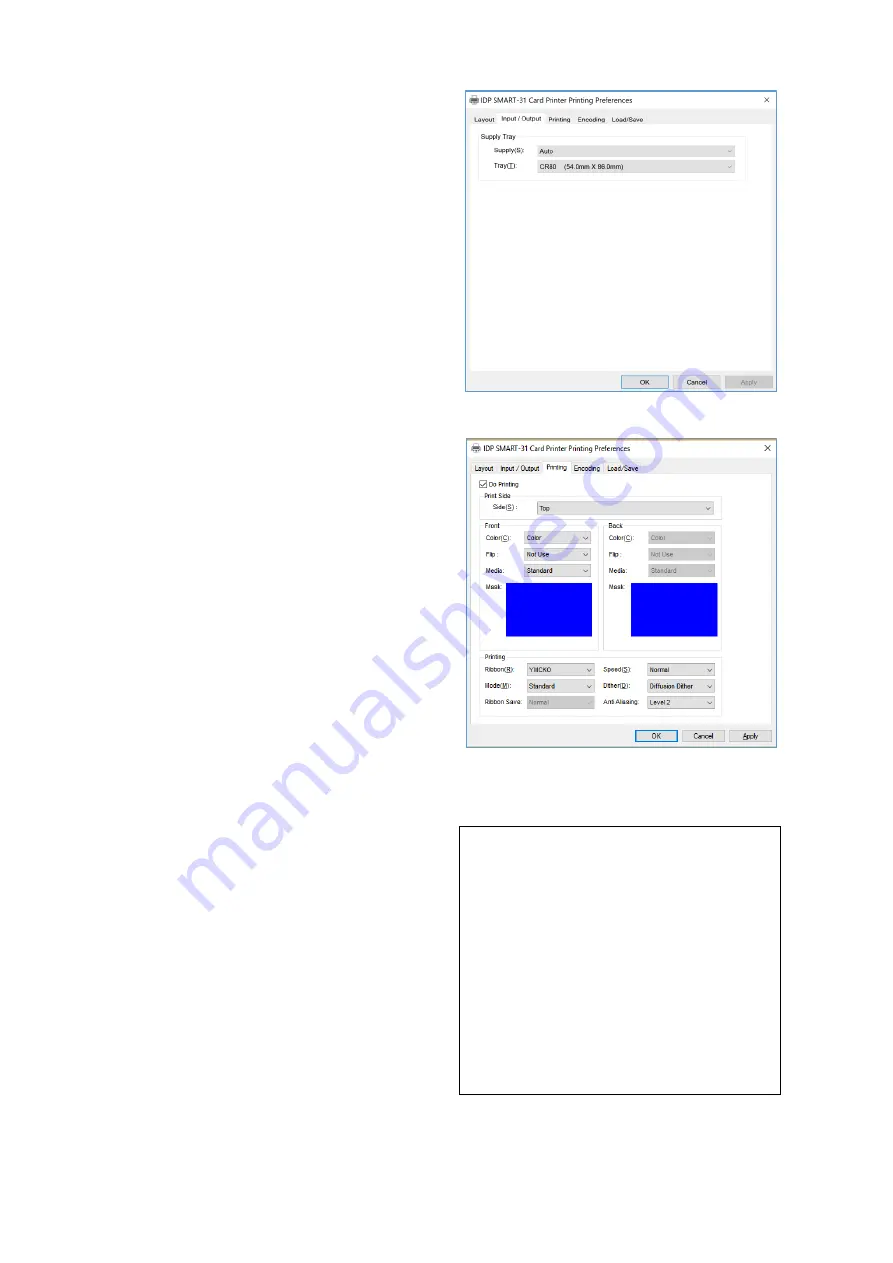
(3) Input / Output
[ Supply Tray ]
Supply :
You can select “Auto” if SMART-
31 has 1 input hopper. Please select the
hopper if it has a multi hopper.
Tray :
You can select “CR-80” because
SMART-31 supports CR80 cards only.
Figure 41 Input / Output
(4) Printing
Do Printing
: You can select printing or
not
[ Print Side ]
Side
: Please select one side printing or
both sides printing (It is possible only when
you have a flipper.)
[ Front / Back ]
Color
: You can select color or mono print.
Flip
: You can flip an image
Media / Mask
: You can indicate the area
to print by using a predefined mask or user
defined mask (white card, smartcard,
Magnetic stripe card, etc.) on front or back
side.
[ Printing ]
Ribbon :
It shows the type of installed
ribbon. You don’t need to select this option
as SMART-31 recognizes ribbon
automatically with RF Tag.
Speed :
Set printing speed and quality
Mode :
Set printing mode
Standard :
Default print mode. Prints all
area of printing
Partial :
Partial print mode. It is printed
Figure 42 Printing
You can define a mask.
User defined mask uses BITMAP file
(1012 X 636 pixels).
Blue (RGB(0,0,255)): Print and
Overlay
Sky Blue (RGB(0,255,255)): Overlay
only
Pink (RGB(255,0,255)): Print only
Yellow (RGB(255,255,0)): Florescent


