38
©Godiva Ltd. Our policy is one of continuous development. We therefore reserve the
right to amend specifications without notice or obligation.
8.
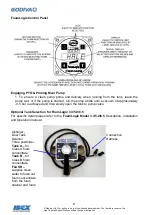
Select simulated flow on the FoamLogix by pressing both up
↑ & down ↓ at the same
time.
9.
Press the
RED
on
button, and the pump will prime itself. The pump will run for 30
seconds or until prime is achieved. If no prime is made, the display will show “
no pr
”.
Repeat this step once more to attempt to prime the pump.
”no Pr” = No prime display
If priming is not achieved after several attempts check the foam supply is connected
and available to the pump. Also use the Fault Finding chart on page 44.
10.
For 3.3/5.0/6.5 FoamLogix
, select tank
B
and repeat the priming procedure for that
tank.
11. When prime is achieved, deselect simulated flow by pressing both up
↑ & down ↓ at the
same time.
12. Return the bypass valve to the inject position.
The unit is now ready to run.
Calibration of FoamLogix
The FoamLogix package as supplied is factory tested and calibrated and should not require
further attention. However, should any calibration issue arise, please refer to the appropriate
FoamLogix Model
Description, Installation and Operation manual.
Smart Switch operation
The CAFS Smart Switch Panel is the primary component of the CAFS with compressor air-
inject system. The Smart Switch Panel allows monitoring and control of the consistency of
the discharged CAFS foam.

