background image

49

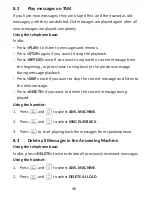
7.    Press


M

to stop and save your personalized OGM. You new saved 

OGM will playback automatically. 

Alternatively, press 

O

 to return to the previous screen without saving the 

personalized OGM.

8.5.4. 

Playback the Outgoing Message (OGM)

Using the telephone base:

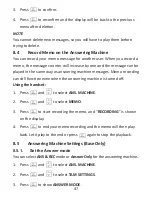
Press 

H

 briefly to listen to the current OGM

Using the handset:

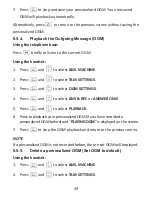
1.    Press


M

and 

.

 to select 

ANS. MACHINE

.

2.    Press


M

and 

.

 to select 

TAM SETTINGS

.

3.    Press


M

and 

.

 to select 

OGM SETTINGS

.

4.    Press


M

and 

.

 to select 

ANS & REC

 or 

ANSWER ONLY

.

5.    Press


M

and 

.

 to select 

PLAYBACK

.

6.    Press to playback your personalized OGM (if you have recorded a  

personalized OGM before) and “

PLAYING OGM

” is displayed on the screen.

7.    Press


M

to stop the OGM playback and return to the previous menu.

NOTE

If a personalized OGM is not recorded before, the pre-set OGM will be played.

8.5.5. 

Delete a personalized OGM (Set OGM to default)

Using the handset:

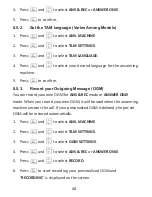
1.    Press


M

and 

.

 to select 

ANS. MACHINE

.

2.    Press


M

and 

.

 to select 

TAM SETTINGS

.
Содержание Loop Plus

Страница 1: ...l 0844 557 9677 Please note that all calls are charged at local rate Or visit our websites www binatonetelecom com www iDECTonline com Before operating this set please read these instructions carefull...

Страница 2: ...0 TYPE NI MH RECHARGEABLE BATTERY VOLTAGE RATING 400MAH 2 X 1 2V AAA SIZE GPI VT40AAAHC TYPE NI MH RECHARGEABLE BATTERY VOLTAGE RATING 400MAH 2 X 1 2V AAA SIZE COSLIGHT LH040 3AH45 TYPE NI MH RECHARGE...

Страница 3: ...Text and Digit Entry Table 18 3 5 1 Latin Character Set 19 4 USE YOUR PHONE 20 4 1 Make a Call 20 4 1 1 Preparatory Dialing 20 4 1 2 Direct Dialing 20 4 1 3 Call from the Phonebook 20 4 1 4 Search Al...

Страница 4: ...Store a Number Entry in the Phonebook 27 5 1 1 Entering Names 27 5 1 2 Writing Tips 28 5 2 Review an Entry 28 5 3 Dial an Entry 28 5 4 Edit a Phonebook Entry 29 5 5 Delete a Phonebook Entry 29 5 6 De...

Страница 5: ...Delete an Entry in the Call List 43 7 5 Delete the Entire List of the Call List 43 7 6 View the Details of the a Call Entry 43 7 7 Call list Category 44 8 ANSWERING MACHINE FOR MODELS WITH TAM BASE 45...

Страница 6: ...reening 51 8 5 9 Remote Access 51 8 5 10 Change the Compression Rate 52 9 TROUBLESHOOTING 55 10 DECLARATION OF CONFORMITY 56 11 GUARANTEE AND SERVICE 58 11 1 While the unit is under Guarantee 58 11 2...

Страница 7: ...supply cord or plug is damaged or frayed If the product fails to operate normally despite following the operating instructions If the product has been dropped and the cabinet has been damaged If the p...

Страница 8: ...lso have the corresponding extra handset s and batteries a charging pod and a back cover for each extra handset Connection and Conditions for Use You can connect your phone to a direct exchange line D...

Страница 9: ...at Large metal objects such as refrigerators mirrors or filing cabinets between the handset and the base unit may block the radio signal Solid structures such as walls may reduce the signal strength E...

Страница 10: ...mains power socket Never try to lengthen the mains power cable The base station needs mains power for normal operation and the cordless handsets will not work without it 2 2 Installing and Charging th...

Страница 11: ...If you have a broadband line If you connect your telephone to a line with a broadband connection you will need to insert a micro filter between the telephone and the telephone line otherwise you may...

Страница 12: ...12 3 GET TO KNOW YOUR PHONE 3 1 Handset Overview...

Страница 13: ...and hold to delete all the characters digits During a call Press mute unmute the microphone While the handset is ringing Press to turn off the ring er volume In idle mode Press to access the call list...

Страница 14: ...o back to idle screen In idle mode Press and hold to power on off the handset In predialing mode Press to insert a flash During a call Press to dial a flash ALPHA NUMERIC KEYPAD Press to insert a digi...

Страница 15: ...book entry Press to make a call with speaker phone During ringing Press to answer a call with speaker phone P In idle mode Press to access the phonebook list F During a call using the handset Press to...

Страница 16: ...ng the message will be stop Press to delete the playing message When the phone is not in use press twice to delete all previously reviewed messages Press to adjust the volume during message playback W...

Страница 17: ...battery is fully charged Whole icon flashes when the battery performs initial charging Internal block icon flashes when the battery is in final charging stage Indicate when the battery needs charging...

Страница 18: ...ETUP EQUALIZER LANGUAGE RENAME HS AUTO ANSWER DATE TIME MAILBOX DIRECT MEMORY PIN PIN DEL ALL OLD MEMO TAM ON OFF TAM SETTINGS 3 5 Text and Digit Entry Table The following tables show you where each l...

Страница 19: ...ame editing and renaming handset Number Editing For phone number edi ting date time editing Key press 1st 2nd 3rd 4th 5th 6th 7th 8th 9th 10th 1 space 1 1 2 A B C 2 2 3 D E F 3 3 4 G H I 4 4 5 J K L 5...

Страница 20: ...ke a mistake press Mto delete the last digit 2 Press Tto dial the number 4 1 2 Direct Dialing 1 Press Tto take the line 2 Enter the phone number to dial 4 1 3 Call from the Phonebook 1 In idle mode pr...

Страница 21: ...le press to access the call list and press to select OR Press Mthen to select CALL LIST Note The first entry in the call list will be displayed If there is no entry in the call list it will show EMPTY...

Страница 22: ...swer a call If you wish to switch AUTO ANSWER Off see Set the Auto Answer The default setting is ON 4 3 Adjust Earpiece and Speakerphone Volume There are 5 levels VOLUME 1 to VOLUME 5 to choose from f...

Страница 23: ...andset ringer RINGER OFF icon will disappear 4 8 Turn the Keypad Lock ON OFF 1 In idle press and hold to turn on the keypad lock The KEYPAD LOCKED icon is displayed on the LCD 2 To unlock the keypad p...

Страница 24: ...to edit the number if necessary 5 Press Mand then to select the melody The respective melody will be played when browsing the melody list 6 Press Mto confirm 4 9 3 Delete a Redial Number 1 Follow Ste...

Страница 25: ...ke internal calls transfer external calls from one handset to another handset and make conference calls If the called handset is not answered within 60 seconds the called handset will stop ringing and...

Страница 26: ...put the calling handset on the charging cradle to end the current call with the external party 6 The external call is transferred to the called handset 4 11 4 Make a 3 way Conference Call The confere...

Страница 27: ...ber Entry in the Phonebook 1 In idle press Pto access the phonebook OR Press Mand to select PHONEBOOK Press Magain Note The first entry in the phonebook will be displayed If there is no entry stored i...

Страница 28: ...2 Press to browse the phonebook entries OR 1 In idle mode press Mthen to select PHONEBOOK 2 Press Mand to browse the phonebook entries 3 Press Mand to select VIEW 4 Press Mto review the details of the...

Страница 29: ...number if applicable 6 Press Mthen to edit the melody if applicable 7 Press Mto save 5 5 Delete a Phonebook Entry 1 In idle press Pto access the phonebook 2 Press to select the desired phonebook entry...

Страница 30: ...check how many entries have been occupied in your phone and how many phonebook entries are available for you to store in the phonebook 1 Press Pto access the phonebook 2 Press Mthen to select PB STAT...

Страница 31: ...odel with answering machine or call list entries 6 1 1 Set the Date Format 1 Press Mand to select HS SETTINGS 2 Press Mand to select DATE TIME 3 Press Mand to select DATE FORMAT 4 Press Mand to select...

Страница 32: ...h for year input 6 Press Mthen enter the date information according to DD MM YY or MM DD YY format The date will be in the format you set 7 Press Mto confirm 6 2 Handset Settings 6 2 1 Set the Direct...

Страница 33: ...e snooze function is activated the alarm will sound again at the end of the snooze period of seven minutes until you go into alarm settings and turn it off Key press is still applicable if handset key...

Страница 34: ...Press Mto confirm If ON is selected 1 Press Mthen use the keypad to enter the time 2 Press Mto confirm The display shows the current time and date and you are prompted to set the snooze function 3 Pr...

Страница 35: ...s Mand to select RING SETUP 3 Press Mand to select INT RING 4 Press Mand to select the desired ringer melody Note The respective ringer melody will be played while you are scrolling through the melody...

Страница 36: ...talking with the phone to alert you that you need to charge your battery 1 Press Mand to select HS SETTINGS 2 Press Mand to select TONE SETUP 3 Press Mand to select KEY TONE BATTERY TONE or OUT OF RAN...

Страница 37: ...without pressing any key 1 Press Mand to select HS SETTINGS 2 Press Mand to select AUTO ANSWER 3 Press Mand to select ON or OFF 4 Press Mto confirm 6 3 Base Settings 6 3 1 Set the Base Ringer Melody Y...

Страница 38: ...the ringer volume 6 3 2 Set the Flash Time Menu Options Vary Among Models The flash time setting is country dependent Please contact your local service provider for the correct settings 1 Press Mand...

Страница 39: ...Press Mthen enter the new system PIN again Note IfthenewPINenteredinStep6isnotmatchedwiththenewsystemPINentered inStep5 youarerequestedtoenterthevalidsystemPINagaininStep5 7 Press Mto confirm 6 4 Rese...

Страница 40: ...ollowing the process below 1 Press and hold on the base station for about five seconds the base station is entered into registration mode 2 Press Mand to select REGISTRATION 3 Press Mand you are reque...

Страница 41: ...digit PIN in order to de register a handset from the base station Note You cannot deregister the handset that you are currently using 1 Press Mand to select BS SETTINGS 2 Press Mand to select DELETE H...

Страница 42: ...h that phonebook entry The call list information might not be available for every incoming call The callers might intentionally block their names and or telephone numbers Call log display screen messa...

Страница 43: ...You need to delete some entries from the phonebook in order to save new ones 7 4 Delete an Entry in the Call List 1 Follow Steps 1 and 2 in the section of View the Call list 2 Press Mand to select DEL...

Страница 44: ...ory You can choose to store all calls or only the unanswered missed calls into the call list 1 Follow Steps 1 and 2 in the section of View the Call list 2 Press Mand to select ALL CALLS or MISSED CALL...

Страница 45: ...in standby or display TAM FULL and the date time information in standby which depends on which option has been selected in the handset setup 8 1 Switching TAM On Off You can turn the answering system...

Страница 46: ...ress twice to skip back to the previous message during message playback Press SKIP once if you want to skip the current message and listen to the next message Press DELETE if you want to delete the cu...

Страница 47: ...chine messages Memo recording can still function even when the answering machine is turned off Using the handset 1 Press Mand to select ANS MACHINE 2 Press Mand to select MEMO 3 Press Mto start record...

Страница 48: ...Outgoing Message OGM You can record your own OGM for ANS REC mode or ANSWER ONLY mode When you record your own OGM it will be used when the answering machine answers the call If your personalized OGM...

Страница 49: ...nd to select TAM SETTINGS 3 Press Mand to select OGM SETTINGS 4 Press Mand to select ANS REC or ANSWER ONLY 5 Press Mand to select PLAYBACK 6 Press to playback your personalized OGM if you have record...

Страница 50: ...rings before the answering system answers and starts playing your OGM You can set the answering system to answer after two to nine rings or Time Saver 1 Press Mand to select ANS MACHINE 2 Press Mand t...

Страница 51: ...sages or otherwise operate your answering system remotely You can do this by calling the answering system when you are away from home and entering a remote access PIN on a tone dialing phone Use the 4...

Страница 52: ...tered in Step 5 user is requested to enter the valid system PIN again in Step 5 8 5 10 Change the Compression Rate Three different compression rates HIGH MID and LOW are provided for you to select dif...

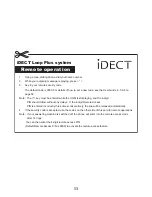
Страница 53: ...still playing and the 4 digit PIN should follow without any delays If the 4 digit Remote Access PIN is entered incorrectly three times consecutively the line will be released automatically 4 If the se...

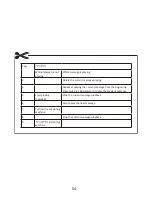
Страница 54: ...laying 4 Repeat at playing the current message from the beginning Press twice to skip backward to play the previous message 5 Start playing messages Stop the current message playback 6 Skip to play th...

Страница 55: ...roximately 15 seconds then plug it back in Allow up to one minute for the handset and telephone base to synchronize Remove and re insert the batteries If that still does not work it might be necessary...

Страница 56: ...he Member States relating to Electromagnetic Compatibility EMC and the European Community Directive 2006 95 EC relating to Electrical Safety Assessment of compliance of the product with the requiremen...

Страница 57: ...orm an integral part of this product and when you decide to dispose of them you have to take them to a local recycling centre for appropriate waste disposal in compliance with the current regulations...

Страница 58: ...under Guarantee 1 Disconnect the base unit from the telephone line and the mains electricity supply 2 Pack up all parts of your phone system using the original package 3 Return the unit to the shop wh...

Отзывы: