SE2L User’s Manual (SE9Z-B1865)
115
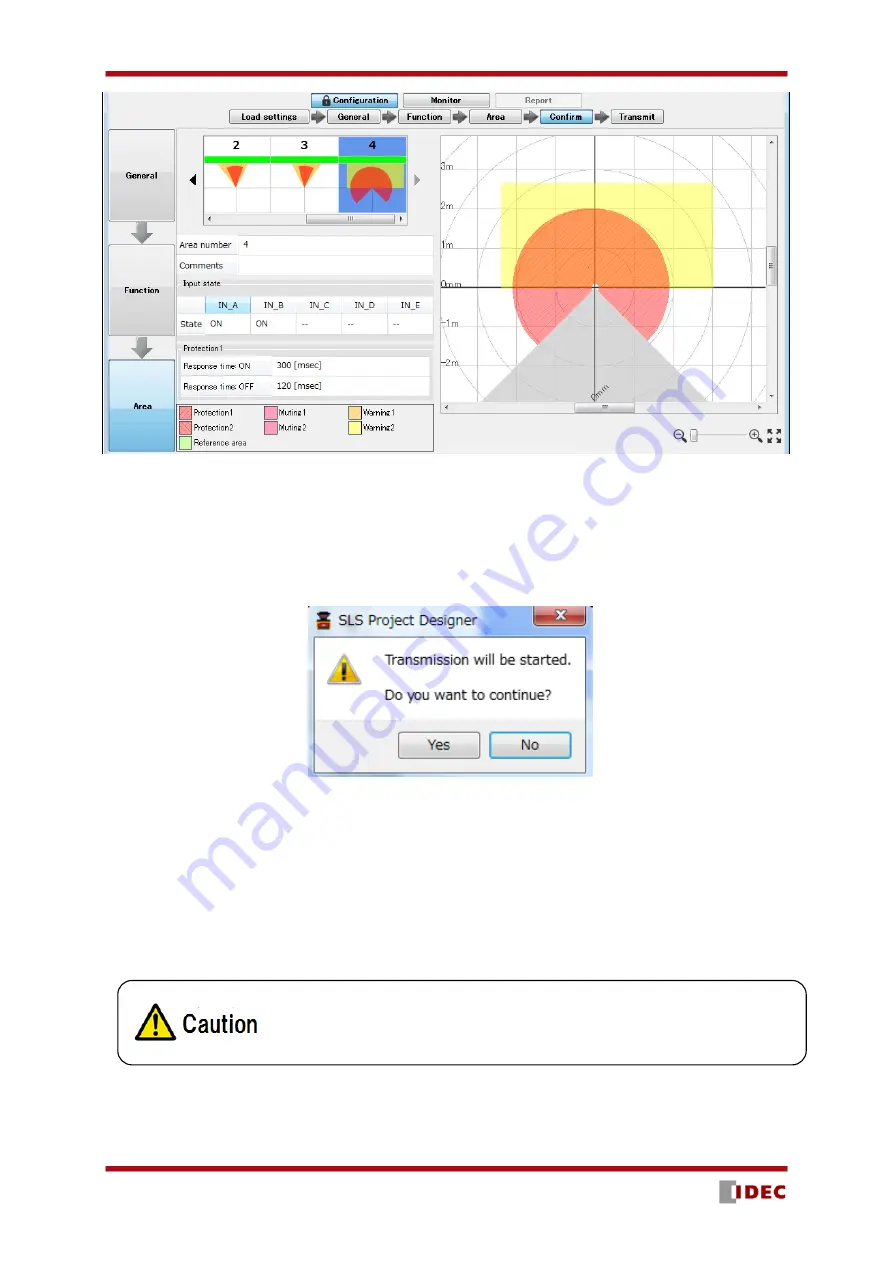
Figure 7-48
Confirm monitor example
When transmit button is clicked verification window appears (Figure 7-49). Click yes to transfer the
configuration to SE2L
Figure 7-49
Reference monitor configuration example
It may take few minutes to transfer the settings to SE2L. When transfer is completed SE2L will restart
automatically. SLS Project Designer will return to start up panel. Click connect button to run the SE2L in
monitor mode and verify the operation.
Do not insert SD card while writing the configuration to SE2L through
USB connection. It may cause configuration failure.
Содержание SE2L Series
Страница 1: ...SE9Z B1865 SE2L Series Safety Laser Scanner User s Manual ...
Страница 100: ...SE2L User s Manual SE9Z B1865 99 Figure 7 31 b Function Figure7 31 c Area ...
Страница 103: ...SE2L User s Manual SE9Z B1865 102 Figure 7 34 a Project report tab Figure 7 34 b Error report tab ...
Страница 143: ...SE2L User s Manual SE9Z B1865 142 13 External dimension 13 1 SE2L H05LP mm ...
Страница 144: ...SE2L User s Manual SE9Z B1865 143 13 2 SE2L H05LPC mm ...
Страница 145: ...SE2L User s Manual SE9Z B1865 144 13 3 Base mounting bracket mm ...
Страница 146: ...SE2L User s Manual SE9Z B1865 145 13 4 Rear mounting bracket mm ...
Страница 147: ...SE2L User s Manual SE9Z B1865 146 13 5 Simple base mounting bracket mm ...
Страница 149: ...SE2L User s Manual SE9Z B1865 148 13 7 Simple rear mounting bracket Long type mm ...
Страница 150: ...SE2L User s Manual SE9Z B1865 149 13 8 Cover Protection Bracket mm ...


