15
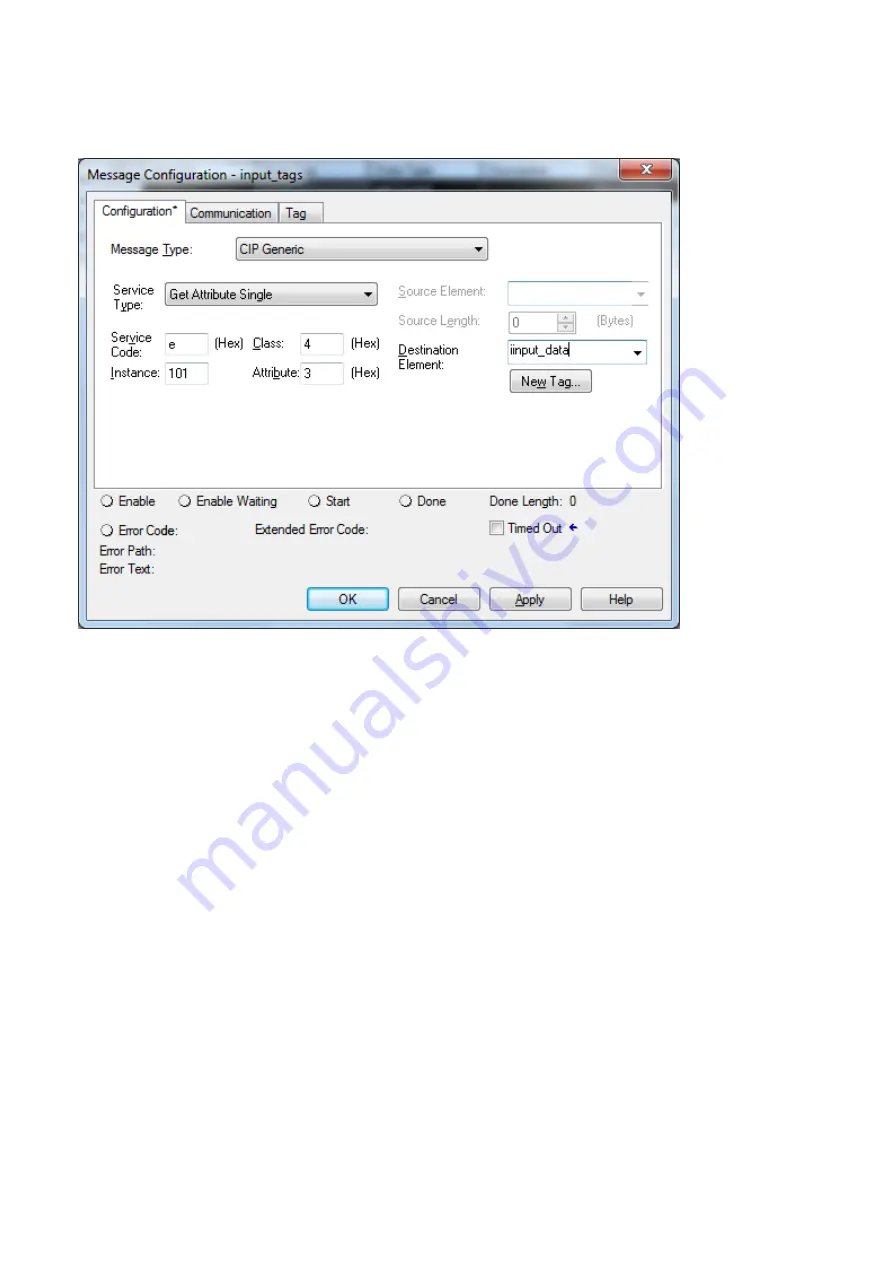
Configure the Message Configuration. here we have to select the
“
Service Type
”
of
“
Get
Attribute Single
”
. To fill in the
“
Class
”
as 4,
“
Instance
”
as 101 and
“
Attribute
”
3. In the
“
Destination
”
dropdown box select the
“
input_data
”
.
Next select the
“
Communication
”
tab, first click on the
“
Browse
”
button. This will bring up a
new window; here select the Ethernet module in the PLC and click OK. Now the name of the
Ethernet module should be filled in at the
“
Path
”
, here we also have to fill in the full path to
GW-7472 (in this example GW-7472 have the IPaddress of 192.168.22.72). After the name of
the Ethernet module in the PLC, add a comma, a space, and a 2, this indicates that the
message should be routed out on Ethernet. Following the 2 add a comma, a space, and the
IP-address to GW-7472, here 192.168.22.72. This is everything that has to be done here, click
on OK.
Содержание GW-7472
Страница 1: ...ICP DAS GW 7472 FAQ FAQ Version 3 1 ICP DAS Co Ltd 2014 10 13...
Страница 9: ...9...
Страница 14: ...14 2 Add a new routine 3 Add MSG element in your ladder and select input_tags...
Страница 16: ...16 4 Add MSG element in your ladder and select Output_tags...
Страница 18: ...18 If you want to send Get Set Attribute Single continuously you can refer to the ladder below...


