background image

NI-707534 

Wireless Router 300N 


- 16 - 

Chapter 4.  Configuring the Router 

This chapter will show each Web page's key functions and the configuration way. 

4.1  Login 

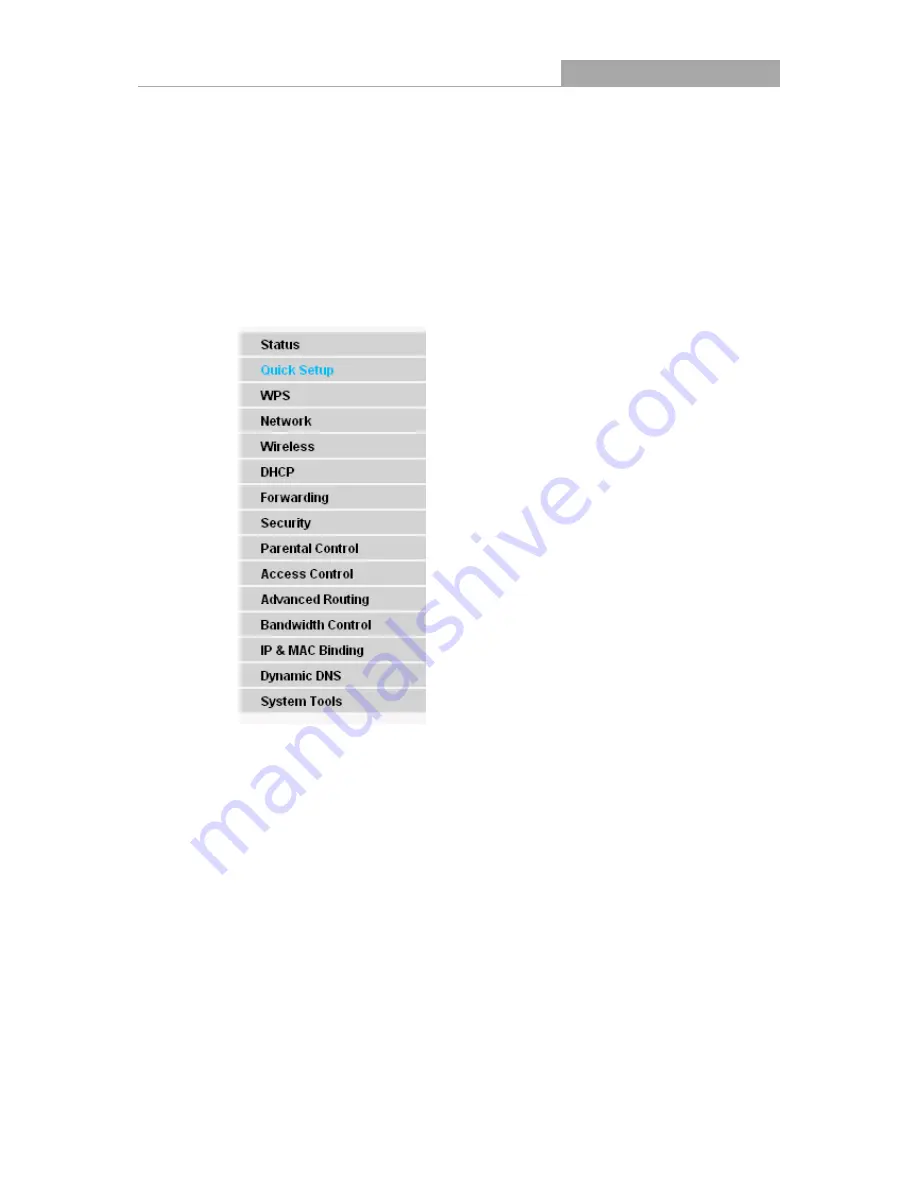
After your successful login, you will see the fifteen main menus on the left of the Web-based utility. 
On the right, there are the corresponding explanations and instructions.   


The detailed explanations for each Web page’s key function are listed below.   

4.2  Status 

The Status page  provides  the  current status information about the Router. All information is 
read-only. 

Содержание NI-707534

Страница 1: ......

Страница 2: ......

Страница 3: ...erference by one or more of the following measures Reorient or relocate the receiving antenna Increase the separation between the equipment and receiver Connect the equipment into an outlet on a circuit different from that to which the receiver is connected Consult the dealer or an experienced radio TV technician for help This device complies with part 15 of the FCC Rules Operation is subject to t...

Страница 4: ...ntries and other countries following the EU directive 1999 5 EC without any limitation except for the countries mentioned below Country Restriction Reason remark Bulgaria None General authorization required for outdoor use and public service France Outdoor use limited to 10 mW e i r p within the band 2454 2483 5 MHz Military Radiolocation use Refarming of the 2 4 GHz band has been ongoing in recen...

Страница 5: ...quirements 6 2 3 Connecting the Router 6 Chapter 3 Quick Installation Guide 8 3 1 TCP IP Configuration 8 3 2 Quick Installation Guide 10 Chapter 4 Configuring the Router 16 4 1 Login 16 4 2 Status 16 4 3 Quick Setup 18 4 4 WPS 18 4 5 Network 25 4 5 1 LAN 25 4 5 2 WAN 26 4 5 3 MAC Clone 36 4 6 Wireless 37 4 6 1 Wireless Settings 38 4 6 2 Wireless Security 40 4 6 3 Wireless MAC Filtering 43 4 6 4 Wi...

Страница 6: ...ol 64 4 11 1 Rule 64 4 11 2 Host 67 4 11 3 Target 69 4 11 4 Schedule 71 4 12 Advanced Routing 73 4 12 1 Static Routing 73 4 12 2 System Routing Table 74 4 13 Bandwidth Control 75 4 13 1 Control Settings 75 4 13 2 Rules List 75 4 14 IP MAC Binding Setting 77 4 14 1 Binding Settings 77 4 14 2 ARP List 79 4 15 Dynamic DNS 79 4 15 1 Comexe cn DDNS 80 4 15 2 Dyndns org DDNS 81 4 15 3 No ip com DDNS 81 ...

Страница 7: ...4 16 5 Backup Restore 87 4 16 6 Reboot 88 4 16 7 Password 88 4 16 8 System Log 89 4 16 9 Statistics 91 Appendix A FAQ 93 Appendix B Configuring the PC 98 Appendix C Specifications 102 Appendix D Glossary 103 ...

Страница 8: ...ing items should be found in your package NI 707534 Wireless Router 300N Power adapter 9V 0 6A CD with manuals Manual Note Make sure that the package contains the above items If any of the listed items are damaged or missing please contact with your distributor ...

Страница 9: ...with all IEEE 802 11g and IEEE 802 11b products With multiple protection measures including SSID broadcast control and wireless LAN 64 128 152 bit WEP encryption WiFi protected Access WPA2 PSK WPA PSK as well as advanced Firewall protections the NI 707534 Wireless 300N Router provides complete data privacy The NI 707534 Wireless 300N Router provides flexible access control so that parents or netwo...

Страница 10: ...curity Shares data and Internet access for users supporting Dynamic IP Static IP PPPoE Internet access Supports Virtual Server Special Application and DMZ host Supports UPnP Dynamic DNS Static Routing Provides Automatic connection and Scheduled Connection on certain time to the Internet Built in NAT and DHCP server supporting static IP address distributing Supports Parental Control and Access Cont...

Страница 11: ... On There is a device linked to the corresponding port but there is no activity Flashing There is an active device linked to the corresponding port WPS Slow Flash A wireless device is connecting to the network by WPS function This process will last in the first 2 minutes On A wireless device has been successfully added to the network by WPS function Quick Flash A wireless device failed to be added...

Страница 12: ...ower socket is where you will connect the power adapter Please use the power adapter provided with this NI 707534 Wireless 300N Router ON OFF The switch for the power WAN This WAN port is where you will connect the DSL cable Modem or Ethernet 4 3 2 1 LAN These ports 4 3 2 1 connect the Router to the local PC s Wireless antenna To receive and transmit the wireless data ...

Страница 13: ...ng Temperature 0 40 32 104 Operating Humidity 10 90 RH Non condensing 2 3 Connecting the Router Before installing the Router make sure your PC is connected to the Internet through the broadband service successfully If there is any problem please contact your ISP After that please install the Router according to the following steps Don t forget to pull out the power plug and keep your hands dry 1 P...

Страница 14: ...r to the power socket on the Router and the other end into an electrical outlet Press the power switch then the Router will start to work automatically 7 Power on your PC and Cable DSL Modem Figure 2 1 Hardware Installation of the NI 707534 Wireless 300N Router ...

Страница 15: ...s to how to do this please refer to Appendix B Configuring the PC 2 Configure the network parameters The IP address is 192 168 1 xxx xxx is any number from 2 to 254 Subnet Mask is 255 255 255 0 and Gateway is 192 168 1 1 The Router s default IP address Obtain an IP address automatically 1 Set up the TCP IP Protocol in Obtain an IP address automatically mode on your PC If you need instructions as t...

Страница 16: ...and If the result displayed is similar to the Figure 3 2 it means the connection between your PC and the Router is failed Figure 3 2 Failure result of Ping command Please check the connection following these steps 1 Is the connection between your PC and the Router correct ...

Страница 17: ...onfigure and manage the NI 707534 Wireless 300N Router The Web based utility can be used on any Windows Macintosh or UNIX OS with a Web browser such as Microsoft Internet Explorer Mozilla Firefox or Apple Safari 1 To access the configuration utility open a web browser and type in the default address 192 168 1 1 in the address field of the browser Figure 3 3 Log in the Router After a moment a login...

Страница 18: ...ure 3 6 Figure 3 6 WAN Connection Type The Router provides Auto Detect function and supports three popular ways PPPoE Dynamic IP and Static IP to connect to the Internet It s recommended that you make use of the Auto Detect function If you are sure of what kind of connection type your ISP provides you can select the very type and click Next to go on configuring 4 If you select Auto Detect the Rout...

Страница 19: ...pe detected is Dynamic IP the next screen will appear as shown in Figure 3 9 Then you can go on with the wireless configuration 3 If the connection type detected is Static IP the next screen will appear as shown in Figure 3 8 Figure 3 8 Quick Setup Static IP IP Address This is the WAN IP address as seen by external users on the Internet including your ISP Enter the IP address into the field Subnet...

Страница 20: ...reless network security the default SSID is set to be ICIDU This value is case sensitive For example TEST is NOT the same as test Region Select your region from the drop down list This field specifies the region where the wireless function of the Router can be used It may be illegal to use the wireless function of the Router in a region other than one of those specified in this field If your count...

Страница 21: ... of any numbers 0 to 9 and any letters A to Z the length should be between 8 and 63 characters For Hexadecimal the key can be made up of any numbers 0 to 9 and letters A to F the length should be between 8 and 64 characters Please also note the key is case sensitive this means that upper and lower case keys will affect the outcome It would also be a good idea to write down the key and all related ...

Страница 22: ...NI 707534 Wireless Router 300N 15 Figure 3 11 Quick Setup Finish ...

Страница 23: ...fter your successful login you will see the fifteen main menus on the left of the Web based utility On the right there are the corresponding explanations and instructions The detailed explanations for each Web page s key function are listed below 4 2 Status The Status page provides the current status information about the Router All information is read only ...

Страница 24: ...NI 707534 Wireless Router 300N 17 Figure 4 1 Router Status ...

Страница 25: ...PIN of the Router to its default Gen New PIN Click this button and then you can get a new random value for the Router s PIN You can ensure the network security by generating a new PIN Add device You can add a new device to the existing network manually by clicking this button b To add a new device If the wireless adapter supports Wi Fi Protected Setup WPS you can establish a wireless connection be...

Страница 26: ...set button on the front panel of the Router Note When press and hold the WPS Reset button for more than 5 seconds you will reset the router Step 2 Press and hold the WPS button of the adapter directly for 2 or 3 seconds Step 3 Wait for a while until the next screen appears Click Finish to complete the WPS configuration The WPS Configuration Screen of Wireless Adapter Method Two Step 1 Press the WP...

Страница 27: ... router Step 2 For the configuration of the wireless adapter please choose Push the button on my access point in the configuration utility of the WPS as below and click Next The WPS Configuration Screen of Wireless Adapter Step 3 Wait for a while until the next screen appears Click Finish to complete the WPS configuration ...

Страница 28: ...k the Add device button in Figure 4 2 then the following screen will appear Figure 4 3 Add A New Device Step 2 Choose Press the button of the new device in two minutes and click Connect Step 3 For the configuration of the wireless adapter please choose Push the button on my access point in the configuration utility of the WPS as below and click Next ...

Страница 29: ...figuration The WPS Configuration Screen of Wireless Adapter II By PIN If the new device supports Wi Fi Protected Setup and the PIN method you can add it to the network by PIN with the following two methods Method One Enter the PIN into my Router Step 1 Keep the default WPS Status as Enabled and click the Add device button in Figure 4 2 then the following screen will appear ...

Страница 30: ...guration of the wireless adapter please choose Enter a PIN into my access point or a registrar in the configuration utility of the WPS as below and click Next The WPS Configuration Screen of Wireless Adapter Note In this example the default PIN code of this adapter is 16952898 as the above figure shown Method Two Enter the PIN from my Router Step 1 Get the Current PIN code of the Router in Figure ...

Страница 31: ...the field after Access Point PIN Then click Next The WPS Configuration Screen of Wireless Adapter Note The default PIN code of the Router can be found in its label or the WPS configuration screen as Figure 4 2 c You will see the following screen when the new device successfully connected to the network Note 1 The WPS LED on the Router will light green for five minutes if the device has been succes...

Страница 32: ...LAN on the screen as below Figure 4 5 LAN MAC Address The physical address of the Router as seen from the LAN The value can t be changed IP Address Enter the IP address of your Router or reset it in dotted decimal notation factory default 192 168 1 1 Subnet Mask An address code that determines the size of the network Normally use 255 255 255 0 as the subnet mask Note 1 If you change the IP Address...

Страница 33: ...by your ISP including IP address Subnet Mask Default Gateway etc Click the Renew button to renew the IP parameters from your ISP Click the Release button to release the IP parameters MTU Size The normal MTU Maximum Transmission Unit value for most Ethernet networks is 1500 Bytes It is not recommended that you change the default MTU Size unless required by your ISP Use These DNS Servers If your ISP...

Страница 34: ...tton to save your settings 2 If your ISP provides a static or fixed IP Address Subnet Mask Gateway and DNS setting select Static IP The Static IP settings page will appear shown in Figure 4 7 Figure 4 7 WAN Static IP IP Address Enter the IP address in dotted decimal notation provided by your ISP Subnet Mask Enter the subnet Mask in dotted decimal notation provided by your ISP usually is 255 255 25...

Страница 35: ...ndary Connection It s available only for PPPoE Connection If your ISP provides an extra Connection type such as Dynamic Static IP to connect to a local area network then you can check the radio button of Dynamic Static IP to activate this secondary connection Disabled The Secondary Connection is disabled by default so there is PPPoE connection only This is recommended Dynamic IP You can check this...

Страница 36: ...Note Only when you have configured the system time on System Tools Time page will the Time based Connecting function can take effect Connect Manually You can click the Connect Disconnect button to connect disconnect immediately This mode also supports the Max Idle Time function as Connect on Demand mode The Internet connection can be disconnected automatically after a specified inactivity period a...

Страница 37: ...ck box and enter the IP address provided by your ISP in dotted decimal notation Detect Online Interval The Router will detect Access Concentrator online at every interval The default value is 0 You can input the value between 0 and 120 The value 0 means no detect Primary DNS Secondary DNS If your ISP does not automatically assign DNS addresses to the Router during login please click Use the follow...

Страница 38: ...ze The normal MTU Maximum Transmission Unit value for most Ethernet networks is 1500 Bytes It is not recommended that you change the default MTU Size unless required by your ISP Connect on Demand In this mode the Internet connection can be terminated automatically after a specified inactivity period Max Idle Time and be re established when you attempt to access the Internet again If you want your ...

Страница 39: ...er a specified inactivity period and re established when you attempt to access the Internet again Click the Connect button to connect immediately Click the Disconnect button to disconnect immediately Caution Sometimes the connection cannot be terminated although you specify a time to Max Idle Time because some applications are visiting the Internet continually in the background Click the Save butt...

Страница 40: ...onnect on Demand You can configure the Router to disconnect from your Internet connection after a specified period of inactivity Max Idle Time If your Internet connection has been terminated due to inactivity Connect on Demand enables the Router to automatically re establish your connection as soon as you attempt to access the Internet again If you wish to activate Connect on Demand check the radi...

Страница 41: ...ection automatically as soon as you attempt to access the Internet again To use this option check the radio button If you want your Internet connection to remain active at all times enter 0 in the Max Idle Time field Otherwise enter the number of minutes that you wish to have the Internet connecting last unless a new link is requested Caution Sometimes the connection cannot be disconnected althoug...

Страница 42: ...the ISP s IP address or the domain name If you choose static IP and enter the domain name you should also enter the DNS assigned by your ISP And click the Save button Click the Connect button to connect immediately Click the Disconnect button to disconnect immediately Connect on Demand You can configure the Router to disconnect from your Internet connection after a specified period of inactivity M...

Страница 43: ...in minutes that you wish to have the Internet connecting last unless a new link is requested Caution Sometimes the connection cannot be disconnected although you specify a time to Max Idle Time because some applications are visiting the Internet continually in the background Click the Save button to save your settings Note If you don t know how to choose the appropriate connection type click the D...

Страница 44: ... PC that is managing the Router If the MAC address is required you can click the Clone MAC Address To button and this MAC address will fill in the WAN MAC Address field Click Restore Factory MAC to restore the MAC address of WAN port to the factory default value Click the Save button to save your settings Note Only the PC on your LAN can use the MAC Address Clone function 4 6 Wireless Figure 4 14 ...

Страница 45: ...ecurity the default SSID is set to be ICIDU This value is case sensitive For example TEST is NOT the same as test Region Select your region from the drop down list This field specifies the region where the wireless function of the Router can be used It may be illegal to use the wireless function of the Router in a region other than one of those specified in this field If your country or region is ...

Страница 46: ...ed only 802 11g wireless stations can connect to the Router When 802 11n mode is selected only 802 11n wireless stations can connect to the AP It is strongly recommended that you set the Mode to 802 11b g n and all of 802 11b 802 11g and 802 11n wireless stations can connect to the Router Channel width Select the channel width from the drop down list The default setting is automatic which can adju...

Страница 47: ...urrent channel Key type This option should be chosen according to the AP s security configuration It is recommended that the security type is the same as your AP s security type WEP Index This option should be chosen if the key type is WEP ASCII or WEP HEX It indicates the index of the WEP key Auth Type This option should be chosen if the key type is WEP ASCII or WEP HEX It indicates the authoriza...

Страница 48: ...u do not want to use wireless security check this radio button But it s strongly recommended to choose one of the following modes to enable security WEP It is based on the IEEE 802 11 standard If you check this radio button you will find a notice in red as show in Figure 4 18 Figure 4 18 ...

Страница 49: ... WEP key entry is invalid 64 bit You can enter 10 hexadecimal digits any combination of 0 9 a f A F zero key is not promoted or 5 ASCII characters 128 bit You can enter 26 hexadecimal digits any combination of 0 9 a f A F zero key is not promoted or 13 ASCII characters 152 bit You can enter 32 hexadecimal digits any combination of 0 9 a f A F zero key is not promoted or 16 ASCII characters Note If...

Страница 50: ...automatically based on the wireless station s capability and request Encryption When WPA PSK or WPA is set as the Authentication Type you can select either Automatic or TKIP or AES as Encryption Note If you check the WPA PSK WPA2 PSK radio button and choose TKIP encryption you will find a notice in red as shown in Figure 4 20 Figure 4 20 PSK Passphrase You can enter ASCII characters between 8 and ...

Страница 51: ...AC Address filtering entry click the Add New button The Add or Modify Wireless MAC Address Filtering entry page will appear shown in Figure 4 22 Figure 4 22 Add or Modify Wireless MAC Address Filtering entry To add or modify a MAC Address Filtering entry follow these instructions 1 Enter the appropriate MAC Address into the MAC Address field The format of the MAC Address is XX XX XX XX XX XX X is ...

Страница 52: ...ion A with MAC address 00 0A EB B0 00 0B and the wireless station B with MAC address 00 0A EB 00 07 5F are able to access the Router but all the other wireless stations cannot access the Router you can configure the Wireless MAC Address Filtering list by following these steps 1 Click the Enable button to enable this function 2 Select the radio button Deny the stations not specified by any enabled ...

Страница 53: ...pecified RTS Threshold size the Router will send RTS frames to a particular receiving station and negotiate the sending of a data frame The default value is 2346 Fragmentation Threshold This value is the maximum size determining whether packets will be fragmented Setting the Fragmentation Threshold too low may result in poor network performance because of excessive packets 2346 is the default sett...

Страница 54: ...ss network performance 4 6 5 Wireless Statistics Choose menu Wireless Wireless Statistics you can see the MAC Address Current Status Received Packets and Sent Packets for each connected wireless station Figure 4 24 Wireless Statistics MAC Address The connected wireless station s MAC address Current Status The connected wireless station s running status one of STA AUTH STA ASSOC STA JOINED WPA WPA ...

Страница 55: ...HCP Dynamic Host Configuration Protocol server which provides the TCP IP configuration for all the PC s that are connected to the Router on the LAN Figure 4 26 DHCP Settings DHCP Server Enable or Disable the DHCP server If you disable the Server you must have another DHCP server within your network or else you must configure the computer manually Start IP Address Specify an IP address for the DHCP...

Страница 56: ...onsult your ISP Secondary DNS Optional Input the IP address of another DNS server if your ISP provides two DNS servers Note To use the DHCP server function of the Router you must configure all computers on the LAN as Obtain an IP Address automatically 4 7 2 DHCP Clients List Choose menu DHCP DHCP Clients List you can view the information about the clients attached to the Router in the screen as sh...

Страница 57: ...n MAC Address The MAC address of the PC for which you want to reserve an IP address Reserved IP Address The IP address reserved for the PC by the Router Status The status of this entry either Enabled or Disabled To Reserve an IP address 1 Click the Add New button Then Figure 4 29 will pop up 2 Enter the MAC address in XX XX XX XX XX XX format and IP address in dotted decimal notation of the comput...

Страница 58: ...u Forwarding Virtual Servers you can view and add virtual servers in the screen as shown in Figure 4 31 Virtual servers can be used for setting up public services on your LAN such as DNS Email and FTP A virtual server is defined as a service port and all requests from the Internet to this service port will be redirected to the computer specified by the server IP Any PC that was used for a virtual ...

Страница 59: ...Port box 3 Type the IP Address of the computer in the IP Address box 4 Select the protocol used for this application either TCP UDP or All 5 Select the Enable to enable the virtual server 6 Click the Save button Figure 4 32 Add or Modify a Virtual Server Entry Note If your computer or server has more than one type of available service please select another service and enter the same IP Address for...

Страница 60: ...an outgoing connection using a destination port number defined in the Trigger Port field 2 The Router records this connection opens the incoming port or ports associated with this entry in the Port Triggering table and associates them with the local host 3 When necessary the external host will be able to connect to the local host using one of the ports defined in the Incoming Ports field Trigger P...

Страница 61: ...the Trigger Protocol drop down list either TCP UDP or All 4 Select the protocol used for Incoming Ports from the Incoming Protocol drop down list either TCP or UDP or All 5 Select Enable in Status field 6 Click the Save button to save the new rule Figure 4 34 Add or Modify a Port Triggering Entry To modify or delete an existing entry 1 Click the Modify in the entry you want to modify If you want t...

Страница 62: ...s DHCP client function disabled and should have a new static IP Address assigned to it because its IP Address may be changed when using the DHCP function Figure 4 35 DMZ To assign a computer or server to be a DMZ server 1 Check the Enable radio button 2 Enter the IP Address of a local host in the DMZ Host IP Address field 3 Click the Save button Note After you set the DMZ host the firewall related...

Страница 63: ...opens for local host IP Address The IP address of the UPnP device that is currently accessing the Router Status The status of the port is displayed here Enabled means that the port is still active Otherwise the port is inactive Click Refresh to update the Current UPnP Settings List 4 9 Security Figure 4 37 The Security menu There are four submenus under the Security menu as shown in Figure 4 37 Ba...

Страница 64: ...to allow VPN tunnels using IPSec PPTP or L2TP protocols to pass through the Router s firewall PPTP Passthrough Point to Point Tunneling Protocol PPTP allows the Point to Point Protocol PPP to be tunneled through an IP network To allow PPTP tunnels to pass through the Router keep the default Enabled L2TP Passthrough Layer 2 Tunneling Protocol L2TP is the method used to enable Point to Point session...

Страница 65: ...LG To allow TFTP clients and servers to transfer data across NAT keep the default Enable H323 ALG To allow Microsoft NetMeeting clients to communicate across NAT keep the default Enable Click the Save button to save your settings 4 9 2 Advanced Security Choose menu Security Advanced Security you can protect the Router from being attacked by TCP SYN Flood UDP Flood and ICMP Flood in the screen as s...

Страница 66: ...s beyond the set value the Router will startup the blocking function immediately Enable TCP SYN FLOOD Attack Filtering Enable or Disable the TCP SYN FLOOD Attack Filtering TCP SYN FLOOD Packets Threshold 5 3600 The default value is 50 Enter a value between 5 3600 When the current TCP SYN FLOOD Packets numbers is beyond the set value the Router will startup the blocking function immediately Ignore ...

Страница 67: ...X XX XX XX XX X is any hexadecimal digit Only the PCs with MAC address listed can use the password to browse the built in web pages to perform Administrator tasks while all the others will be blocked After click the Add button your PC s MAC Address will be placed in the list above Click the Save button to save your settings Note If your PC is blocked but you want to access the Router again press a...

Страница 68: ...55 then all the hosts can access the Router from internet Note 1 To access the Router you should type your Router s WAN IP address into your browser s address in IE or Location in Navigator box followed by a colon and the custom port number For example if your Router s WAN address is 202 96 12 8 and the port number used is 8080 please enter http 202 96 12 8 8080 in your browser Later you may be as...

Страница 69: ... an existing entry To add a new entry please follow the steps below 1 Click the Add New button and the next screen will pop up as shown in Figure 4 43 2 Enter the MAC address of the PC e g 00 11 22 33 44 AA you d like to control in the MAC Address of Child PC field Or you can choose the MAC address from the All Address in Current LAN drop down list 3 Give a description e g Allow Google for the web...

Страница 70: ... If you desire that the child PC with MAC address 00 11 22 33 44 AA can access www google com on Saturday only while the parent PC with MAC address 00 11 22 33 44 BB is without any restriction you should follow the settings below 1 Click Parental Control menu on the left to enter the Parental Control Settings page Check Enable and enter the MAC address 00 11 22 33 44 BB in the MAC Address of Paren...

Страница 71: ...down list In Status field select Enable 4 Click Save to complete the settings Then you will go back to the Parental Control Settings page and see the following list as shown in Figure 4 44 Figure 4 44 Parental Control Settings 4 11 Access Control Figure 4 45 The Access Control menu There are four submenus under the Access Control menu as shown in Figure 4 45 Rule Host Target and Schedule Click any...

Страница 72: ...e Router Deny means that the Router rejects the packets to go through the Router Status This field displays the status of the rule Enabled means the rule will take effect Disabled means the rule will not take effect Modify Here you can edit or delete an existing rule To add a new rule please follow the steps below 1 Click the Add New button and the next screen will pop up as shown in Figure 4 47 2...

Страница 73: ...7 Add or Modify Internet Access Control Entry For example If you desire to allow the host with MAC address 00 11 22 33 44 AA to access www google com only from 18 00 to 20 00 on Saturday and Sunday and forbid other hosts in the LAN to access the Internet you should follow the settings below 1 Click Access Control Host in the left to enter the Host Settings page Add a new entry with the Host Descri...

Страница 74: ...ction field select Allow In Status field select Enable Click Save to complete the settings Then you will go back to the Access Control Rule Management page and see the following list 4 11 2 Host Choose menu Access Control Host you can view and set a Host list in the screen as shown in Figure 4 48 The host list is necessary for the Access Control Rule Figure 4 48 Host Settings Host Description Here...

Страница 75: ...the Delete All button to delete all the entries in the table Click the Next button to go to the next page or click the Previous button return to the previous page Figure 4 49 Add or Modify a Host Entry Figure 4 50 Add or Modify a Host Entry For example If you desire to restrict the internet activities of host with MAC address 00 11 22 33 44 AA you should first follow the settings below 1 Click Add...

Страница 76: ...name Modify To modify or delete an existing entry To add a new entry please follow the steps below 1 Click the Add New button 2 In Mode field select IP Address or Domain Name If you select IP Address the screen shown is Figure 4 52 1 In Target Description field create a unique description for the target e g Target_1 2 In IP Address field enter the IP address of the target 3 Select a common service...

Страница 77: ...gle in the blank Any domain name with keywords in it e g www google com will be blocked or allowed You can enter 4 domain names 3 Click the Save button Click the Delete All button to delete all the entries in the table Click the Next button to go to the next page or click the Previous button return to the previous page Figure 4 52 Add or Modify an Access Target Entry Figure 4 53 Add or Modify an A...

Страница 78: ...Settings page and see the following list 4 11 4 Schedule Choose menu Access Control Schedule you can view and set a Schedule list in the next screen as shown in Figure 4 54 The Schedule list is necessary for the Access Control Rule Figure 4 54 Schedule Settings Schedule Description Here displays the description of the schedule and this description is unique Day Here displays the day s in a week Ti...

Страница 79: ...ict the internet activities of host with MAC address 00 11 22 33 44 AA to access www google com only from 18 00 to 20 00 on Saturday and Sunday you should first follow the settings below 1 Click Add New button shown in Figure 4 54 to enter the Advanced Schedule Settings page 2 In Schedule Description field create a unique description for the schedule e g Schedule_1 3 In Day field check the Select ...

Страница 80: ... 1 Static Routing Choose menu Advanced Routing Static Routing and you can configure the static route in the next screen shown in Figure 4 57 A static route is a pre determined path that network information must travel to reach a specific host or network Figure 4 57 Static Routing To add static routing entries follow the steps below 1 Click Add New shown in Figure 4 57 you will see the following sc...

Страница 81: ...tries Click the Previous button to view the information in the previous screen click the Next button to view the information in the next screen 4 12 2 System Routing Table Choose menu Advanced Routing System Routing Table and you can views all of the valid route entries in use The Destination IP address Subnet Mask Gateway and Interface will be displayed for each entry Destination IP Address The D...

Страница 82: ...nfigure should be less than 100000Kbps For optimal control of the bandwidth please select the right Line Type and ask your ISP for the total bandwidth of the egress and ingress Figure 4 60 Bandwidth Control Settings Enable Bandwidth Control Check this box so that the Bandwidth Control settings can take effect Line Type Select the right type for you network connection If you don t know how to choos...

Страница 83: ...field displays the max and mix download bandwidth through the WAN port the default is 0 Enable This displays the status of the rule Modify Click Modify to edit the rule Click Delete to delete the rule To add modify a Bandwidth Control rule follow the steps below Step 1 Click Add New shown in Figure 4 61 you will see a new screen shown in Figure 4 62 Step 2 Enter the information like the screen sho...

Страница 84: ...AC Binding Setting table you can operate it in accord with your desire as shown in Figure 4 64 Figure 4 64 Binding Settings MAC Address The MAC address of the controlled computer in the LAN IP Address The assigned IP address of the controlled computer in the LAN Bind Check this option to enable ARP binding for a specific device Modify To modify or delete an existing entry When you want to add or m...

Страница 85: ... or delete an existing entry follow the steps below 1 Find the desired entry in the table 2 Click Modify or Delete as desired on the Modify column To find an existing entry follow the steps below 1 Click the Find button as shown in Figure 4 64 2 Enter the MAC Address or IP Address 3 Click the Find button in the page as shown in Figure 4 66 Figure 4 66 Find IP MAC Binding Entry Click the Enable All...

Страница 86: ... the IP MAC Binding list Delete Delete the item Click the Bind All button to bind all the current items available after enable Click the Load All button to load all items to the IP MAC Binding list Click the Refresh button to refresh all items Note An item could not be loaded to the IP MAC Binding list if the IP address of the item has been loaded before Error warning will prompt as well Likewise ...

Страница 87: ...c DNS Service Provider you select is www comexe cn the page will appear as shown in Figure 4 68 Figure 4 68 Comexe cn DDNS Settings To set up for DDNS follow these instructions 1 Type the Domain Name received from your dynamic DNS service provider 2 Type the User Name for your DDNS account 3 Type the Password for your DDNS account 4 Click the Login button to log in to the DDNS service Connection S...

Страница 88: ...he User Name for your DDNS account 6 Type the Password for your DDNS account 7 Type the Domain Name you received from dynamic DNS service provider here 8 Click the Login button to log in to the DDNS service Connection Status The status of the DDNS service connection is displayed here Click Logout to logout of the DDNS service 4 15 3 No ip com DDNS If the dynamic DNS Service Provider you select is ...

Страница 89: ...DDNS account 2 Type the Password for your DDNS account 3 Type the Domain Name you received from dynamic DNS service provider 4 Click the Login button to log in the DDNS service Connection Status The status of the DDNS service connection is displayed here Click Logout to log out the DDNS service 4 16 System Tools Figure 4 71 The System Tools menu ...

Страница 90: ... from this drop down list Date Enter your local date in MM DD YY into the right blanks Time Enter your local time in HH MM SS into the right blanks NTP Server Prior Enter the address for the NTP Server then the Router will get the time from the NTP Server preferentially In addition for some built in common NTP Servers the Router can get time automatically once it connects the Internet To configure...

Страница 91: ... GMT automatically from Internet if it has already connected to Internet 4 16 2 Diagnostic Choose menu System Tools Diagnostic you can transact Ping or Traceroute function to check connectivity of your network in the following screen Figure 4 73 Diagnostic Tools Diagnostic Tool Check the radio button to select one diagnostic too Ping This diagnostic tool troubleshoots connectivity reachability and...

Страница 92: ...t Ping Timeout Set the waiting time for the reply of each Ping packet If there is no reply in the specified time the connection is overtime Traceroute Max TTL The max number of hops for a Traceroute connection Click Start to check the connectivity of the Internet The Diagnostic Results page displays the result of diagnosis If the result is similar to the following screen the connectivity of the In...

Страница 93: ...ite and can be downloaded for free There is no need to upgrade the firmware unless the new firmware has a new feature you want to use However when experiencing problems caused by the Router rather than the configuration you can try to upgrade the firmware 2 When you upgrade the Router s firmware you may lose its current configurations so before upgrading the firmware please write down some of your...

Страница 94: ... can save the current configuration of the Router as a backup file and restore the configuration via a backup file as shown in Figure 4 77 Figure 4 77 Backup Restore Configuration Click the Backup button to save all configuration settings as a backup file in your local computer To upgrade the Router s configuration follow these instructions Click the Browse button to locate the update file for the...

Страница 95: ...tomatically Change the DHCP Settings Change the Wireless configurations Change the Web Management Port Upgrade the firmware of the Router system will reboot automatically Restore the Router s settings to factory defaults system will reboot automatically Update the configuration with the file system will reboot automatically 4 16 7 Password Choose menu System Tools Password you can change the facto...

Страница 96: ...not exceed 14 characters in length and not include any spaces Enter the new Password twice to confirm Click the Save button when finished Click the Clear All button to clear all 4 16 8 System Log Choose menu System Tools System Log you can view the logs of the Router Figure 4 80 System Log Auto Mail Feature Indicates whether auto mail feature is enabled or not Mail Settings Set the receiving and s...

Страница 97: ...st mailboxes that need User Name and Password to log in Note Only when you select Authentication do you have to enter the User Name and Password in the following fields User Name Your mail account name filled in the From field The part behind is excluded Password Your mail account password Confirm The Password Enter the password again to confirm Enable Auto Mail Feature Select it to mail logs auto...

Страница 98: ...istics Choose menu System Tools Statistics you can view the statistics of the Router including total traffic and the value of the last Packets Statistic Interval in seconds Figure 4 82 Statistics Current Statistics Status Enable or Disable The default value is disabled To enable click the Enable button If disabled the function of DoS protection in Security settings will disabled Packets Statistics...

Страница 99: ...the ICMP packets transmitted to WAN per second at the specified Packets Statistics interval It is shown like current transmitting rate Max transmitting rate UDP Tx The number of UDP packets transmitted to the WAN per second at the specified Packets Statistics interval It is shown like current transmitting rate Max transmitting rate TCP SYN Tx The number of TCP SYN packets transmitted to the WAN pe...

Страница 100: ...r name in the User Name field and password in the Password field finish by clicking Connect Figure A 1 PPPoE Connection Type 4 If your ADSL lease is in pay according time mode select Connect on Demand or Connect Manually for Internet connection mode Type an appropriate number for Max Idle Time to avoid wasting paid time Otherwise you can select Auto connecting for Internet connection mode Figure A...

Страница 101: ... will fill in the WAN MAC Address field Or else type the MAC Address into the WAN MAC Address field The format for the MAC Address is XX XX XX XX XX XX Then click the Save button It will take effect after rebooting Figure A 3 MAC Clone 3 I want to use NetMeeting what do I need to do 1 If you start NetMeeting as a sponsor you don t need to do anything with the Router 2 If you start as a response yo...

Страница 102: ...our browser and click DMZ submenu On the DMZ page click Enable radio button and type your IP address into the DMZ Host IP Address field using 192 168 1 169 as an example remember to click the Save button Figure A 6 DMZ 5 How to enable H323 ALG Log in to the Router click the Security menu on the left of your browser and click Basic Security submenu On the Basic Security page check the Enable radio ...

Страница 103: ...nge the WEB management port number Log in to the Router click the Security menu on the left of your browser and click Remote Management submenu On the Remote Management page type a port number except 80 such as 88 into the Web Management Port field Click Save and reboot the Router Figure A 8 Remote Management Note If the above configuration takes effect configure to the Router by typing 192 168 1 ...

Страница 104: ...ssuming 192 168 1 188 for an example remember to Enable and Save Figure A 9 Virtual Servers Figure A 10 Add or Modify a Virtual server Entry 5 The wireless stations cannot connect to the Router 1 Make sure the Enable Wireless Router Radio is checked 2 Make sure that the wireless stations SSID accord with the Router s SSID 3 Make sure the wireless stations have right KEY for encryption when the Rou...

Страница 105: ...apter s manual if necessary 1 Configure TCP IP component 1 On the Windows taskbar click the Start button and then click Control Panel 2 Click the Network and Internet Connections icon and then click on the Network Connections tab in the appearing window 3 Right click the icon that showed below select Properties on the prompt page Figure B 1 4 In the prompt page that showed below double click on th...

Страница 106: ...window will display and the IP Address tab is open on this window by default Now you have two ways to configure the TCP IP protocol below Setting IP address automatically Select Obtain an IP address automatically Choose Obtain DNS server automatically as shown in the Figure below ...

Страница 107: ...ms available 2 If the Router s LAN IP address is 192 168 1 1 specify the IP address as 192 168 1 x x is from 2 to 254 and the Subnet mask as 255 255 255 0 3 Type the Router s LAN IP address the default IP is 192 168 1 1 into the Default gateway field 4 Select Use the following DNS server addresses In the Preferred DNS Server field you can enter the same value as the Default gateway or type the loc...

Страница 108: ...NI 707534 Wireless Router 300N 101 Now click OK to keep your settings ...

Страница 109: ...sions FCC CE Wireless Frequency Band 2 4 2 4835GHz Radio Data Rate 11n up to 300Mbps Automatic 11g 54 48 36 24 18 12 9 6Mbps Automatic 11b 11 5 5 2 1Mbps Automatic Frequency Expansion DSSS Direct Sequence Spread Spectrum Modulation DBPSK DQPSK CCK OFDM 16 QAM 64 QAM Security WEP WPA WPA2 WPA2 PSK WPA PSK Sensitivity PER 270M 68 5dBm 10 PER 130M 72dBm 10 PER 54M 74 5dBm 10 PER 11M 89 5dBm 8 PER 6M ...

Страница 110: ...tion and operating in the unlicensed radio spectrum at 2 4GHz and backward compatibility with IEEE 802 11b devices and WEP encryption for security DDNS Dynamic Domain Name System The capability of assigning a fixed host and domain name to a dynamic Internet IP Address DHCP Dynamic Host Configuration Protocol A protocol that automatically configure the TCP IP parameters for the all the PC s that ar...

Страница 111: ...int and to the wireless network name WEP Wired Equivalent Privacy A data privacy mechanism based on a 64 bit or 128 bit or 152 bit shared key algorithm as described in the IEEE 802 11 standard Wi Fi A trade name for the 802 11b wireless networking standard given by the Wireless Ethernet Compatibility Alliance WECA see http www wi fi net an industry standards group promoting interoperability among ...

Отзывы: