4.
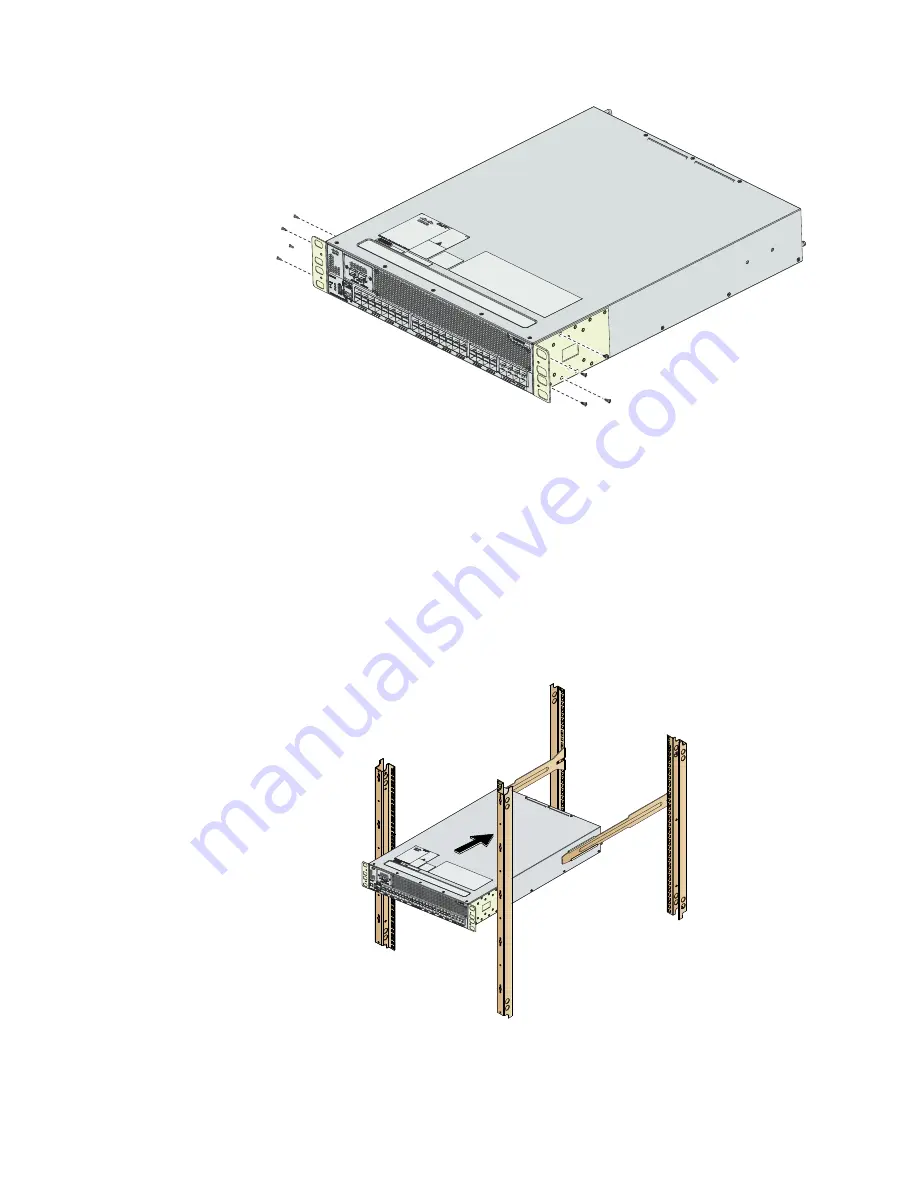
Attach the slider rail using four 12-24 screws or four 10-32 screws, depending
on the rack rail thread type. For racks with square holes, insert the 12-24 cage
nuts in position behind the mounting holes in the slider rails.
a.
Repeat with the other slider rail on the other side of the rack.
b.
Use the tape measure and level to verify that the rails are horizontal and at
the same height.
5.
Insert the switch into the rack as follows.
a.
Figure 1-4 Installing the Slider Rails
a.
Use both hands to position the switch with the back of the switch between
the front rack-mounting rails.
b.
Align the two C brackets on either side of the switch with the slider rails
installed in the rack. Slide the C brackets onto the slider rails, and then
Installing the Slider Rails
rav00053
Installing the Switch on the Slider Rails
rav00056
Chapter 2. Installing the IBM SAN50C-R switch
19
Содержание SAN50C-R
Страница 1: ...IBM Storage Networking SAN50C R Installation Service and User Guide SC27 9274 00 IBM...
Страница 2: ......
Страница 3: ...IBM Storage Networking SAN50C R Installation Service and User Guide SC27 9274 00 IBM...
Страница 8: ...vi SAN50C R Installation Service and User Guide...
Страница 10: ...viii SAN50C R Installation Service and User Guide...
Страница 24: ...xxii SAN50C R Installation Service and User Guide...
Страница 31: ...rav00052 Figure 7 IBM SAN50C R Fan Module Chapter 1 Introducing the SAN50C R 7...
Страница 52: ...28 SAN50C R Installation Service and User Guide...
Страница 60: ...36 SAN50C R Installation Service and User Guide...
Страница 72: ...48 SAN50C R Installation Service and User Guide...
Страница 74: ...50 SAN50C R Installation Service and User Guide...
Страница 84: ...60 SAN50C R Installation Service and User Guide...
Страница 85: ......
Страница 86: ...IBM Printed in USA SC27 9274 00...


