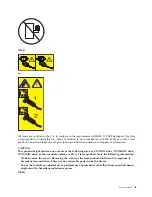
CAUTION:
Removing components from the upper positions in the rack cabinet improves rack stability during
relocation. Follow these general guidelines whenever you relocate a populated rack cabinet within a
room or building:
v
Reduce the weight of the rack cabinet by removing equipment starting at the top of the rack
cabinet. When possible, restore the rack cabinet to the configuration of the rack cabinet as you
received it. If this configuration is not known, you must observe the following precautions:
– Remove all devices in the 32U position and above.
– Ensure that the heaviest devices are installed in the bottom of the rack cabinet.
– Ensure that there are no empty U-levels between devices installed in the rack cabinet below the
32U level.
v
If the rack cabinet you are relocating is part of a suite of rack cabinets, detach the rack cabinet from
the suite.
v
Inspect the route that you plan to take to eliminate potential hazards.
v
Verify that the route that you choose can support the weight of the loaded rack cabinet. Refer to the
documentation that comes with your rack cabinet for the weight of a loaded rack cabinet.
v
Verify that all door openings are at least 760 x 230 mm (30 x 80 in.).
v
Ensure that all devices, shelves, drawers, doors, and cables are secure.
v
Ensure that the four leveling pads are raised to their highest position.
v
Ensure that there is no stabilizer bracket installed on the rack cabinet during movement.
v
Do not use a ramp inclined at more than 10 degrees.
v
When the rack cabinet is in the new location, complete the following steps:
– Lower the four leveling pads.
– Install stabilizer brackets on the rack cabinet.
– If you removed any devices from the rack cabinet, repopulate the rack cabinet from the lowest
position to the highest position.
v
If a long-distance relocation is required, restore the rack cabinet to the configuration of the rack
cabinet as you received it. Pack the rack cabinet in the original packaging material, or equivalent.
Also lower the leveling pads to raise the casters off of the pallet and bolt the rack cabinet to the
pallet.
(R002)
(L001)
(L002)
viii
Finding parts, locations, and addresses
Содержание Power Systems Series
Страница 1: ...Power Systems Finding parts locations and addresses IBM...
Страница 2: ......
Страница 3: ...Power Systems Finding parts locations and addresses IBM...
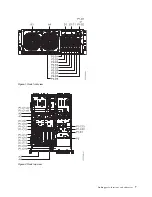
Страница 19: ...Figure 1 Rack front view Figure 2 Rack top view Finding parts locations and addresses 7...
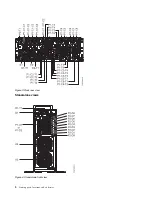
Страница 32: ...Figure 12 Stand alone front view Figure 13 Stand alone side view 20 Finding parts locations and addresses...
Страница 60: ...Figure 30 Rack front view Figure 31 Rack top view 48 Finding parts locations and addresses...
Страница 70: ...Rear Top 58 Finding parts locations and addresses...
Страница 80: ...Rear Top 68 Finding parts locations and addresses...
Страница 81: ...Midplane I O card Finding parts locations and addresses 69...
Страница 89: ...Rear Top 9117 MMC or 9179 MHC with two processor system unit Finding parts locations and addresses 77...
Страница 98: ...Figure 34 Front and rear views Figure 35 Emergency power off EPO 86 Finding parts locations and addresses...
Страница 100: ...Figure 39 Node locations 88 Finding parts locations and addresses...
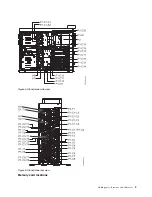
Страница 111: ...Figure 44 Memory card locations Finding parts locations and addresses 99...
Страница 158: ...Figure 53 5802 front view Figure 54 5802 rear view Figure 55 5877 front view 146 Finding parts locations and addresses...
Страница 244: ...Final assembly 232 Finding parts locations and addresses...
Страница 253: ...Finding parts locations and addresses 241...
Страница 265: ...Final assembly 9117 MMC or 9179 MHC with two processor system unit Finding parts locations and addresses 253...
Страница 288: ...Cover assembly 276 Finding parts locations and addresses...
Страница 324: ...312 Finding parts locations and addresses...
Страница 335: ...Notices 323...
Страница 336: ...IBM Printed in USA...


