background image

Functions of Your Computer

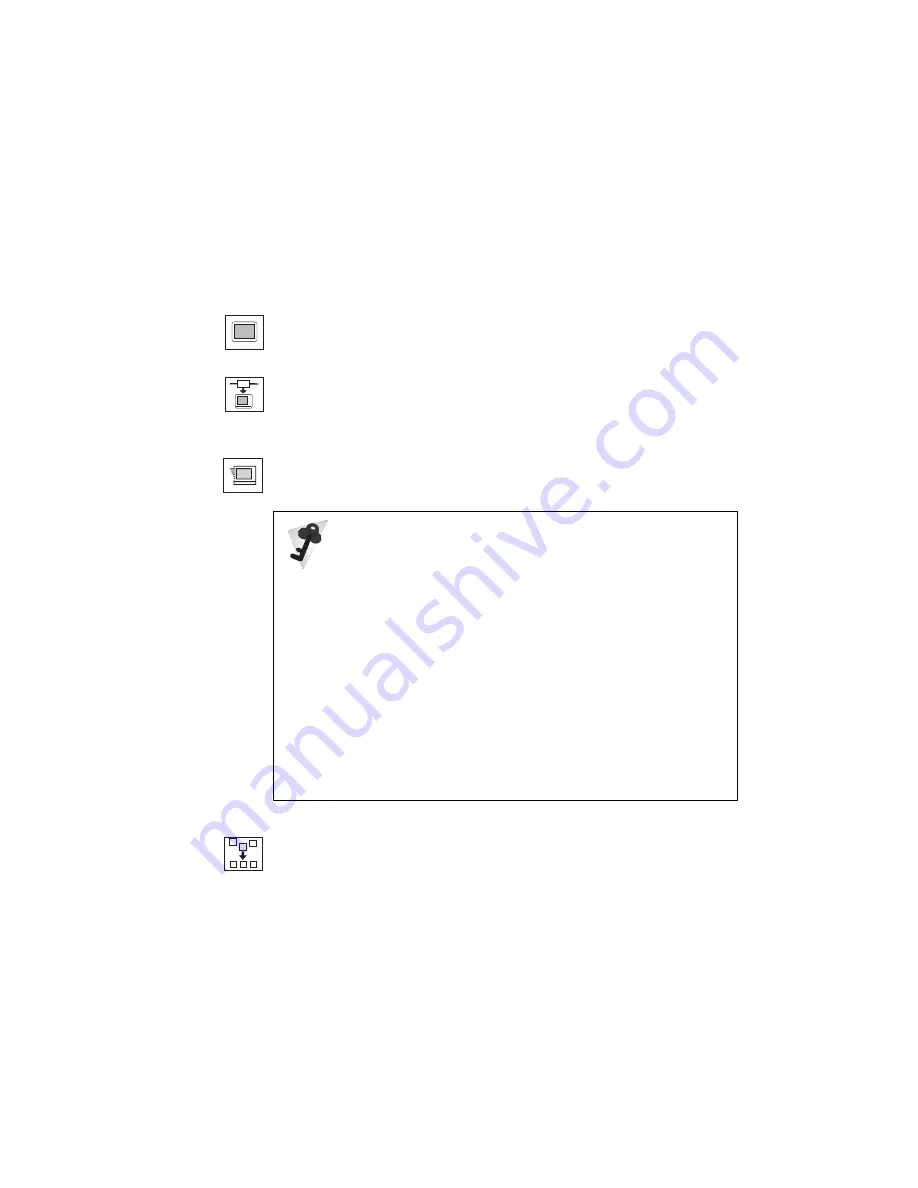
The Display button sets the screen output to be displayed on either
single screen or on multiple screens.

The Network button enables or disables the Wake-on-LAN function
(option) or the Flash-over-LAN function (option). You can use these
functions only with a docking station.

The Quick Boot button enables or disables the Simple Boot Flag
function.

Simple Boot Flag function

This function automatically optimizes the behavior and boot
performance of the BIOS and operating system, based on the
installed operating system and previous boot.

>

If this function is Enabled and once a Plug and Play–capable

>

operating system, such as Windows 98, is installed, the system
BIOS does not configure such hardware resources as system
interruptions, memory windows, and I/O port ranges for all the
devices in the system.

If you are going to use a non–Plug and Play–capable
operating system, disable this function so that the BIOS will
configure hardware resources.

The Initialize button sets all device settings to their default values.

18

IBM ThinkPad 600E User's Reference 


Содержание 600E - ThinkPad 2645 - PII 400 MHz

Страница 1: ...i...

Страница 2: ...ON AS IS WITHOUT ANY WARRANTY OF ANY KIND EITHER EXPRESS OR IMPLIED INCLUDING BUT NOT LIMITED TO THE LIMITED WARRANTIES OF MERCHANTABILITY OR FITNESS FOR A PARTICULAR PURPOSE Some states do not allow...

Страница 3: ...veloped this ThinkPad computer to meet both your technical requirements and your high expectations To help us continue to build products that address your mobile computing needs please take a moment t...

Страница 4: ...ext and graphics Lithium ion battery pack The large capacity lithium ion battery pack extends the operating time of your computer further enhancing to its portability DVD ROM drive A DVD digital versa...

Страница 5: ...bility To use the ThinkPad modem function Basic in the Online User s Guide TrackPoint with enhanced controls Your computer has an enhanced TrackPoint function that enables you to make selections merel...

Страница 6: ...vi IBM ThinkPad 600E User s Reference...

Страница 7: ...Replacing the Battery Pack 36 Getting Service 38 Help at the ThinkPad Web Site 38 Help by Telephone 39 Recording Sheet 40 Chapter 2 Extending the Features of Your Computer 43 Customizing the TrackPoin...

Страница 8: ...he Personalization Window 108 Using Locks 109 Using the Security Screw 110 Chapter 4 Solving Computer Problems 111 Hints and Limitations 113 Using the Hard Disk Drive 118 Using a Docking Station 118 U...

Страница 9: ...ms 148 A Television Problem 151 Other Option Problems 151 Software Problems 153 Other Problems 154 Testing Your Computer 155 Appendix A Features and Specifications 157 Features 157 Specifications 159...

Страница 10: ...Chapter 3 Protecting Your Computer provides information on using passwords identifying yourself with the Personalization Editor and using locks Chapter 3 Protecting Your Computer Chapter 4 Solving Com...

Страница 11: ...uter WIN 98 Information for Microsoft Windows 98 users OS 2 Information for IBM Operating System 2 OS 2 users WIN 95 Information for Microsoft Windows 95 users DOS Information for IBM DOS users WIN NT...

Страница 12: ...onnect cables as shown below when installing moving or opening the covers of this product or attached devices The 3 pin power cord must be used with a properly grounded outlet Turn everything OFF Turn...

Страница 13: ...or disposed of Do not 1 throw or immerse into water 2 heat to more than 100 C 212 F or 3 repair or disassemble Dispose of it as required by local ordinances or regulations CAUTION The fluorescent lam...

Страница 14: ...ed to conform to the requirements of EN60825 DANGER Do not open the CD ROM or DVD ROM drive no user adjustments or serviceable parts are inside Use of controls adjustments or the performance of proced...

Страница 15: ...our Computer 8 Keyboard Functions 8 TrackPoint 8 Fn Key 11 Numeric Keypad 14 UltraslimBay 15 ThinkPad Utility Programs 16 Easy Setup 16 ThinkPad Configuration Program 25 Online User s Guide 29 Backing...

Страница 16: ...Identifying the Hardware Features Identifying the Hardware Features Front View 19 18 17 16 15 13 12 11 8 7 6 5 4 3 2 1 9 10 14 2 IBM ThinkPad 600E User s Reference...

Страница 17: ...diskette drive as an external diskette drive if another device is in the UltraslimBay 1 The diskette eject button ejects the diskette from the diskette drive 11 The video out connector is used for con...

Страница 18: ...Identifying the Hardware Features Rear View 1 2 3 5 7 8 9 11 10 6 4 Bottom View 1 4 5 2 3 6 7 8 9 4 IBM ThinkPad 600E User s Reference...

Страница 19: ...parallel connector is where you connect a parallel printer signal cable 1 The external monitor connector is where you attach an external monitor CRT 11 The external input device connector is used to...

Страница 20: ...ators on the computer show the current status of your computer by their on or off states and colors green and orange Each indicator is identified with a symbol The following shows the location and the...

Страница 21: ...ator is on 4 Numeric lock Green The numeric keypad on the keyboard is enabled You enable or disable the keypad by pressing and holding the Shift key and pressing the NumLk key For details see Numeric...

Страница 22: ...ey Numeric keypad TrackPoint The keyboard contains a unique cursor pointing device called the TrackPoint Pointing selecting and dragging all become part of a single process you can perform without mov...

Страница 23: ...hese functions depend on the software you are using The function of the center button is described on page 47 Stick Left click button Right click button Center button If you are not familiar with usin...

Страница 24: ...ired by your software By enabling Press to Select you can make the TrackPoint stick function the same as the left or right click button For more information Customizing the TrackPoint on page 44 Chang...

Страница 25: ...nction key Start the ThinkPad Configuration program ThinkPad Configuration Program on page 25 Click on the Accessibility button and click on Enable for Fn key lock You can also set up by typing PS2 FN...

Страница 26: ...or speed changes as follows High Performance Automatic Customized Power Conservation Functions for Battery Power Standby mode The computer enters standby mode For more information about this mode Basi...

Страница 27: ...LCD Volume up The volume increases Volume down The volume decreases Mute Sound turns off Note This function will not be disabled when you power off the computer and power it on again To turn on the s...

Страница 28: ...mputer To enable or disable the numeric keypad press and hold Shift and then press NumLk 0 1 2 3 4 5 6 7 8 9 NumLk 6 Y F8 F9 F10 Shift Alt Ctrl F11 F12 H N _ If the numeric keypad is enabled press and...

Страница 29: ...drive CD ROM drive LS 120 drive Secondary hard disk drive adapter Secondary battery For the detailed information about these devices refer to the manuals shipped with them To replace a device in the...

Страница 30: ...rtup device Test Test the system Restart Restart the system To start Easy Setup do as follows 1 Power off the computer and remove any diskette from the diskette drive 2 Press and hold F1 then power on...

Страница 31: ...the Screen Color You can change the color of the Easy Setup menu by pressing the Ctrl PgUp keys or by pressing the Ctrl PgDn keys To return to the original color press the Ctrl Home keys Clicking on t...

Страница 32: ...he behavior and boot performance of the BIOS and operating system based on the installed operating system and previous boot If this function is Enabled and once a Plug and Play capable operating syste...

Страница 33: ...Hour Minute Second then type the date and time 2 Click on OK to save the changes or on Cancel to cancel them Instead of typing you can place the pointer on any of the arrow icons or to adjust the dat...

Страница 34: ...on displays a submenu for setting the supervisor password An open lock icon shows that a password has not been set yet Clicking on the Start up button displays the Start up submenu which you can use t...

Страница 35: ...4 Select the first device you want for the startup sequence then click on it You can set up to four devices 5 Click on OK or press Enter to save the changes Note The Power On button sets the startup...

Страница 36: ...1 Supported Combinations for Diskette Drives Case Diskette Drive in the UltraslimBay Diskette Drive in the Docking Station External Diskette Drive Case 1 FDD 1 None None Case 2 None None FDD 1 Case 3...

Страница 37: ...1 Select Network and click on it The Speed menu appears 2 If you are using a token ring card select the speed you want 4 or 16 and click on it then press Enter If you are using a network card other t...

Страница 38: ...a LAN using remote network management software Disable the function if your computer is not under system management of a network administrator For more information System Management in the Online User...

Страница 39: ...describes how to start the ThinkPad Configuration program WIN 98 For Windows 98 To start the ThinkPad Configuration program for Windows 98 do as follows 1 Click on Start 2 Move the cursor to Settings...

Страница 40: ...n displays the System Properties window where you can make a device available or unavailable 4 The Show Allocated Resources View button displays the Allocated Resources View window where you can check...

Страница 41: ...s 1 2 3 4 5 9 6 8 7 9 1 The One Touch Setup buttons Click on one of these buttons to set the system configuration 2 The Power Mode buttons Click on one of these buttons to set the power mode to High P...

Страница 42: ...t button Click on this button to set the default values for each option and to cancel the changes you just made 8 The Status bar The device name and its status appears in the status bar when you place...

Страница 43: ...Installing software Using system management Using PS2 commands Information Getting service Handling tips Glossary To start the Online User s Guide click on Start move the cursor to Programs and Think...

Страница 44: ...n CD is provided for your installation convenience you can customize your system using this CD It contains all the software applications and hardware device drivers for your computer It also contains...

Страница 45: ...you always have a copy on your ThinkPad Customization CD Using the ThinkPad Customization CD This page contains an overview of ThinkPad Customization CD Using the Recovery CD If you accidentally erase...

Страница 46: ...Replacing an UltraslimBay Device on page 89 Then go to Case 1 Case 1 Your computer supports startable CDs when the startable CD ROM function is enabled To use the Recovery CD enable this function the...

Страница 47: ...w appears 15 Click on Start up 16 Click on Power on 17 Click on Reset 18 Set the startup device and then click on OK 19 Click on Exit 20 Click on Restart and then OK Your computer restarts with the pr...

Страница 48: ...re device drivers for your computer in the Windows 98 Windows 95 and Windows NT environment For the device drivers for Windows 3 1 OS 2 and DOS http www ibm com thinkpad With this program you can crea...

Страница 49: ...or Windows NT that periodically takes snapshots of your system files If your computer does not operate properly after you install a new device driver or software use ConfigSafe to restore the last wor...

Страница 50: ...n remove the battery pack 2 1 2 5 Align the front of the fully charged spare battery pack with the front side of the battery space in the computer 1 then put the battery pack in place 2 1 2 You can re...

Страница 51: ...y Pack 6 Gently push the battery pack back into the space then slide the battery pack latch to the locked position Unlock Lock You have finished replacing the battery pack Chapter 1 Getting Familiar w...

Страница 52: ...Appendix B You will need to know the following information when requesting repair service Identification number of your computer Options installed in your system Note Use the record sheet on page 40 E...

Страница 53: ...t shipment of customer replaceable parts Please have the following information ready when you call Serial number of your computer and proof of purchase Description of the problem Exact wording of the...

Страница 54: ...he DIMM check box then note 128 MB x 2 Identification Numbers The serial number label is on the bottom of your computer Write down the machine Type and the serial number S N in the following box To de...

Страница 55: ...g system and its version number if available Application programs running at the time of the problem Problem symptom Describe the problem specifically Can the problem be reproduced Yes No If yes descr...

Страница 56: ...Getting Service 42 IBM ThinkPad 600E User s Reference...

Страница 57: ...ing an External Mouse or Numeric Keypad 61 Attaching an External Keyboard and Mouse 63 Disabling the TrackPoint 65 Attaching an External Monitor 66 Attaching a Television to Your Computer 70 Using a D...

Страница 58: ...set the following features in this window Press to Select Sensitivity Scrolling or Magnifying Glass Setting Press to Select If you enable Press to Select by putting a check mark in the Enable Press to...

Страница 59: ...to select which button the stick will simulate either the left or the right button For example if you select Left Click you can start a program with the TrackPoint by putting the cursor on the program...

Страница 60: ...r both cursor movement and Press to Select Slide toward Firm Touch to increase the force needed to move the cursor and to activate Press to Select Slide toward Light Touch to decrease the force needed...

Страница 61: ...ts with the press of a button To scroll press the center click button and then use the TrackPoint instead of the scroll bars in any program Magnifying Glass This function enables you to enlarge a mova...

Страница 62: ...rates normally that is it controls the mouse cursor Use External Mouse This option sets an externally attached mouse to scroll or move the magnifying glass horizontally or vertically The TrackPoint fu...

Страница 63: ...of the computer Your computer memory capacity can be expanded up to 288 MB 32 MB base memory and two 128 MB DIMM options Your computer supports the synchronous dynamic random access memory SDRAM card...

Страница 64: ...ose the LCD turn the computer over and then remove the battery pack page 36 3 Loosen the screw on the memory slot cover then remove the cover Handling a Screwdriver Use a screwdriver that fits the scr...

Страница 65: ...the socket insert the DIMM at an angle of approximately 20 into the socket then press it firmly 1 6 Pivot the DIMM until it snaps into place 2 If you want to install two DIMMs remove the 32 MB DIMM w...

Страница 66: ...over again and power it on 10 Confirm that the new memory size appears at the upper left corner of the screen For example if you install a 32 MB DIMM into your computer with 64 MB base memory you shou...

Страница 67: ...ernation file as follows a Power off the computer b Remove the DIMM you added c Power on the computer and disable hibernation mode d Add the DIMM e Enable hibernation mode To disable and enable hibern...

Страница 68: ...3 Loosen the screw and remove the memory slot cover 4 Press out on the latches on both edges of the socket at the same time 5 Remove the DIMM Be sure to save the DIMM for future use 6 Replace the memo...

Страница 69: ...puter upside down 2 Remove the battery pack page 36 Replace the hard disk drive only if you upgrade it or have it repaired You should not replace it often Handling a Hard Disk Drive Do not drop or app...

Страница 70: ...in as shown 1 then remove the hard disk drive cover 2 2 1 CAUTION Do not use your fingernails to open the hard disk drive cover You might injure your fingernails To open the drive cover use a coin 4 P...

Страница 71: ...use force when inserting the hard disk drive into the bay The connector is sensitive and it might get damaged If the hard disk drive that you will be installing has a spacer on it remove the spacer us...

Страница 72: ...it as an external diskette drive To attach the diskette drive externally do the following 1 Power off the computer 2 Insert the diskette drive in the external diskette drive enclosure and connect it f...

Страница 73: ...wappable device for the UltraslimBay For an explanation of warm swapping page 90 If you typically use the diskette drive externally you can set its configuration to allow warm attachment externally to...

Страница 74: ...enclosure is designed only for the diskette drive Do not insert any other drive into it The diskette drive enclosure has a lock on the bottom To remove the diskette drive from the enclosure hold the...

Страница 75: ...nd external keyboard to your computer Attaching an External Mouse or Numeric Keypad You can attach an external mouse or numeric keypad to the external input device connector on the rear of the compute...

Страница 76: ...PS 2 Miniature Mouse Disabling the TrackPoint on page 65 If you want to use both the external numeric keypad and mouse at the same time first connect the keypad cable to the computer 1 then connect th...

Страница 77: ...eyboard will not work if it is connected directly to the computer s external input device connector See the Options by IBM Catalog supplied with your computer for details about the options When the ex...

Страница 78: ...ach a mouse to the mouse connector of the keyboard mouse cable 1 2 Keyboard mouse cable Keyboard connector Using the IBM ThinkPad Space Saver Keyboard If you are using the IBM ThinkPad Space Saver Key...

Страница 79: ...le the TrackPoint 1 Start the ThinkPad Configuration program See ThinkPad Configuration Program on page 25 2 Click on the TrackPoint button 3 Click on Auto Disable for the TrackPoint This setting auto...

Страница 80: ...g an external monitor that supports a resolution higher than VGA mode you can achieve a maximum of 1280x1024 video resolution To attach an external monitor do the following 1 Power off the computer 2...

Страница 81: ...these applications before changing the display output location If you are attaching an external monitor that supports only VGA mode 640x480 resolution do not click on Both LCD and CRT Display Doing s...

Страница 82: ...changes effective Do not disconnect the external monitor while the computer is in suspend mode or hibernation mode If no external monitor is attached when the computer resumes the LCD remains blank a...

Страница 83: ...se the virtual screen function to display a part of the high resolution screen image produced by your computer You can see other parts by moving the screen with the TrackPoint or other pointing device...

Страница 84: ...the computer output on it To display the computer output on television do the following 1 Power off the computer and television 2 Connect the video connector cable to the video out connector then conn...

Страница 85: ...ntrol Panel c Double click on Display d Select the Settings tab e Click on the Advanced button f Select the NeoMagic tab g Put a check mark in the TV check box h Select either a 640x480 or a 800x600 T...

Страница 86: ...omputer page 70 To enable the dual display do as follows 1 Attach the computer to an external monitor CRT or a television 2 Click on Start 3 Move the cursor to Settings and Control Panel then click on...

Страница 87: ...ry display the CRT or TV 17 Select the color depth and the resolution of the secondary display 18 Set the relative position of the each monitor by dragging its icon 19 Click on OK to apply the changes...

Страница 88: ...disable the dual display function entirely for better performance and removing some limitaions continue the procedure as follows 7 Click on the Advanced button 8 Select the NeoMagic tab 9 Remove the c...

Страница 89: ...8 64K 800x600 16M The following table shows the display mode when you use the television You need to enable the television settings every time you start your computer to use this function with the TV...

Страница 90: ...mode on television If you play the video clip AVI or MPEG file the image is in overlay mode on the LCD and TV when you use them simultaneously but only on the LCD when you use the dual display functi...

Страница 91: ...ot and supports the following types of cards PC Card Type I Type II and Type III CardBus Card Zoomed Video ZV 1 Find the notched edge 1 of the PC Card as shown 2 Insert the PC Card into the appropriat...

Страница 92: ...software Basic in the Online User s Guide For Windows 98 If you have not installed the PC Card driver Windows 98 starts to install it For Windows NT Your computer has PC Card support software called C...

Страница 93: ...Card Otherwise data on the PC Card might be corrupted or lost 1 Stop the card To stop the PC Card Basic in the Online User s Guide 2 Press the PC Card eject button to pop out the button Then press it...

Страница 94: ...cator available as an option is a convenient way to attach several input devices and an external monitor Of course you can also attach these devices directly to your computer SelectaDock I SelectaDock...

Страница 95: ...your computer to the docking station Docking with Your Computer Powered Off Cold Docking You should dock with both your computer and your docking station powered off if It is the first time you are d...

Страница 96: ...ows 98 or Windows 95 creates a configuration profile for the docking station with the name Dock X 5 In Windows 98 or Windows 95 select My Computer Control Panel System and then the Hardware Profile ta...

Страница 97: ...powers off and on Preloaded Applications ThinkPad Information ThinkPad Tools Programs Documents Settings Find Help RUN Suspend Shut Down Eject PC If your computer does not enter suspend mode while it...

Страница 98: ...n If this happens try cold undocking Presetting a Device to Avoid a Resource Conflict The Windows 98 or Windows 95 plug and play function enables you to use devices that you install in the docking sta...

Страница 99: ...installed an IDE device such as a hard disk drive or a CD ROM drive in the docking station you must change the setting on your computer to enable the device By default your computer uses the primary...

Страница 100: ...ove a device that is not currently being used by clicking on the device and the Remove button under the Device Manager tab 6 Click on OK to close the System Properties window 7 Return to the Docking s...

Страница 101: ...is no available IRQ value remove a device that is not currently being used by clicking on the device and the Remove button under the Device Manager tab 6 Click on OK to close the System Properties win...

Страница 102: ...lues Legend 1 P M Primary master 2 P S Primary slave 3 S M Secondary master 4 S S Secondary slave 5 T M Third master 6 T S Third slave Device 2 Channel IDE Default Mode 3 Channel IDE Mode 2 Channel ID...

Страница 103: ...drive with the diskette drive follow the same procedure to install the other storage devices in the UltraslimBay 1 Power off the computer and remove the AC Adapter and cables then turn the computer up...

Страница 104: ...program ThinkPad Configuration Program on page 25 2 Click on UltraBay 3 Make sure that there is a check mark in the Enable IDE device Hot Warm Swap check box If there is no check mark put a check mar...

Страница 105: ...e UltraslimBay and the external diskette drive connector To remove the diskette drive from the UltraslimBay and attach it to the external diskette drive connector or vice versa you need to first power...

Страница 106: ...Replacing an UltraslimBay Device 92 IBM ThinkPad 600E User s Reference...

Страница 107: ...ng Passwords 94 Entering a Password 95 Setting a Password 96 Changing or Removing a Password 98 For a Power On Password or Hard Disk Drive Password 98 For a Supervisor Password 100 Removing a Power On...

Страница 108: ...person cannot access the data on your hard disk without knowing the password A hard disk drive password provides the following security features You need to type the hard disk drive password at startu...

Страница 109: ...cannot access data on the hard disk The system administrator can set the same supervisor password on many ThinkPad computers to make administration easier Other passwords Some Microsoft operating sys...

Страница 110: ...tries you must power off the computer wait 5 seconds and then power it on again and retry Setting a Password To set a password do the following 1 Start Easy Setup a Press and hold F1 then turn on the...

Страница 111: ...on of letters A to Z and numbers 0 to 9 Uppercase and lowercase letters for example A and a are treated as the same character If you type a wrong character use the Backspace key to erase it and then t...

Страница 112: ...d an additional charge might be required for the service Neither an IBM reseller nor IBM marketing representative can make the hard disk drive usable Changing or Removing a Password This security feat...

Страница 113: ...to step 4 To remove the password press Enter The following window appears and the system starts You have removed your password Skip the remaining steps 4 To change the password type the new password...

Страница 114: ...arts You have changed your password Write down the password and keep it in a safe place For a Supervisor Password 1 Start Easy Setup a Press and hold F1 then turn on the computer b Hold F1 until the p...

Страница 115: ...assword go to step 8 5 To remove the password enter the current password and press the Spacebar 6 Press Enter twice 7 Click on Exit then click on Restart The supervisor password has been removed Your...

Страница 116: ...Using Passwords 8 Enter the current password and press the Spacebar 9 Type the new password then press Enter 102 IBM ThinkPad 600E User s Reference...

Страница 117: ...word and keep it in a safe place Removing a Power On Password with Supervisor Authority You can remove a power on password even if you don t know it if you know the supervisor password 1 Power on the...

Страница 118: ...6 Press Enter The Password Confirmation window appears 7 Press Enter again 8 Click on Exit then click on Restart Your computer restarts The power on password has been removed 104 IBM ThinkPad 600E Us...

Страница 119: ...l computers are being used in your location or to deter theft Entering Your Personal Data A personalized password prompt window consists of two parts the personal data area 1 and the background bitmap...

Страница 120: ...g Up Your System on page 30 3 Insert the backup copy of the Utility Diskette for DOS Personalization into the diskette drive 4 Open the Personalization Editor a Click on Start b Move the cursor to Pro...

Страница 121: ...d bitmap continue with step 6 otherwise go to step 10 6 Select Background in the Personalization Editor window Windows Paint automatically opens 7 Draw an image or color the background Your bitmap siz...

Страница 122: ...Set your password if you have not yet set it Click on Help for more information The information that you typed in will be displayed the next time you power on the computer Deleting the Personalization...

Страница 123: ...n on the lock to a stationary object Refer to the instructions shipped with the mechanical lock For information on the keyhole location page 4 You are responsible for evaluating selecting and implemen...

Страница 124: ...nd all cables from the computer 2 Remove the screw with a coin then install the security screw and tighten it with a 2 5 mm allen wrench 3 Connect the AC Adapter then power on the computer You can use...

Страница 125: ...123 Error Codes or Messages 125 No Error Codes or Messages 131 Input Problems 131 Suspend or Hibernation Problems 133 LCD Problems 136 Indicator Problems 137 Battery Problems 137 A Hard Disk Drive Pr...

Страница 126: ...Other Option Problems 151 Software Problems 153 Other Problems 154 Testing Your Computer 155 112 IBM ThinkPad 600E User s Reference...

Страница 127: ...this book standby mode suspend mode and hibernation mode You can enter these modes as follows Fn F3 standby mode Fn F4 suspend mode Fn F12 hibernation mode The computer also enters suspend mode or hib...

Страница 128: ...trol Panel Then click on Control Panel 2 Double click on System 3 Click on the Device Manager tab and double click on CD ROM 4 Click on the CD ROM or DVD ROM drive name under CD ROM then click on the...

Страница 129: ...d MEM C to review your DOS memory usage occasionally If you have installed more than 256 MB of memory check the 386Enh section of the SYSTEM INI file and do one of the following If the PageOverCommit...

Страница 130: ...oming faxes or mail you must set the modem settings in the fax application to one of the following Hardware FIFO enabled Hardware Flow Control on UART 16550A modem In OS 2 FaxWorks for example select...

Страница 131: ...iguration online help window appears C PS2 C Copyright IBM Corp 1993 1998 All rights reserved US Government Users Restricted Rights Use duplication or disclosure restricted by GSA ADP Schedule Contrac...

Страница 132: ...on see Using the USB Connector on page 119 Hot or Warm Docking to a Docking Station Windows 95 and Windows 98 Only You might not be able to hot or warm dock your computer to the SelectaDock docking st...

Страница 133: ...rive Do not switch the display mode from the LCD to the external monitor while viewing a DVD with video content such as a DVD movie or business presentation You need to change the display mode before...

Страница 134: ...your computer you must configure a second CardBus manually by using the Device Manager To get to the Device Manager click on the System icon in the Control Panel Using a Microphone If you are using a...

Страница 135: ...column that you don t use either LINE or MIC Using an External Condenser Microphone The microphone line in jack supports the following type of microphones A dynamic microphone A self battery powered c...

Страница 136: ...the test and make sure the hardware and the device drivers are OK Testing Your Computer on page 155 3 Note the error code and have the computer serviced Getting Service in the Online User s Guide If y...

Страница 137: ...hecklist Troubleshooting Chart Page Error codes or messages 125 No error codes or messages 131 Input problems 131 Suspend or hibernation problems 133 LCD problems 136 Indicator problems 137 Battery pr...

Страница 138: ...Troubleshooting Guide Troubleshooting Chart Page Other problems 154 124 IBM ThinkPad 600E User s Reference...

Страница 139: ...eck the devices in the startup sequence box Is the default drive listed in the startup sequence box Yes Exit this window and power off the computer No Select the Reset icon 6 Is an operating system in...

Страница 140: ...Enter to proceed to the Easy Setup Password submenu 4 Select the Supervisor icon then press Enter The same password as the supervisor password is set for the hard disk password on the main hard disk b...

Страница 141: ...is low Connect the AC Adapter to the computer and charge the battery pack or replace the battery pack with a fully charged one 192 cooling fan error Have the computer serviced 195 hibernation error Th...

Страница 142: ...puter stops during the test have the computer serviced 6xx diskette error Have the computer serviced 11xx serial port error Have the computer serviced 12xx infrared error Have the computer serviced 17...

Страница 143: ...pe the correct password and press Enter to use the computer see page 96 If the power on password is not accepted a supervisor password might have been set Type the supervisor password and press Enter...

Страница 144: ...f you use a DOS application that supports only the 640x480 resolution VGA mode the screen image might look slightly distorted or might appear smaller than the display size This is to maintain compatib...

Страница 145: ...pack is installed correctly The AC Adapter is connected to the computer and the power cord is plugged into a working electrical outlet The computer power is on Turn on the power switch again for conf...

Страница 146: ...ackPoint is pressed for a long time When the temperature changes The cursor does not work for a while after the settings in the TrackPoint Properties window have been changed This is a normal characte...

Страница 147: ...pend mode automatically The computer enters suspend mode automatically when the processor temperature reaches a certain level This is not a defect The computer enters suspend mode immediately after PO...

Страница 148: ...neric CD ROM or DVD ROM driver accesses the internal CD ROM drive or DVD ROM drive every 3 seconds to see if a CD ROM is inserted in the CD ROM drive or DVD ROM drive This prevents your computer from...

Страница 149: ...remove the PC Card or disable the PC Card slot using the Control Panel For Windows NT Note You must format your hard disk with the FAT format system to use hibernation mode in Windows NT If you format...

Страница 150: ...MagicMedia 256AV 8 Select the Monitor tab Make sure the information is correct Incorrect characters appear on the screen Did you install the operating system or application program correctly If they a...

Страница 151: ...the metal shutter end first in the diskette drive If these items are correct have the computer serviced If there is no diskette in the drive have the computer serviced Battery Problems Problem Cause a...

Страница 152: ...ing the hard disk drive You are carrying your computer This is a normal characteristic of a hard disk drive and is not a defect CD ROM Drive Problems Problem Cause and Action The CD ROM drive does not...

Страница 153: ...format conforms with one of the following Music CD CD ROM or CD ROM XA Multisession photo CD Video CD DVD ROM Drive Problems Problem Cause and Action The DVD ROM does not work Make sure that The comp...

Страница 154: ...session photo CD Video CD DVD ROM DVD video Infrared Communication Problems Problem Cause and Action Your computer cannot communicate with other devices using the infrared port Make sure that The comm...

Страница 155: ...ar your computer or the communicating device You cannot use DMA channels for both the parallel connector and the infrared port If you enable ECP and choose DMA3 the default value for the parallel conn...

Страница 156: ...The volume of the WaveTable MidiSynth device cannot be controlled Use the Serial in control in the volume control panel to control the volume The voice quality over the Voice Over Data communication...

Страница 157: ...modem does not work when you start your computer from an operating system other than Windows 95 The operating system might be sharing the same IRQ levels as your modem The ThinkPad Modem software mig...

Страница 158: ...ur PC Card Make sure that If the PC Card is not a modem an ATA a Flash or an SRAM card you have the proper client device driver for the card In Windows 95 the PC Card must have an INF file associated...

Страница 159: ...D6000 DBFFFh I O A20 A23h RPL Ethernet IRQ 5 Memory D2000 D7FFFh I O 300 31Fh The PC Card is installed and configured but it does not work Modem card Make sure all settings in the Modem Control panel...

Страница 160: ...not select Battery 7 Click on the Customized radio button 8 Select Maximize in the Processor speed list box under Setting details 9 Click on OK to apply the change Docking Station or Port Replicator...

Страница 161: ...power on or resume operation Make sure that The AC Adapter is connected to the port replicator or docking station by following the instructions described in this book The power on indicator of the por...

Страница 162: ...ms Problem Cause and Action The external monitor is blank Do the following 1 Connect the external monitor to another computer to make sure it works 2 Reconnect the external monitor to your computer 3...

Страница 163: ...monitor type is selected by doing the following 1 Click on Start 2 Move the cursor to Settings and Control Panel 3 Click on Control Panel and then double click on Display 4 Select the Settings tab in...

Страница 164: ...ttings tab in the Display Properties window 2 Click on the Monitor tab Make sure you choose the correct monitor 3 Click on OK to close the window An appropriate refresh rate is selected by doing the f...

Страница 165: ...Output Standards and Output Selection in the procedure make sure that you select the appropriate radio button under TV Output Standards box and the Composite radio button under Output Selections box...

Страница 166: ...orrect and the test program did not find the problem have the computer and option serviced The serial connector does not work Make sure that the serial connector is enabled by doing the following For...

Страница 167: ...kPad Configuration program is distorted Windows NT only Installing the Active Desktop bundled with Internet Explorer Version 4 0 on Windows NT might cause this problem Do one of the following Uninstal...

Страница 168: ...t on again To power off the computer press the power shutdown switch using the tip of a ballpoint pen The computer does not power off with the power switch If the suspend indicator is on and you are w...

Страница 169: ...ollowing Easy Setup menu appears Date Time Password Easy Setup Start up Test Restart Config BIOS part number Date System unit serial number System board serial number Microprocessor nnnnnnnnnnnnnn nnn...

Страница 170: ...he pointing device during the test If you have the SelectaDock I or II docking station as an option with your computer you need to create the diagnostic diskette to test the SelectaDock docking statio...

Страница 171: ...ssor mobile module with MMX Memory Built in 64 MB Option Maximum 288 MB Storage devices 2 5 inch hard disk drive Display The color display uses TFT technology Up to 1024 by 768 resolution on the LCD U...

Страница 172: ...ion 100 2 MB 3 5 inch unformatted diskette ANSI X3 171 ISO 9529 ECMA 125 External interface Serial connector EIA RS232D Parallel connector Centronics External input device connector External monitor c...

Страница 173: ...F Nonoperating 5 to 43 C 41 to 109 F Relative humidity Operating with no diskette in the drive 8 to 95 Operating with a diskette in the drive 8 to 80 Maximum altitude 3048 m 10 000 ft in unpressurized...

Страница 174: ...Ecuador El Salvador Guatemala Guyana Haiti Honduras Jamaica Korea South Mexico Netherlands Antilles Nicaragua Panama Peru Philippines Saudi Arabia Suriname Taiwan Thailand Trinidad West Indies United...

Страница 175: ...ia Suriname Taiwan Thailand Trinidad West Indies United States of America Venezuela 76H3518 Austria Belgium Bosnia Herzogovina Bulgaria Croatia Czech Republic Egypt Finland France Germany Greece Hunga...

Страница 176: ...IBM Power Cords 162 IBM ThinkPad 600E User s Reference...

Страница 177: ...ature conversion or upgrade IBM or your reseller may require that the Machine on which it is installed be 1 the designated serial numbered Machine and 2 at an engineering change level compatible with...

Страница 178: ...E HOWEVER SOME LAWS DO NOT ALLOW THE EXCLUSION OF IMPLIED WARRANTIES IF THESE LAWS APPLY THEN ALL EXPRESS AND IMPLIED WARRANTIES ARE LIMITED IN DURATION TO THE WARRANTY PERIOD NO WARRANTIES APPLY AFTE...

Страница 179: ...Y 10594 U S A Year 2000 Readiness and Instructions A product is Year 2000 Ready if the product when used in accordance with its associated documentation is capable of correctly processing providing an...

Страница 180: ...information Trademarks The following terms are trademarks of the IBM Corporation in the United States or other countries or both Microsoft Windows Windows NT and the Windows 95 flag logo are trademar...

Страница 181: ...t or relocate the receiving antenna Increase the separation between the equipment and receiver Connect the equipment into an outlet on a circuit different from that to which the receiver is connected...

Страница 182: ...Council Directive 89 336 EEC on the approximation of the laws of the Member States relating to electro magnetic compatibility IBM cannot accept responsibility for any failure to satisfy the protection...

Страница 183: ...evices you may connect to your line as determined by the REN you should call your local telephone company to determine the maximum REN for your calling area 4 If the built in modem causes harm to the...

Страница 184: ...cularly important in rural areas Caution Users should not attempt to make such connections themselves but should contact the appropriate electric inspection authority or electrician as appropriate The...

Страница 185: ...ectrique des lignes t l phoniques et des canalisations d eau m talliques s il y en a sont raccord s ensemble Cette pr caution est particuli rement importante dans les r gions rurales Avertissement L u...

Страница 186: ...ion s copy protection technology in the device must be authorized by Macrovision and is intended for home and other limited pay per view use only unless otherwise authorized in writing by Macrovision...

Страница 187: ...ackPoint cursor drift 9 customizing customizing continued built in device 25 system 30 D date setting 19 DIMM installing 50 removing 54 disabling numeric keypad on keyboard 14 TrackPoint 65 warm attac...

Страница 188: ...y 11 H hard disk problem 138 recovering contents 31 upgrading 55 hard disk drive password 94 changing 98 forgetting 98 removing 98 hard disk drive password continued setting 96 hibernation mode enteri...

Страница 189: ...ving 98 password continued setting 96 supervisor authority 103 PC Card installing 77 modem using setting for OS 2 116 problems 144 removing 79 restrictions 23 119 stopping 79 119 supported 77 types 77...

Страница 190: ...nd mode entering 12 problems 133 suspend mode continued restrictions with PC Card 77 using CD ROM drive with for Windows 95 114 system files restoring 35 system status indicator 7 problems 137 T telep...

Страница 191: ...44 port replicator problems 146 printer problems 148 software problems 153 suspend problems 133 telephony problems 142 television problem 151 universal serial bus USB problem 143 U UltraslimBay 15 sto...

Отзывы: