7. Secure the system to the rack by screwing a screw through the handles on each side of the front of
the system chassis.
8. Plug the power cords into the power supplies.
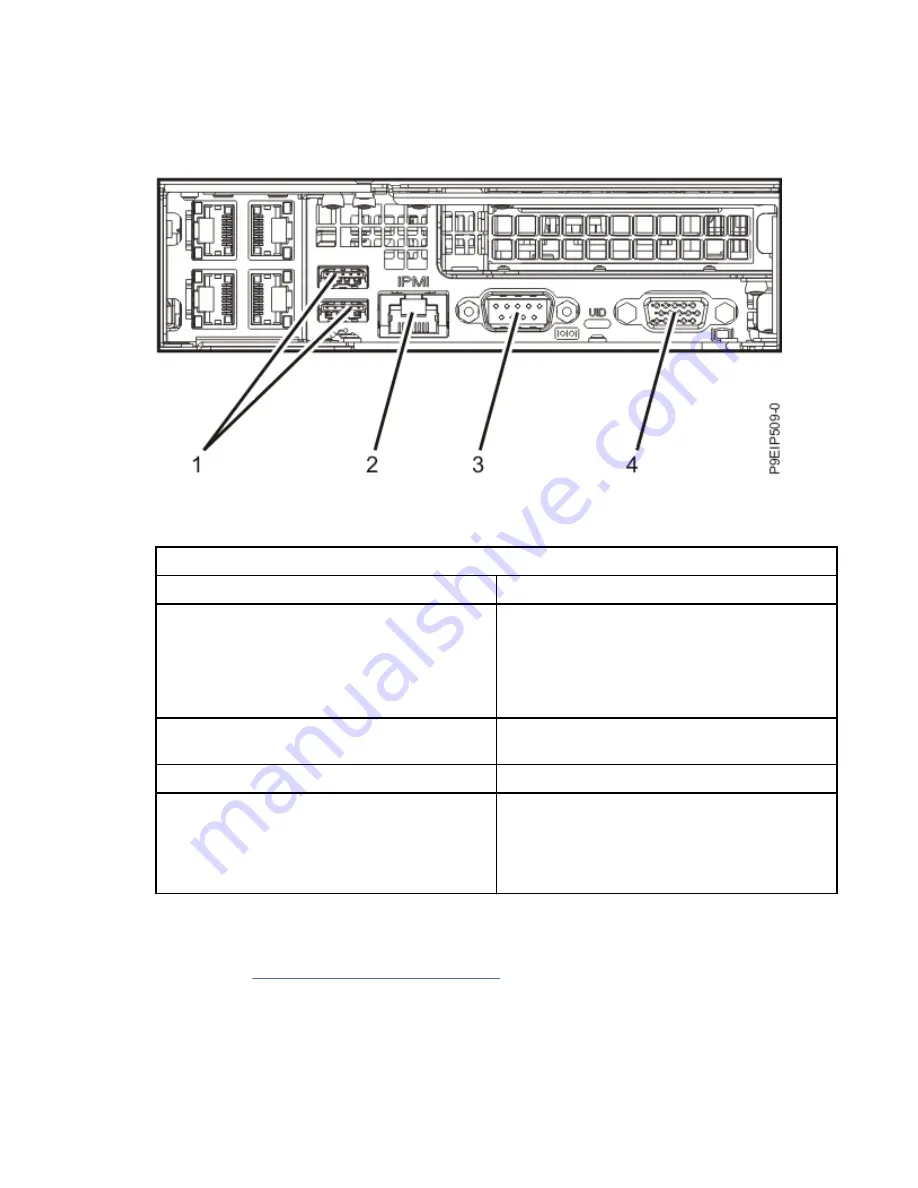
9. Attach all cables to the rear of the server.
Figure 2. Rear ports
Table 1. Input and output ports
Identifier
Description
1
USB 2.0 used for keyboard and mouse.
Certain USB drives might be too wide to fit
properly into the USB ports on the rear of the
system. Test the fit of your USB drive before
proceeding.
2
Ethernet Intelligent Platform Management
Interface (IPMI)
3
Serial IPMI
4
Video Graphics Array (VGA) used for monitor.
Only the 1024 x 768 at 60 Hz VGA setting is
supported. Only up to a 3-meter cable is
supported. Only text-based capability is
supported.
10. Plug the system power cords and the power cords for any other attached devices into the alternating
current (AC) power source.
11. Press and hold the power button until the system begins the power-on sequence.
12. Continue with “Completing server setup” on page 8.
Completing server setup
Learn how to set up your server.
Procedure
1. Connect your server to a VGA terminal and keyboard or a console.
8 Power Systems: Installing and configuring the IBM Power System LC922 (9006-22P)
Содержание 5104-22C
Страница 1: ...Power Systems Installing and configuring the IBM Power System LC922 9006 22P IBM ...
Страница 14: ...xiv Power Systems Installing and configuring the IBM Power System LC922 9006 22P ...
Страница 112: ...98 Power Systems Installing and configuring the IBM Power System LC922 9006 22P ...
Страница 120: ...or or or 106 Power Systems Installing and configuring the IBM Power System LC922 9006 22P ...
Страница 136: ...122 Power Systems Installing and configuring the IBM Power System LC922 9006 22P ...
Страница 147: ......
Страница 148: ...IBM ...


