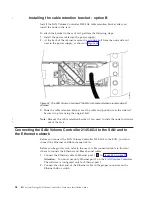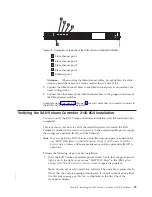
background image

In


most


cases,


the


battery


is


delivered


charged,


so


you


do


not


see


the


Charging


message.


If


the


Charging


message


is


displayed,


you


will


also


see


a


progress


bar


on


the


second


line.


Battery


charging


can


take


up


to


three


hours


to


complete.


In


the


meantime,


if


you


press


any


navigation


buttons,


the


battery


charging


menu


is


replaced,


but


battery


charging


continues.


(You


can


re-enter


the


menu


system


to


view


the


charging


progress,


as


described


in


step


4.)


When


the


battery


is


charged


enough,


Cluster:


is


displayed


on


the


first


line


of


the


front-panel


display.


The


second


line


is


left


blank.


2.


Press


and


hold


the


select


button


for


five


seconds.


The


check


light


comes


on


and


a


display


test


is


performed.


When


the


display


test


is


complete,


the


check


light


goes


off


and


a


button


test


is


started.


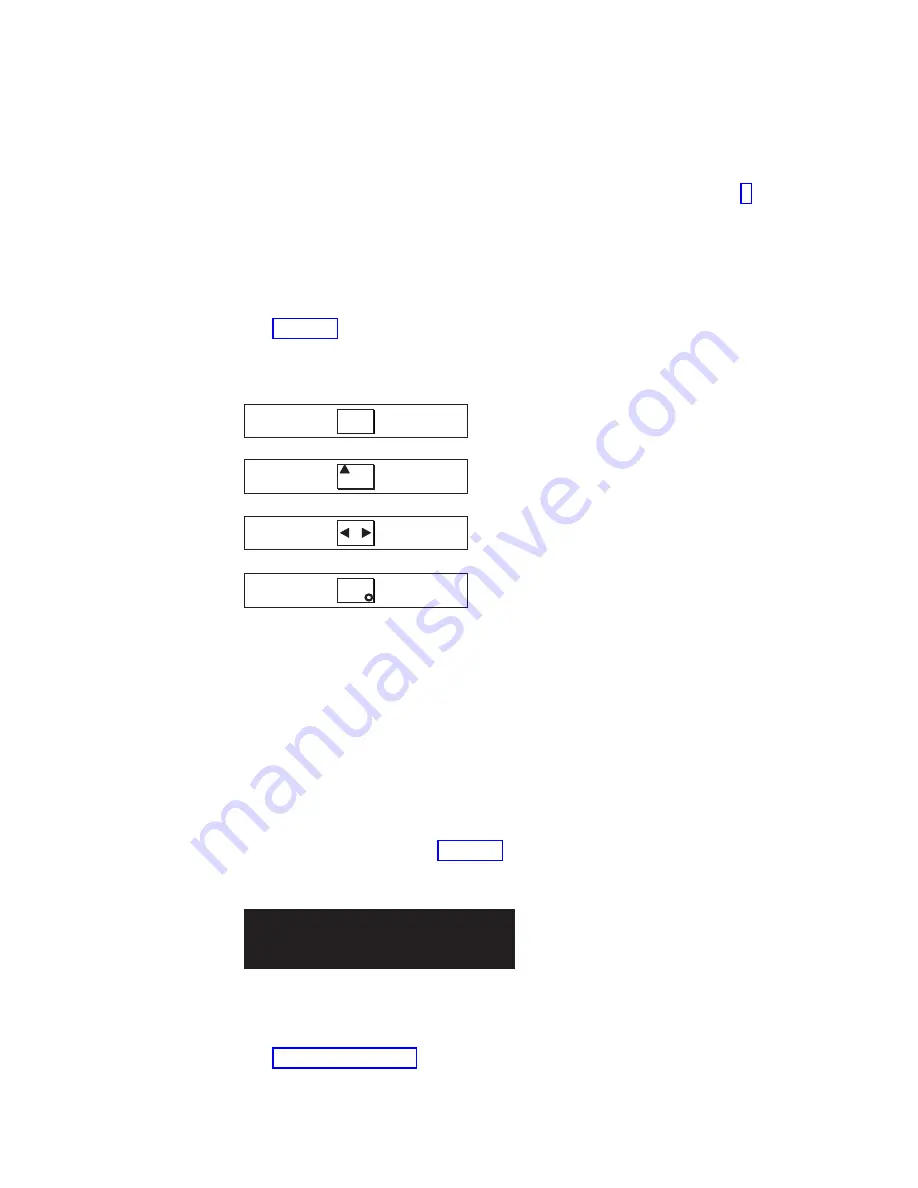
3.


Press


the


up,


down,


left,


and


right


buttons


to


verify


that


they


are


working.


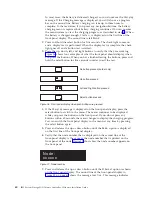
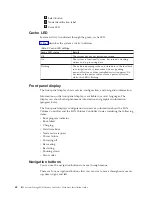
Figure


36


shows


four


examples


of


what


the


front


panel


should


display


when


you


press


the


buttons.


When


you


have


finished


testing


the


buttons,


press


and


hold


the


select


button


for


five


seconds


in


order


to


exit


the


test.


4.


If


the


Charging


message


is


displayed


on


the


front


panel


display,


press


the


select


button


to


switch


to


the


menu.


The


menu


continues


to


be


displayed


while


you


press


the


buttons


on


the


front


panel.


If


you


do


not


press


any


buttons


within


60


seconds,


the


menu


changes


to


display


the


charging


progress.


You


can


switch


the


front


panel


display


to


the


menu


at


any


time


by


pressing


the


select


button


again.


5.


Press


and


release


the


up


or


down


button


until


the


Node:


option


is


displayed


on


the


first


line


of


the


front-panel


display.


6.


Verify


that


the


node


number


that


is


displayed


on


the


second


line


of


the


front-panel


display


is


the


same


as


the


node


number


that


is


printed


on


the


front


panel


of


the


node.


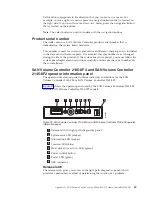
Figure


37


shows


how


the


node


number


appears


on


the


front


panel.


7.


Press


and


release


the


up


or


down


button


until


the


Ethernet


option


is


shown


on


the


front


panel


display.


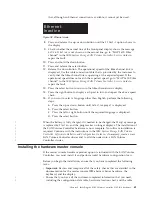
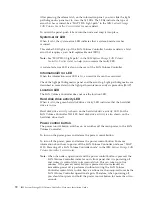
The


second


line


of


the


front-panel


display


in


Figure


38


on


page


61


shows


the


message


Inactive

.


This


message


indicates


No button pressed (border only)

Up button pressed

Left and Right button pressed

Select button pressed


Figure


36.


Front


panel


display


when


push


buttons


are


pressed

N o d e :
x x x x x x


Figure


37.


Node


number


60


IBM


System


Storage


SAN


Volume


Controller:


Hardware


Installation


Guide

Содержание 2145UPS-1U

Страница 1: ...IBM System Storage SAN Volume Controller Hardware Installation Guide V ersion 4 2 1 GC27 2132 01...

Страница 2: ......

Страница 3: ...IBM System Storage SAN Volume Controller Hardware Installation Guide V ersion 4 2 1 GC27 2132 01...

Страница 4: ...difications until otherwise indicated in new editions This edition replaces GC27 2132 00 Note The IBM System Storage SAN Volume Controller Hardware Installation Guide was formerly titled IBM System St...

Страница 5: ...rear panel indicators 10 Fibre channel LEDs on the SAN Volume Controller 2145 8G4 11 Ethernet activity LED 11 Ethernet link LED 11 Power location and system error LEDs 11 Ac and dc LEDs 12 SAN Volume...

Страница 6: ...roller 2145 8F4 fibre channel port numbers and worldwide port names 78 SAN Volume Controller 2145 8F2 fibre channel port numbers and worldwide port names 79 Installing the SAN Volume Controller 2145 8...

Страница 7: ...ral Communications Commission FCC statement 157 Industry Canada compliance statement 158 Avis de conformit la r glementation d Industrie Canada 158 New Zealand compliance statement 158 European Union...

Страница 8: ...vi IBM System Storage SAN Volume Controller Hardware Installation Guide...

Страница 9: ...ors at the back of the SAN Volume Controller 2145 8G4 59 36 Front panel display when push buttons are pressed 60 37 Node number 60 38 Ethernet mode 61 39 SAN Volume Controller 2145 8F4 and SAN Volume...

Страница 10: ...nstalling the 2145 UPS into a rack 127 89 Installing the 2145 UPS power cable 128 90 Power switch and indicators on the 2145 UPS 128 91 Retracting the latch lock carrier 129 92 Opening the front latch...

Страница 11: ...hanges or additions to the text and illustrations are indicated by a vertical line to the left of the change This summary of changes describes new functions that have been added to this release Summar...

Страница 12: ...ix B SAN Volume Controller 2145 4F2 on page 101 in the back of this book v Moved most of the information about the 2145 UPS to Appendix B SAN Volume Controller 2145 4F2 on page 101 in the back of this...

Страница 13: ...orage Master Console for SAN Volume Controller Installation and User s Guide and the IBM System Storage Master Console for SAN Volume Controller Information Center are no longer updated and distribute...

Страница 14: ...s Guide This guide describes the commands that you can use from the SAN Volume Controller command line interface CLI SC26 7903 IBM System Storage SAN Volume Controller Software Installation and Config...

Страница 15: ...ide This guide describes the IBM System Storage Multipath Subsystem Device Driver Version 1 6 for TotalStorage Products and how to use it with the SAN Volume Controller This publication is referred to...

Страница 16: ...the hardware master console MIGR 54820 IBM eServer xSeries 305 Type 8673 Installation Guide This guide describes how to install the IBM eServer xSeries 305 which is the hardware delivered for some ver...

Страница 17: ...those features GC26 7517 IBM System Storage Productivity Center Introduction and Planning Guide This guide introduces the IBM System Storage Productivity Center hardware and software SC23 8824 IBM Sy...

Страница 18: ...text you are commenting on such as a page number or table number v Mail Fill out the Readers Comments form RCF at the back of this book If the RCF has been removed you can address your comments to In...

Страница 19: ...hing translated notice Inspecting the SAN Volume Controller for unsafe conditions Use caution when working in any potential safety hazardous situation that is not covered in the safety checks If unsaf...

Страница 20: ...oltage 8 Inspect the power supply assemblies and check that the fasteners screws or rivets in the cover of the power supply unit have not been removed or disturbed 9 Before connecting the SAN Volume C...

Страница 21: ...n be damaged if the external signal cables are present at the SAN Volume Controller while it is undergoing a grounding test 1 Ensure that the SAN Volume Controller node is powered off See MAP 5350 Pow...

Страница 22: ...receptacle to the ground conductor of the output power receptacle c If used the redundant ac power switch from the ground pin of the main input power receptacle to the ground conductor of the output p...

Страница 23: ...power This power loss is reported to the SAN Volume Controller 2145 4F2 which completes the process of shutting down the UPS within five minutes Attention The 2145 UPS power off shutdown is normally...

Страница 24: ...V 3 2 A 50 60 Hz Licensed Machine Code Property of IBM Copyright IBM Corp 1981 2002 All rights reserved US Government Users Restricted Rights Use duplication or disclosure restricted by GSA ADP Sched...

Страница 25: ...ing the labels on the redundant ac power switch Before you install use or service the redundant ac power switch you must ensure that you understand the safety labels Locate the following labels on the...

Страница 26: ...v No user access label v Input ratings label v Output port warning label xxiv IBM System Storage SAN Volume Controller Hardware Installation Guide...

Страница 27: ...understand the safety labels Checking the 2145 UPS 1U labels Before you continue ensure that you locate and understand each of the following 2145 uninterruptible power supply 1U 2145 UPS 1U labels v W...

Страница 28: ...v People s Republic of China Electronic Information Products EIP mark 20 years v Taiwan agency label v IT compatible label xxvi IBM System Storage SAN Volume Controller Hardware Installation Guide...

Страница 29: ...cycled Checking the 2145 UPS labels Ensure that you locate and understand each of the following 2145 uninterruptible power supply 2145 UPS labels v Agency label v Rear panel configuration label Note T...

Страница 30: ...GROUND SCREW Remove to comply with national deviations UK DE SE INPUT INLET LOAD GROUP 1 16A MAX REPO CONNECTOR A Use Class 2 Input Only Utilisez Uniquement Une Alimentation De Classe 2 LOAD GROUP 1...

Страница 31: ...battery of the uninterruptible power supply UPS you must ensure that you understand the safety labels Checking the battery label of the 2145 UPS 1U Locate the following labels for the battery of the...

Страница 32: ...tion Products EIP mark 5 years v Do not discard the UPS or the UPS batteries in the trash label Note The UPS can contain sealed lead acid batteries which must be recycled v Recycling label f2c00425 xx...

Страница 33: ...abels for the 2145 uninterruptible power supply 2145 UPS v Two man lift label v Do not discard the UPS or the UPS batteries in the trash label Note The UPS can contain sealed lead acid batteries which...

Страница 34: ...milj Mere end t str mf rende kredsl b KUN uddannede serviceteknikere Achtung Nur in einer kontrollierten Umgebung Mehrere unter Spannung stehende Stromkreise Ausf hrung nur durch Fachpersonal UPOZORNE...

Страница 35: ...f the materials of the product that can be recycled This unit must be recycled or discarded according to applicable local and national regulations IBM encourages owners of information technology IT eq...

Страница 36: ...health due to the potential presence of hazardous substances in EEE For proper collection and treatment contact your local IBM representative Battery return program Ensure that you understand the prec...

Страница 37: ...that the battery is not to be thrown away but rather reclaimed upon end of life per this Directive In accordance with the European Directive 2006 66 EC batteries and accumulators are labeled to indica...

Страница 38: ...tic sensitive devices in their static protective bags until you are ready to install them To reduce the possibility of electrostatic discharge observe the following precautions v Limit your movement M...

Страница 39: ...he SAN Volume Controller 2145 8G4 Appendix A SAN Volume Controller 2145 8F4 and SAN Volume Controller 2145 8F2 on page 65 provides conceptual information and installation instructions for the SAN Volu...

Страница 40: ...ontroller 2145 8F4 or SAN Volume Controller 2145 8F2 hardware components Appendix A SAN Volume Controller 2145 8F4 and SAN Volume Controller 2145 8F2 on page 65 SAN Volume Controller 2145 4F2 hardware...

Страница 41: ...for the SAN storage that it controls v Creates a single pool of storage v Provides logical unit virtualization v Manages logical volumes v Provides the following advanced functions for the SAN Large s...

Страница 42: ...tems that are connected in a SAN fabric A cluster of SAN Volume Controller nodes is connected to the same fabric and presents virtual disks VDisks to the host systems You create these VDisks from unit...

Страница 43: ...e is added back into the cluster configuration information that is required by that SAN Volume Controller node is read from other SAN Volume Controller nodes in the cluster SAN Volume Controller opera...

Страница 44: ...er provides an application programming interface called the Common Information Model CIM agent which supports the Storage Management Initiative Specification SMI S of the Storage Network Industry Asso...

Страница 45: ...phical information progress bars The front panel displays configuration and service information about the SAN Volume Controller and the SAN Volume Controller cluster including the following items v Bo...

Страница 46: ...ED amber 4 Location LED blue 5 Hard disk drive activity LED green 6 Power LED green 7 Power control button Release latch The release latch gives you access to the light path diagnostics panel which pr...

Страница 47: ...N Volume Controller is turned off but is still connected to a power source Note A power LED is also on the rear of the server Power control button The power control button switches on or switches off...

Страница 48: ...node identifier can also be displayed on the front panel display when node is selected from the menu If the service controller assembly front panel is replaced the configuration and service software...

Страница 49: ...net link LED The Ethernet link LED indicates that there is an active connection on the Ethernet port The Ethernet link LED is located on each Ethernet port however only Ethernet port 1 is used during...

Страница 50: ...D The upper LED 1 next to the power supply indicates that ac current is present on the node Dc LED The lower LED 2 next to the power supply indicates that dc current is present on the node Ac and dc L...

Страница 51: ...the power supply assembly The connector enables you to connect the SAN Volume Controller 2145 8G4 to the power source from the uninterruptible power supply SAN Volume Controller 2145 8G4 ports used du...

Страница 52: ...the physical environment Input voltage requirements Ensure that the following requirements for each SAN Volume Controller 2145 8G4 node are met Voltage Frequency 200 to 240 V single phase ac 50 or 60...

Страница 53: ...ironment Temperature Altitude Relative humidity Maximum wet bulb temperature Operating in lower altitudes 15 C to 32 C 59 F to 89 F 0 to 914 m 0 to 2998 ft 20 to 80 noncondensing 23 C 74 F Operating i...

Страница 54: ...left to right when you view the rear panel of the SAN Volume Controller The WWPNs are derived from the worldwide node name WWNN of the SAN Volume Controller in which the card is installed The WWNN is...

Страница 55: ...e 6 provides a view of the rear of the SAN Volume Controller 2145 8G4 svc00219 1 2 3 4 Figure 6 The physical port numbers for the SAN Volume Controller 2145 8G4 Chapter 2 SAN Volume Controller overvie...

Страница 56: ...18 IBM System Storage SAN Volume Controller Hardware Installation Guide...

Страница 57: ...node The redundant ac power switch logically sits between the rack power distribution unit and the 2145 UPS 1U You can use a single redundant ac power switch to power one or two SAN Volume Controller...

Страница 58: ...dth Reason Left side 124 mm 4 89 in Side mounting plate Right side 124 mm 4 89 in Side mounting plate Heat output maximum The maximum heat output dissipated inside the redundant ac power switch is app...

Страница 59: ...B 6 I O group 1 7 SAN Volume Controller node C 8 2145 UPS 1U C 9 SAN Volume Controller node D 10 2145 UPS 1U D 11 Redundant ac power switch 1 12 Redundant ac power switch 2 Figure 7 A four node SAN Vo...

Страница 60: ...er switches are used and each powers one node in each I O group However for maximum redundancy use one redundant ac power switch to power each node in the cluster Note While this topic provides an exa...

Страница 61: ...ith documented guidelines and procedures and must not power any equipment other than SAN Volume Controller nodes 2145 UPS 1U configuration A 2145 UPS 1U powers one SAN Volume Controller node All SAN V...

Страница 62: ...to power the SAN Volume Controller node while it saves DRAM data sufficient battery capacity remains to allow the SAN Volume Controller node to become fully operational as soon as input power is rest...

Страница 63: ...on off button until the power on light is extinguished approximately 5 seconds This places the 2145 UPS 1U in standby mode You must then unplug the 2145 UPS 1U to power off the unit Test and alarm res...

Страница 64: ...to load segment 2 When the load segment 2 indicator is green the 2145 UPS 1U is running normally and power is available to this segment See the 2145 UPS 1U hardware documentation for the location of...

Страница 65: ...er application that may be used with the SAN Volume Controller is not supported Figure 9 shows the 2145 UPS 1U ports that are not used 1 USB interface port 2 Network ports 3 Load segment receptacles H...

Страница 66: ...wer switch The following table lists the power cable requirements for your country or region Country or region Length Connection type attached plug designed for 200 240 V ac input Part number United S...

Страница 67: ...A R of China Cyprus Dubai Fiji Ghana India Iraq Ireland Kenya Kuwait Malawi Malaysia Malta Nepal Nigeria Polynesia Qatar Sierra Leone Singapore Tanzania Uganda United Kingdom Yemen Zambia 2 8 m 9 ft B...

Страница 68: ...fications 2145 UPS 1U dimensions and weight Height Width Depth Maximum weight 44 mm 1 73 in 439 mm 17 3 in 579 mm 22 8 in 16 kg 35 3 lb Note The 2145 UPS 1U package which includes support rails weighs...

Страница 69: ...ve complex problems v Access to the following components SAN Volume Controller Console which is a graphical user interface application through a Web browser SAN Volume Controller command line interfac...

Страница 70: ...for the master console hardware option Height Width Depth Maximum Weight 44 mm 1 7 in 480 mm 18 9 in 426 mm 16 8 in 12 7 kg 28 lb Server AC and input voltage requirements Power Supply Electrical Inpu...

Страница 71: ...Maximum configuration 150 watts 512 Btu Monitor console kit dimensions and weight Height Width Depth Maximum Weight 40 mm 1 6 in 480 mm 18 9 in 530 mm 20 9 in 17 0 kg 37 0 lb Chapter 5 Master console...

Страница 72: ...34 IBM System Storage SAN Volume Controller Hardware Installation Guide...

Страница 73: ...AN Volume Controller hardware installation You must perform the steps to prepare for the installation of the optional redundant ac power switch the uninterruptible power supply UPS the master console...

Страница 74: ...cables for the 2145 UPS 1U on page 28 c Optionally install two redundant ac power switches to power the nodes in an I O group through two 2145 UPS 1Us 3 If you are installing UPSs read through the sa...

Страница 75: ...asks in the order that they must be performed 1 Attach the mounting plates to the redundant ac power switch 2 Label the cables 3 Connect the power input cables to the redundant ac power switch 4 Insta...

Страница 76: ...power switch pos 7 MAIN input One cable is labeled MAIN the other is labeled BACKUP 2 Label the redundant ac power switch end redundant ac power switch location MAIN BACKUP input from Power source nam...

Страница 77: ...in the rack 1 Use the hardware location chart to determine where to install the redundant ac power switch in the rack The redundant ac power switch can be installed horizontally in a rack slot or ver...

Страница 78: ...power inputs when the main input power fails or is restored You can either use a volt meter to measure for voltage at the output or attach a work light or similar device with a C14 plug to the redunda...

Страница 79: ...ect the power cables to the 2145 UPS 1U 5 Install the 2145 UPS 1U cable retention bracket Installing the support rails for the 2145 UPS 1U You must install the support rails in the rack before install...

Страница 80: ...he 2145 UPS 1U Note The bottom flange of the support rail must align with the EIA mark on the rack 7 Using two M6 10 screws 1 in Figure 17 on page 43 and two clip nuts 2 attach the rail to the rear of...

Страница 81: ...l the 2145 uninterruptible power supply 1U 2145 UPS 1U in the rack Attention Read all safety and environmental notices before you start the installation process Use the reference numbers in parenthese...

Страница 82: ...13 CAUTION To avoid any hazard from the rack tipping forward when devices are installed observe all safety precautions for the rack into which you are installing the device Perform the following step...

Страница 83: ...r has two wires one red and one black Join the black wires and the red wires together Note A small amount of arcing might occur when connecting the batteries This is normal and does not damage the uni...

Страница 84: ...sure that you comply with the following requirements v The voltage supplied to the 2145 UPS 1U must be 200 240 V single phase v The frequency supplied must be 50 or 60 Hz Notes a The 2145 UPS 1U has a...

Страница 85: ...a SAN Volume Controller has been connected to this 2145 UPS 1U and powered on 9 Repeat all of these steps to install additional 2145 UPS 1Us Installing the 2145 UPS 1U cable retention bracket The 214...

Страница 86: ...he power cable protruding through the rightmost slot in the bracket 5 Secure the bracket in place with one screw on each side as shown in Figure 25 svc00201 Figure 24 2145 UPS 1U power cable retention...

Страница 87: ...rload and compromise the supply wiring or overcurrrent protection v Plan the device installation starting at the bottom of the rack cabinet v Install the heaviest device in the bottom of the rack cabi...

Страница 88: ...the rack Perform this procedure for both rails 3 Insert the right slide rail 2 into the rear rack mounting flange as shown in Figure 27 with the rail pins 1 protruding through the flange 4 Extend the...

Страница 89: ...the left rail in the same way 6 Attach the slide rail to the left rear mounting flange 1 with a single screw 2 as shown in Figure 30 on page 52 The screw should be only finger tight Likewise attach th...

Страница 90: ...ler 2145 8G4 which is also called a node in the rack 1 Extend the slides approximately 150 mm 6 inches from the front of the rack cabinet 2 Remove the protective metal guard and the shipping bracket f...

Страница 91: ...ntion Use only the rear slide release latches 2 to remove the SAN Volume Controller 2145 8G4 from the rack 8 Repeat this procedure for each SAN Volume Controller 2145 8G4 that needs to be installed Ti...

Страница 92: ...45 8G4 is to be connected Perform the following steps to connect the SAN Volume Controller 2145 8G4 to the 2145 UPS 1U 1 At the back of the SAN Volume Controller 2145 8G4 plug the power cable of the c...

Страница 93: ...et ensures that the SAN Volume Controller 2145 8G4 node does not mistakenly become unplugged from the uninterruptible power supply UPS The SAN Volume Controller 2145 8G4 comes with one of two differen...

Страница 94: ...he SAN Volume Controller 2145 8G4 cable retention bracket after you install the node in the rack To attach the bracket to the rack rail perform the following steps 1 With the node powered off and the...

Страница 95: ...rew 5 Move the power supply handle back into place over the retention bracket and replace the lower screw so that it holds the power supply handle cable retention bracket and power supply rear plate i...

Страница 96: ...k Connecting the SAN Volume Controller 2145 8G4 to the SAN and to the Ethernet network Before you connect the SAN Volume Controller 2145 8G4 to the SAN you must connect the Ethernet and fibre channel...

Страница 97: ...ntroller in the rack and connect it to the uninterruptible power supply the storage area network SAN and the Ethernet Note If at any point the SAN Volume Controller does not operate as described see M...

Страница 98: ...the test 4 If the Charging message is displayed on the front panel display press the select button to switch to the menu The menu continues to be displayed while you press the buttons on the front pa...

Страница 99: ...ge is displayed b Press the select button c Press the left or right button until the required language is displayed d Press the select button When the battery is fully charged if it needed to be charg...

Страница 100: ...e installing it in the rack Leave the other end of the Ethernet cable disconnected from the network until you are directed to connect it Important Do not follow any software installation procedures in...

Страница 101: ...r is not presented later with the choice to accept or decline Windows registration conditions 6 Connect the master console to the Ethernet port that is designated in the Cable connection table Chapter...

Страница 102: ...64 IBM System Storage SAN Volume Controller Hardware Installation Guide...

Страница 103: ...aring your SAN Volume Controller 2145 8F4 or SAN Volume Controller 2145 8F2 environment Before installing the SAN Volume Controller 2145 8F4 or SAN Volume Controller 2145 8F2 you must prepare the phys...

Страница 104: ...o 80 noncondensing 29 C 84 F Shipping 20 C to 60 C 4 F to 140 F 0 to 10668 m 0 to 34991 ft 5 to 100 condensing but no precipitation 29 C 84 F Environment requirements with redundant ac power Environme...

Страница 105: ...lume Controller 2145 8F2 node Model Heat output per node SAN Volume Controller 2145 8F4 450 W 1540 Btu per hour SAN Volume Controller 2145 8F2 450 W 1540 Btu per hour SAN Volume Controller 2145 8F4 an...

Страница 106: ...y The front panel display shows service configuration and navigation information Information on the front panel display is available in several languages The display can show both alphanumeric informa...

Страница 107: ...he serial number on the system board SAN Volume Controller 2145 8F4 and SAN Volume Controller 2145 8F2 operator information panel The operator information panel contains indicators and buttons for the...

Страница 108: ...t the green hard disk drive activity LED indicates that the hard disk drive is in use Hard disk drive activity is shown on the hard disk drive activity LED For the SAN Volume Controller 2145 8F2 hard...

Страница 109: ...on buttons Node identification label The node identification label on the front panel displays a six digit node identification number The node identification label is the same as the six digit number...

Страница 110: ...panel assembly 1 Fibre channel LEDs 2 Ethernet link LED 3 Power location and system error LEDs 4 Ac and dc LEDs SAN Volume Controller 2145 8F2 rear panel indicators The following figure shows the rear...

Страница 111: ...er 2145 8F4 The fibre channel LEDs on the SAN Volume Controller 2145 8F4 indicate the status of the fibre channel ports Figure 42 shows the fibre channel LEDs on the SAN Volume Controller 2145 8F4 The...

Страница 112: ...ystem board error has occurred The light path diagnostics provide more information Ac and dc LEDs The ac and dc LEDs indicate whether the node is receiving electrical current Ac LED The upper LED 1 ne...

Страница 113: ...N Volume Controller 2145 8F4 connectors The external connectors for the SAN Volume Controller 2145 8F4 can be easily located 1 PCI slot 1 2 PCI slot 2 3 Fibre channel port 1 4 Fibre channel port 2 5 F...

Страница 114: ...e locations of the service ports 1 Ethernet port 2 2 Keyboard port 3 Monitor port SAN Volume Controller 2145 8F4 ports not used during normal operation The SAN Volume Controller 2145 8F4 is equipped w...

Страница 115: ...sily located 1 PCI slot 1 2 PCI slot 2 3 Power supply 4 Ethernet port 1 5 Fibre channel port 1 6 Fibre channel port 2 7 Fibre channel port 3 svc00208 1 2 3 4 5 6 Figure 45 Ports not used by the SAN Vo...

Страница 116: ...e rear panel of the SAN Volume Controller The WWPNs are derived from the worldwide node name WWNN of the SAN Volume Controller in which the card is installed The WWNN is in the form 50050768010XXXXX w...

Страница 117: ...dware installation tasks in the order they should be performed Note If you are adding a new I O group to an existing SAN Volume Controller 2145 8F4 or SAN Volume Controller 2145 8F2 cluster there is n...

Страница 118: ...hart to determine where in the rack that the 2145 UPS 1U is to be installed 2 At the back of the rack observe the Electronic Industries Alliance EIA positions and determine where you are going to inst...

Страница 119: ...screws 1 in Figure 51 and two clip nuts 2 attach the rail to the rear of the rack The customer s rack might be different than the one shown here and if so might require different clip nuts or fastene...

Страница 120: ...wn energy source sealed lead acid batteries The output receptacles might carry live voltage even when the 2145 UPS 1U is not connected to an ac supply 11 CAUTION Do not remove or unplug the input cord...

Страница 121: ...slide the 2145 UPS 1U into the rack Note The 2145 UPS 1U weighs 16 kg If you feel unsure about lifting the UPS to its location in the rack seek assistance or remove the battery to reduce its weight 2...

Страница 122: ...u might need to move the sliding section on the front of the 2145 UPS 1U to the closed position first 7 At the back of the 2145 UPS 1U plug the 2145 UPS 1U main power connector into the power socket 1...

Страница 123: ...mately five seconds The front panel indicators cycle through a startup sequence while the 2145 UPS 1U conducts a self test When the self test is complete the power on indicator 1 and the load indicato...

Страница 124: ...oller 2145 8G4 or the SAN Volume Controller 2145 8F4 node You can attach the bracket by performing the following steps 1 Install the power cable into the rightmost power supply on the rear of the 2145...

Страница 125: ...e SAN Volume Controller 2145 8F4 Installing the support rails for the SAN Volume Controller 2145 8F4 or the SAN Volume Controller 2145 8F2 You must install the support rails that hold the SAN Volume C...

Страница 126: ...and put your thumb against the front of the latch lock 2 1 Latch lever 2 Latch lock 3 Gently push the latch lock 2 away from the rail as you move the latch lever 1 toward the far end of the rail Figur...

Страница 127: ...rd the front of the rail until it stops The rail is now at its shortest adjustment 1 Back rail bracket 2 Latch lock 3 Latch lever 6 Place the front end of the left rail in the rack cabinet Align the t...

Страница 128: ...release the carrier The latch lock carrier slides toward the front of the rack and the locating pins project through the holes that are in the front flange and in the front rail bracket Important Ens...

Страница 129: ...ail Store the shipping bracket for further use You must perform this procedure for both rails Installing the SAN Volume Controller in a rack After installing the support rails you can install the SAN...

Страница 130: ...cluster more resilient to power failure the 2145 UPS 1Us can be connected to the redundant ac power switch If a redundant ac power switch is not used connecting the two UPSs that are powering an I O g...

Страница 131: ...ller power is now connected to the 2145 UPS 1U Installing the SAN Volume Controller 2145 8F4 cable retention bracket The cable retention bracket ensures that the SAN Volume Controller 2145 8F4 node do...

Страница 132: ...ct the SAN Volume Controller 2145 8F4 or the SAN Volume Controller 2145 8F2 to the SAN you must connect the Ethernet and fibre channel cables Before you begin this task refer to the user s cable conne...

Страница 133: ...channel cables to the fibre channel ports as required by the user s configuration 4 Connect the other ends of the fibre channel cables to the proper connectors of the fibre channel switches Complete s...

Страница 134: ...e second line Battery charging can take up to three hours to complete In the meantime if you press any navigation buttons the battery charging menu is replaced but battery charging continues You can r...

Страница 135: ...Service Guide to repair the fault 10 If you are installing a SAN Volume Controller 2145 8F2 go to step 16 If you are installing a SAN Volume Controller 2145 8F4 go to step 11 11 Press and hold the dow...

Страница 136: ...on is included with the SAN Volume Controller you must install it and perform initial hardware configuration for it Before you begin the installation ensure that you have completed the following tasks...

Страница 137: ...Click OK if you receive any messages that a network interface card port is offline 4 Check that the reference identification tag is securely fastened to the front panel of the master console The tag...

Страница 138: ...100 IBM System Storage SAN Volume Controller Hardware Installation Guide...

Страница 139: ...power supply UPS type and whether the redundant ac power feature is used Components Power requirements SAN Volume Controller 2145 4F2 2145 UPS 1U 420 W One SAN Volume Controller 2145 4F2 one 2145 UPS...

Страница 140: ...o 88 F 914 to 2133 m 2998 to 6988 ft 20 to 80 noncondensing 23 C 74 F Powered off 10 C to 43 C 50 F to 110 F 0 to 2133m 0 to 6988 ft 20 to 80 noncondensing 27 C 81 F Storing 1 C to 60 C 34 F to 140 F...

Страница 141: ...press and release the power button For a preferred method of powering off see the Powering off a SAN Volume Controller node topic in the IBM System Storage SAN Volume Controller Service Guide Note Whe...

Страница 142: ...The amber check LED is used to indicate critical failures on the service controller If the check LED is off and the power LED is on the service controller is working correctly If the check LED is on...

Страница 143: ...ng v Restarting v Shutting down v Error codes Node identification label The node identification label on the front panel displays a six digit node identification number The node identification label i...

Страница 144: ...me Controller You can view the monitor LED in the documentation concerning the rear panel indicators Lower Ethernet link LED The lower Ethernet link LED indicates the operational status of Ethernet po...

Страница 145: ...igure shows an illustration of the type of connector located on the power supply assembly The connector allows you to connect the SAN Volume Controller 2145 4F2 to the power source from the uninterrup...

Страница 146: ...e output of the 2145 UPS In the event of a delay in the completion of the power down sequence the 2145 UPS output power is removed five minutes after the power is disconnected from the 2145 UPS Becaus...

Страница 147: ...slew rate of no more than 3 Hz per second 2145 UPS dimensions and weight Height Width Depth Maximum weight 89 mm 3 5 in 483 mm 19 in 622 mm 24 5 in 37 kg 84 lb Heat output Model Heat output during nor...

Страница 148: ...olume Controller 2145 4F2 is connected to the 2145 UPS the SAN Volume Controller 2145 4F2 automatically adjusts the voltage range setting Take no action for this alarm condition unless it persists for...

Страница 149: ...the 2145 UPS shuts down it automatically restarts when the main power returns Battery mode indicator The battery mode indicator shows that the 2145 uninterruptible power supply 2145 UPS is operating o...

Страница 150: ...s 4 Circuit breakers Hardware locations for the 2145 UPS 1 Battery assembly 2 Frame assembly 3 Electronics assembly 4 Front panel assembly 2145 UPS connector 1 2 3 4 1 2 3 4 Ground Live Neutral 112 IB...

Страница 151: ...den Syria Togo Tunisia Turkey former USSR Vietnam former Yugoslavia Zaire Zimbabwe 2 5 m 8 ft CEE7 55H6643 Antigua Bahrain Brunei Channel Islands Cyprus Denmark Dubai Fiji Ghana Hong Kong S A R of the...

Страница 152: ...onnect the node to the UPS 6 Verify the node 7 Install and verify the master console unless it is already installed Optionally you can perform this step first After you finish these steps the hardware...

Страница 153: ...ith the front facing you 3 Attach the long side of a mounting bracket 1 to each side of the 2145 UPS 1U using four M3 6 screws 2 for each bracket as shown in Figure 49 on page 80 4 Loosen the assembly...

Страница 154: ...different clip nuts or fasteners 8 Attach only the bottom hole of the rail to the front of the rack with one M6 10 screw and one clip nut 1 in Figure 52 on page 82 9 Install a clip nut in the top hol...

Страница 155: ...12 CAUTION To reduce the risk of fire or electric shock install the 2145 UPS 1U in a temperature and humidity controlled indoor environment free of conductive contaminants Ambient temperature must not...

Страница 156: ...ry connector remove the 2145 UPS 1U front panel 4 Remove the protective label from the internal battery connector 1 svc00008 svc00063 Figure 78 Removing the 2145 UPS 1U front panel 118 IBM System Stor...

Страница 157: ...the sliding section on the front of the 2145 UPS 1U to the closed position first 7 At the back of the 2145 UPS 1U plug the 2145 UPS 1U main power connector into the power socket 1 in the following fi...

Страница 158: ...gh a startup sequence while the 2145 UPS 1U conducts a self test When the self test is complete the power on indicator 1 and the load indicators 7 and 8 illuminate to indicate that power is being supp...

Страница 159: ...in the rack Complete the following prerequisites before you install the support rails v Use the user s hardware location chart which you downloaded from http www ibm com storage support 2145 to deter...

Страница 160: ...have completed step 8 7 Ensure that the support rail is horizontal a level might be useful here 8 Install the two mounting screws 1 into the third and fourth holes of the support rail flange Fully ti...

Страница 161: ...n This removes the safety ground from the 2145 UPS 1U and the equipment connected to the 2145 UPS 1U 12 CAUTION To reduce the risk of fire or electric shock install the 2145 UPS 1U in a temperature an...

Страница 162: ...and rest its front edge on the edge of the carton as shown in Figure 85 c Remove the two bolts 1 and additional nut 2 on the left side of the bracket as shown in Figure 86 on page 125 Next remove the...

Страница 163: ...he 2145 UPS is not installed however it is included inside of the shipping carton The front cover is installed later in the installation process 2 With the assistance of another service representative...

Страница 164: ...e representative place the back of the 2145 UPS onto the support rails and then slide it into the rack 6 Install the front flathead screws 1 in Figure 88 on page 127 1 2 Figure 87 Removing the 2145 UP...

Страница 165: ...he input line power cord you are usually not required to use this additional grounding screw feature 8 Install the front panel 9 At the back of the 2145 UPS plug the 2145 UPS main power cable 1 in Fig...

Страница 166: ...All front panel indicators of the 2145 UPS flash for a short time while the 2145 UPS runs a self test When the test is complete the mode indicator 1 flashes to show that the 2145 UPS is in standby mod...

Страница 167: ...r 2145 4F2 You must install the support rails that hold the SAN Volume Controller 2145 4F2 When you are ready to install the support rails perform the following tasks v Refer to the Hardware Location...

Страница 168: ...n The latch lever engages a hole in the back bracket assembly and holds the latch lock carrier in the retracted position 5 Push the back rail bracket 1 Figure 93 toward the front of the rail until it...

Страница 169: ...re in the rack mounting flange 8 Push the latch lock 2 Figure 95 on page 132 away from the rail to release the carrier The latch lock carrier slides toward the front of the rack and the locating pins...

Страница 170: ...de rail Store the shipping bracket for further use You must perform this procedure for both rails Installing the SAN Volume Controller 2145 4F2 in a rack After installing the support rails you can ins...

Страница 171: ...ac power switch is not used connecting the two UPS units that are powering an I O group to different independent electrical power sources allows the SAN Volume Controller cluster to continue to operat...

Страница 172: ...ume Controller 2145 4F2 power is now connected to the 2145 UPS 1U Connecting the SAN Volume Controller 2145 4F2 to the 2145 UPS Connecting the SAN Volume Controller 2145 4F2 node to the 2145 uninterru...

Страница 173: ...rt 2145 to identify the 2145 UPS that you want this SAN Volume Controller 2145 4F2 to connect to Perform the following steps to connect the SAN Volume Controller 2145 4F2 to the 2145 UPS 1 At the back...

Страница 174: ...st use only Ethernet port 1 on the SAN Volume Controller The software is configured only for Ethernet port 1 2 Connect the other end of the Ethernet cable to the proper connector on the Ethernet hub o...

Страница 175: ...ee the Charging message If the Charging message is displayed you will also see a progress bar on the second line Battery charging can take up to three hours to complete In the meantime if you press an...

Страница 176: ...the second line go to MAP 5600 Fibre channel in the IBM System Storage SAN Volume Controller Service Guide to repair the fault 10 Press and release the left or right button to display the other port...

Страница 177: ...idelines for completing these tables and charts If you experience a problem with your master console use the 2145 machine type and the serial number of the SAN Volume Controller node that was installe...

Страница 178: ...T This step must be the last step that you perform on the master console before you hand over the machine to the user It sets up the master console so that it presents a Windows license agreement scre...

Страница 179: ...s bar moves to the right while the boot operation proceeds Boot failed If the boot operation fails a boot code is displayed See the topic that contains the boot codes in the IBM System Storage SAN Vol...

Страница 180: ...AN Volume Controller software is preinstalled on all SAN Volume Controller nodes This software includes the operating system the application software and the SAN Volume Controller publications It is n...

Страница 181: ...age is displayed the node does not restart until the UPS has charged to a level where it can sustain a second power failure Restarting The front panel indicates when the software on a node is restarti...

Страница 182: ...of the cluster node and external interfaces They also provide access to the tools that you need to install and service the node Figure 103 shows the sequence of the menu options Only one option at a t...

Страница 183: ...at this SAN Volume Controller node is an active member of the cluster Inactive v Indicates that the SAN Volume Controller node is a member of a cluster but is not now operational It is not operational...

Страница 184: ...de option displays the identification number of the SAN Volume Controller or the name of the SAN Volume Controller if the user has assigned a name Status Use the status to diagnose cluster failures Ac...

Страница 185: ...create Be sure to verify the correct IP address with the customer before you create a cluster Attention If you change the IP address ensure that you type the correct address Otherwise you cannot acce...

Страница 186: ...button The first subnet mask number is displayed 2 Press the up button if you want to increase the value that is displayed press the down button if you want to decrease that value If you want to quick...

Страница 187: ...cessful Password is displayed on line 1 The password that you can use to access the cluster is displayed on line 2 Be sure to immediately record the password it is required on the first attempt to acc...

Страница 188: ...onal but cannot access the fibre channel fabric One of the following conditions caused this result v The fibre channel cable has failed v The fibre channel cable is not installed v The device that is...

Страница 189: ...rman v Italian v Japanese v Korean v Portuguese v Spanish v Chinese simplified v Chinese traditional If you do not understand the language that is displayed wait for at least 60 seconds for the menu t...

Страница 190: ...152 IBM System Storage SAN Volume Controller Hardware Installation Guide...

Страница 191: ...gh mouse actions You can navigate the SAN Volume Controller Console and help system from the keyboard by using the following key combinations v To traverse to the next link button or topic press Tab i...

Страница 192: ...154 IBM System Storage SAN Volume Controller Hardware Installation Guide...

Страница 193: ...country or send inquiries in writing to IBM World Trade Asia Corporation Licensing 2 31 Roppongi 3 chome Minato ku Tokyo 106 0032 Japan The following paragraph does not apply to the United Kingdom or...

Страница 194: ...e measurement may have been estimated through extrapolation Actual results may vary Users of this document may verify the applicable data for their specific environment Information concerning non IBM...

Страница 195: ...other countries or both UNIX is a registered trademark of The Open Group in the United States and other countries Linux is a trademark of Linus Torvalds in the United States other countries or both A...

Страница 196: ...eived including interference that might cause undesired operation Industry Canada compliance statement This Class A digital apparatus complies with IECS 003 Avis de conformit la r glementation d Indus...

Страница 197: ...in Um dieses sicherzustellen sind die Ger te wie in den Handb chern beschrieben zu installieren und zu betreiben Des Weiteren d rfen auch nur von der IBM empfohlene Kabel angeschlossen werden IBM bern...

Страница 198: ...t International Electrotechnical Commission IEC statement This product has been designed and built to comply with IEC Standard 950 United Kingdom telecommunications requirements This apparatus is manu...

Страница 199: ...cal Regulations Pascalstr 100 Stuttgart Germany 70569 Tele 0049 0 711 785 1176 Fax 0049 0 711 785 1283 e mail mailto tjahn de ibm com Taiwan Contact Information This topic contains the product service...

Страница 200: ...162 IBM System Storage SAN Volume Controller Hardware Installation Guide...

Страница 201: ...antively different meaning Numerics 2145 A hardware machine type for the IBM System Storage SAN Volume Controller Models of the SAN Volume Controller are expressed as the number 2145 followed by xxx s...

Страница 202: ...to one pixel of a display image blade One component in a system that is designed to accept some number of components blades Blades could be individual servers that plug into a multiprocessing system...

Страница 203: ...t application A storage management program that initiates Common Information Model CIM requests to the CIM agent for the device cluster In SAN Volume Controller up to four pairs of nodes that provide...

Страница 204: ...that indicates that a copy has been started after the copy relationship was created The copy process is complete and the target disk has no further dependence on the source disk copying A status cond...

Страница 205: ...a plug in for the Common Information Model CIM that is the CIM object manager CIMOM uses the handler to interface with the device directed maintenance procedures The set of maintenance procedures that...

Страница 206: ...nd the group dates back to 1924 empty In a Global Mirror relationship a status condition that exists when the consistency group contains no relationships engineering change EC A correction for a defec...

Страница 207: ...col IP to connect distributed SANs over large distances Fibre Channel Protocol FCP A protocol that is used in fibre channel communications with five layers that define how fibre channel ports interact...

Страница 208: ...rface host bus adapter HBA In SAN Volume Controller an interface card that connects a host bus such as a peripheral component interconnect PCI bus to the storage area network host ID In SAN Volume Con...

Страница 209: ...configuration that will not operate and will generate an error code to indicate the cause of the problem image mode An access mode that establishes a one to one mapping of extents in the managed disk...

Страница 210: ...by instantiating a class integrity The ability of a system to either return only correct data or respond that it cannot return correct data Internet Protocol IP In the Internet suite of protocols a c...

Страница 211: ...connect the local and remote fabrics together logical block address LBA The block number on a disk logical unit LU An entity to which Small Computer System Interface SCSI commands are addressed such...

Страница 212: ...auxiliary virtual disk MB See megabyte MDisk See managed disk megabyte MB In decimal notation 1 048 576 bytes mesh configuration A network that contains a number of small SAN switches configured to cr...

Страница 213: ...sts of data and the operations associated with that data object model A representation such as a diagram of objects in a given system Using symbols similar to standard flowchart symbols an object mode...

Страница 214: ...paused In SAN Volume Controller the process by which the cache component quiesces all ongoing I O activity below the cache layer pend To cause to wait for an event petabyte PB In decimal notation 1 12...

Страница 215: ...ate as the cluster Typically this is the larger group of nodes but the quorum disk serves as a tiebreaker if the groups are the same size queue depth The number of I O operations that can be run in pa...

Страница 216: ...ing fault tolerance for up to two failed disk drives by striping volume data across several disk drives and mirroring the first set of disk drives on an identical set redundant ac power switch A devic...

Страница 217: ...of object classes defined for and applicable to a single namespace Within the CIM Agent the supported schemas are the ones that are loaded through the managed object format MOF SCSI See Small Computer...

Страница 218: ...ol Protocol TCP is the underlying protocol Simple Network Management Protocol SNMP In the Internet suite of protocols a network management protocol that is used to monitor routers and attached network...

Страница 219: ...iple managed disks MDisks that are in the MDisk group Extents are allocated on the MDisks in the order specified stripeset See RAID 0 subsystem device driver SDD An IBM pseudo device driver designed t...

Страница 220: ...telligent disk storage subsystem across an enterprise trigger To initiate or reinitiate copying between a pair of virtual disks VDisks that have a copy relationship U UID See unique identifier unconfi...

Страница 221: ...m hardware software and microcode elements of a processing system VLUN See managed disk VPD See vital product data VSAN See virtual storage area network W WBEM See Web Based Enterprise Management Web...

Страница 222: ...uping of multiple ports to form a virtual private storage network Ports that are members of a zone can communicate with each other but are isolated from ports in other zones 184 IBM System Storage SAN...

Страница 223: ...21 2145 UPS 1U 41 80 114 redundant ac power switch 37 SAN Volume Controller 2145 4F2 114 129 SAN Volume Controller 2145 8F2 87 SAN Volume Controller 2145 8F4 87 SAN Volume Controller 2145 8G4 35 49 ci...

Страница 224: ...AN Volume Controller 141 G gateway menu option 146 general alarm indicator 111 Germany electronic emission compliance statement 159 glossary 163 GR 1089 CORE xxxii grounding checking SAN Volume Contro...

Страница 225: ...2 129 SAN Volume Controller 2145 8F2 87 SAN Volume Controller 2145 8F4 87 SAN Volume Controller 2145 8G4 49 UPS 2145 1U 43 82 117 interfaces application program 6 user 6 internal machine safety check...

Страница 226: ...ons accessing 153 ordering xvi R rear panel indicators SAN Volume Controller 2145 4F2 105 SAN Volume Controller 2145 8F2 72 SAN Volume Controller 2145 8F4 72 SAN Volume Controller 2145 8G4 10 recoveri...

Страница 227: ...rmation panel 8 ports 12 power location and system error LEDs 11 73 product characteristics 14 rear panel indicators 10 specifications 14 support rails 49 weight and dimensions 14 SDD 5 serial number...

Страница 228: ...190 IBM System Storage SAN Volume Controller Hardware Installation Guide...

Страница 229: ...prices please contact your IBM branch office your IBM business partner or your authorized remarketer When you send comments to IBM you grant IBM a nonexclusive right to use or distribute your comments...

Страница 230: ...elopment Department 61C 9032 South Rita Road Tucson Arizona 85775 4401 _ _ _ _ _ _ _ _ _ _ _ _ _ _ _ _ _ _ _ _ _ _ _ _ _ _ _ _ _ _ _ _ _ _ _ _ _ _ _ _ _ _ _ _ _ _ _ _ _ _ _ _ _ _ _ _ _ _ _ _ _ _ _ _ _...

Страница 231: ......

Страница 232: ...Part Number 31P1046 Printed in USA GC27 2132 01 1P P N 31P1046...

Страница 233: ...Spine information IBM System Storage SAN Volume Controller Hardware Installation Guide Version 4 2 1...

Отзывы: