2
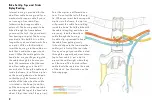
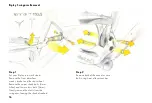
Internal routing is provided for the
derailleur cable housing, and for a
mechanical dropper cable if you’re
not running a front derailleur
(otherwise the dropper cable is
external). The housing needs to be
fished through the frame before
you mount the fork. Use your derail-
leur housing as a pilot. The housing
provided in Ibis build kits is a little
longer than you need and works fine
as a pilot. With no fork installed,
insert the housing into the cable exit
hole that is under the upper shock
mount. When the cable gets to the
head tube, use your finger to guide
the cable through the front access
hole. We recommend that the rear
derailleur cable goes in the left
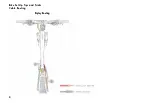
access holes. To keep the cable quiet
inside the frame, install three zip ties
on the housing about an inch apart,
so that they will be located in the
middle of the tube when the cable
is installed in the frame (to do this,
pull the housing out of the top tube
and through the top of the head tube
about 2 feet, then install the zip ties).
Ripley Routing
Bike Set-Up Tips and Tricks
Point the zip ties in different direc-
tions. Do not cut the tail off the zip
tie. When you insert the housing with
zip ties into the frame, the zip ties
will prevent the cable from rattling
inside the frame. Build the bike with
the cables dangling, and when you
are ready, feed the derailleur
cable through the housing.
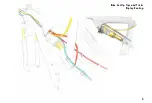
A cable clip is provided to keep
the cable from getting unruly.
It should clip onto the two derailleur
cables just in front of the seat tube.
Once you’ve got your cables routed
through the upper shock mount area
(up to four cables), put a zip tie
around the cables right where they
exit that area. The front derailleur
cable should be routed on the inside
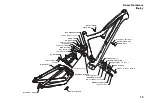
of the clevis. See illustration on the
following page.
Содержание Ripley
Страница 3: ...3 Bike Set Up Tips and Tricks Ripley Routing...
Страница 4: ...4 Ripley Routing Cable Routing Bike Set Up Tips and Tricks...
Страница 12: ...12 Maintenance...


