77
13. Maintenance and Inspection
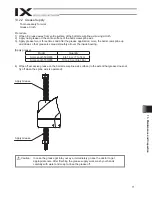
13.6 How to Measure Lost Motion
Tool necessary for work
Digimatic Indicator (Measurement range 10mm or more, minimum display 0.001mm) or equivalent
acceptable
Magnet stand
Procedure
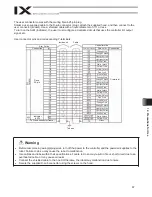
1) Create a position and a program to operate first Axis and second Axis in ±5deg with PTP
Operation.
2) Take off the cover (on Arm 2) on one side and allocate the measurement equipment as shown in
the figure below.
Measurement Point: See figure below
Operation Command: PTP Operation (MOVP Command)
Operation Speed: 30%
Acceleration/Deceleration : 30%
s
i
x
A
d
n
2
s
i
x
A
t
s
1
Negative Direction
Negative Direction
Positive Direction
Positive Direction
Mesurement Point
Mesurement
Redius
Mesurement Point
Mesurement Redius 100mm
100mm
-5° 0° +5°
-5° 0° +5°
a. Move the axis from +5deg towards 0deg, the measurement point, in the positive direction, and
measure the position.
b. After moving from 0deg towards -5deg in the positive direction, move it from -5deg towards 0deg,
the measurement point, in the negative direction, and measure the position.
c. In addition, after moving from 0deg t5deg in the negative direction, move it from +5deg
towards 0deg, the measurement point, in the positive direction, and measure the position.
Repeat the measurements of b and c for seven times in each positive and negative direction. The
difference of the average of the measurement results is determined as the lost motion.
Содержание IX Series
Страница 2: ......
Страница 4: ......
Страница 56: ...50 9 How to Install ...
Страница 58: ...52 9 How to Install Center of recommended installation part ...
Страница 95: ...89 13 Maintenance and Inspection 6 Click the Servo OFF button Servo OFF 7 Press the emergency stop switch ...
Страница 104: ......
Страница 105: ......

