2
2.
Configuring the XDS-2450
Mounting Options and Hardware Installation
Option 1
: Supplied
Monopod Flex Stand
Option 2
: Optional tabletop
VESA stand PVK-202
Option 3
: 3
rd
party VESA
MIS-D100/E200 fixtures
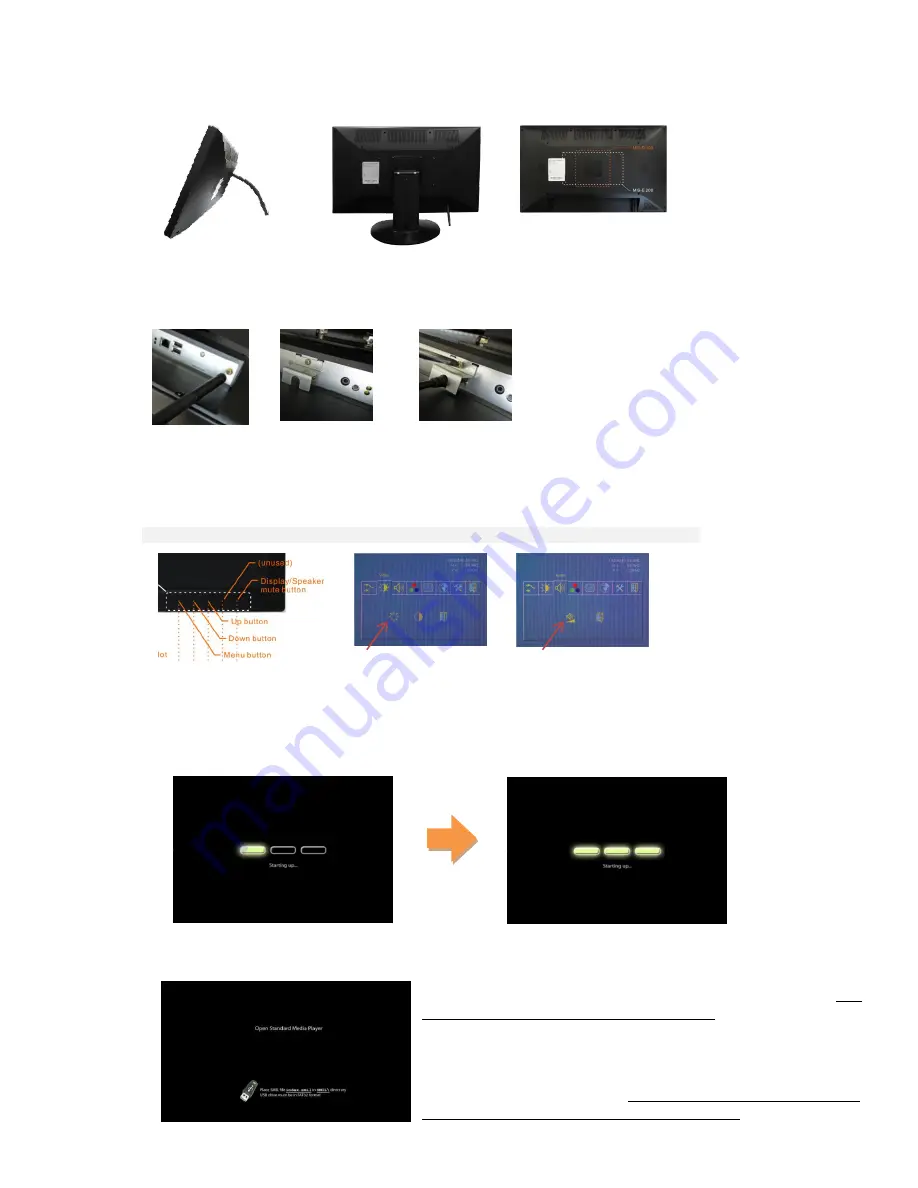
Installing Wi-Fi antenna and power plug
SCREW-MOUNT
Wi-Fi
antenna
REMOVE
screw to
detach metal plate
ATTACH
power plug
RE-ATTACH
plate and tighten screw
Adjusting picture and sound (disabling the on-screen key lock)
Video and audio settings can be adjusted like a regular TV via hidden front-panel touch buttons.
Optional remote accessory (PRC-100) is also available for remote adjustment of these settings
ENTER
front bezel
-
key combination
MENU-↑-↓-↑-↓-MENU
to disable key lock
ADJUST
brightness in the on
screen menu using
↑
/
↓
/
MENU
ADJUST
volume. Menu auto-locks
after 5 seconds of inactivity
Menu setup
1
Attach the AC power adapter to power on the unit. The following progress bar will be displayed on screen:
2
Player boot process takes approximately
60 seconds
to complete. After boot up, the player will indicate that
it is ready for content sync via the USB port.
The player will boot into the “Open Standard Media Player” screen. Plug
in a USB keyboard to enter configuration menus. The menu and blue
background will appear in about 30 seconds.
If you have already loaded media contents into the player
, contents will
play back immediately after boot up, and the “Open Standard Media
Player” screen will not be shown. You can still plug in a USB keyboard at
any time during playback to enter the menu system.
~ 90 seconds
Содержание XDS-2450
Страница 1: ...XDS 2450 User s Manual...


