Connecting your External Mouse
To select a mouse option, do the following:
Switch to External Mouse port use
1. Select the External mouse from the switch located on the front panel of the JKP1 KVM switch.
2. Connect your external mouse to the mouse port located on the front panel of the JKP1 KVM switch.
Switch back to Touchpad Mouse use
Select the Touchpad mouse from the switch located on the front panel of the JKP1 KVM switch.
MULTIPLE STAGE INSTALLATION
Cascading
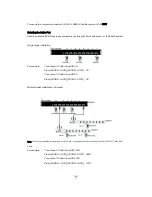
This section provides complete instructions for the hardware setup of installing cascaded computers. To
control even more computers, up to 8 (JKP115-801e/117-801e) and 16 (JKP115-1601e/117-1601e)
additional switches can be cascade from the CPU ports of the First Stage (Master) switch. The cascaded
Switches that connect back to the First Stage switch are referred to as Second Stage switches (or
BANKS) and assigned a location. For example; the Console keyboard, monitor and mouse connects to
BANK 00 or the “Master” switch. As many as 128 / 256 computers can be controlled by a system
administrator in a complete multi-bank installation.
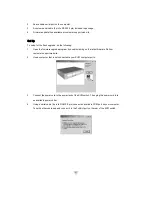
To set up a Multiple Stage Installation, do the following;
1. Power off all computers.
2. Using the all-in-one KVM Cable set (Part No. K15C6P). Take the male (HDDB-15pin) connector
and plug it into the PC1 port indicated on the rear of the KVM Switch. Connect the other male
VGA (HDDB-15) cable end to the console VGA port of the second stage switch.
Содержание JKP115-801e
Страница 2: ......
Страница 8: ...Note Specifications are subject to change without notice...
Страница 10: ...617JKP1 Rear View 1 DC Input 2 Firmware Upgrade Port 3 PC Ports...


