background image

5-11

Dri
ving y

o

ur v

ehicle

5

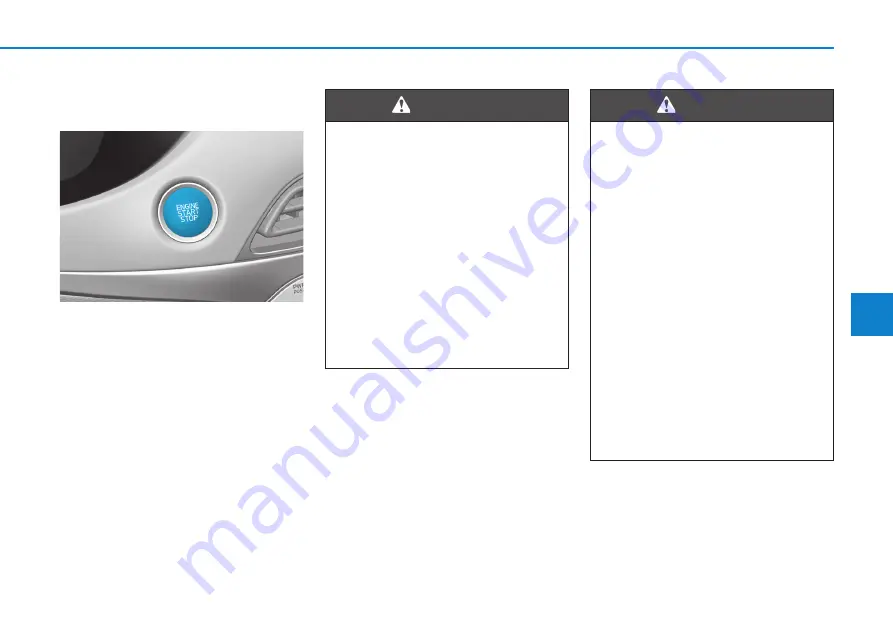
Engine Start/Stop button
(if equipped)

Whenever the front door is opened,
the Engine Start/Stop button will illu-
minate and will go off 30 seconds
after the door is closed.

OLX2058074

To turn the engine off in an
emergency:
Press and hold the Engine
Start/Stop button for more than
two seconds OR Rapidly press
and release the Engine Start/
Stop button three times (within
three seconds).
If the vehicle is still moving, you
can restart the engine without
depressing the brake pedal by
pressing the Engine Start/Stop
button with the shift button in
the N (Neutral) position.

WARNING  

NEVER press the Engine Start/
Stop button while the vehicle is
in motion except in an emer-
gency. This will result in the
engine turning off and loss of
power assist for the steering
and brake systems. This may
lead to loss of directional con-
trol and braking function,
which could cause an accident.

Before leaving the driver's
seat, always make sure the
shift button is in the P (Park)
position,

set the parking

brake, press the Engine Start/
Stop button to the OFF posi-
tion, and take the Smart Key
with you. Unexpected vehicle
movement may occur if these
precautions are not followed.

WARNING  

Содержание LX2

Страница 1: ...reserves the right to make changes at any time so that our policy of continual product improvement may be carried out This manual applies to all models of this vehicle and includes descrip tions and explanations of optional as well as standard equipment As a result you may find material in this manual that does not apply to your specific vehicle ...

Страница 2: ...ernment agencies in your country Your vehicle is equipped with electronic fuel injection and other electronic components It is possible for an improperly installed adjusted two way radio or cellular telephone to adversely affect electronic systems For this reason we recommend that you carefully follow the radio manufacturer s instructions or consult your HYUNDAI dealer for precautionary measures o...

Страница 3: ...ua tion which if not avoided will result in death or serious injury DANGER WARNING indicates a hazardous situ ation which if not avoided could result in death or serious injury CAUTION indicates a hazardous situa tion which if not avoided could result in minor or moderate injury CAUTION NOTICE indicates a situation which if not avoided could result in vehicle damage NOTICE WARNING ...

Страница 4: ... your car be performed by an authorized HYUNDAI dealer HYUNDAI dealers are prepared to provide high quality service maintenance and any other assistance that may be required This Owner s Manual should be considered a permanent part of your vehicle and should be kept in the vehicle so you can refer to it at any time The manual should stay with the vehicle if you sell it to provide the next owner wi...

Страница 5: ...rs is very important This Owner s Manual provides you with many safe ty precautions and operating proce dures This information alerts you to potential hazards that may hurt you or others as well as damage to your vehicle Safety messages found on vehicle labels and in this manual describe these hazards and what to do to avoid or reduce the risks Warnings and instructions contained in this manual ar...

Страница 6: ... not use methanol blended fuels Your new vehicle is designed to obtain maximum performance with UNLEADED FUEL as well as mini mize exhaust emissions and spark plug fouling NOTICE Do not top off after the noz zle automatically shuts off when refueling Always check that the fuel cap is installed securely to pre vent fuel spillage in the event of an accident WARNING NEVER USE LEADED FUEL The use of l...

Страница 7: ...gasoline Do not use gasohol containing more than 10 ethanol and do not use gasoline or gasohol containing any methanol Either of these fuels may cause drivability problems and dam age to the fuel system engine control system and emission control system Discontinue using gasohol of any kind if drivability problems occur Vehicle damage or driveability prob lems may not be covered by the manufacturer...

Страница 8: ...This type of fuel can reduce vehicle performance and damage components of the fuel system engine control system and emission control system Fuel Additives HYUNDAI recommends that you use unleaded gasoline which has an octane rating of RON Research Octane Number 95 AKI Anti Knock Index 91 or higher for Europe or Octane Rating of RON Research Octane Number 91 AKI Anti Knock Index 87 or higher except...

Страница 9: ... is used in your vehicle If two types of diesel fuel are available use summer or winter fuel properly according to the following temperature conditions Above 5 C 23 F Summer type diesel fuel Below 5 C 23 F Winter type diesel fuel Watch the fuel level in the tank very carefully If the engine stops through fuel failure the circuits must be com pletely purged to permit restarting Do not let any gasol...

Страница 10: ...ll not be covered by the manufactures warranty This vehicle should not be modi fied Modification of your vehicle could affect its performance safety or durability and may even violate governmental safety and emis sions regulations In addition damage or perform ance problems resulting from any modification may not be covered under warranty If you use unauthorized electronic devices it may cause the...

Страница 11: ...performance econo my and life of your vehicle Do not race the engine While driving keep your engine speed RPM or revolutions per minute between 2 000 RPM and 4 000 RPM Do not maintain a single speed for long periods of time either fast or slow Varying engine speed is need ed to properly break in the engine Avoid hard stops except in emer gencies to allow the brakes to seat properly Fuel economy an...

Страница 12: ... I Your vehicle at a glance Safety system of your vehicle Convenience features Multimedia System Driving your vehicle What to do in an emergency Maintenance Specifications Consumer information Index TABLE OF CONTENTS ...

Страница 13: ...Your vehicle at a glance 1 Your vehicle at a glance 1 Exterior overview I 1 2 Exterior overview II 1 3 Interior overview 1 4 Instrument panel overview 1 5 Engine compartment 1 6 ...

Страница 14: ...lamp 3 106 7 86 3 Tires and wheels 7 54 8 4 4 Outside rearview mirror 3 30 5 Sunroof 3 39 6 Front windshield wiper blades 7 47 7 Windows 3 34 8 Parking Distance Warning system Reverse Forward 3 129 OLX2018001 Front view The actual shape may differ from the illustration ...

Страница 15: ...ller door 3 57 3 Rear combination lamp 7 89 4 Tailgate 3 46 5 High mounted stop lamp 7 91 6 Rear window wiper 3 121 7 Parking Distance Warning system Reverse 3 125 8 Antenna 4 2 9 Rearview monitor 3 123 OLX2018002L Rear view The actual shape may differ from the illustration ...

Страница 16: ...irror control 3 31 7 Headlight leveling device 3 113 8 Instrument panel illumination control switch 3 61 9 Blind spot Collision Warning BCW system 5 81 10 Lane Keeping assist LKA system 5 119 11 ESC OFF button 5 39 12 Power tailgate button 3 48 13 EPB Electronic Parking Brake 5 27 14 Hood release lever 3 44 15 Steering wheel tilt telescopic lever 3 27 16 Steering wheel 3 26 17 Seat 2 4 18 Fuse box...

Страница 17: ...button 5 44 11 Parking Distance Warning Reverse Forward button 3 129 12 Surround view monitor 3 132 13 Air ventilation seat 2 24 14 Seat warmer 2 22 15 Heated steering wheel 3 27 16 Air ventilation seat 2nd row 2 24 17 Seat warmer 2nd row 2 23 18 Climate control system rear 3 141 3 155 19 Power outlet 3 173 20 Passenger s front air bag 2 53 21 Glove box 3 167 22 Light control Turn signals 3 106 23...

Страница 18: ...id reservoir 7 42 4 Air cleaner 7 44 5 Engine oil filler cap 7 36 6 Engine oil dipstick 7 35 7 Windshield washer fluid reservoir 7 43 8 Fuse box 7 72 9 Battery terminal 7 50 10 Battery terminal 7 50 OLX2078002L Gasoline Engine 3 8 GDI The actual engine compartment in the vehicle may differ from the illustration ...

Страница 19: ...uid reservoir 7 42 4 Air cleaner 7 44 5 Fuse box 7 72 6 Battery terminal 7 50 7 Battery terminal 7 50 8 Radiator cap 7 39 9 Engine oil dipstick 7 35 10 Windshield washer fluid reservoir 7 43 OLX2078048L Gasoline Engine 3 5 MPI The actual engine compartment in the vehicle may differ from the illustration ...

Страница 20: ...3 3 Radiator cap 7 39 4 Fuse box 7 72 5 Engine oil dipstick 7 36 6 Engine oil filler cap 7 37 7 Brake fluid reservoir 7 42 8 Air cleaner 7 44 9 Battery terminal 7 50 10 Battery terminal 7 50 OLX2078001 Diesel Engine 2 2 VGT The actual engine compartment in the vehicle may differ from the illustration ...

Страница 21: ...mendation Children always in the rear 2 40 Selecting a Child Restraint System CRS 2 41 Installing a Child Restraint System CRS 2 43 Air bag supplemental restraint system 2 51 Where are the air bags 2 53 How does the air bags system operate 2 56 What to expect after an air bag inflates 2 60 Do not install a Child Restraint System on the front passenger seat 2 61 Why didn t my air bag go off in a co...

Страница 22: ...p erly restrained Infants young chil dren and short adults are at the greatest risk of being injured by an inflating air bag Follow all instruc tions and warnings in this manual Driver distraction Driver distraction presents a serious and potentially deadly danger espe cially for inexperienced drivers Safety should be the first concern when behind the wheel and drivers need to be aware of the wide...

Страница 23: ...is a major factor in crash injuries and deaths Generally the higher the speed the greater the risk but serious injuries can also occur at lower speeds Never drive faster than is safe for current condi tions regardless of the maximum speed posted Keep your vehicle in safe condi tion Having a tire blowout or a mechanical failure can be extremely hazardous To reduce the possibility of such prob lems ...

Страница 24: ...t 6 Seat cushion length 7 Seat warmer 8 Air ventilation seat 9 Headrest 2nd row seat 10 Forward and backward 11 Seatback angle 12 Walk in switch 13 Headrest 14 Headrest 8 passengers 15 Seat warmer 16 Air ventilation seat 17 Seat folding strap 18 2nd row seat remote folding switch 3rd row seat 19 Headrest 20 Seat folding strap The actual shape may differ from the illustration ...

Страница 25: ...t belt during an acci dent or a sudden stop Serious or fatal internal injuries could result because the seat belt cannot operate properly WARNING To reduce the risk of serious injury or death from an inflating air bag take the following pre cautions Adjust the driver s seat as far to the rear as possible main taining the ability to control the vehicle Adjust the front passenger seat as far to the ...

Страница 26: ...to adjust the seat while the vehicle is mov ing The seat could respond with unexpected movement and may cause loss of vehicle control resulting in an acci dent Do not place anything under the front seats Loose objects in the driver s foot area could interfere with the operation of the foot pedals causing an accident WARNING Do not allow anything to inter fere with the normal position and proper lo...

Страница 27: ...hen buckled up the protections of your restraint system seat belts and or air bags is greatly reduced by reclining your seatback Seat belts must be snug against your hips and chest to work properly When the seatback is reclined the shoulder belt cannot do its job because it will not be snug against your chest Instead it will be in front of you During an accident you could be thrown into the seat b...

Страница 28: ...rd or rearward as possible Do not adjust the seats longer than necessary when the engine is turned off This may result in unnecessary battery drain Do not operate two or more seats at the same time This may result in an electrical malfunction Forward and rearward adjustment To move the seat forward or rearward 1 Push the control switch forward or rearward 2 Release the switch once the seat reaches...

Страница 29: ...art of control switch to move the seat cushion to the desired length 2 Release the switch once the seat cushion reaches the desired length Reclining seatback Sitting in a reclined position when the vehicle is in motion can be dan gerous Even when buckled up the protections of your restraint system seat belts and air bags is greatly reduced by reclining your seatback NEVER ride with a reclined seat...

Страница 30: ... 1 To change the angle of the front part of the seat cushion Push the front portion of the control switch up to raise or down to lower the front part of the seat cushion Release the switch once the seat reaches the desired position Seat cushion height 2 To change the height of the seat cushion Push the rear portion of the control switch up to raise or down to lower the height of the seat cushion R...

Страница 31: ...at before driving and make sure the seat is locked securely by trying to move forward and back ward without using the lever If the seat moves it is not locked properly Seatback angle 2nd row seat To recline the seatback 1 Pull up the seatback recline lever 2 Hold the lever and adjust the seat back of the seat to the position you desire 3 Release the lever and make sure the seatback is locked in pl...

Страница 32: ...n or out of the 3rd row seat 1 Routing the seat belt webbing through the rear seat belt guide clip After inserting the seat belt tighten the belt webbing by pulling it up 2 Push the walk in switch located in upper part 1 of 2nd row seat or side part 2 of 2nd row seat 3 The 2nd row seatback will be fold ed and push the seat to the far thest forward position After getting in or out slide the 2nd row...

Страница 33: ...ot extend higher than the top of the front seatbacks This could allow cargo to slide forward and cause injury or damage during sudden stops WARNING Never attempt to adjust while the vehicle is moving or the 2nd row seat is occupied as the seat may suddenly move and cause the passenger on the seat to be injured WARNING If the walk in switch does not work pull the strap 1 located on the lower left s...

Страница 34: ...he seat toward the front of the vehicle Pull the strap backward 3rd row seat then fold the 3rd seat toward the front of the vehicle When you return the seatback to its upright position always be sure it has locked into position by pushing on the top of the seatback 5 To use the rear seat lift and pull the seatback backward by pulling the folding lever or the strap Pull the seatback firmly until it...

Страница 35: ...g on the top of the seat back In an accident or sudden stop the unlocked seatback could allow cargo to move for ward with great force and enter the passenger compartment which could result in serious injury or death WARNING Do not place objects in the rear seats since they cannot be properly secured and may hit vehicle occupants in a collision causing serious injury or death WARNING Make sure the ...

Страница 36: ... a collision and causing injury to the vehicle occupants Do not place objects in the rear seats since they can not be properly secured and may hit the front seat occupants in a collision WARNING Be careful when loading cargo through the rear passenger seats to prevent damage to the vehicle interior When cargo is loaded through the rear passenger seats ensure the cargo is properly secured to preven...

Страница 37: ... you check the passenger in 2nd row seat before you get off For more information refer to the Rear occupant alert system in chapter 3 Headrest The vehicle s front and rear seats have adjustable headrests The headrests provide comfort for passengers but more importantly they are designed to help protect passengers from whiplash and other neck and spinal injuries dur ing an accident especially in a ...

Страница 38: ...he height of the top of the eyes NEVER adjust the headrest position of the driver s seat when the vehicle is in motion Adjust the headrest as close to the passenger s head as possible Do not use a seat cushion that holds the body away from the seatback Make sure the headrest locks into position after adjusting it OLF034072N When there is no occupant in the rear seats adjust the height of the headr...

Страница 39: ...e headrest to the desired position 3 If you recline the seatback towards the front with the headrest and seat cushion raised the headrest may come in contact with the sun visor or other parts of the vehicle Removal Reinstall To remove the headrest 1 Recline the seatback 2 with using the seatback angle lever or switch 1 2 Raise the headrest as far as it can go NOTICE OLX2038010 OLF034015 OLX2038073...

Страница 40: ...hile pulling the headrest up 4 To reinstall the headrest 1 Recline the seatback 2 Put the headrest poles 2 into the holes while pressing the release button 1 3 Adjust the headrest to the appropri ate height 4 Recline the seatback 4 the seat back angle lever or switch 3 NEVER allow anyone to travel in a seat with the headrest removed WARNING OLX2038095 OLX2038012L Type A Type B ...

Страница 41: ...o raise the headrest 1 Pull it up to the desired position 1 To lower the headrest 1 Push and hold the release button 2 on the headrest support 2 Lower the headrest to the desired position 3 OLX2038098L if equipped Adjust the headrests so the middle of the headrest is at the same height as the height of the top of the eyes When sitting on the rear seat do not adjust the height of the headrest to th...

Страница 42: ...e the seat cover It may damage the seat warmer NOTICE OLX2038016 The seat warmers can cause a SERIOUS BURN even at low temperatures and especially if used for long periods of time Passengers must be able to feel if the seat is becoming too warm so they can turn it off if needed People who cannot detect tem perature change or pain to the skin should use extreme cau tion especially the following typ...

Страница 43: ...the switch for more than 1 5 seconds with the seat warmer operating the seat warmer will turn OFF The seat warmer defaults to the OFF position whenever the ignition switch is in the ON position However if the Auto Comfort Control function is ON the driver s seat warner will turn on and off depending on the ambient temper ature Auto Comfort Control for driver s seat if equipped The seat warmer auto...

Страница 44: ...eat is not needed keep the switches in the OFF position While the engine is running push the switch to cool the driver s seat or the front passenger s seat if equipped While the engine is running push the switch to cool the 2nd row passen ger s seat if equipped Each time you push the switch the airflow changes as follows When pressing the switch for more than 1 5 seconds with the air venti lation ...

Страница 45: ...ate Use the air ventilation seat when the climate control system is on Using the air ventilation seat for prolonged periods of time with the climate con trol system off could cause the cli mate control seat performance to be reduced To prevent damage to the air ven tilation seat Use the air ventilation seat ONLY when the climate control system is on Using the air ventilation seat for prolonged per...

Страница 46: ... bag is deactivated If a child is seated in the front pas senger seat move the seat as far back as possible and prop erly restrain them in the seat NEVER allow an infant or child to be carried on an occupant s lap NEVER ride with the seatback reclined when the vehicle is moving Do not allow children to share a seat or seat belt WARNING Do not wear the shoulder belt under your arm or behind your ba...

Страница 47: ...n you drive under 20km h the corresponding warning light will continue to illuminate until you fasten the seat belt If you continue to drive without the seat belt fastened or you unfasten the seat belt when you drive over 20km h the seat belt warning chime will sound for approximately 100 sec onds and the corresponding warning light will blink Damaged seat belts and seat belt assemblies will not o...

Страница 48: ...at belt If you continue to drive without the seat belt fastened or you unfasten the seat belt when you drive over 20km h the seat belt warning chime will sound for approximately 100 sec onds and the corresponding warning light will blink Information Although the front passenger seat is not occupied the seat belt warning light will blink or illuminate for 6 seconds Also when the front pas senger ge...

Страница 49: ...t belt automatically adjusts to the proper length after the lap belt portion is adjusted manually so that it fits snugly around your hips If you lean forward in a slow easy motion the belt will extend and move with you If there is a sudden stop or impact the belt will lock into position It will also lock if you try to lean forward too quickly If you are not able to smoothly pull enough of the seat...

Страница 50: ...nchor into position Try sliding the height adjuster to make sure that it has locked into position OHSS038102 Improperly positioned seat belts may increase the risk of serious injury in an accident Take the fol lowing precautions when adjust ing the seat belt Position the lap portion of the seat belt as low as possible across your hips not on your waist so that it fits snugly This allows your stron...

Страница 51: ...ctor If this does not happen check the belt to be sure it is not twist ed then try again Rear center seatbelt 3rd row To fasten your seatbelt 1 Extract the tongue plate A from the hole on the belt assembly cover 2 Insert the tongue plate A into the buckle A until an audible click is heard indicating the latch is locked Make sure the belt is not twisted OHSS038103 OLX2038081 OLX2038082 ...

Страница 52: ...you are not able to pull out the safe ty belt from the retractor firmly pull the belt out and release it After release you will be able to pull the belt out smoothly To release your seatbelt 1 Press the release button on the buckle B and remove the tongue plate B 2 To retract the rear center seatbelt insert the tongue plate into the web release hole A Pull up on the seat belt web and allow the web...

Страница 53: ... help keep the belts from being trapped behind or under the seats After inserting the seat belt tighten the belt webbing by pulling it up OLX2038018 OLX2038069L 2nd row seat 3nd row seat if equipped OTM038042 OLX2038035 2nd row seat 8 passengers vehicle 3nd row seat When using the seat belt use it after taking it out of the guides If you pull the seat belt when it is stored in the guides it may da...

Страница 54: ...against the occupant s upper body in cer tain frontal or side collision s If the system senses excessive tension on the driver or passenger s seat belt when the pre tensioner system acti vates the load limiter inside the retrac tor pre tensioner will release some of the pressure on the affected seat belt OLMB033039 If equipped with rollover sensor The pre tensioner will activate not only in a fron...

Страница 55: ...does not illuminate stays illuminat ed or illuminates when the vehicle is being driven we recommend the pre tensioner seat belts and or SRS control module be inspected by an authorized HYUNDAI dealer as soon as possible NOTICE Do not touch the pre tensioner seat belt assemblies for several minutes after they have been activated When the pre ten sioner seat belt mechanism deploys during a collision...

Страница 56: ...r seat belt Place the shoulder belt across your chest rout ed between your breasts and away from your neck Place the lap belt below your belly so that it fits SNUGLY across your hips and pelvic bone under the rounded part of the belly Seat belt use and children Infant and small children Most countries have Child Restraint System laws which require children to travel in approved Child Restraint Sys...

Страница 57: ...odically A child s squirming could put the belt out of position In the event of an acci dent children are afforded the best safety restrained by a proper Child Restraint System in the rear seats If a larger child over age 13 must be seated in the front seat the child must be securely restrained by the available lap shoulder belt and the seat should be placed in the rear most position If the should...

Страница 58: ...nst your hips and chest to work properly During an accident you could be thrown into the seat belt causing neck or other injuries The more the seat back is reclined the greater the chance for the pas senger s hips to slide under the lap belt or the passenger s neck to strike the shoulder belt Always make sure larger chil dren s seat belts are worn and properly adjusted NEVER allow the shoulder bel...

Страница 59: ...ged parts should be replaced as soon as possible Keep belts clean and dry Seat belts should be kept clean and dry If belts become dirty they can be cleaned by using a mild soap solution and warm water Bleach dye strong detergents or abrasives should not be used because they may damage and weaken the fabric When to replace seat belts The entire seat belt assembly or assemblies should be replaced if...

Страница 60: ...nstead of Child Restraint System differs among countries so you should be aware of the specific requirements in your country and where you are trav elling Child Restraint Systems must be properly installed in the vehicle seat Always use a commercially available Child Restraint System that meets the requirements of your country Child Restraint System CRS Infants and younger children must be restrai...

Страница 61: ...ld Restraint System Do not use an infant carrier or a child safety seat that hooks over a seatback it may not pro vide adequate protection in an accident After an accident we recom mend a HYUNDAI dealer to check the Child Restraint System seat belts ISOFIX anchorages and top tether anchorages Be especially careful when installing a child restraint on the center seating position in the second row a...

Страница 62: ...ild Restraint Systems and reduce the stress to the fragile neck and spinal cord All children under the age of one year must always ride in a rearward facing Child Restraint System There are dif ferent types of rearward facing Child Restraint Systems infant only Child Restraint Systems can only be used rearward facing Convertible and 3 in 1 Child Restraint Systems typically have higher height and w...

Страница 63: ...seats until they are big enough to fit in a seat belt properly For a seat belt to fit properly the lap belt must lie comfortable across the upper thighs not the stomach The shoulder belt should lie comfortable across the shoulder and chest and not across the neck or face Children under age 13 must always be proper ly restrained to minimize the risk of injury in an accident sudden stop or sudden ma...

Страница 64: ... child is properly strapped in the Child Restraint System according to the Child Restraint System man ufacturer s instructions ISOFIX anchorage and top teth er anchorage ISOFIX anchorage system for children The ISOFIX system holds a Child Restraint System during driving and in an accident This system is designed to make installation of the Child Restraint System easier and reduce the possi bility ...

Страница 65: ... rear seat left and right outboard seating positions indicated by the symbols Their locations are shown in the illus tration To use the ISOFIX anchorages push the upper portion of the ISOFIX anchorage cover OLX2038040L Do not attempt to install a Child Restraint System using ISOFIX anchorages in the rear center seating position There are no ISOFIX anchorages provided for this seat Using the outboa...

Страница 66: ... anchorages Securing a Child Restraint System seat with Top tether Anchorage system Top tether anchorages for Child Restraint Systems are located on the rear of the rear passenger seat backs OLX2038087 OLX2038101L 2nd row passenger seat 3rd row passenger seat Take the following precautions when using the ISOFIX system Read and follow all installation instructions provided with your Child Restraint...

Страница 67: ...installing the top tether Read and follow all installation instructions provided with your Child Restraint System NEVER attach more than one Child Restraint System to a single ISOFIX top tether anchorage This could cause the anchorage or attachment to come loose or break Do not attach the top tether to anything other than the cor rect top tether anchorage It may not work properly if attached to so...

Страница 68: ...rding to UN regulations Information for use by vehicle users and CRS manufacturers Yes Suitable for fitment of the designated category of CRS No Not suitable for fitment of the designated category of CRS Not applicable F Forward facing R Rearward facing The table is based on LHD vehicle Except for the front passenger seat the table is valid for RHD vehicle For RHD vehicle front passenger seat plea...

Страница 69: ...all a Child Restraint System on the rear seats do the following 1 Place the Child Restraint System on a rear seat and route the lap shoulder belt around or through the Child Restraint System follow ing the Child Restraint System manufacturer s instructions Make sure the seat belt webbing is not twisted OLMB033044 OTM038094L Seat umber Position in the vehicle 1 Front left 2 Front center 3 Front rig...

Страница 70: ...int System while feeding the shoulder belt back into the retractor 4 Push and pull on the Child Restraint System to confirm that the seat belt is holding it firmly in place If your Child Restraint System manu facturer recommends the use of a top tether with the lap shoulder belt see page 2 46 To remove the Child Restraint System press the release button on the buckle and then pull the lap shoulder...

Страница 71: ...r vehicle 2 AIR BAG SUPPLEMENTAL RESTRAINT SYSTEM OLX2038041L The actual air bags in the vehicle may differ from the illustration 1 Driver s front air bag 2 Passenger s front air bag 3 Side air bag 4 Curtain air bag if equipped ...

Страница 72: ... Child Restraint System or booster seat in the front passenger seat unless the air bag is deactivated An inflating air bag could forcefully strike the infant or child causing serious or fatal injuries ABC Always Buckle Children under age 13 in the back seat It is the safest place for children of any age to ride If a child age 13 or older must be seated in the front seat he or she must be properly ...

Страница 73: ...erious injury or death from inflating front air bags take the following pre cautions Seat belts must be worn at all times to help keep occupants positioned properly WARNING OLX2038044 OLX2038045 Passenger s front air bag Driver s front air bag Move your seat as far back as possible from front air bags while still maintaining control of the vehicle Never lean against the door or center console Do n...

Страница 74: ...rs to lean their heads or bodies onto doors put their arms on the doors stretch their arms out of the window or place objects between the doors and seats Hold the steering wheel at the 9 o clock and 3 o clock positions to minimize the risk of injuries to your hands and arms Do not use any accessory seat covers This could reduce or prevent the effectiveness of the system Do not hang other objects e...

Страница 75: ...with rollover sensor The curtain air bags are not designed to deploy in all side impact or rollover situations Do not place any objects between the door and the seat They may become dan gerous projectiles if the side air bag inflates Do not install any accessories on the side or near the side air bags Do not cause impact to the doors when the ignition switch is in the ON position as this may cause...

Страница 76: ...ermine if a crash impact is severe enough to require air bag deployment or pre tensioner seat belt deployment Properly secure Child Restraint System as far away from the door as possible Do not place any objects over the air bag Also do not attach any objects around the area the air bag inflates such as the door side door glass front and rear pillar roof side rail Do not hang other objects except ...

Страница 77: ...or rollover by supporting the side upper body area Air bags are activated able to inflate if necessary only when the ignition switch is in the ON position Air bags inflate in the event of cer tain frontal or side collisions to help protect the occupants from serious physical injury There is no single speed at which the air bags will inflate Generally air bags are designed to inflate based upon the...

Страница 78: ...lts if equipped with a rollover sensor To help provide protection the air bags must inflate rapidly The speed of air bag inflation is a consequence of extremely short time in which to inflate the air bag between the occupant and the vehicle structures before the occupant impacts those structures This speed of inflation reduces the risk of serious or life threatening injuries and is thus a necessar...

Страница 79: ...allows full inflation of the air bags A fully inflated air bag in combina tion with a properly worn seat belt slows the driver s or the front pas senger s forward motion reducing the risk of head and chest injury After complete inflation the air bag immediately starts deflating enabling the driver to maintain forward visibili ty and the ability to steer or operate other controls OLMB033054 Driver ...

Страница 80: ...passen ger s air bag is located Do not install a container of liquid air freshener near the instrument cluster or on the instrument panel surface WARNING After an air bag inflates take the following precautions Open your windows and doors as soon as possible after impact to reduce prolonged exposure to the smoke and powder released by the inflat ing air bag Do not touch the air bag stor age area s...

Страница 81: ...hma for some people If you experience breathing problems after an air bag deployment seek medical attention immediately Though the smoke and powder are nontoxic they may cause irritation to the skin eyes nose throat etc If this is the case wash and rinse with cold water immediately and seek medical attention if the symptoms persist Do not install a Child Restraint System on the front passenger sea...

Страница 82: ...impact the locations where air bags or sensors are installed Do not perform maintenance on or around the air bag sen sors If the location or angle of the sensors is altered the air bags may deploy when they should not or may not deploy when they should Installing bumper guards with non genuine Hyundai or non equivalent parts may adverse ly affect the collision and airbag deployment perform ance To...

Страница 83: ...your vehicle 2 1 SRS control module Rollover sensor 2 Front impact sensor 3 Side pressure sensor front 4 Side impact sensor 5 Side impact sensor if equipped OLX2038052 OLX2039053L OLX2038054 OLX2039055L OLX2038056 OLX2038057 ...

Страница 84: ...inflate in frontal collisions they also may inflate in other types of colli sions if the front impact sensors detect a sufficient impact Side and curtain air bags are designed to inflate in side impact collisions but they may inflate in other collisions if the side impact sensors detect a suf ficient impact Also the side and curtain air bags are designed to inflate when a rollover is detected by a...

Страница 85: ...n rear collisions because occupants are moved backward by the force of the impact In this case inflated air bags would not provide any additional benefit Front air bags may not inflate in side impact collisions because occupants move in the direction of the collision and thus in side impacts front air bag deployment would not provide addi tional occupant protection However side and curtain air bag...

Страница 86: ...tuation because deceleration forces that are detected by sensors may be significantly reduced by such underride collisions Front air bags may not inflate in rollover accidents because front air bag deployment would not provide additional occupant protection Information Vehicles equipped with rollover sensor The side and curtain air bags may inflate in a rolloversituation when it is detected by the...

Страница 87: ...ay result in serious personal injury OLX2038065 To reduce the risk of serious injury or death take the follow ing precautions Do not attempt to modify or disconnect the SRS compo nents or wiring including the addition of any kind of badges to the pad covers or modifica tions to the body structure WARNING Do not place objects over or near the air bag modules on the steering wheel instrument panel a...

Страница 88: ...bags Do not place items under the front seats Placing items under the front seats could interfere with the opera tion of the supplemental restraint sys tem sensing components and wiring harnesses Do not cause impact to the doors Impact to the doors when the ignition switch is in the ON position may cause the air bags to inflate Adding equipment to or modify ing your air bag equipped vehicle If you...

Страница 89: ...ng memory position 3 23 Easy access function 3 24 Driver position memory system reset 3 25 Steering wheel 3 26 Electric power steering EPS 3 26 Tilt steering Telescopic steering 3 27 Heated steering wheel 3 27 Horn 3 28 Mirrors 3 29 Inside rearview mirror 3 29 Outside rearview mirror 3 30 Reverse parking aid function 3 33 Windows 3 34 Power windows 3 34 Remote window closing function 3 38 Sunroof ...

Страница 90: ...monitor 3 132 Blind spot View Monitor system 3 135 Defroster 3 136 Rear window defroster 3 136 Manual climate control system 3 137 Heating and air conditioning 3 138 Rear climate control 3 142 System operation 3 145 System maintenance 3 147 Automatic climate control system 3 149 Automatic heating and air conditioning 3 150 Manual heating and air conditioning 3 150 Rear climate control button 3 154...

Страница 91: ...70 Conversation mirror 3 172 Sunvisor 3 172 Power outlet 3 173 USB charger 3 174 Wireless cellular phone charging system 3 175 Clock 3 177 Clothes hanger 3 177 Floor mat anchor s 3 178 Luggage net holder 3 179 Cargo security screen 3 179 Side curtain 3 181 Exterior features 3 182 Roof rack 3 182 3 ...

Страница 92: ...l unlock The hazard warning lights will blink two times Also the outside rearview mirror will unfold if Convenience Welcome mirror light On door unlock is selected from the User Settings mode on the LCD display For more details refer to LCD Display in this chapter Information After unlocking the doors the doors will lock automatically after 30 sec onds unless a door is opened Tailgate unlocking To...

Страница 93: ...he release button Do not fold the key without press ing the release button This may damage the key Remote key precautions The remote key will not work if any of the following occur The key is in the ignition switch You exceed the operating distance limit about 10 m 30 feet The remote key battery is weak Other vehicles or objects may be blocking the signal The weather is extremely cold The remote k...

Страница 94: ... away from electromagnetic materials that block electromagnetic waves to the key surface Battery replacement If the remote key is not working prop erly try replacing the battery with a new one Battery Type CR2032 To replace the battery 1 Insert a slim tool into the slot and gently pry open the cover 2 Using a screw driver remove the battery cover 3 Remove the old battery and insert a new battery M...

Страница 95: ...t On door unlock is selected from the User Settings mode on the LCD display For more details refer to LCD Display in this chapter 4 Make sure the doors are locked by checking the position of the door lock button inside the vehicle Information The door handle button will only operate when the smart key is within 0 7 1 m 28 40 in from the outside door handle Even though you press the outside door ha...

Страница 96: ... 3 The hazard warning lights will blink two times Information Type A Non power Tailgate The Tailgate Unlock button 3 will only unlock the tailgate It will not release the latch and open the tail gate automatically If the Tailgate Unlock button is used someone must still press the tailgate handle button to open the tailgate After unlocking the tailgate the tailgate will lock automatically after 30 ...

Страница 97: ...ks or moisture or is heated internal circuit may malfunction and may void the vehicle warranty Avoid dropping or throwing the smart key Protect the smart key from extreme temperatures Remote start if equipped for Middle East You can start the engine and turn on the climate system by pressing the remote start button 4 outside the vehicle To start and stop engine remotely 1 Press the door lock butto...

Страница 98: ... The smart key may not work if any of the following occur The smart key is close to a radio transmitter such as a radio station or an airport which can interfere with normal operation of the trans mitter The smart key is near a mobile two way radio system or a cellular phone Another vehicle s smart key is being operated close to your vehicle If the smart key does not work cor rectly open and close...

Страница 99: ...nty Keep the smart key away from electromagnetic materials that blocks electromagnetic waves to the key surface Always have the smart key with you when leaving the vehicle If the smart key is left near the vehi cle the vehicle battery may be dis charged Battery replacement If the Smart Key is not working prop erly try replacing the battery with a new one Battery Type CR2032 To replace the battery ...

Страница 100: ... the key The engine may not start because the metal may interrupt the transponder signal from transmitting normally If the system repeatedly does not recognize the coding of the key it is recommended that you contact your HYUNDAI dealer Do not attempt to alter this system or add other devices to it Electrical problems could result that may make your vehicle inoperable The transponder in your key i...

Страница 101: ...lock If you lock unlock the driver s door with a key a driver s door will lock unlock Once the doors are unlocked they may be opened by pulling the door handle When closing the door push the door by hand Make sure that doors are closed securely Remote key To lock the doors press the Door Lock button 1 on the remote key To unlock the doors press the Door Unlock button 2 on the remote key Once the d...

Страница 102: ...ly due to freezing conditions If the door is locked unlocked multi ple times in rapid succession with either the vehicle key or door lock switch the system may stop operat ing temporarily in order to protect the circuit and prevent damage to system components Operating door locks from inside the vehicle With the door lock button To unlock a door push the door lock button 1 to the Unlock posi tion ...

Страница 103: ...itch is pressed If the smart key is in the vehicle and any door is opened the doors will not lock even though the lock button 1 of the central door lock switch is pressed When pressing the portion 2 on the switch all vehicle doors will unlock i OLX2048007 The doors should always be fully closed and locked while the vehicle is in motion If the doors are unlocked the risk of being thrown from the ve...

Страница 104: ... potential risk to you or others from someone hiding in your vehicle To secure your vehicle while depressing the brake press the P Park button engage the park ing brake and place the ignition switch in the LOCK OFF posi tion close all windows lock all doors and always take the key with you WARNING Opening a door when something is approaching may cause dam age or injury Be careful when opening door...

Страница 105: ...e child safety lock Electronic child safety lock system if equipped If you push the Electronic child safe ty lock button and the indicator illumi nates rear passengers can not open the rear door from inside the vehicle To cancel the Electronic child safety lock system you push the Electronic child safety lock system button one more time and then the indicator turns off The Safe Exit Assist SEA sys...

Страница 106: ...ar win dow also For more details refer to Windows in this chapter Safe Exit Assist SEA system if equipped 1 The Safe Exit Assist system is pro vided to help prevent the passen gers from opening door by warning the passengers when an approach ing vehicle from the rear area is detected after the vehicle stops Convenience features OTM058100 If the Electronic child safety lock system is not operated w...

Страница 107: ...e the Electronic child safety lock system To deac tivate the Electronic child safety lock system press the Electronic child safety lock button again with the ignition switch in the ON posi tion or after starting the engine When the power is supplied again after removing the battery or battery discharge while the child safety lock in the lock posi tion press the rear door lock but ton once again to...

Страница 108: ...ck the door with the remote key or smart key to stop the alert The system detects movement in the vehicle for 24 hours after the door is locked The 2nd alert is activated only after the prior activation of the 1st alert You can activate or deactivate the Rear Occupant Alert ROA sys tem from the User Settings mode on the LCD display Convenience Rear Occupant Alert Convenience features The system do...

Страница 109: ...y foreign sub stances The alert may activate if movement in the driver or passenger seat is detected The alert may activate with the doors locked due to car wash or surrounding vibration or noise Inside movement detection is stopped under remote start if equipped status CAUTION Even if your vehicle is equipped with the Rear Occupant Alert ROA system always make sure you check the rear seat before ...

Страница 110: ...the tailgate or the hood without using the remote key or smart key will cause the alarm to activate The Theft Alarm System will not set if the hood the tailgate or any door is not fully closed If the system will not set check the hood the tailgate or the doors are fully closed Do not attempt to alter this system or add other devices to it Information Do not lock the doors until all pas sengers hav...

Страница 111: ...ce and notify you Press button to save settings on the LCD display 4 Press one of the memory buttons 1 or 2 within 4 seconds The sys tem will beep twice when the memory has been successfully stored 5 Driver 1 or 2 settings saved will appear on the LCD display Recalling memory position 1 Shift to P Park position 2 Press the desired memory button 1 or 2 The system will beep once and then the driver ...

Страница 112: ...ved It will move the driver s seat for ward and upward when the igni tion key is inserted With smart key It will move the driver s seat rear ward and downward when the Engine Start Stop button is pressed to the OFF position It will move the driver s seat for ward and upward when the Engine Start Stop button is pressed to the ACC or START position You can activate or deactivate the Easy Access Func...

Страница 113: ...n the process 1 Initialization begins as the alarm sounds 2 The seat and seatback will auto matically move backwards The alarm sound will continue while the system is in operation 3 Initialization will be complete after the seat and seatback move to the center with an alarm sound If however cases as follows occur the initialization process will come to a stop and the alarm sound will stop as well ...

Страница 114: ...n the cluster The steering wheel may become difficult to control or operate Have your vehicle checked immediately after mov ing the vehicle to a safe zone Information The following symptoms may occur during normal vehicle operation The steering effort may be high immediately after placing the igni tion switch in the ON position This happens as the system per forms the EPS system diagnostics When t...

Страница 115: ...rd your face Make sure you can see the instrument panel warning lights and gauges After adjusting pull up the lock release lever 1 to lock the steering wheel in place Push the steering wheel both up and down to be cer tain it is locked in position Always adjust the position of the steering wheel before driving Heated steering wheel if equipped When the ignition switch is in the ON position or when...

Страница 116: ...unction it must be acti vated from the Settings menu in the Audio AVN system screen Select All menus Setup Vehicle Heated Ventilated Features For more details refer to the sepa rately supplied manual with your vehicle Information The heated steering wheel will turn off automatically approximately 30 min utes after the heated steering wheel is turned on Do not install any cover or acces sory on the...

Страница 117: ...trols the glare from the head lamp of the vehicle behind you in nighttime or low light driving condi tions When the engine is running the glare is automatically controlled by the sensor mounted in the rearview mirror The sensor detects the light level around the vehicle and auto matically adjusts to control the head lamp glare from vehicles behind you Whenever the shift button is placed in R Rever...

Страница 118: ...witch is turned on When cleaning the mirror use a paper towel or similar material dampened with glass cleaner Do not spray glass cleaner directly on the mirror as that may cause the liquid cleaner to enter the mirror housing Outside rearview mirror Be sure to adjust mirror angles before driving Your vehicle is equipped with both left hand and right hand outside rearview mirrors The mirror can be a...

Страница 119: ...u would like to adjust 2 Use the mirror adjustment control 2 to position the selected mirror up down left or right 3 After adjustment move the lever 1 to the middle to prevent inad vertent adjustment NOTICE 3 OLX2048017 The right outside rearview mir ror is convex In some coun tries the left outside rearview mirror is also convex Objects seen in the mirror are closer than they appear Use your inte...

Страница 120: ...ror grasp the housing of the mirror and then fold it toward the rear of the vehicle Electric type The outside rearview mirror can be folded or unfolded by pressing the switch If Convenience Welcome mirror light On door unlock is selected in the User Settings mode on the LCD display the outside mirror will fold or unfold automatically as follows The mirror will fold or unfold when the door is locke...

Страница 121: ... hand It could cause motor failure Reverse parking aid function if equipped When you press the R Reverse but ton the outside rearview mirror s will rotate downwards to aid with driving in reverse The position of the outside rearview mirror switch 1 determines whether or not the mirrors will move Left Right When either the L Left or R Right switch is select ed both outside rearview mirrors will mov...

Страница 122: ...ed The ignition switch must be in the ON position to be able to raise or lower the windows Each door has a Power Window switch to control that door s window The driver has a Power Window Lock switch which can block the operation of passenger windows The power windows will operate for approximately 10 minutes after the ignition switch is placed in the ACC or OFF position However if the front doors ...

Страница 123: ...pen slightly close the sun roof Window opening and closing To open Press the window switch down to the first detent position 5 Release the switch when you want the window to stop To close Pull the window switch up to the first detent position 5 Release the win dow switch when you want the win dow to stop Auto up down window if equipped Pressing or pulling up the power win dow switch momentarily to...

Страница 124: ...ower window switch is pulled up continuously again within 5 sec onds after the window is lowered by the automatic window reverse fea ture the automatic window reverse will not operate Information The automatic reverse feature is only active when the Auto Up feature is used by fully pulling up the switch to the second detent Do not install any accessories on the windows The automatic reverse featur...

Страница 125: ...same time This will also ensure the longevity of the fuse Never try to operate the main switch on the driver s door and the individual door window switch in opposite directions at the same time If this is done the window will stop and cannot be opened or closed NOTICE Do not allow children to play with the power windows Keep the driver s door power window lock switch in the LOCK posi tion Serious ...

Страница 126: ...mation The remote window closing function may abruptly stop when you move away from your vehicle during the operation Stay in close proximity of your vehicle while monitoring the window movement One of the windows may stop oper ating when the window is interrupt ed by certain force However the other windows will keep operating Thus you should make sure that all windows are closed and that the haza...

Страница 127: ...be operated when the Engine Start Stop button is in the ON or START position The sunroof can be operated for approximately 10 minutes after the Engine Start Stop button is in the ACC or OFF position However if the front door is open the sunroof can not be operated even within the 10 minute period Do not operate the sunroof when the roof bars are installed on the vehicle or when there is luggage on...

Страница 128: ...when the sunroof glass is opened by pushing the sunroof switch A rear ward but the sunshade does not close automatically when the sunroof glass is closed Also only the sunshade can not be closed when the sunroof glass is opened Rear Push the power sunshade open switch B the power sunshade auto matically slides open Push the power sunshade close switch B the power sunshade auto matically closes i O...

Страница 129: ...sunroof movement at any point push the sunroof switch in any direction Slide open close Front Push the sunroof switch rearward the sunshade and sunroof glass slide open Push the sunroof switch forward only the sunroof glass closes Push the sunroof switch forward or rearward to the first detent posi tion the sunroof glass moves until the switch is released Push the sunroof switch forward or rearwar...

Страница 130: ...ted dust on the sunroof rail Using the sunroof for a long time can make noise caused by dust accumulated between the sunroof and vehicle body Open the sunroof and remove dust regularly using a clean cloth Do not try to open the sunroof when the temperature is below freezing or when the sunroof is covered with snow or ice other wise the motor could be dam aged In cold and wet climates the sunroof m...

Страница 131: ...uch AUTO OPEN CLOSE operation is not functioning properly Sunroof resetting procedure 1 It is recommended to perform the reset procedure with the vehicle engine running Start the vehicle in P Park 2 Make sure the power sunshade or sunroof glass is in the fully closed position If the power sunshade or sunroof glass is open push the switch forward until the power sun shade and sunroof glass is fully...

Страница 132: ... fuse is blown the sunroof may not operate normally Sunroof open warning If the driver turns off the engine when the sunroof is not fully closed the warning chime will sound for several seconds and the sunroof open warn ing will appear on the cluster LCD display Close the sunroof securely when leaving your vehicle i Convenience features OLX2048108 Make sure the sunroof is closed fully when leaving...

Страница 133: ...and lift the hood 2 After it has been raised about halfway it will raise completely by itself Closing the hood 1 Before closing the hood check the following All filler caps in engine compart ment must be correctly installed Gloves rags or any other com bustible material must be removed from the engine compartment 2 Lower the hood halfway lifted approximately 30cm from the closed position and push ...

Страница 134: ...lid and press down until it locks To be sure the tailgate lid is securely fastened always check by trying to pull it up again without pressing the tailgate handle button Always double check to be sure that the hood is firmly latched before driving away Check there is no hood open warning light or message dis played on the instrument clus ter If the hood is not latched while the vehicle is moving t...

Страница 135: ...are that the deformation of the part may cause vehicle damage and a risk of injury WARNING OHYK047009 NEVER allow anyone to occu py the luggage compartment of the vehicle at any time If the tailgate is partially or totally latched and the person is unable to get out serious injury or death could occur due to lack of ventilation exhaust fumes and rapid heat build up or because of exposure to cold w...

Страница 136: ...n switch is in the ON position with the shift button in P Park position To activate or de activate the power tailgate go to User Settings mode and select the Power Tailgate on the LCD display For more details refer to LCD Display in this chapter OLX2048037 For emergencies be fully aware of the location of the emer gency tailgate safety release lever in the vehicle and how to open the tailgate if y...

Страница 137: ...ult in injury to themselves or others or damage the vehicle WARNING Make sure there are no people or objects around the tailgate before operating the power tail gate Wait until the tailgate is opened fully and stopped before loading or unloading cargo or passengers from the vehicle WARNING Do not close or open the power tailgate manually This may cause damage to the power tail gate If it is necess...

Страница 138: ... button shortly Press the tailgate handle switch carrying the smart key with you Closing the tailgate Press the power tailgate button for approximately one second when the tailgate is opened The tailgate will close and lock automatically For emergency stop while operating press the power tailgate button shortly OLX2049040L OLX2048039 OLX2049040L ...

Страница 139: ...pair any part of the power tailgate by yourself We recommend that you contact an authorized HYUNDAI dealer When jacking up the vehicle to change a tire or repair the vehicle do not operate the power tailgate This could cause the power tailgate to operate improperly In cold and wet climates the power tailgate may not work properly due to freezing conditions i The chime will sound if you drive with ...

Страница 140: ...gate automatically again How to reset the power tailgate If the battery has been discharged or disconnected or if the related fuse has been replaced or disconnected for the power tailgate to operate normally reset the power tailgate as follow 1 Press the P Parking button 2 While Pressing the power tailgate inner switch press the tailgate handle switch for more than 3 sec onds the chime will sound ...

Страница 141: ...llowing the below instruction 1 Position the tailgate manually to the height you prefer 2 Press the power tailgate inner switch for more than 3 seconds 3 Close the tailgate manually after hearing the buzzer sound The tailgate will open to the height the driver has set up Always keep the tailgate com pletely closed while the vehicle is in motion If it is left open or ajar poisonous exhaust gases co...

Страница 142: ...ith a smart key the tailgate can be opened with no touch activation using the Smart tailgate system For emergencies be fully aware of the location of the emergency tailgate safety release lever in the vehicle and how to open the tailgate if you are accidentally locked in the luggage compartment No one should be allowed to occupy the luggage compart ment of the vehicle at any time The luggage compa...

Страница 143: ...ng a smart key the hazard warning lights will blink and chime will sound to alert you the smart key has been detected and the tailgate will open Information Do not approach the detecting area if you do not want the tailgate to open If you have unintentionally entered the detecting area and the hazard warning lights and chime starts to operate leave the detecting area with the smart key The tailgat...

Страница 144: ...tivated again If you press the tailgate open button 3 for more than 1 second the tail gate opens If you press the door lock button 1 or tailgate open button 3 when the Smart Tailgate function is not in the Detect and Alert stage the Smart Tailgate function will not be deacti vated In case you have deactivated the Smart Tailgate function by pressing the smart key button and opened a door the Smart ...

Страница 145: ...Fuel filler door Opening the fuel filler door 1 To open the fuel filler door press the center edge of the fuel filler door Information The fuel filler door will open and close only when all doors are unlocked 2 Pull the fuel filler door 1 out to fully open 3 To remove the fuel tank cap 2 turn it counterclockwise You may hear a hissing noise as the pres sure inside the tank equalizes 4 Place the ca...

Страница 146: ... ignite fuel vapors and cause a fire Do not get back into a vehicle once you have begun refuel ing You can generate a build up of static electricity by touching rubbing or sliding against any item or fabric capable of producing static electricity Static electricity discharge can ignite fuel vapors causing a fire If you must re enter the vehicle you should once again eliminate potentially dangerous...

Страница 147: ...lit cigarette in your vehicle while at a gas station especially during refueling Do not over fill or top off your vehicle tank which can cause gasoline spillage If a fire breaks out during refu eling leave the vicinity of the vehicle and immediately con tact the manager of the gas station and then contact the local fire department Follow any safety instructions they provide If pressurized fuel spr...

Страница 148: ...ne coolant temperature gauge 4 Fuel gauge 5 Warning and indicator lights 6 LCD display including Trip computer Type A Type B The actual cluster in the vehicle may differ from the illustration For more details refer to the Gauges and Meters in this chapter OLX2048100L OLX2048101L ...

Страница 149: ...ty is also adjusted The brightness of the instrument panel illumination is displayed If the brightness reaches the maxi mum or minimum level an alarm will sound Gauges and meters Speedometer The speedometer indicates the speed of the vehicle and is calibrated in kilometers per hour km h and or miles per hour MPH Never adjust the instrument cluster while driving This could result in loss of control...

Страница 150: ...revent lug ging and or over revving the engine Do not operate the engine within the tachometer s RED ZONE This may cause severe engine damage Engine coolant temperature gauge This gauge indicates the tempera ture of the engine coolant when the ignition switch is in the ON position NOTICE OLX2048104 Diesel engine Gasoline engine OLX2048105 OLX2048106L For Europe Except Europe OLX2048106 ...

Страница 151: ... curves the fuel gauge pointer may fluctuate or the low fuel warning light may come on earlier than usual due to the movement of fuel in the tank Avoid driving with an extremely low fuel level Running out of fuel could cause the engine to misfire damaging the catalytic converter NOTICE i NOTICE Running out of fuel can expose vehicle occupants to danger You must stop and obtain addi tional fuel as ...

Страница 152: ...tomatic climate control system While pressing the OFF button press the AUTO button for 3 sec onds or more The temperature unit of the instrument cluster and climate control system will change at once Odometer The odometer indicates the total dis tance that the vehicle has been driv en and should be used to determine when periodic maintenance should be performed Distance to empty The distance to em...

Страница 153: ...6 liters 1 6 gallons of fuel are added to the vehicle The distance to empty may vary sig nificantly based on driving condi tions driving habits and condition of the vehicle Transmission shift indicator Automatic transmission shift indicator This indicator displays which shift button position is selected Park P Reverse R Neutral N Drive D Shift Indicator Pop up if equipped The pop up that indicates...

Страница 154: ...n if the parking brake is applied When the parking brake is applied When the brake fluid level in the reservoir is low If the warning light illuminates with the parking brake released it indicates the brake fluid level in the reservoir is low If the brake fluid level in the reser voir is low 1 Drive carefully to the nearest safe location and stop your vehicle 2 With the engine stopped check the br...

Страница 155: ... an authorized HYUNDAI dealer Electronic Brake Force Distribution EBD System Warning Light These two warning lights illuminate at the same time while driving When the ABS and regular brake system may not work normally In this case we recommend that you have the vehicle inspected by an authorized HYUNDAI dealer Parking Brake Brake Fluid Warning Light Driving the vehicle with a warn ing light ON is ...

Страница 156: ...nd that you have the vehicle inspected by an authorized HYUNDAI dealer Information The Electronic Parking Brake EPB Warning Light may illuminate when the Electronic Stability control ESC Indicator Light comes on to indicate that the ESC is not working properly This does not indicate malfunction of the EPB AUTO HOLD Indicator Light if equipped This indicator light illuminates White When you activat...

Страница 157: ...riving with the Malfunction Indicator Lamp MIL on may cause damage to the emission control system which could affect drivability and or fuel economy NOTICE Diesel Engine with DPF if equipped When the Malfunction Indicator Lamp MIL blinks it may stop blinking after driving the vehicle at more than 60km h 40 mph or at more than 2nd gear with 1500 2000 engine rpm for a certain time for about 25 min u...

Страница 158: ...ssure Warning Light This warning light illuminates When the engine oil pressure is low If the engine oil pressure is low 1 Drive carefully to the nearest safe location and stop your vehicle 2 Turn the engine off and check the engine oil level For more details refer to Engine Oil in chapter 7 If the level is low add oil as required If the warning light remains on after adding oil or if oil is not a...

Страница 159: ... Warning Light This warning light illuminates When the fuel tank is nearly empty Add fuel as soon as possible Driving with the Low Fuel Level warning light on or with the fuel level below E Empty or 0 can cause the engine to misfire and damage the catalytic converter if equipped Overspeed Warning Light if equipped This warning light blinks When you drive the vehicle more than 120 km h This is to p...

Страница 160: ...possible For more details refer to Tire Pressure Monitoring System TPMS in chapter 6 Fuel Filter Warning Light for diesel engine This warning light illuminates When water has accumulated inside the fuel filter In this case remove the water from the fuel filter For more details refer to Fuel Filter in chapter 7 When the Fuel Filter Warning Light illuminates engine power vehicle speed idle speed may...

Страница 161: ...n worsen Glow Indicator Light for diesel engine This indicator light illuminates When the engine is being preheat ed with the ignition switch or Engine Start Stop button in the ON position The engine can be started after the glow indicator light goes off The illumination time varies depending on the with the engine coolant temperature air tempera ture and battery condition If the indicator light r...

Страница 162: ...button to the ON position It illuminates for approximately 3 seconds and then goes off When there is a malfunction with the ESC system In this case we recommend that you have the vehicle inspected by an authorized HYUNDAI dealer This indicator light blinks While the ESC is operating For more details refer to Electronic Stability Control ESC in chapter 5 Electronic Stability Control ESC OFF Indicat...

Страница 163: ...econds When the vehicle detects the smart key in the vehicle with the Engine Start Stop button in the ACC or ON position At this time you can start the engine The indicator light goes off after starting the engine This indicator light blinks for a few seconds When the smart key is not in the vehicle At this time you cannot start the engine This indicator light illuminates for 2 seconds and goes of...

Страница 164: ...uthorized HYUNDAI dealer Low Beam Indicator Light if equipped This indicator light illuminates When the headlamps are on High Beam Indicator Light This indicator light illuminates When the headlamps are on and in the high beam position When the turn signal lever is pulled into the Flash to Pass position High Beam Assist HBA indicator light if equipped This warning light illuminates When the high b...

Страница 165: ...is a malfunction with the LED headlamp In this case we recommend that you have the vehicle inspected by an an authorized HYUNDAI dealer This warning light blinks When there is a malfunction with a LED headlamp related part In this case we recommend that you have the vehicle inspected by an an authorized HYUNDAI dealer Continuous driving with the LED Headlamp Warning Light on or blinking can reduce...

Страница 166: ...nd that you have the vehicle inspected by an authorized HYUNDAI dealer For more details refer to Downhill Brake Control DBC System in chapter 5 SPORT Mode Indicator Light This indicator light illuminates When you select SPORT mode as drive mode For more details refer to Drive Mode Integrated Control System in chapter 5 ECO Mode Indicator Light This indicator light illuminates When you select ECO m...

Страница 167: ...g conditions are satisfied White The system operating con ditions are not satisfied Yellow When there is a malfunc tion with the lane keeping assist system In this case we recommend that you have your vehicle inspected by an authorized HYUNDAI dealer For more details refer to Lane Keeping Assist LKA system in chapter 5 Icy Road Warning Light if equipped This warning light is to warn the driver the...

Страница 168: ...ey system This warning message is displayed if the steering wheel does not lock nor mally while the Engine Start Stop but ton changes to the OFF position Press brake pedal to start engine for smart key system and auto matic transmission This warning message is displayed if the Engine Start Stop button changes to the ACC position twice by pressing the button repeatedly without depress ing the brake...

Страница 169: ...rning message is displayed if the brake switch fuse is disconnected You need to replace the fuse with a new one If that is not possible you can start the engine by pressing the Engine Start Stop button for 10 sec onds in the ACC position Shift to P or N to start engine for smart key system and automatic transmission This warning message is displayed if you try to start the engine with the shift bu...

Страница 170: ...oof is open Close the sunroof securely when leaving your vehicle Window open if equipped This warning is displayed if you turn off the engine when any window is open Lights mode This indicator displays which exterior light is selected using the lighting control OLX2048114 OLX2048108 OIK047145L OIK047163L Type A Type B ...

Страница 171: ...urn off the heated steering wheel For more details refer to Heated Steering Wheel in this chapter Low washer fluid if equipped This warning message is displayed if the washer fluid level in the reser voir is nearly empty Have the washer fluid reservoir refilled Low fuel This warning message is displayed if the fuel tank is almost out of fuel When this message is displayed the low fuel level warnin...

Страница 172: ... oil and travelling approximately 50 100 km after the engine warms up we recommend that the system be checked by an authorized HYUNDAI dealer Even if this message is not dis played after the engine has started the engine oil level should be peri odically checked and topped up if required Engine has overheated if equipped This warning message is displayed when the engine coolant tempera ture is abo...

Страница 173: ...rized HYUNDAI dealer For more information refer to Driver Attention Warning DAW system in chapter 5 Check Forward Collision Warning system if equipped This warning message is displayed if there is a problem with the Forward Collision Warning FCW system We recommend that you have the vehicle inspected by an authorized HYUNDAI dealer For more details refer to Forward Collision Avoidance Assist FCA s...

Страница 174: ...ntrol The LCD display modes can be changed by using the control buttons 1 MODE button for changing modes 2 MOVE switch for changing items 3 OK SELECT RESET button for setting or resetting the selected item LCD DISPLAY OTM048414 Type A Type B ...

Страница 175: ...ys the state of Lane Keeping Assist LKA system Driver Attention Warning DAW system Tire pressure For more information refer to Lane Keeping Assist LKA system Driver Attention Warning DAW system in chapter 5 and Tire Pressure Monitoring System TPMS in chapter 6 User Settings In this mode you can change settings of the doors lamps etc Warning This mode displays warning messages related to the Cruise...

Страница 176: ...quipped This mode provides quick guides for the systems in the User Settings mode Select an item press and hold the OK button For more details about each sys tem refer to this Owner s Manual Trip computer mode The trip computer mode displays information related to vehicle driving parameters including fuel economy tripmeter information and vehicle speed For more information refer to Trip Computer i...

Страница 177: ...efer to each system information in chap ter 5 Tire Pressure This mode displays information relat ed to Tire Pressure For more information refer to Tire Pressure Monitoring System TPMS in chapter 6 Driving force distribution 4WD This mode displays information relat ed to 4WD driving force For detailed information refer to the Four Wheel Drive in the chapter 5 OLX2048119 OLX2048120L OLX2048121 ...

Страница 178: ...ure Monitoring System TPMS if equipped High Beam Assist HBA malfunc tion if equipped Forward Collision Avoidance Assist FCA malfunction if equipped User settings mode In this mode you can change the settings of the instrument cluster doors lamps etc 1 Head up display if equipped 2 Driver Assistance 3 Door 4 Lights 5 Sound 6 Convenience 7 Service interval 8 Other Features 9 Languages 10 Reset The i...

Страница 179: ...height of the image displayed Rotation To adjust the angle of the image displayed Brightness To adjust the brightness of the image displayed Content Selection To select the content to be displayed Speed Size Large Medium Small To select the speedometer size displayed Speed Color White Orange Green To select the speedometer color displayed 1 Head Up Display ...

Страница 180: ...le departure alert in chapter 5 Lane Following Assist To activate or deactivate the Lane Following Assist LFA system For more details refer to the Lane Following Assist LFA System in chapter 5 Warning timing To adjust the warning timing of the driver assistance system Normal Later Warning volume To adjust the warning volume of the driver assistance system High Medium Low DAW Driver Attention Warni...

Страница 181: ... View To activate or deactivate the Blind Spot View For more details refer to the Blind Spot View in this chapter SEA Safe Exit Assistance To activate or deactivate the Safe Exit Assistance For more details refer to the Safe Exit Assistance in chapter 5 Active assist Warning only Off For more details refer to Blind spot Collision Avoidance Assist BCA or Blind spot Collision Warning BCW in chapter ...

Страница 182: ...e off All doors will be automatically unlocked when the ignition key is removed from the ignition switch or the Engine Start Stop button is set to the OFF position On Shift to P All doors will be automatically unlocked if the automatic transmission shift button is pressed to P Park position Only when the engine is running Power tailgate If this item is checked the power tailgate function will be a...

Страница 183: ...hapter 4 Lights Items Explanation Welcome sound To activate or deactivate the welcome sound 5 Sound Items Explanation Seat Slide Easy Access Off The seat easy access function is deactivated Normal Extended When you turn off the engine the driver s seat will automatically move rearward short Normal or long Extended for you to enter or exit the vehicle more comfortably For more details refer to Driv...

Страница 184: ... wireless charging system in the front seat For more details refer to Wireless cellular phone charging system in this chapter Wiper Lights Display To activate or deactivate the Wiper Light mode When activated the LCD display shows the selected Wiper Light mode whenever you changed the mode Auto rear wiper reverse Off The Auto Rear Wiper function will be deactivated ON If you press the R Reverse bu...

Страница 185: ...YUNDAI dealer If the service interval is activated and the time and distance is adjusted messages are displayed in the following sit uations each time the vehicle is turned on Service in Displayed to inform the driver the remaining mileage and days to service Service required Displayed when the mileage and days to service has been reached or passed Information If any of the following conditions oc...

Страница 186: ...speed exceeds 1 km h 1 mph For more information refer to Trip Computer in this chapter Fuel Economy Unit To select the fuel economy unit km L L 100km MPG Temperature Unit To select the temperature unit C F Tire Pressure Unit To select the tire pressure unit psi kPa bar 8 Other features Items Explanation Language Choose the language You can choose the language in AVN device if equipped 9 Language i...

Страница 187: ...n the trip computer for example Average Vehicle Speed resets if the battery is disconnected Trip modes To change the trip mode toggle the switch on the steering wheel i TRIP COMPUTER OTM048414 Tripmeter Average Fuel Economy Elapsed Time Accumulated Info Tripmeter Average Fuel Economy Elapsed Time Drive Info Average Fuel Economy Instant Fuel Economy Fuel Economy Digital Speedometer Smart Shift ...

Страница 188: ...FF the engine After Refueling The average fuel economy will reset automatically when driving speed exceeds 1 km h after adding 6 liters 1 6 gal lons of fuel or more Information The average fuel economy may be inaccurate when the vehicle drives shorter than 300 meters 0 19 miles after turning ON the Engine Start Stop button Instant Fuel Economy 2 This mode displays the instant fuel economy during t...

Страница 189: ...formation is combined for each ignition cycle However when the engine has been OFF for 4 hours or longer the Drive Info screen will reset To manually reset the information press and hold the OK button when viewing the Drive Info The trip dis tance the average fuel economy and total driving time will reset simultane ously The driving information will continue to be counted while the engine is still...

Страница 190: ...ital Speedometer This message shows the speed of the vehicle km h MPH Smart Shift This mode displays the currently selected drive mode For more details refer to Drive Mode Integrated Control System in chapter 5 OIK047151 OIK047179L ...

Страница 191: ...installed inside the vehicle or there is incoming light from outside of the vehicle The driver wears glasses The driver wears contact lenses When it is difficult to read the head up display information adjust the head up display angle or the head up display brightness level in the User Settings Mode For more information refer to LCD Display in this chapter OLX2048051L Do not tint the front wind sh...

Страница 192: ...ed 3 Speedometer 4 Cruise setting speed if equipped 5 Smart Cruise Control SCC infor mation if equipped 6 Lane Keeping Assist LKA system information if equipped 7 Blind spot Collision Warning BCW system information if equipped 8 Warning lights Low fuel 9 Audio Video information When replacing the front wind shield glass of the vehicles equipped with the head up dis play replace it with a wind shie...

Страница 193: ... Turn TBT naviga tion information will not be displayed on the LCD Display Head Up Display Setting On the LCD display you can change the head up display settings as fol lows Enable Head up display Display Height Rotation Brightness Content Selection Speed Size Speed Color For more details refer to LCD Display in this chapter i ...

Страница 194: ... of light outside the vehicle Even with the AUTO light feature in operation it is recommended to manually turn ON the lamps when driving at night or in a fog or when you enter dark areas such as tun nels and parking facilities Do not cover or spill anything on the sensor 1 located on the instrument panel Do not clean the sensor using a window cleaner the cleanser may leave a light film which could...

Страница 195: ...n to turn on the headlamp High beam operation To turn on the high beam headlamp push the lever away from you The lever will return to its original position The high beam indicator will light when the headlamp high beams are switched on To turn off the high beam headlamp pull the lever towards you The low beams will turn on i OAE046469L OAE046467L OAE046453L Do not use high beam when there are othe...

Страница 196: ...h Beam Assist HBA will turn on when vehicle speed is above 40km h 25mph 1 If the light switch is pushed away when the High Beam Assist HBA is operating the High Beam Assist HBA will turn off and the high beam will be on continuously 2 If the light switch is pulled towards you when the high beam is off the high beam will turn on without the High Beam Assist HBA canceled When you let go of the light...

Страница 197: ... h 22mph Warning light and message When the High Beam Assist HBA is not working properly the warning message will come on for a few sec ond After the message disappears the master warning light will illu minate We recommend that you take your vehicle to an authorized HYUNDAI dealer and have the system checked OOS047127L The system may not operate normally in the following condi tions When the ligh...

Страница 198: ...ight illu minates if equipped When the front visibility is poor When the lamp of the on coming or vehicle in front is covered with dust snow or water When the light from the on com ing or vehicle in front is not detected because of exhaust fume smoke fog snow etc When the front window is cov ered with foreign matter When it is hard to see because of fog heavy rain or snow etc Do not disassemble a ...

Страница 199: ...nal lever slightly and then release it The lane change signals will blink 3 5 or 7 times You can activate deactivate the One Touch Turn Signal function or choose the number of blinks 3 5 or 7 from the User Settings mode on the LCD display For more details refer to LCD Display in this chapter OTLE045284 Do not place objects on the crash pad that reflect light such as mirrors white paper etc The sys...

Страница 200: ... OFF O or AUTO if equipped position after the engine is turned off If necessary to keep the lamps on turn the position lamps OFF and ON again using the headlamp switch on the steering column after the engine is turned off Headlamp delay function if equipped If you place the ignition switch to the ACC or OFF position with the head lamps ON the headlamps and or position lamps remain on for about 5 m...

Страница 201: ...arking brake is engaged 3 The engine is turned off Headlamp leveling device if equipped Manual type To adjust the headlamp beam level according to the number of the pas sengers and loading weight in the luggage area turn the beam leveling switch The higher the number on the switch position the lower the headlamp beam level Always keep the head lamp beam at the proper leveling position otherwise he...

Страница 202: ... possession You can activate or deactivate Welcome Light function from the User Settings mode on the LCD dis play For more details refer to LCD Display in this chapter Headlamp and position lamp When the headlamp lamp switch in the headlamp or AUTO position is on and all doors and tailgate are locked and closed the position lamp and headlamp will come on for 15 seconds when the door unlock button ...

Страница 203: ...ome on when the front or rear doors are opened if the engine is running or not When doors are unlocked by the smart key the front and rear lamps come on for approximately 30 sec onds as long as any door is not opened The front and rear room lamps go out gradually after approxi mately 30 seconds if the door is closed However if the ignition switch is in the ON position or all doors are locked the f...

Страница 204: ...on at all times DOOR The luggage compartment lamp comes on when the tailgate is opened OFF The luggage compartment lamp is off Vanity mirror lamp if equipped Opening the lid of the vanity mirror will automatically turn on the mirror light OLX2048067 OLX2048070 ODH043356 To prevent unnecessary charg ing system drain close the van ity mirror cover after using the mirror CAUTION ...

Страница 205: ...s and tailgate are closed and locked the puddle lamp will come on for 15 seconds if the door is unlocked by the remote key or smart key or outside door handle button For more details refer to Welcome System in this chapter Escort light When the vehicle is turned OFF and the driver s door is opened the pud dle lamp will come on for 30 sec onds If the driver s door is closed within the 30 seconds th...

Страница 206: ...High wiper speed B Intermittent control wipe time adjustment C Wash with brief wipes front D Rear wiper control 2 HI High wiper speed 1 LO Low wiper speed O OFF Off E Wash with brief wipes rear if equipped WIPERS AND WASHERS Front windshield wiper washer Rear windshield wiper washer OTM048446L OTLE045161 OTM048447L OTLE045508 Type A Type B Type A Type B ...

Страница 207: ...d washer it may damage the wiper and washer system AUTO Automatic control if equipped The rain sensor located on the upper end of the windshield glass senses the amount of rainfall and controls the wiping cycle for the proper inter val The wiper operation time will be automatically controlled depends on rainfall When the rain stops the wiper stops To vary the sensitivity setting turn the sensitivi...

Страница 208: ...cording to sudden ambient light change made by stone and dust while driving Windshield washers In the OFF O position pull the lever gently toward you to spray washer fluid on the windshield and to run the wipers 1 3 cycles The spray and wiper operation will continue until you release the lever If the washer does not work you may need to add washer fluid to the washer fluid reservoir NOTICE When th...

Страница 209: ... O OFF Off To prevent possible damage to the washer pump do not operate the washer when the fluid reservoir is empty To prevent possible damage to the wipers or windshield do not operate the wipers when the windshield is dry To prevent damage to the wiper arms and other compo nents do not attempt to move the wipers manually To prevent possible damage to the wipers and washer sys tem use anti freez...

Страница 210: ...ray and wiper operation will continue until you release the lever if equipped Auto rear wiper if equipped The rear wiper will operate while the vehicle is in reverse with the front wipers ON by selecting the function on the LCD display Go to User Settings Convenience Auto Rear Wiper reverse OTM048454L OTLE045166 Type A Type B ...

Страница 211: ...only a mild soap or neutral detergent and rinse thoroughly with water Information Always keep the camera lens clean The camera may not work normally if the lens is covered with dirt water or snow However do not use chemical solvents such as strong detergents containing high alkaline or volatile organic sol vents gasoline acetone etc This may damage the camera lens i NOTICE OLX2048056 OLX2048057L T...

Страница 212: ... deactivated when You press the button 1 again You press the audio or AVN system button 2 When the vehicle is reversing the screen switches to rear parking assist screen Warning indicator in the screen is indicated when The tailgate is open The driver passenger s door is open Rear View Monitor Top view When you touch the icon 1 the top view is displayed on the screen and shows the distance from th...

Страница 213: ... tion to prevent a collision Always pay close attention when the vehicle is driven close to objects particularly pedestri ans and especially children Be aware that some objects may not be visible on the screen or be detected by the sensors due to the objects distance size or material all of which can limit the effective ness of the sensor WARNING The Rear View Monitor system is a supplementary dri...

Страница 214: ... cm to 60 cm 47 in to 24 in from the rear bumper Buzzer beeps intermittently When an object is 60 cm to 30 cm 24 in to 12 in from the rear bumper Buzzer beeps more frequently When an object is within 30 cm 12 in of the rear bumper Buzzer beeps continuously The indicator may differ from the illustration depending on objects or sensors status If the indicator blinks we recommend that you have your v...

Страница 215: ...ng Distance Warning Reverse system malfunction when Driving on uneven road surfaces such as unpaved roads gravel bumps or gradient Objects generating excessive noise such as vehicle horns loud motor cycle engines or truck air brakes can interfere with the sensor Heavy rain or water spray is present Wireless transmitters or mobile phones are present near the sensor The sensor is covered with snow A...

Страница 216: ...cted The Parking Distance Warning Reverse system may malfunction if the vehicle bumper height or sensor installation has been modified or damaged Any non factory installed equipment or accessories may also interfere with the sensor perform ance The sensor may not recognize objects less than 30 cm 11 in from the sensor or it may sense an incor rect distance Use caution When the sensor is frozen or ...

Страница 217: ...ll activate when the Parking Distance Warning Reverse Forward system button is pressed with the engine running The Parking Distance Warning Reverse Forward system button turns on automatically and activates the Parking Distance Warning Reverse Forward system when you press the R Reverse button ALWAYS look around your vehi cle to make sure there are no objects or obstacles before moving the vehicle...

Страница 218: ...be checked by an authorized HYUNDAI dealer If the audible warning does not sound or if the buzzer sounds inter mittently when shifting into R Reverse position this may indicate a malfunction with the Parking Distance Warning Reverse Forward system If this occurs we recommend that you have your vehicle checked by an authorized HYUNDAI dealer as soon as possible NOTICE Distance from object Warning i...

Страница 219: ...r than 14 cm in diameter The following objects may not be recognized by the sensor Sharp or slim objects such as ropes chains or small poles Objects which tend to absorb sen sor frequency such as clothes spongy material or snow Parking Distance Warning Reverse Forward system precautions The Parking Distance Warning Reverse Forward system may not sound consistently depending on the speed and shapes...

Страница 220: ...nformation When vehicle speed is over 15km h the system will turn off The system will not automatically turn on again even though vehicle speed gets below 15 km h Push the button 1 indicator ON again to turn on the system When the vehicle is backing up the system will turn ON regardless of vehicle speed or button status However if vehicle speed is over 15 km h when driving forward the SVM system w...

Страница 221: ...icle s speed is under 15 km h and you press the 2 on the screen The system is deactivated when You press the SVM button 1 indi cator OFF again You press the 2 on the screen again You press the AVN system button 3 Information If vehicle speed is over 15 km h 9 mph the rear image stays ON when the rear view was on the screen if other modes top front wide front right and front left of SVM system was ...

Страница 222: ...modes of SVM system was ON the screen for setting the initial rear view mode appears When the shift button is shifted from R Reverse to D Drive the screen of the previous mode is dis played A warning appears on the SVM sys tem when the tailgate is opened the driver passenger s door is opened the outside rearview mirror is folded The Rear View Monitor system is a supplementary driving assist system...

Страница 223: ...he Blind spot View Monitor system turns on and gets ready to be activated when the User Settings Driver Assistance Blind spot safety Blind spot view is selected on the cluster The system stops operation when the setting is deactivated OLX2048062L Like all assistance systems BVM system has limitations Over reliance on the system may result in a collision Always look around your vehi cle to make sur...

Страница 224: ...e rear window defroster press the rear window defroster button located in the cen ter facia switch panel The indicator on the rear window defroster but ton illuminates when the defroster is ON To turn off the defroster press the rear window defroster button again Information If there is heavy accumulation of snow on the rear window brush it off before operating the rear defroster The rear window d...

Страница 225: ...ontrol knob 2 Temperature control knob 3 Air conditioning button 4 Mode selection button 5 Front windshield defroster button 6 Rear window defroster button 7 Air intake control button 8 Rear climate control button Front MANUAL CLIMATE CONTROL SYSTEM IF EQUIPPED ...

Страница 226: ...Heating Cooling 3 Set the temperature control to the desired position 4 Set the air intake control to the outside fresh air position 5 Set the fan speed control to the desired speed 6 If air conditioning is desired turn the air conditioning system on Mode selection 4 OLX2049410L The mode selection button controls the direction of the air flow through the ventilation system ...

Страница 227: ...e air flow is directed to the floor and the windshield with a small amount directed to the side window defrosters Front defroster 5 A D Most of the air flow is directed to the windshield with a small amount of air directed to the side window defrosters A C MAX Level B D if equipped To operate the A C MAX turn the temperature control knob to extreme left Air flow is directed toward the upper body a...

Страница 228: ...tion selected air from the passenger compartment will be drawn through the heat ing system and heated or cooled according to the function selected Outside fresh air position With the outside fresh air position selected air enters the vehicle from outside and is heated or cooled according to the function selected Information Using the system in the fresh air posi tion is recommended Prolonged opera...

Страница 229: ... the air conditioning sys tem off Rear climate control button If you press the rear climate control button rear passengers can control the rear climate system NOTICE Continued climate control system operation in the recir culated air position may allow humidity to increase inside the vehicle which may fog the glass and obscure visibility Do not sleep in a vehicle with the air conditioning or heati...

Страница 230: ...selection button 3 Temperature control button 4 Fan speed control button If you press the rear climate control button of the front climate control sys tem rear passengers can control the rear climate system by using the rear climate control system 2nd row air conditioning control Type A Type B ...

Страница 231: ...Pressing the OFF but ton turns off the fan Temperature control 1 Press the rear climate control but ton of the front climate control sys tem 2 To turn off the 3rd row air condi tioning control system press the 3rd row air conditioning ON OFF button once more located on the front climate control panel or set the fan speed to the OFF position with the 3rd row fan speed switch indicator light on the ...

Страница 232: ...ugh the ventilation system Air flow is directed toward the upper body from the rear headlining Air flow is directed toward the upper body and the flow Air flow is directed toward the flow You can adjust the front climate con trol system for heating or cooling to passengers on 2nd row seats The air flow is directed from the floor OLX2048332L OLX2048313 OLX2048333L ...

Страница 233: ...sired speed Heating 1 Set the mode to the position 2 Set the air intake control to the outside fresh air position 3 Set the temperature control to the desired position 4 Set the fan speed control to the desired speed 5 If dehumidified heating is desired turn the air conditioning system if equipped on If the windshield fogs up set the mode to the or position OLX2048314 No Diffusion lever A Directio...

Страница 234: ...ur vehicle on the label located inside of the hood Refer to chapter 8 for the location of the air conditioning refrigerant label The refrigerant system should only be serviced by trained and certified technicians to insure proper and safe operation The refrigerant system should be serviced in a well ventilated place The air conditioning evaporator cooling coil shall never be repaired or replaced w...

Страница 235: ...ox It filters the dust or other pollutants that enter the vehicle through the heating and air condi tioning system We recommend that the climate con trol air filter be replaced by an author ized HYUNDAI dealer according to the maintenance schedule If the vehicle is being driven in severe conditions such as dusty or rough roads more frequent climate control filter inspections and changes are requir...

Страница 236: ...2 Amount of refrigerant 3 Classification of compressor lubricant 4 Caution 5 Service manual Vehicles equipped with R 134a Since the refrigerant is operated at very high pressure the air conditioning system should only be serv iced by trained and certified technicians All refrigerants should be reclaimed with proper equipment Venting refrigerants directly to the atmosphere is harmful to individuals...

Страница 237: ...ger s temperature control knob 3 AUTO automatic control button 4 SYNC button 5 OFF button 6 Front windshield defroster button 7 Air conditioning button 8 Fan speed control button 9 Mode selection button 10 Rear climate control button 11 Rear window defroster button 12 Air intake control button 13 Climate control information screen Front ...

Страница 238: ...olled manually while other func tions operate automatically For your convenience and to improve the effectiveness of the climate con trol use the AUTO button and set the temperature to 23 C 73 F Information Never place anything near the sensor to ensure better control of the heating and cooling system Manual heating and air condi tioning The heating and cooling system can be controlled manually by...

Страница 239: ...the air discharged from the outlet Bi Level B C D E Air flow is directed towards the face and the floor Floor Level A C D E Most of the air flow is directed to the floor with a small amount of the air being directed to the windshield and side window defrosters OLX2049304L The mode selection button controls the direction of the air flow through the ventilation system ...

Страница 240: ...he vent control lever to the left end the outlet vents can be closed Temperature control 1 2 The temperature will increase by turning the knob to the right The temperature will decrease by turning the knob to the left Adjusting the driver and passenger side temperature equally Press the SYNC button 4 to adjust the driver and passenger side temperature equally The passenger side temperature will be...

Страница 241: ...resh air position or recirculated air position To change the air intake control posi tion push the control button Recirculated air position With the recirculated air position selected air from the passenger com partment will be drawn through the heating sys tem and heated or cooled according to the function selected Outside fresh air position With the outside fresh air position selected air enters...

Страница 242: ... operate the mode and air intake buttons as long as the ignition switch is in the ON position Rear climate control button If you press the rear climate control button rear passengers can control the rear climate system NOTICE Continued climate control system operation in the recir culated air position may allow humidity to increase inside the vehicle which may fog the glass and obscure visibility ...

Страница 243: ...ontrol system rear passengers can control the rear climate system by using the rear climate control system When you want to use the rear climate control heating and air conditioning 1 Press the air conditioning button of the front climate control 2 Adjust the rear climate control temperature air direction and fan speed 3 Check that Lock Control is not selected in the AVN or Audio If Lock Control i...

Страница 244: ...ontrol button The higher the fan speed is the more air is delivered Pressing the OFF but ton turns off the fan Temperature control 1 Press the rear climate control but ton of the front climate control sys tem 2 The temperature of delivered air can be set to the desired tempera ture by pushing the temperature control button Pressing the OFF button turns off the fan OLX2048311 OLX2048323 OLX2048324 ...

Страница 245: ...e desired temperature OFF mode Push the OFF button 5 to turn the rear climate control system off Mode selection You can select the direction of the air flow through the ventilation system You can adjust the front climate con trol system for heating or cooling to passengers on 2nd row seats The air flow is directed from the floor Air flow is directed toward the upper body from the rear headlining A...

Страница 246: ...o the desired position 4 Set the fan speed control to the desired speed 5 If dehumidified heating is desired turn the air conditioning system on If the windshield fogs up set the mode to the or position OLX2048314 No Diffusion lever A Direction thumbwheel B Description 1 Open Close The air is delivered widely toward the sur roundings of rear passengers However the fan speed may be decreased 2 Open...

Страница 247: ...l to maintain maximum comfort Information Your vehicle is filled with R 134a according to the regulation in your country at the time of production You can find out which air conditioning refrigerant is applied to your vehicle on the label located inside of the hood Refer to chapter 8 for the location of the air conditioning refrigerant label The refrigerant system should only be serviced by traine...

Страница 248: ... inside the vehicle by operating the air conditioning system with the win dows and sunroof closed Use the air conditioning system every month for a few minutes to ensure maximum system perform ance If you operate the air conditioner excessively the difference between the temperature of the outside air and that of the wind shield could cause the outer sur face of the windshield to fog up causing lo...

Страница 249: ...ance of the air conditioning system Therefore if abnormal operation is found we recommend that the sys tem be inspected by an authorized HYUNDAI dealer It is important that the correct type and amount of oil and refrig erant is used Otherwise damage to the compressor and abnormal system operation may occur To prevent damage the air condition ing system in your vehicle should only be serviced by tr...

Страница 250: ...s applied to your vehi cle on the label located inside of the hood Each symbols and specification on the air conditioning refrigerant label is represented as below 1 Classification of refrigerant 2 Amount of refrigerant 3 Classification of compressor lubricant 4 Caution 5 Service manual OLX2088007 OHCM059040 Example ...

Страница 251: ...perature is still cold after starting then a brief engine warm up period may be required for the vented air flow to become warm or hot Manual climate control system To defog inside windshield 1 Select any fan speed except 0 position 2 Select the desired temperature 3 Press the defroster button 4 The outside fresh air will be select ed automatically Additionally the air conditioning if equipped wil...

Страница 252: ... inside windshield 1 Select the desired fan speed 2 Select the desired temperature 3 Press the defroster button 4 The air conditioning will turn on according to the detected ambient temperature outside fresh air position and higher fan speed will be selected automatically If the air conditioning outside fresh air position and higher fan speed are not selected automatically adjust the corresponding...

Страница 253: ... temperature to the extreme hot HI position 3 Press the defroster button 4 The air conditioning will turn on according to the detected ambient temperature and outside fresh air position will be selected auto matically If the position is selected lower fan speed is controlled to higher fan speed OLX2048321 ...

Страница 254: ...he indicator will blink 3 times Sunroof inside air recirculation if equipped When the sunroof is opened out side fresh air will be automatically selected At this time if you press the air intake control button recirculated air position will be selected but will change back to outside fresh air after 3 minutes When the sunroof is closed the air intake position will return to the orig inal position ...

Страница 255: ...he vehicle is exposed to hot tem peratures for extended periods WARNING ALWAYS keep the storage com partment covers closed secure ly while driving Items inside your vehicle are moving as fast as the vehicle If you have to stop or turn quickly or if there is a crash the items may fly out of the compartment and may cause an injury if they strike the driver or a passenger WARNING ALWAYS close the glo...

Страница 256: ...onvenience features Luggage tray if equipped You can place a first aid kit a reflec tor triangle front tray tools etc in the box for easy access Grasp the handle on the top of the cover and lift it OLX2048076 ...

Страница 257: ...at you use parts for replacement from an authorized HYUNDAI dealer Only a genuine HYUNDAI lighter or the equivalent specified for your vehicle should be used in the cigarette lighter socket The use of plug in accessories shavers hand held vacuums and coffee pots etc may damage the socket or cause electrical failure NOTICE OPDE046419 Putting lit cigarettes or matches in an ashtray with other com bu...

Страница 258: ... the front console Push in the cup supporter securely after use Rear 2nd row 3rd row Cups or small beverages cups may be placed in the cup holders OLX2048079 Rear 2nd row Rear 3rd row OLX2048080 OLX2048077 OLX2048078 Do not place thin objects coin card etc on the cover These may fall into the inside when the cover is operated CAUTION ...

Страница 259: ... abrupt starting and braking when the cup holder is in use to prevent spilling your drink If hot liquid spills you could be burned Such a burn to the driver could cause loss of vehicle control result ing in an accident Do not place uncovered or unsecured cups bottles cans etc in the cup holder containing hot liquid while the vehicle is in motion Injuries may result in the event of a sudden stop or...

Страница 260: ...he bracket 1 and swing it to the side 2 To use the vanity mirror pull down the sunvisor and slide the mirror cover 3 Adjust the sunvisor forward or back ward 4 as needed Use the ticket holder 5 to hold tickets Information Close the vanity mirror cover securely and return the sunvisor to its original position after use Do not put several tickets in the ticket holder at one time This could cause dam...

Страница 261: ...ric capacity Adjust the air conditioner or heater to the lowest operating level when using the power outlet Close the cover when not in use NOTICE OLX2048081 Front Center console storage OLX2049411L OLX2049083L Avoid electrical shocks Do not place your fingers or foreign objects pin etc into a power outlet or touch the power outlet with a wet hand WARNING The power outlet is designed to provide po...

Страница 262: ...ectronic devices with reverse current protection The current from the battery may flow into the vehicle s electrical electronic sys tem and cause system malfunc tion USB charger if equipped OLX2048084 Front Rear 2nd row OLX2048085L Center console storage OLX2049412L Rear 3rd row left side OLX2048086L The USB charger is designed to recharge batteries of small size electrical devices using a USB cab...

Страница 263: ...ACC ON position To charge a cellular phone The wireless cellular phone charging system charges only the Qi enabled cellular phones Read the label on the cellular phone accessory cover or visit your cellular phone manufacturer s website to check whether your cellular phone supports the Qi technology The wireless charging process starts when you put a Qi enabled cellular phone on the wireless chargi...

Страница 264: ...e phone in the middle of the mat for optimal charging performance If your cell phone is off to the side the charging rate may be less and in some cases the cell phone may experi ence higher heat conduction In some cases the wireless charging may stop temporarily when the Remote Key or Smart Key is used either when starting the vehicle or locking unlocking the doors etc When charging certain cellul...

Страница 265: ...y of the object placed on the charging pad It does not affect your vehicle or the cellular phone in any way Information If the ignition switch is in the OFF position the charging also stops Clock You can set the time through audio or AVN For more details please refer to the separate manual that was sup plied with your vehicle Clothes hanger if equipped These hangers are not designed to hold large ...

Страница 266: ...k floor mats on top of one another e g all weath er rubber mat on top of a car peted floor mat Only a single floor mat should be installed in each position IMPORTANT Your vehicle was manufactured with driver s side floor mat anchors that are designed to securely hold the floor mat in place To avoid any interference with pedal operation HYUNDAI recommends that the HYUNDAI floor mat designed for use...

Страница 267: ... Pull the cargo security screen towards the rear of the vehicle by the handle 1 2 Insert the guide pin 2 into the guide 3 Information Pull out the cargo security screen with the handle in the center to prevent the guide pin from falling out of the guide i To avoid eye injury DO NOT overstretch the luggage net ALWAYS keep your face and body out of the luggage net s recoil path DO NOT use the lug ga...

Страница 268: ...he luggage tray and keep the cargo security screen in the tray To remove the cargo security screen from the luggage tray 1 Pull up the screen board 2 Push in the guide pin 3 While pushing the guide pin pull out the cargo security screen Since the cargo security screen may be damaged or malformed do not put luggage on it when it is used NOTICE i OTM048438L Do not place objects on the cargo security...

Страница 269: ... if only one side of the curtain is hooked Do not let any foreign material get in between the vehicle and side curtain The side curtain may not be lifted up Do not hang other objects except the side curtain When using the side curtain and turning it back into place pulling the curtain or applying force may cause damage to the side curtain When lower ing the curtain be sure to place the curtain kno...

Страница 270: ...in excess of the specified weight limit on the roof rack may damage your vehicle The vehicle center of gravity will be higher when items are loaded onto the roof rack Avoid sudden starts braking sharp turns abrupt maneuvers or high speeds that may result in loss of vehicle control or rollover resulting in an accident Always drive slowly and turn corners carefully when carry ing items on the roof r...

Страница 271: ...media System Multimedia system 4 2 USB port 4 2 Antenna 4 2 Steering wheel audio controls 4 3 Bluetooth Wireless Technology hands free 4 4 Audio Video Navigation system AVN 4 4 How vehicle radio works 4 5 4 ...

Страница 272: ...the portable audio device Antenna Pole antenna The pole antenna receives both AM and FM broadcast signals This antenna pole is removable Rotate the antenna in a counter clockwise direction to remove it Rotate it in a clockwise direction to reinstall it Before entering a place with a low height clearance or a car wash remove the antenna pole by rotating it counterclockwise If not the antenna may be...

Страница 273: ...taneously VOLUME VOL 1 Move the VOLUME toggle switch up to increase volume Move the VOLUME toggle switch down to decrease volume SEEK PRESET 2 If the SEEK PRESET toggle switch is moved up or down and held for 0 8 seconds or more it will function in the following modes RADIO mode It will function as the AUTO SEEK select switch It will SEEK until you release the switch MEDIA mode It will function as...

Страница 274: ...d information for audio control buttons are described in the separately supplied manual with vehicle Bluetooth Wireless Technology hands free You can use the phone wirelessly by using the Bluetooth Wireless Technology 1 Call Answer button 2 Call end button 3 Microphone Audio AVN Detailed information for the Bluetooth Wireless Technology hands free is described in the manual supplied separately Aud...

Страница 275: ...the signal coming to your vehi cle may not be strong and clear This can be due to factors such as the distance from the radio station closeness of other strong radio sta tions or the presence of buildings bridges or other large obstructions in the area AM MW LW reception AM broadcasts can be received at greater distances than FM broad casts This is because AM radio waves are transmitted at low fre...

Страница 276: ...nother stronger station Flutter Static Weak FM signals or large obstructions between the transmitter and your radio can dis turb the signal causing static or fluttering noises to occur Reducing the treble level may lessen this effect until the disturbance clears Station Swapping As a FM signal weakens another more powerful signal near the same frequency may begin to play This is because your radio...

Страница 277: ...must be fitted When a cellular phone or a radio set is used with an internal antenna alone it may interfere with the vehicle s electrical sys tem and adversely affect safe operation of the vehicle Bluetooth Wireless Technology The Bluetooth word mark and logos are registered trademarks owned by Bluetooth SIG Inc and any use of such marks by HYUNDAI is under license Other trademarks and trade names...

Страница 278: ... Hill Start Assist Control HAC 5 44 Downhill Brake Control DBC 5 44 Good braking practices 5 46 Four wheel drive 4WD 5 48 Multi Terrain Control 5 48 Multi Terrain Control mode 5 48 4WD operation 5 50 LCD display message 5 53 Emergency precautions 5 54 Reducing the risk of a rollover 5 55 Drive mode integrated control system 2WD 5 57 Drive mode integrated control system 4WD 5 62 Forward collision a...

Страница 279: ...message 5 124 Driver s attention 5 125 LKA system function change 5 126 Lane following assist LFA system 5 128 LFA operation 5 130 Warning message 5 131 Limitations of the system 5 133 Driver attention warning DAW system 5 135 System setting and activation 5 135 Resetting the system 5 136 System standby 5 136 System malfunction 5 137 Cruise control 5 139 Cruise Control operation 5 139 Smart cruise...

Страница 280: ...ooth cornering 5 164 Driving at night 5 164 Driving in the rain 5 164 Driving in flooded areas 5 165 Highway driving 5 165 Reducing the risk of a rollover 5 166 Winter driving 5 167 Snow or icy conditions 5 167 Winter Precautions 5 169 Trailer towing 5 171 Vehicle weight 5 172 Overloading 5 172 5 ...

Страница 281: ...er Do not run the engine in an enclosed area Letting the engine idle in your garage even with the garage door open is a hazardous practice Run the engine only long enough to start the engine and to move the vehicle out of the garage Avoid idling the engine for prolonged periods with people inside the vehicle If it is necessary to idle the engine for a prolonged period with people inside the vehicl...

Страница 282: ...k that all passengers have fastened their seat belt Check the gauges and indicators in the instrument panel and the mes sages on the instrument display when the ignition switch is in the ON position Check that any items you are car rying are stored properly or fas tened down securely BEFORE DRIVING To reduce the risk of SERIOUS INJURY or DEATH take the fol lowing precautions ALWAYS wear your seat ...

Страница 283: ...ment Just one drink can reduce your ability to respond to changing conditions and emergencies and your reac tion time gets worse with each additional drink Driving while under the influ ence of drugs is as dangerous or more dangerous than driving under the influence of alcohol WARNING You are much more likely to have a serious accident if you drink or take drugs and drive If you are drinking or ta...

Страница 284: ...ake systems This may lead to loss of directional control and braking function which could cause an accident Before leaving the driver s seat always make sure the shift button is P Park posi tion apply the parking brake and turn the ignition switch to the LOCK position Unexpected vehicle move ment may occur if these pre cautions are not followed WARNING To reduce the risk of SERIOUS INJURY or DEATH...

Страница 285: ...s experienced turning the ignition switch to the ACC position turn the key while turning the steering wheel right and left to release ON This is the normal key position when the engine has started All features and accessories are usable The warning lights can be checked when you turn the ignition switch from ACC to ON Do not leave the ignition switch in the ON position when the engine is not runni...

Страница 286: ...n the START position for more than 10 seconds Wait 5 to 10 seconds before trying again Do not turn the ignition switch to the START position with the engine running It may damage the starter If traffic and road conditions permit you may put the shift button in the N Neutral position while the vehicle is still moving and turn the ignition switch to the START position in an attempt to restart the en...

Страница 287: ...lerate the engine immediately after starting the engine If the engine is cold idle for sever al seconds before sufficient lubri cation is ensured in the turbo charger unit 2 After high speed or extended driv ing that requires heavy engine load idle the engine about 1 minute before turning the engine off This idle time will allow the tur bocharger to cool prior to shutting the engine off Do not tur...

Страница 288: ...brake pedal by pressing the Engine Start Stop button with the shift button in the N Neutral position WARNING NEVER press the Engine Start Stop button while the vehicle is in motion except in an emer gency This will result in the engine turning off and loss of power assist for the steering and brake systems This may lead to loss of directional con trol and braking function which could cause an acci...

Страница 289: ...e warning chime will sound ACC Press the Engine Start Stop button when the button is in the OFF position without depressing the brake pedal Some electrical accessories are usable The steering wheel unlocks If you leave the Engine Start Stop button in the ACC position for more than one hour the battery power will turn off automatically to prevent the bat tery from discharging If the steering wheel ...

Страница 290: ... is not running to pre vent the battery from discharging START To start the engine depress the brake pedal and press the Engine Start Stop but ton with the shift button in the P Park or in the N Neutral position For your safety start the engine with the shift button in the P Park position If you press the Engine Start Stop button without depressing the brake pedal the engine does not start and the...

Страница 291: ...key with you 2 Make sure the parking brake is applied 3 Make sure the shift button is in P Park 4 Depress the brake pedal 5 Press the Engine Start Stop button Information Do not wait for the engine to warm up while the vehicle remains station ary Start driving at moderate engine speeds Steep accelerating and decel erating should be avoided Always start the vehicle with your foot on the brake pedal...

Страница 292: ...erate the engine immediately after starting the engine If the engine is cold idle for sever al seconds before sufficient lubri cation is ensured in the turbo charger unit 2 After high speed or extended driv ing that requires heavy engine load idle the engine about 1 minute before turning the engine off This idle time will allow the tur bocharger to cool prior to shutting the engine off Do not turn...

Страница 293: ...le to replace the fuse you can start the engine by pressing and holding the Engine Start Stop button for 10 seconds with the Engine Start Stop button in the ACC position For your safety always depress the brake and or clutch pedal before starting the engine Information If the smart key battery is weak or the smart key does not work correctly you can start the engine by pressing the Engine Start St...

Страница 294: ...peeds and one reverse speed The individual speeds are selected automatically in the D Drive posi tion AUTOMATIC TRANSMISSION OLX2058003 The automatic transmission shift button or interior parts might get hot when a vehicle is parked outside during hot weather Always be careful when the vehicle is hot WARNING ...

Страница 295: ... open the driver s door with the seat belt unfas tened the gear may be not shifted to P Park position automatically for protecting the automatic transmis sion NOTICE To reduce the risk of serious injury or death ALWAYS check the surround ing areas near your vehicle for people especially children before shifting a vehicle into D Drive or R Reverse Before leaving the driver s seat always make sure t...

Страница 296: ...mis sion will automatically downshift to the next lower gear or gears as appropriate When the vehicle is stopped in D Drive position if you open the dri ver s door with the seat belt unfas tened the gear is shifted to P Park position automatically However when the vehicle moves in D Drive position if you open the dri ver s door with the seat belt unfas tened the gear may be not shifted to P Park p...

Страница 297: ...p the N Neutral position after the vehicle is OFF do the following 1 Deactivate the AUTO HOLD and release the parking brake when the ignition switch is ON 2 Push the N Neutral button by depressing the brake pedal If the message Press and hold OK button to stay in Neutral when vehicle is Off appears on the cluster LCD display press and hold the OK button on the steering wheel for more than 1 second...

Страница 298: ... apply the parking brake and place the ignition switch in the LOCK OFF position Take the Key with you when exiting the vehi cle The gear is shifted to P Park position automatically for safety under the following conditions When the driver unfasten the seat belt and open the driver s door in the Stay in Neutral when vehicle is Off condition or in the ignition ON When turn off the engine with R Reve...

Страница 299: ...e LCD display when the gear is shifted to P Park while the vehicle is moving Stop the vehicle before shifting to P Park Press and hold OK button to stay in Neutral when vehicle is Off The warning message appears on the LCD display when pushing the N Neutral button If you want to stay N Neutral after turning off the engine press and hold the OK but ton on the steering wheel more than 1 second Vehic...

Страница 300: ...rom P Park or N Neutral to any other position with the accelerator pedal depressed Never move the shift button into P Park when the vehicle is in motion Be sure the vehicle is completely stopped before you attempt to shift into R Reverse or D Drive Do not move the shift button to N Neutral when driving Doing so may result in an accident because of a loss of engine braking and the transmission coul...

Страница 301: ...elerator In the event your vehicle leaves the roadway do not steer sharply Instead slow down before pulling back into the travel lanes HYUNDAI recommends you follow all posted speed limits To reduce the risk of SERIOUS INJURY or DEATH ALWAYS wear your seatbelt In a collision an unbelted occupant is significantly more likely to be seriously injured or killed than a properly belt ed occupant Avoid h...

Страница 302: ...e speed is more than 10km h Pull the or paddle shifter once to shift up or down one gear and the system changes from automatic mode to manual mode When the vehicle speed is lower than 10km h if you depress the accelerator pedal for more than 5 seconds the system changes from manual mode to automatic mode Information If the and paddle shifters are pulled at the same time gear shift may not occur i ...

Страница 303: ...t drive with your foot resting on the brake pedal This will create abnormal high brake temperatures exces sive brake lining and pad wear and increased stopping distances When descending a long or steep hill shift to a lower gear and avoid continuous applica tion of the brakes Applying the brakes continuously will cause the brakes to overheat and could result in a tempo rary loss of braking perform...

Страница 304: ... does not indicate a problem with your brakes To avoid costly brake repairs do not continue to drive with worn brake pads Information Always replace brake pads as com plete front or rear axle sets Electronic Parking Brake EPB Applying the parking brake To apply the EPB Electronic Parking Brake 1 Depress the brake pedal 2 Pull up the EPB switch Make sure the Parking Brake Warning Light comes on i N...

Страница 305: ...tor pedal while the shift button is in R Reverse or D Drive Make sure the Parking Brake Warning light goes off Information For your safety you can engage the EPB even though the ignition switch is in the OFF position but you can not release it For your safety depress the brake pedal and release the parking brake manually with the EPB switch when you drive downhill or when backing up the vehicle If...

Страница 306: ...f the situation occurs depress the brake pedal and release EPB by pressing the EPB switch OTM058132L Whenever leaving the vehicle or parking always come to a complete stop and continue to depress the brake pedal Move the shift button into the P Park position press the EPB switch and set the igni tion switch to the OFF posi tion Take the key with you when exiting the vehicle Vehicles not fully enga...

Страница 307: ... brake parts Make sure the EPB is released and the Parking Brake Warning Light is off before driving Information A clicking sound may be heard while operating or releasing the EPB These conditions are normal and indicate that the EPB is func tioning properly When leaving your keys with a parking attendant or assistant make sure to inform him her how to operate the EPB AUTO HOLD deactivating Press ...

Страница 308: ...unction indicator may illuminate when the ESC indicator comes on to indicate that the ESC is not working properly but it does not indicate a malfunction of the EPB If the EPB warning light is still on we recommend that the sys tem be checked by an author ized HYUNDAI dealer If the parking brake warning light does not illuminate or blinks even though the EPB switch was pulled up the EPB may not be ...

Страница 309: ...the system checked Parking brake warning light Check the Parking Brake Warning Light by placing the ignition switch to the ON posi tion do not start the engine This light will be illuminated when the parking brake is applied with the igni tion switch in the START or ON posi tion Before driving be sure the parking brake is released and the Brake Warning Light is OFF If the Parking Brake Warning Lig...

Страница 310: ... and tailgate closed depress the brake pedal and then press the AUTO HOLD switch The white AUTO HOLD indicator will come on and the system will be in the standby position 2 When you stop the vehicle com pletely by depressing the brake pedal the AUTO HOLD indicator changes from white to green 3 The vehicle will remain stationary even if you release the brake pedal 4 If EPB is applied Auto Hold will...

Страница 311: ...eleased regardless of accelerator pedal operation The AUTO HOLD indi cator changes from green to white To cancel 1 Depress the brake pedal 2 Press the AUTO HOLD switch The AUTO HOLD indicator will turn off When the AUTO HOLD is auto matically released by depress ing the accelerator pedal always take a look around your vehicle Slowly depress the accelerator pedal for a smooth start WARNING OLX20580...

Страница 312: ...s from green to white and a warning sound and a message will appear to inform you that EPB has been automatically engaged Before driving off again press foot brake pedal check the surrounding area near your vehicle and release parking brake manually with the EPB switch While operating Auto Hold you may hear mechanical noise However it is normal operating noise If there is a malfunction with the dr...

Страница 313: ...om Auto Hold to EPB is not working properly a warning will sound and a message will appear When this message is displayed the Auto Hold and EPB may not operate For your safety depress the brake pedal Press brake pedal to deactivate AUTO HOLD If you did not apply the brake pedal when you release the Auto Hold by pressing the AUTO HOLD switch a warning will sound and a message will appear NOTICE OTM...

Страница 314: ... maneuvers Even though vehi cle control is improved during emergency braking always maintain a safe distance between you and objects ahead of you Vehicle speeds should always be reduced during extreme road conditions The braking distance for vehicles equipped with ABS or ESC may be longer than for those without these systems in the following road conditions Drive your vehicle at reduced speeds dur...

Страница 315: ...ad surfaces operation of the anti lock brake sys tem may result in a longer stopping distance than for vehicles equipped with a conventional brake system The ABS warning light will stay on for several seconds after the Ignition switch is placed in the ON position During that time the ABS will go through self diagnosis and the light will go off if everything is nor mal If the light stays on you may...

Страница 316: ...cornering maneuvers ESC checks where you are steering and where the vehicle is actually going ESC applies braking pressure to any one of the vehicle s brakes and intervenes in the engine man agement system to assist the driver with keeping the vehicle on the intended path It is not a substitute for safe driving practices Always adjust your speed and driving to the road conditions i OLX2059016L Nev...

Страница 317: ...ut of the mud or driving on a slippery road the engine rpm revolutions per minute may not increase even if you press the accelerator pedal deeply This is to maintain the stability and traction of the vehicle and does not indicate a problem ESC OFF condition To cancel ESC operation State 1 Press the ESC OFF button briefly The ESC OFF indicator light and message Traction Control disabled will illumi...

Страница 318: ...rent sizes may cause the ESC system to malfunction Before replacing tires make sure all four tires and wheels are the same size Never drive the vehicle with different sized wheels and tires installed ESC OFF usage When Driving The ESC OFF mode should only be used briefly to help free the vehicle if stuck in snow or mud by temporarily stopping operation of the ESC to maintain wheel torque To turn E...

Страница 319: ...our tires can suddenly become uneven VSM operation VSM ON condition The VSM operates when The Electronic Stability Control ESC is on Vehicle speed is approximately above 22 km h 13 mph on curve roads Vehicle speed is approximately above 10 km h 6 mph when the vehicle is braking on a two surface road The two surface road is made of surfaces which have different friction forces When operating When y...

Страница 320: ...cle stability control system Trailer stability assist system has an effort to stabilize the vehicle and trail er when the trailer sways or oscil lates There are various reasons making vehicle sway and oscillate Almost case it happens at high speed however if the trailer is affect ed by crosswinds buffeting and improper overloading it may be a risk of swaying Factors of swaying such as High speed S...

Страница 321: ...pproximately 2 seconds and releas es the brake after 2 seconds or when the accelerator pedal is depressed Information The HAC does not operate when the shift button is in P Park or N Neutral The HAC activates even when the ESC Electronic Stability Control is off However it does not activate when the ESC does not operate nor mally Downhill Brake Control DBC if equipped The Downhill Brake Control DB...

Страница 322: ... The DBC will turn off under the following conditions The DBC button is pressed again The vehicle speed is over 60 km h 40 mph The DBC will be deactivated but maintain the standby mode under the following conditions The hill is not steep enough The accelerator pedal is depressed over a constant force The vehicle speed is between 40 60 km h 25 40 mph The yellow warning light illuminates when the sy...

Страница 323: ...e speed at a certain speed The DBC does not operate when The shift button is in P Park The ESC is activated Good braking practices NOTICE i OTMA048167 Always turn off the DBC on nor mal roads The DBC might acti vate inadvertently from the standby mode when driving through speed bumps or mak ing sharp curves WARNING Whenever leaving the vehicle or parking always come to a com plete stop and continu...

Страница 324: ... to normal stop as soon as it is safe to do so We recommend that you call an authorized HYUNDAI dealer for assistance DO NOT drive with your foot resting on the brake pedal Even light but constant pedal pressure can result in the brakes overheating brake wear and possibly even brake failure If a tire goes flat while you are driv ing apply the brakes gently and keep the vehicle pointed straight ahe...

Страница 325: ...rain Control Multi Terrain Control is a system that achieves optimal driving perform ance by controlling four wheel drive engine transmission and braking by terrain conditions snow muddy and sandy road etc Multi Terrain Control mode If you press the DRIVE TERRAIN mode button the driving mode is changed from normal driving control to Multi Terrain Control You can select SNOW MUD or SAND mode by rot...

Страница 326: ...r tires of the same size and type Make sure that a full time 4WD vehicle is towed by a flat bed tow truck NOTICE To reduce the risk of SERIOUS INJURY or DEATH Do not drive in conditions that exceed the vehicles intended design such as challenging off road conditions Avoid high speeds when cor nering or turning Do not make quick steering wheel movements such as sharp lane changes or fast sharp turn...

Страница 327: ...rce distribution 4WD state is displayed SNOW In this mode the vehicle can start stably by properly distributing the driving force of the vehicle on slippery roads such as snowy roads And you can drive safely by suppressing wheel slip MUD In this mode you can drive safely by securing enough driving power at the initial start by appropriately distributing the driving force of the vehicle when drivin...

Страница 328: ...smoothly depress the accelerator pedal Use tire chains driving in mud if necessary Keep sufficient distance between your vehicle and the vehicle in front of you Reduce vehicle speed and always check the road condition Avoid speeding rapid acceleration sudden brake applications and sharp turns to prevent getting stuck Be sure to maintain 4WD AUTO mode when driving on normal roads If you drive with ...

Страница 329: ...e terrain and water mud conditions WARNING OLMB053018 Do not drive across the contour of steep hills A slight change in the wheel angle can destabilize the vehicle or a stable vehicle may lose stability if the vehicle stops its forward motion Your vehicle may roll over and lead to a serious injury or death WARNING When the vehicle is stuck in snow sand or mud place a non slip material under the dr...

Страница 330: ...enter of gravity of 4WD vehicles is higher than con ventional 2WD vehicles making them more likely to roll over when you rapidly turn corners Always hold the steering wheel firm ly when you are driving off road LCD display message Transmission hot Park with engine On Do not grab the inside of the steering wheel when you are driving off road You may hurt your arm by a sudden steering maneuver or fr...

Страница 331: ... can continue to drive your vehicle When possible drive the vehicle smoothly Emergency precautions Tires Do not use tire and wheel with differ ent size and type from the one origi nally installed on your vehicle It can affect the safety and performance of your vehicle which could lead to steering failure or rollover causing serious injury When replacing the tires be sure to equip all four tires wi...

Страница 332: ...he road which allows you to anticipate problems They are not designed for cornering at the same speeds as conventional passenger vehicles any more than low slung sports cars are designed to perform satisfactori ly in off road conditions Due to this risk driver and passengers are strongly recommended to buckle their seat belts In a rollover crash an unbelted person is more likely to die than a pers...

Страница 333: ... is equipped with tires designed to provide safe ride and handling capability Do not use a size and type of tire and wheel that is different from the one that is originally installed on your vehicle It can affect the safety and perform ance of your vehicle which could lead to steering failure or rollover and serious injury When replacing the tires be sure to equip all four tires with the tire and ...

Страница 334: ... the driver s driving habits COMFORT mode COMFORT mode provides soft driving and comfortable riding SPORT mode SPORT mode pro vides sporty but firm riding ECO mode ECO mode improves fuel efficiency for eco friendly driv ing The driving mode will be set to COM FORT or ECO mode when the engine is restarted if it is in SMART COMFORT SPORT mode COM FORT mode will be set when the engine is restarted If...

Страница 335: ... OFF in SMART mode SMART mode automatically con trols gear shifting patterns engine torque in accordance with the dri ver s driving habits Information When you mildly drive the vehicle in SMART mode the driving mode changes to ECO mode to improve fuel efficiency However the actual fuel efficiency may differ in accor dance with your driving situations i e upward downward slope vehi cle deceleration...

Страница 336: ... the accelerator pedal in SMART SPORT mode It is because your vehicle remains to be in a lower gear over a certain period of time for next acceleration Thus it is a normal driving situa tion not indicating any malfunc tion The driving mode automatically changes to SMART SPORT mode only in harsh driving situations In most of the normal driving situa tions the driving mode sets to be either in SMART...

Страница 337: ...e is activated The engine rpm will tend to remain raised over a certain length of time even after releas ing the accelerator Upshifts are delayed when accel erating Information In SPORT mode the fuel efficiency may decrease ECO mode When the Drive Mode is set to ECO mode the engine and transmission control logic are changed to maximize fuel efficiency When ECO mode is selected by rotating the DRIV...

Страница 338: ...ated to improve fuel efficiency Limitation of ECO mode operation If the following conditions occur while ECO mode is operating the system operation is limited even though there is no change in the ECO indi cator When the coolant temperature is low The system will be limited until engine performance becomes nor mal When driving up a hill The system will be limited to gain power when driving uphill ...

Страница 339: ... mode automatically adjusts the driving mode ECO COMFORT SPORT in accordance with the driver s driving habits COMFORT mode COMFORT mode provides soft driving and comfortable riding SPORT mode SPORT mode pro vides sporty but firm riding ECO mode ECO mode improves fuel efficiency for eco friendly driv ing The driving mode will be set to COM FORT or ECO mode when the engine is restarted if it is in S...

Страница 340: ...FF in SMART mode SMART mode automatically con trols gear shifting patterns engine torque in accordance with the dri ver s driving habits Information When you mildly drive the vehicle in SMART mode the driving mode changes to ECO mode to improve fuel efficiency However the actual fuel efficiency may differ in accor dance with your driving situations i e upward downward slope vehi cle deceleration a...

Страница 341: ... in SMART SPORT mode It is because your vehicle remains to be in a lower gear over a certain period of time for next acceleration Thus it is a normal driving situa tion not indicating any malfunc tion The driving mode automatically changes to SMART SPORT mode only in harsh driving situations In most of the normal driving situa tions the driving mode sets to be either in SMART ECO mode or in SMART ...

Страница 342: ... is activated The engine rpm will tend to remain raised over a certain length of time even after releas ing the accelerator Upshifts are delayed when accel erating Information In SPORT mode the fuel efficiency may decrease ECO mode When the Drive Mode is set to ECO mode the engine and transmission control logic are changed to maximize fuel efficiency When ECO mode is selected by rotating the DRIVE...

Страница 343: ...ted to improve fuel efficiency Limitation of ECO mode operation If the following conditions occur while ECO mode is operating the system operation is limited even though there is no change in the ECO indi cator When the coolant temperature is low The system will be limited until engine performance becomes nor mal When driving up a hill The system will be limited to gain power when driving uphill b...

Страница 344: ...elect Warning only the FCA system activates and pro duces only warning alarms in accordance with the collision risk levels You should control the brake directly because the FCA system do not control the brake If you select Off the FCA sys tem deactivates FORWARD COLLISION AVOIDANCE ASSIST FCA SYSTEM SENSOR FUSION TYPE FRONT RADAR FRONT CAMERA IF EQUIPPED Take the following precautions when using t...

Страница 345: ...ial warning activation time may not seem fast Later When this condition is selected the initial Forward Collision Warning is activated later than nor mal This setting reduces the amount of distance between the vehicle ahead before the initial warning occurs Select Later when traffic is light and when driving speed is slow if you change the warning timing the warning timing of other sys tems may ch...

Страница 346: ... brake Collision Warning First warning This warning message appears on the LCD display with a warning chime Additionally some vehicle system intervention occurs by the engine management system to help decelerate the vehicle The Vehicle speed may slow down slightly It will operate if the vehicle speed is greater than 10 km h and less than or equal to 160 km h on a forward vehicle Completely stop th...

Страница 347: ...ly some vehicle system intervention occurs by the engine management system to help decel erate the vehicle The brake control is maximized just before a collision reducing impact when it strikes a forward vehicle It will operate if the vehicle speed is greater than 10 km h and less than or equal to 80 km h on a for ward vehicle Depending on the condition of the vehicle ahead and the envi ronment su...

Страница 348: ...always make sure the sensor cover or sensor is clean and free of dirt snow and debris The driver should always use extreme caution while operating the vehicle whether or not there is a warning message or alarm from the FCA system CAUTION The braking control cannot completely stop the vehicle nor avoid all collisions The driver should hold the responsibility to safely drive and control the vehicle ...

Страница 349: ... front bumper becomes damaged in the area around the radar sensor the FCA system may not operate properly We recommend that you have the vehicle inspected by authorized HYUNDAI dealer Use only genuine parts or the equivalent specified for your vehicle to repair or replace a damaged sensor or sensor cover Do not apply paint to the sensor cover NEVER install any accessories or stickers on the front ...

Страница 350: ...bstances are not detected after turning ON the engine Forward Collision Avoidance Assist FCA system disabled Camera obscured When the sensor cover is blocked with dirt snow or debris the FCA system operation may stop tem porarily If this occurs a warning message will appear on the LCD dis play Remove any dirt snow or debris and clean the front camera before oper ating the FCA system The system wil...

Страница 351: ...ystem may activate unintentionally This initial warning message appears on the LCD display with a warning chime Also in certain instances the front radar sensor or camera recognition system may not detect the vehicle ahead The FCA system may not activate and the warning message will not be displayed WARNING Even if there is any problem with the brake control func tion of the FCA system the vehicle...

Страница 352: ...icle abruptly stops by the activated FCA system Pay extreme caution The FCA system operates only to detect vehicles in front of the vehicle The FCA system does not operate when the vehicle is in reverse The FCA system is not designed to detect other objects on the road such as animals The FCA system does not detect vehicles in the oppo site lane The FCA system does not detect cross traffic vehicle...

Страница 353: ... located unusually The outside brightness changes suddenly for example when enter ing or exiting a tunnel When light coming from a street light or an oncoming vehicle is reflected on a wet road surface such as a puddle in the road The field of view in front is obstruct ed by sun glare or head light of oncoming vehicle The windshield glass is fogged up a clear view of the road is obstruct ed The ve...

Страница 354: ...e FCA system may be limited when driving on a curved road On curved roads the other vehicle on the same lane is not recognized and the FCA system s performance may be degraded This may result in unnecessary alarm or braking or no alarm or braking when necessary Also in certain instances the front radar sensor or camera recognition system may not detect the vehicle traveling on a curved road In the...

Страница 355: ...pe not recognizing the vehi cle in front in the same lane It may unnecessarily produce the warning message and the warning alarm or it may not produce the warning mes sage and the warning alarm at all When the FCA suddenly recognizes the vehicle in front while passing over a slope you may experience sharp deceleration Always keep your eyes forward while driving upward or downward on a slope and if...

Страница 356: ...ending from the vehicle In these instances you must maintain a safe braking distance from the rearmost object and if nec essary depress the brake pedal to reduce your driving speed in order to maintain distance OTM058119 OLX2058077 Do not use the Forward Collision avoidance Assist FCA system when towing a vehicle Application of the FCA system while towing may adversely affect the safety of your ve...

Страница 357: ...c interference i Never try to test the operation of the FCA system Doing so may cause severe injury or death If the front bumper front glass radar or camera have been replaced or repaired we recommend that you have your vehicle inspected by an authorized HYUNDAI dealer Driving your vehicle 5 80 ...

Страница 358: ... spot detection range varies relative to vehicle speed Note that if your vehicle is traveling much faster than the vehicles around you the warning will not occur 2 Closing at high speed BCW system will alert you when it detects a vehicle is approaching in an adjacent lane at a high rate of speed If the driver activates the turn signal when the system detects an oncom ing vehicle the system sounds ...

Страница 359: ... system activates In this case the system returns to the state before the engine turned off When the system is initially turned on and when the engine is turned off then on again while the system is in activation the warning light will illuminate for 3 seconds on the outside rearview mirror OLX2059032L Always be aware of road con ditions while driving and be alert for unexpected situa tions even t...

Страница 360: ...ime may feel late if the side rear vehicle abruptly accelerates Later Select this warning activation time when the traffic is light and you are driving in a low speed However if you change the warn ing activation time the warning activation time of vehicle s other system may also change Check the warning activation time before changing it The driver can select the warning volume of Blind Spot Coll...

Страница 361: ... Warning sound Second stage alert A warning chime to alert the driver will activate when 1 A vehicle has been detected in the blind spot area by the radar system AND 2 The turn signal is applied same side as where the vehicle is being detected When this alert is activated the warning light on the outside rearview mir ror and the head up display if equipped will also blink And a warning chime will ...

Страница 362: ...ed with a Blind Spot Collision Warning System BCW Do not solely rely on the system but check your surrounding before changing lanes or backing the vehicle up The system may not alert the driver in some conditions so always check your surround ings while driving WARNING The driver should always use extreme caution while operat ing the vehicle whether or not the warning light on the out side rearvie...

Страница 363: ... road When the road is narrow the system may detect other vehicles in the next lane The system may turn off due to strong electromagnetic waves Always keep the sensors clean NEVER arbitrarily disassem ble the sensor component nor apply any impact on the sen sor component Be careful not to apply unnec essary force on the radar sen sor or sensor cover If the sen sor is forcibly moved out of proper a...

Страница 364: ...r check to make sure that the rear bumper is free from any dirt or snow in the areas where the sensor is located Remove any dirt snow or foreign material that could interfere with the radar sensors After any dirt or debris is removed the BCW should operate normally after about 10 minutes of driving the vehicle If the system still does not operate normally we recommend that you have your vehicle in...

Страница 365: ...There is a fixed object near the vehicle such as a guardrail While going down or up a steep road where the height of the lane is different Driving on a narrow road where trees or grass or overgrown Driving in rural areas where the sensor does not detect another vehicle or structure for an extended period of time Driving on a wet road Driving on a road where the guardrail or wall is in double struc...

Страница 366: ... slippery surface due to snow water puddle or ice Driving on a curve The BCW system may not operate properly when driving on a curved road In certain instances the system may not detect the vehicle in the next lane Always pay attention to road and driving conditions while driving The BCW system may not operate properly when driving on a curved road In certain instances the system may recognize a v...

Страница 367: ...e system may not detect the vehicle in the next lane Also in certain instances the system may wrongly recognize the ground or structures Always pay attention to road and driving conditions while driving Driving where the heights of the lanes are different The may not operate properly when driving where the heights of the lanes are different In certain instances the system may not detect the vehicl...

Страница 368: ... properly when driving where there is structure beside the road In certain instances the system may wrongly recognize the structures noise barriers guardrail double guardrail median strip bollard street light road sign tunnel wall etc beside the road Always pay attention to road and driving conditions while driving OLX2058041L ...

Страница 369: ...speed If the driver activates the turn signal when the system detects an oncoming vehicle the system sounds an audible alert Blind Spot Collision Avoidance Assist BCA The Blind Spot Collision Avoidance Assist BCA system detects the front lane through the camera installed on the upper front wind shield and detects the side rear areas through radar sensors The Blind Spot Collision Avoidance Assist s...

Страница 370: ...uished when Off is selected 5 The Blind Spot Collision Warning BCW system and Blind Spot Collision Avoidance Assist BCA system may not detect every object alongside the vehicle Always be aware of road con ditions while driving and be alert for unexpected situa tions even though the Blind Spot Collision Warning sys tem and Blind Spot Collision Avoidance Assist system are operating The Blind Spot Co...

Страница 371: ... system maintains the previous state The driver can select the initial warning activation time in the User Settings in the LCD display by selecting User Settings Driver assistance Warning timing The options for the initial Blind Spot Collision Warning includes the following Normal When this condition is selected the initial Blind Spot Collision Warning is activated normally If this setting feels s...

Страница 372: ...ready status when Active assist or Warning only is selected and the following condi tions are satisfied Active Assist 1 The Blind Spot Collision Avoidance Assist system will acti vate when Vehicle speed is between 60 km h and 180 km h 40 mph 112 mph The system detects both of the lane lines An approaching vehicle is detect ed next to or behind your vehicle 2 The Blind Spot Collision Warning system...

Страница 373: ...8035 Right side A Warning sound Second stage alert A warning chime to alert the driver will activate when 1 A vehicle has been detected in the blind spot area by the radar system AND 2 The turn signal is applied same side as where the vehicle is being detected When this alert is activated the warning light on the outside rearview mir ror and the head up display if equipped will also blink And a wa...

Страница 374: ...e warning light and neglect to see the surrounding of the vehicle Drive safely even though the vehicle is equipped with a Blind Spot Collision Warning BCW system Do not solely rely on the system but check your surrounding before changing lanes or backing the vehicle up The system may not alert the driver in some conditions so always check your surround ings while driving WARNING The driver should ...

Страница 375: ...ons Thus always pay close attention to road situations Detecting Sensor Camera and Radar Driving your vehicle The driver is responsible for accurate steering Do not unnecessarily operate the steering wheel when the Blind Spot Collision Avoidance Assist system is in operation Always pay extreme caution while driving The Blind Spot Collision Avoidance Assist system may not operate or unnecessarily o...

Страница 376: ...tem may detect other vehicles in the next lane The system may turn off due to strong electromagnetic waves Always keep the sensors clean NEVER arbitrarily disassem ble the sensor component nor apply any impact on the sen sor component Be careful not to apply unnec essary force on the radar sen sor or sensor cover If the sen sor is forcibly moved out of proper alignment the system may not operate c...

Страница 377: ... make sure that the rear bumper is free from any dirt or snow in the areas where the sensor is located Remove any dirt snow or foreign material that could interfere with the radar sensors After any dirt or debris is removed the system should operate normally after about 10 minutes of driving the vehicle If the system still does not operate normally we recommend that you have your vehicle inspected...

Страница 378: ... your vehicle inspected by an authorized HYUNDAI dealer to use BCA system Limitations of the system The driver must be cautious in the below situations because the sys tem may not detect other vehicles or objects in certain circumstances When a trailer or carrier is installed The vehicle drives in inclement weather such as heavy rain or snow The sensor is polluted with rain snow mud etc The rear b...

Страница 379: ...accelerated When the vehicle in the next lane moves two lanes away from you OR when the vehicle two lanes away moves to the next lane from you A motorcycle or bicycle is near A flat trailer is near If there are small objects in the detecting area such as a shopping cart or a baby stroller If there is a low height vehicle such as a sports car The brake pedal is depressed ESC Electronic Stability Co...

Страница 380: ...operate properly when driving on a curved road In certain instances the system may recognize a vehicle in the same lane Always pay attention to road and driving conditions while driving Driving where the road is merg ing dividing The BCW and BCA systems may not operate properly when driving where the road is merging dividing In cer tain instances the system may not detect the vehicle in the next l...

Страница 381: ...ces the system may not detect the vehicle on a road with different lane heights i e underpass joining section grade separated intersections etc Always pay attention to road and driving conditions while driving A noise barrier B guardrail Driving where there is a structure beside the road The BCW and BCA systems may not operate properly when driving where there is structure beside the road In certa...

Страница 382: ...For Indonesia For Malaysia For Singapore For Vietnam For Brazil DECLARATION OF CONFORMITY IF EQUIPPED 5 The radio frequency components Rear Corner Radar complies If equipped OANATEL006 OANATEL010 OANATEL007 OANATEL011 OANATEL008 OANATEL005 ...

Страница 383: ...5 106 For Mexico For Japan For Ukraine For Jordan For Oman For UAE For Botswana Driving your vehicle OANATEL013 OANATEL014 OANATEL015 OANATEL041 OANATEL016 OANATEL017 OANATEL012 ...

Страница 384: ...5 107 Driving your vehicle For Ghana For Zambia For Jamaica For Paraguay For Uzbekistan For Mozambique 5 OANATEL018 OANATEL019 OANATEL020 OANATEL021 OANATEL022 OANATEL023 ...

Страница 385: ...nce with a colliding possibility with an approach ing vehicle It is to lower the colliding risk or mitigate the colliding damage REAR CROSS TRAFFIC COLLISION WARNING RCCW REAR CROSS TRAFFIC COLLISION AVOIDANCE ASSIST RCCA IF EQUIPPED OTM058092 The Rear Cross Traffic Collision Warning system and Rear Cross Traffic Collision Avoidance Assist system are supplemental systems to assist you Do not entir...

Страница 386: ...ng Normal When this condition is selected the initial Rear Cross Traffic Collision Warning is activated normally If this setting feels sensitive change the option to Later The warning activation time may feel late if the a vehicle at the side or rear abruptly accelerates Later Select this warning activation time when the traffic is light and you are driving in a low speed Information If you change...

Страница 387: ... in R Reverse The system will not activate when the vehicle speed exceeds 10 km h 7 mph The system will activate again when the speed is below 8 km h 5 mph The system s detecting range is approximately 0 5 m 20 m 1 ft 65 ft An approaching vehicle will be detected if their vehicle speed is within 8 km h 36 km h 5 22 5 mph Note that the detecting range and operating speed may vary under cer tain con...

Страница 388: ... system is in activation a mes sage will also appear on the audio or AVN screen The warning will stop when The detected vehicle moves out of the sensing area or when the vehicle is right behind your vehicle or when the vehicle is not approach ing your vehicle or when the other vehicle slows down The vehicle s approaching speed is decreased Warning and system control Rear Cross Traffic Collision Wa...

Страница 389: ... may not operate properly according to the status of the ESC Electronic Stability Control The same warning mes sage is displayed on the instrument cluster for this case also When the ESC Electronic Stability Control warning light is on When the ESC Electronic Stability Control is engaged in a different function Rear Cross Traffic Collision Avoidance Assist RCCA system OLX2058046L Left OLX2058044L ...

Страница 390: ... accordance with your driv ing situations The Rear Cross Traffic Collision Avoidance Assist system is not a substitute for safe driving practices but a convenience function only It is the responsibility of the driver to always drive cau tiously to prevent unexpected and sudden situations from occurring Pay attention to the road conditions at all times WARNING When the operation condition of the Re...

Страница 391: ...ot work properly when the bumper has been damaged or if the rear bumper has been replaced or repaired The system may turn off due to strong electromagnetic waves Always keep the sensors clean NEVER arbitrarily disassem ble the sensor component nor apply any impact on the sen sor component Be careful not to apply unnec essary force on the radar sen sor or sensor cover If the sen sor is forcibly mov...

Страница 392: ...Spot Collision Warning BCW system If there is a problem with the BCW system a warning message will appear and the light on the switch will turn off The system will turn off automatically RCCW and RCCA will not operate also if the BCW system turns off due to malfunction We rec ommend that you have your vehicle inspected by an authorized HYUNDAI dealer Limitations of the system The driver must be ca...

Страница 393: ...nes If the vehicle has started at the same time as the vehicle next to you and has accelerated When the vehicle in the next lane moves two lanes away from you OR when the vehicle two lanes away moves to the next lane from you A motorcycle or bicycle is near A flat trailer is near If there are small objects in the detecting area such as a shopping cart or a baby stroller If there is a low height ve...

Страница 394: ... exactly deter mine the risk of collision for the vehicles which are parking or pulling out near your vehicle e g a vehicle escaping beside your vehi cle a vehicle parking or pulling out in the rear area a vehicle approaching your vehicle making a turn etc In this case the warning or brake may not operate properly A Vehicle When the vehicle is parked diago nally The system may not operate proper l...

Страница 395: ...proper ly when pulling in the vehicle to the parking space where there is a struc ture at the back or side of your vehi cle In certain instances when backing into the parking space the system may not detect the vehicle moving in front of your vehicle In this case the warning or brake may not operate properly Always pay attention to the parking space while driving When the vehicle is parked rear wa...

Страница 396: ...eering wheel suddenly when the steering wheel is being assist ed by the system LKA system helps to prevent the driver from moving out of the lane unintentionally by assisting the driver s steering However the driver should not solely rely on the system but always pay attention on the steering wheel to stay in the lane WARNING The operation of the LKA sys tem can be canceled or not work properly ac...

Страница 397: ...not hear a warning sound of LKA system because of excessive audio sound If any other warning sound such as seat belt warning chime is already generated the Lane Keeping Assist LKA system warning may not sound Do not place objects on the dashboard that reflects light such as mirrors white paper etc The system may malfunc tion if the sunlight is reflected Always have your hands on the steering wheel...

Страница 398: ...uster goes off LKA activation To see the LKA system screen on the LCD display in the cluster select ASSIST mode For more details refer to LCD Display Modes in chapter 3 After LKA is activated if lane mark er is detected vehicle speed is over 64 km h 40 mph and all the activation conditions are satisfied a green LKA indicator will change to green and the steering wheel will be controlled i OLX20580...

Страница 399: ...on the LCD display and a warning sound is heard When the conditions below are met LKA will be enable to assist steering Vehicle speed is above 64 km h 40 mph Both lane markers are detected by LKA The vehicle is between the lane markers Lane marker undetected Lane marker detected OLX2058058L OLX2058059L Left lane marker Right lane marker OLX2058060L OLX2058061L OLX2058059L Lane Keeping Assist is en...

Страница 400: ... the system would gen erate hands off warning because LKA can treat the sit uation as you do not grab the wheel WARNING The driver is responsible for accurate steering Even though the steering is assisted by the system the driver may control the steer ing wheel Turn off the system and drive the vehicle in following situa tions In bad weather In bad road condition When the steering wheel needs to b...

Страница 401: ...heck if there is foreign matter on the camera lens If the problem is not solved we rec ommend that the system be checked by an authorized HYUNDAI dealer The LKA system will not be in the ENABLED state and the steering wheel will not be assisted when The system may not operate for 15 seconds after the engine is started or the camera is initialized The turn signal is turned on before changing a lane...

Страница 402: ...ust or sand It is difficult to distinguish the color of the lane marker from road There is something looks like a lane marker The lane marker is indistinct or damaged The number of lanes increases decreases or the lane lines are crossing Driving through a toll plaza toll gate merged divided lane There are more than two lane markers The lane marker is very thick or thin The lane marker is not visib...

Страница 403: ...ensor cannot detect the lane because of fog heavy rain or snow The windshield is fogged by humid air in the vehicle Putting something on the crash pad and etc LKA system function change The driver can change LKA to the Lane Departure Warning LDW sys tem or change the LKA system mode from the LCD display Go to the User Settings Driver Assistance Lane Safety Lane Keeping Assist LKA Lane Departure Wa...

Страница 404: ...l and acoustic warning when the sys tem detects the vehicle leaving the lane In this mode the steering wheel will not be controlled When the vehi cle s front wheel contacts the inside edge of lane line LKA issues the lane departure warning Off If you select Off the LKA system is deactivated ...

Страница 405: ...s be aware of the sur rounding and steer the vehicle WARNING Take the following precautions when using the Following Assist LFA system Do not steer the steering wheel suddenly when the steering wheel is being assist ed by the system LFA system helps the driver to keep the vehicle in the cen ter of the lane by assisting the driver s steering However the driver should not solely rely on the system b...

Страница 406: ...cle may not be controlled by the system The driver must always follow the speed limit when using the system If you attach objects to the steering wheel the system may not assist steering or the hands off alarm may not work properly When you tow a trailer make sure that you turn off the LFA system Do not disassemble the LFA system camera temporarily to tint the window or attach any types of coating...

Страница 407: ...ied The Smart Cruise Control is in acti vation vehicle deceleration and acceleration Vehicle speed is lower than 150 km h 93 mph When the system is activated the indicator on the cluster will illu minate The color of the indicator will change depending on the condition of LFA system Green The system is in the enable state White The system is in the ready state LFA activation After LFA is activated...

Страница 408: ...nges to white Warning message Keep hands on steering wheel If the driver takes their hands off the steering wheel for several seconds while the LFA system is activated the system will warn the driver Information If the steering wheel is held very light ly the message may still appear because the LFA system may not rec ognize that the driver has their hands on the wheel i OLX2058062L The warning me...

Страница 409: ... the steering is assisted by the system the driver may con trol the steering wheel The steering wheel may feel heavier when the steering wheel is assisted by the system than when it is not Check LFA Lane Following Assist system If there is a problem with the system a message will appear for a few sec onds If the problem continues the LFA system failure indicator will illu minate i OLX2058065L The ...

Страница 410: ...ur steering or warn you if the vehicle leaves the intended lane under the following circumstances When the lane and road condi tions are poor It is difficult to distinguish the lane marking from the road surface or the lane marking is faded or not clearly marked It is difficult to distinguish the color of the lane marker from the road There are markings on the road surface that look like a lane ma...

Страница 411: ...structed by sun glare There is not enough distance between you and the vehicle in front to be able to detect the lane marker or the vehicle ahead is driv ing on the lane marker Driving on a steep grade over a hill or when driving on a curved road The adverse road conditions cause excessive vehicle vibrations while driving The surrounding of the inside rear view mirror temperature is high due to di...

Страница 412: ... Attention Warning DAW system will be maintained as selected when the engine is re started Display of the driver s attention level The driver can monitor their driving conditions on the LCD display The DAW screen will appear when you select the ASSIST mode tab on the LCD display if the sys tem is activated For more details refer to LCD Display Modes in chapter 3 The driver s attention level is dis...

Страница 413: ...e when the driver resets the Driver Attention Warning DAW system The Driver Attention Warning DAW system resets in the follow ing situations The engine is turned OFF The driver unfastens the seat belt and then opens the driver s door The vehicle is stopped for more than 10 minutes The Driver Attention Warning DAW system operates again when the driver restarts driving System standby The Driver Atte...

Страница 414: ...stem checked for calibra tion Do not locate any reflective objects i e white paper mirror over the dashboard Any light reflection may cause a malfunc tion of the Driver Attention Warning DAW system Pay extreme caution to keep the camera sensor out of water Do not arbitrarily disassemble the camera assembly nor apply any impact on the camera assembly NOTICE The Driver Attention Warning DAW system i...

Страница 415: ... struction area other vehicles fallen objects bumpy road CAUTION Forward drivability of the vehicle is severely under mined possibly due to wide variation in tire pressures uneven tire wear out toe in toe out alignment The vehicle drives on a curvy road The vehicle drives through a windy area The vehicle drives on a bumpy road The vehicle is controlled by the following driving assist systems Lane ...

Страница 416: ... Take the following precautions Always set the vehicle speed under the speed limit in your country If the Cruise Control is left on CRUISE indicator light in the instrument cluster is illuminated the Cruise Control can be activated unin tentionally Keep the Cruise Control system off CRUISE indicator light OFF when the Cruise Control is not in use to avoid inadvertently setting a speed Use the Crui...

Страница 417: ...peed 1 Press the CRUISE button on the steering wheel to turn the sys tem on The CRUISE indica tor will illuminate 2 Accelerate to the desired speed which must be more than 30 km h 20 mph 3 Push the toggle switch down SET and release it The set speed on the LCD display will illu minate 4 Release the accelerator pedal Information On a steep slope the vehicle may slightly slow down or speed up while ...

Страница 418: ...s manner Push the toggle switch up RES and hold it Your vehicle set speed will increase by 10 km h 5 mph Release the toggle switch at the speed you want To decrease Cruise Control speed Push the toggle switch down SET and release it immediately The cruising speed will decrease by 1 km h 1 mph each time you move the toggle switch down in this man ner Push the toggle switch down SET and hold it Your...

Страница 419: ...ing the CRUISE button Both the CRUISE indicator and the set speed will turn off Moving the shift button into N Neutral Decreasing the vehicle speed to less than approximately 30 km h 20 mph The ESC Electronic Stability Control is operating Information Each of the above actions will cancel Cruise Control operation the set speed on the instrument cluster will go off but only pressing the CRUISE butt...

Страница 420: ...set Cruising speed Push the toggle switch up RES If the vehicle speed is over 30 km h 20 mph the vehicle will resume the preset speed To turn Cruise Control off Press the CRUISE button the CRUISE indicator light will go off OTM058039 OTM058037 ...

Страница 421: ...acceler ator or brake pedals SMART CRUISE CONTROL SCC WITH STOP GO SYSTEM IF EQUIPPED For your safety please read the owner s manual before using the Smart Cruise Control system WARNING The Smart Cruise Control sys tem is not a substitute for safe driving practices but a con venience function only It is the responsibility of the driver to always check the speed and distance to the vehicle ahead Al...

Страница 422: ...elerate to the desired speed The Smart Cruise Control speed can be set as follows 30 km h 20 mph 160 km h 100 mph when there is no vehicle in front 0 km h 0 mph 160 km h 100 mph when there is a vehicle in front 3 Push the toggle switch down SET The Set Speed and Vehicle to Vehicle Distance on the LCD display will illuminate 4 Release the accelerator pedal The desired speed will automati cally be m...

Страница 423: ... either of these procedures Push the toggle switch up RES and release it immediately The cruising speed will increase by 1 km h 1 mph each time you move the toggle switch up in this manner Push the toggle switch up RES and hold it Your vehicle set speed will increase by 10 km h 5 mph Release the toggle switch at the speed you want You can set the speed to 160 km h 100 mph i OTM058039 Check the dri...

Страница 424: ... accelerator pedal Increased speed will not interfere with Smart Cruise Control operation or change the set speed To return to the set speed take your foot off the accelerator pedal If you push the toggle switch down SET at increased speed the cruis ing speed will be set again Information Be careful when accelerating tem porarily because the speed is not con trolled automatically at this time even...

Страница 425: ...ch up RES down SET or depressing the accelera tor pedal after the vehicle is stopped by the Smart Cruise Control system with no other vehi cle ahead The driver starts driving by pushing the toggle switch up RES down SET or depressing the accelera tor pedal after stopping the vehicle with a vehicle stopped far away in front The Forward Collision Avoidance Assist FCA is activated The engine speed is...

Страница 426: ...o cancel cruising speed and the system is still activated the cruising speed will automatically resume when you push the toggle switch up RES or down SET If you push the toggle switch up RES the speed will resume to the recently set speed However if vehi cle speed drops below 30 km h 20 mph it will resume when there is a vehicle in front of your vehicle Information Always check the road conditions...

Страница 427: ...ce of the vehicle s front and rear Unexpected situations may lead to possible accidents Pay attention continuously to road conditions and driving even when the smart cruise control system is being oper ated OTM058041 Distance 4 Distance 3 Distance 2 Distance 1 Take the following precautions Always set the vehicle speed under the speed limit in your country If the Smart Cruise Control is left on in...

Страница 428: ...e lane ahead is clear The vehicle speed will maintain the set speed When there is a vehicle ahead of you in your lane Your vehicle speed will slow down or speed up to maintain the select ed distance If the vehicle ahead speeds up your vehicle will travel at a steady cruising speed after accelerating to the set speed If distance from the front vehicle has been changed due to acceler ating or decele...

Страница 429: ...d a mes sage Watch for surrounding vehicles will appear Adjust your vehicle speed for vehicles or objects that can suddenly appear in front of you by depressing the brake pedal Always pay attention to the road condition ahead CAUTION OLX2058054L When using the Smart Cruise Control System The warning message appears and warning chime sounds if the vehicle is unable to maintain the selected dis tanc...

Страница 430: ...the smart cruise control toggle switch RES or SET while Auto Hold and advanced smart cruise control is operating the Auto Hold will be released regardless of accelerator pedal operation and the vehicle will start to move The AUTO HOLD indicator changes from green to white if equipped with EPB Electronic Parking Brake Sensor to detect distance to the vehicle ahead The Smart Cruise Control uses a se...

Страница 431: ...the vehicle Do not spray pres surized water directly on the sensor or sensor cover Be careful not to apply unnec essary force on the radar sen sor or sensor cover If the sen sor is forcibly moved out of proper alignment the Smart Cruise Control system may not operate correctly In this case a warning message may not be displayed We recom mend that you have the vehi cle inspected by an author ized H...

Страница 432: ... the set distance can be adjusted Go to the User Settings Driver assistance SCC response Fast Normal Slow on the LCD display You may select one of the three stages you prefer Fast Vehicle speed following the front vehicle to maintain the set distance is faster than normal speed Normal Vehicle speed following the front vehicle to maintain the set distance is normal Slow Vehicle speed following the ...

Страница 433: ...art Cruise Control mode will turn on Limitations of the system The Smart Cruise Control system may have limits to its ability to detect distance to the vehicle ahead due to road and traffic conditions On curves The Smart Cruise Control system may not detect a moving vehicle in your lane and then your vehicle could accelerate to the set speed Also the vehicle speed will decrease when the vehicle ah...

Страница 434: ...ecrease when the vehicle ahead is recognized suddenly Select the appropriate set speed on inclines and apply the brake or accelerator pedal if necessary Lane changing A vehicle which moves into your lane from an adjacent lane cannot be recognized by the sensor until it is in the sensor s detection range The radar may not detect immedi ately when a vehicle cuts in sud denly Always pay attention to ...

Страница 435: ...oads A vehicle ahead cannot be recog nized correctly by the sensor if any of following occurs When the vehicle is pointing upwards due to overloading in the luggage compartment While the steering wheel is operat ing When driving to one side of the lane When driving on narrow lanes or on curves Apply the brake or accelerator pedal if necessary Your vehicle may accelerate when a vehicle ahead of you...

Страница 436: ...this case you must maintain a safe braking dis tance and if necessary depress the brake pedal to reduce your driving speed in order to maintain a safe distance Always look out for pedestrians when your vehicle is maintaining a distance with the vehicle ahead Always be cautious for vehicles with higher height or vehicles car rying loads that sticks out from the back of the vehicle OLX2058077 OTM058...

Страница 437: ...hicle speed The Smart Cruise Control sys tem may not recognize com plex driving situations so always pay attention to driv ing conditions and control your vehicle speed When using the Smart Cruise Control take the following pre cautions If an emergency stop is nec essary you must apply the brakes The vehicle cannot be stopped at every emergency situation by using the Smart Cruise Control system Ke...

Страница 438: ...en the User Settings Driver Assistance Driving assist Leading vehicle departure alert is selected on the cluster The system stops operation when the setting is deactivated However if the engine is turned off then on again the system maintains the previous state Operating conditions While the Smart Cruise Control SCC system is in operation your vehicle stops behind the vehicle in front when it stop...

Страница 439: ...e vehicle departs automatically if the accelerator pedal is depressed or RES or SET switch is activated when there is a vehicle in front The Smart Cruise Control SCC system is deactivated if the accelera tor pedal is depressed or RES or SET switch is activated when there is no vehicle in front Always check the front of the vehicle and road conditions before departure WARNING OLX2058095L ...

Страница 440: ...elease the accelera tor pedal while shifting and press lightly on the accelerator pedal while the transmission is in gear Slowly spinning the wheels in forward and reverse directions causes a rocking motion that may free the vehicle SPECIAL DRIVING CONDITIONS Downshifting with an a auto matic transmission while driv ing on slippery surfaces can cause an accident The sudden change in tire speed cou...

Страница 441: ... drivers head lamps Keep your headlamps clean and properly aimed Dirty or improperly aimed headlamps will make it much more difficult to see at night Avoid staring directly at the head lamps of oncoming vehicles You could be temporarily blinded and it will take several seconds for your eyes to readjust to the darkness Driving in the rain Rain and wet roads can make driving dangerous Here are a few...

Страница 442: ...hub Drive through any water slowly Allow adequate stopping distance because brake performance may be reduced After driving through water dry the brakes by gently applying them sev eral times while the vehicle is moving slowly Highway driving Tires Adjust the tire inflation as specified Under inflation may overheat or damage the tires Do not install worn out or damaged tires which may reduce tracti...

Страница 443: ...signifi cantly more likely to die than a per son wearing a seat belt There are steps that a driver can make to reduce the risk of a rollover If at all possible avoid sharp turns or abrupt maneuvers do not load your vehicle with heavy cargo on the roof and never modify your vehicle in any way Utility vehicles have a signifi cantly higher rollover rate than other types of vehicles To pre vent rollov...

Страница 444: ...cy equipment Some of the items you may want to carry include tire chains tow straps or chains a flashlight emergency flares sand a shovel jumper cables a window scraper gloves ground cloth coveralls a blanket etc Snow tires If you mount snow tires on your vehi cle make sure to use radial tires of the same size and load range as the original tires Mount snow tires on all four wheels to balance your...

Страница 445: ...install studded tires without first checking local and municipal regulations for possible restrictions against their use Chain Installation When installing tire chains follow the manufacturer s instructions and mount them as tightly possible Drive slowly less than 30 km h 20 mph with chains installed If you hear the chains contacting the body or chas sis stop and tighten them If they still make co...

Страница 446: ...th the maintenance schedule in chapter 7 Before winter have your coolant tested to assure that its freezing point is sufficient for the temperatures anticipated during the winter Check battery and cables Winter temperatures affect battery performance Inspect the battery and cables as specified in the chapter 7 The battery charging level can be checked by an authorized HYUNDAI dealer or in a servic...

Страница 447: ...Also block the rear wheels in advance so the vehicle may not roll Then release the parking brake Do not let ice and snow accumu late underneath Under some conditions snow and ice can build up under the fenders and interfere with the steering When driving in such conditions during the severe winter you should check underneath the vehicle on a regular basis to ensure that the front wheels and the st...

Страница 448: ...5 171 Driving your vehicle 5 TRAILER TOWING We do not recommend using this vehicle for trailer towing ...

Страница 449: ...each axle front and rear including vehicle curb weight and all payload GAWR Gross Axle Weight Rating This is the maximum allowable weight that can be carried by a single axle front or rear These numbers are shown on the Certification Label The total load on each axle must never exceed its GAWR GVW Gross Vehicle Weight This is the Base Curb Weight plus actual Cargo Weight plus passen gers GVWR Gros...

Страница 450: ...em TPMS 6 9 Check tire pressure 6 9 Tire pressure monitoring system 6 10 Low tire pressure telltale 6 11 Low tire pressure position telltale and tire pressure telltale 6 11 TPMS Tire Pressure Monitoring System malfunction indicator 6 12 Changing a tire with TPMS 6 13 If you have a flat tire with spare tire 6 15 Jack and tools 6 15 Removing and storing the spare tire 6 16 Changing tires 6 17 Jack l...

Страница 451: ...eously The hazard warning flasher oper ates whether your vehicle is run ning or not The turn signals do not work when the hazard flasher is on If the engine stalls while driving Reduce your speed gradually keeping a straight line Move cau tiously off the road to a safe place Turn on your hazard warning flash er Try to start the engine again If your vehicle will not start we recom mend that you con...

Страница 452: ... the ignition switch in the OFF posi tion Have all passengers get out of the vehicle Be sure they all get out on the side of the vehicle that is away from traffic When changing a flat tire follow the instructions provided later in this chapter If the engine doesn t turn over or turns over slowly Be sure the shift button is in N Neutral or P Park if it is auto matic transmission vehicle The engine ...

Страница 453: ...ery Always read and follow instructions carefully when handling a battery Wear eye protection designed to protect the eyes from acid splashes Keep all flames sparks or smoking materials away from the battery WARNING Hydrogen is always present in battery cells is highly combustible and may explode if ignit ed Keep batteries out of reach of children Batteries contain sulfu ric acid which is highly c...

Страница 454: ...moving parts in the engine compartment at all times even when the vehicles are turned off 3 Turn off all electrical devices such as radios lights air conditioning etc Put the vehicle in P Park and set the parking brakes Turn both vehicles OFF i NOTICE Do not attempt to jump start your vehicle if your battery is frozen NEVER attempt to recharge the battery when the vehicle s battery cables are conn...

Страница 455: ...tart the engine of the assisting vehicle and let it run at approxi mately 2 000 rpm for a few min utes Then start your vehicle If your vehicle will not start after a few attempts it probably requires servicing In this event please seek qualified assistance If the cause of your battery discharging is not apparent we recommend that you have your vehicle checked by an authorized HYUNDAI dealer Discon...

Страница 456: ...e vehi cle If the air conditioning had been in use it is normal for cold water to be draining from it when you stop 5 If engine coolant is leaking out stop the engine immediately and we rec ommend that you call an authorized HYUNDAI dealer for assistance IF THE ENGINE OVERHEATS While the engine is running keep hands clothing and tools away from the mov ing parts such as the cooling fan and drive b...

Страница 457: ...d with caution keeping alert for further signs of overheat ing If overheating happens again we recommend that you call an authorized HYUNDAI dealer for assistance Serious loss of coolant indi cates a leak in the cooling system and we recommend the system be checked by an authorized HYUNDAI dealer When the engine overheats from low engine coolant sud denly adding engine coolant may cause cracks in ...

Страница 458: ...is displayed after a few minutes of driving after initial engine start up If tire pressure is not displayed when the vehicle is stopped Drive to dis play message will appear After driv ing check the tire pressure The displayed tire pressure values may differ from those measured with a tire pressure gauge You can change the tire pressure unit in the User Settings mode on the instrument cluster psi ...

Страница 459: ...nance and it is the driver s responsi bility to maintain correct tire pres sure even if under inflation has not reached the level to trigger illumina tion of the TPMS low tire pressure telltale Your vehicle has also been equipped with a TPMS malfunction indicator to indicate when the system is not operating properly The TPMS mal function indicator is combined with the low tire pressure telltale Wh...

Страница 460: ...re pressure position telltale light will indicate which tire is significantly under inflated by illuminating the cor responding position light If either telltale illuminates immedi ately reduce your speed avoid hard cornering and anticipate increased stopping distances You should stop and check your tires as soon as pos sible Inflate the tires to the proper pressure as indicated on the vehi cle s ...

Страница 461: ...ather the low tire pressure telltale may illuminate if the tire pressure was adjusted to the recom mended tire inflation pressure in warm weather It does not mean your TPMS is malfunc tioning because the decreased temperature leads to a lowering of tire pressure When you drive your vehicle from a warm area to a cold area or from a cold area to a warm area or the outside temperature is higher or lo...

Страница 462: ...e tire to cool before measur ing the inflation pressure Always be sure the tire is cold before inflating to the recommended pressure A cold tire means the vehicle has been sitting for 3 hours and driven for less than 1 6 km 1 mile in that 3 hour period The TPMS malfunction indica tor may blink for approximate ly 1 minute and then remain continuously illuminated if the vehicle is moving around elec...

Страница 463: ...sure Monitoring System TPMS components may void the warranty for that portion of the vehicle WARNING For EUROPE Do not modify the vehicle it may interfere with the TPMS function The wheels on the market do not have a TPMS sensor For your safety we recom mend that you use parts for replacement from an author ized HYUNDAI dealer If you use the wheels on the market use a TPMS sensor approved by a HYU...

Страница 464: ...ons to reduce the possibility of personal injury Changing a tire can be danger ous Follow the instructions in this section when changing a tire to reduce the risk of serious injury or death WARNING Be cautious as the minimum ground clearance gets lower when you store the original tire in the bottom of the vehicle after replacing it with a spare tire In particular drive below 30 km h 18 mph when dr...

Страница 465: ...r 3 Connect the socket A and wheel lug nut wrench B 4 Loosen the bolt enough to lower the spare tire Turn the wrench counterclockwise until the spare tire reaches the ground 5 After the spare tire reaches the ground continue to turn the wrench counterclockwise and draw the spare tire outside Never rotate the wrench excessively otherwise the spare tire carrier may be damaged 6 Draw out the retainer...

Страница 466: ...o an accident CAUTION A vehicle can slip or roll off of a jack causing serious injury or death to you or those nearby Take the following safety pre cautions Do not get under a vehicle that is supported by a jack NEVER attempt to change a tire in the lane of traffic ALWAYS move the vehicle completely off the road on level firm ground away from traffic before trying to change a tire If you cannot fi...

Страница 467: ... diagonally opposite of the tire you are changing OLX2068029L Block Changing a tire To prevent vehicle movement while changing a tire always set the parking brake fully and always block the wheel diagonally opposite the wheel being changed We recommend that the wheels of the vehicle be chocked and that no person remain in a vehicle that is being jacked CAUTION Do not start or run the engine while ...

Страница 468: ... at the designated locations under the frame The jacking positions are plates welded to the frame with two tabs and a raised dot to index with the jack 8 Insert the jack handle into the jack and turn it clockwise raising the vehicle until the tire just clears the ground This measurement is approximately 30 mm 1 2 in Before removing the wheel lug nuts make sure the vehicle is sta ble and that there...

Страница 469: ...alled with their tapered small diameter ends directed inward Jiggle the tire to be sure it is completely seated then tighten the nuts as much as possible with your fin gers again 11 Lower the vehicle to the ground by turning the wheel nut wrench counterclockwise Wheels may have sharp edges Handle them carefully to avoid possible severe injury Before putting the wheel into place be sure that there ...

Страница 470: ...e valve cap after checking or adjusting tire pressure If the cap is not replaced air may leak from the tire If you lose a valve cap buy another and install it as soon as pos sible After you have changed wheels always secure the flat tire in its place and return the jack and tools to their proper storage locations Check the tire pressure as soon as possible after installing a spare tire Adjust it t...

Страница 471: ...ay lose their ability to retain the wheel This could lead to the loss of the wheel and a collision resulting in serious injuries WARNING Inadequate spare tire pressure Check the inflation pressures as soon as possible after installing the spare tire Adjust it to the specified pressure if necessary Refer to Tires and wheels in section 8 WARNING To prevent compact spare tire failure and loss of cont...

Страница 472: ...spare tire is installed When the original tire and wheel are repaired and reinstalled on the vehicle the lug nut torque must be set correctly The correct lug nut tightening torque is 11 13 kgf m 79 94 lbf ft NOTICE To prevent damaging the com pact spare tire and your vehicle Drive slowly enough for the road conditions to avoid all hazards such as a potholes or debris Avoid driving over obstacles T...

Страница 473: ...rting the vehicle the base plate of jack must be vertical under the lifting point 8 Shift into Reverse gear on vehi cles with manual transmission or move the shift lever to the P posi tion on vehicles with automatic transmission 9 The jack should be used on firm level ground 10 Jack manufacturer 11 Production date 12 Representative company and address The actual Jack label in the vehicle may diffe...

Страница 474: ...6 25 What to do in an emergency 6 OHYK009001 EC Declaration of conformity for Jack ...

Страница 475: ...ted to N Neutral the vehicle should never be towed with the wheels on the ground If any of the loaded wheels or sus pension components are damaged or the vehicle is being towed with the front wheels on the ground use a towing dolly under the front wheels When being towed by a commercial tow truck and wheel dollies are not used the front of the vehicle should always be lifted not the rear OLX206801...

Страница 476: ...from the tool case 2 Remove the hole cover pressing the lower part of the cover on the bumper Failure to place the shift button in N Neutral may cause inter nal damage to the transmission CAUTION If your vehicle is equipped with a rollover sensor place the igni tion switch in the OFF or ACC position when the vehicle is being towed The side impact and curtain air bag may deploy if the sensor detect...

Страница 477: ...g a cable or chain secured to the emergency tow ing hook at the front or rear of the vehicle Use extreme caution when towing the vehicle with a cable or chain A driver must be in the vehicle to steer it and operate the brakes Towing in this manner may be done only on hard surfaced roads for a short distance and at low speeds Also the wheels axles power train steering and brakes must all be in good...

Страница 478: ...out 30 cm 12 inches wide in the middle of the cable or chain for easy visibility Drive carefully so the towing cable or chain remains tight during tow ing Before towing check the automat ic transmission for fluid leaks under your vehicle If the automatic trans mission fluid is leaking flatbed equipment or a towing dolly must be used Accelerate or decelerate the vehi cle in a slow and gradual manne...

Страница 479: ...flector Place the triangle reflector on the road to warn oncoming vehicles dur ing emergencies such as when the vehicle is parked by the roadside due to problems Tire pressure gauge if equipped Tires normally lose some air in day to day use and you may have to add a air periodically and usually it is not a sign of a leaking tire but of normal wear Always check tire pressure when the tires are cold...

Страница 480: ...xcept Europe 7 27 Maintenance Under Severe Usage and Low Mileage Conditions Diesel Engine except Europe 7 30 Explanation of scheduled maintenance items 7 32 Engine oil 7 35 Checking the engine oil level Gasoline engine 7 35 Checking the engine oil level Diesel Engine 7 36 Checking the engine oil and filter 7 38 Engine coolant 7 39 Checking the engine coolant level 7 39 Changing the engine coolant ...

Страница 481: ...p turn signal lamp and daytime running light bulb replacement 7 86 Side repeater lamp replacement 7 89 Rear combination lamp bulb replacement 7 89 High mounted stop lamp replacement 7 91 License plate light bulb replacement 7 91 Interior light bulb replacement 7 91 Appearance care 7 94 Exterior care 7 94 Interior care 7 99 Emission control system 7 102 Crankcase emission control system 7 102 Evapo...

Страница 482: ... Brake fluid reservoir 4 Air cleaner 5 Engine oil filler cap 6 Engine oil dipstick 7 Windshield washer fluid reservoir 8 Fuse box 9 Battery terminal 10 Battery terminal The actual engine compartment in the vehicle may differ from the illustration OLX2078002L Gasoline Engine 3 8 GDI ...

Страница 483: ...rake fluid reservoir 4 Air cleaner 5 Fuse box 6 Battery terminal 7 Battery terminal 8 Radiator cap 9 Engine oil dipstick 10 Windshield washer fluid reservoir The actual engine compartment in the vehicle may differ from the illustration OLX2078048L Gasoline Engine 3 5 MPI ...

Страница 484: ...d reservoir 3 Radiator cap 4 Fuse box 5 Engine oil dipstick 6 Engine oil filler cap 7 Brake fluid reservoir 8 Air cleaner 9 Battery terminal 10 Battery terminal The actual engine compartment in the vehicle may differ from the illustration OLX2078001 Diesel Engine 2 2 VGT ...

Страница 485: ...equirements of your vehicle war ranties Detailed warranty information is pro vided in your Service Passport Repairs and adjustments required as a result of improper maintenance or a lack of required maintenance are not covered Owner maintenance precautions Inadequate incomplete or insuffi cient servicing may result in opera tional problems with your vehicle that could lead to vehicle damage an acc...

Страница 486: ...pply the parking brake and place the ignition switch in the OFF position Block the tires front and back to prevent the vehicle from moving Remove loose clothing or jew elry that can become entan gled in moving parts WARNING If you must run the engine during maintenance do so out doors or in an area with plenty of ventilation Keep flames sparks or smok ing materials away from the battery and fuel r...

Страница 487: ...e increased brake pedal travel or hard to push brake pedal If any slipping or changes in the operation of your transmission occurs check the transmission fluid level Check the automatic transmission P Park function Check the parking brake Check for fluid leaks under your vehicle water dripping from the air conditioning system during or after use is normal At least monthly Check coolant level in th...

Страница 488: ...r fluid Check headlamp alignment Check muffler exhaust pipes shields and clamps Check seat belts for wear and function At least once a year Clean body and door drain holes Lubricate door hinges and hood hinges Lubricate door and hood locks and latches Lubricate door rubber weather strips Check the air conditioning system Inspect and lubricate automatic transmission linkage and controls Clean the b...

Страница 489: ... with loads on the roof Driving as a patrol car taxi other commercial use of vehicle towing Frequently driving under high speed or rapid acceleration deceleration Frequently driving in stop and go condition Engine oil usage which is not recommended Mineral type Semi synthetic Lower grade spec etc If your vehicle is operated under the above conditions you should inspect replace or refill more frequ...

Страница 490: ... information on how to use them Do not mix other additives 4 For your convenience it can be replaced prior to it s interval when you do maintenance of other items Normal Maintenance Schedule Gasoline Engine for Europe Months 24 48 72 96 120 144 168 192 Miles x 1 000 20 40 60 80 100 120 140 160 Km x 1 000 30 60 90 120 150 180 210 240 Drive belts 1 At first inspect at 90 000 km 60 000 miles or 72 mo...

Страница 491: ...luid R R R R R R R R Disc brakes and pads I I I I I I I I MAINTENANCE INTERVALS MAINTENANCE ITEM I Inspect and if necessary adjust correct clean or replace R Replace or change 5 The fuel filter is considered to be maintenance free but periodic inspection is recommended for this maintenance schedule depends on fuel quality If there are some important matters like fuel flow restriction surging loss ...

Страница 492: ...0 140 160 Km x 1 000 30 60 90 120 150 180 210 240 Steering gear rack linkage and boots I I I I I I I I Driveshaft and boots I I I I I I I I Tire pressure tread wear I I I I I I I I Front suspension ball joints I I I I I I I I Bolt and nuts on chassis and body I I I I I I I I Air conditioner refrigerant I I I I I I I I Air conditioner compressor I I I I I I I I Climate control air filter R R R R R ...

Страница 493: ... every 7 500 km 4 650 miles or 6 months A B C D E F G H I J K L Air cleaner filter R Replace more frequently depending on the condition C E Spark plugs R Replace more frequently depending on the condition A B H I K Steering gear rack linkage and boots I Inspect more frequently depending on the condition C D E F G Front suspension ball joints I Inspect more frequently depending on the condition C D...

Страница 494: ...ng with loads on the roof I Driving as patrol car taxi commercial car or vehicle towing J Frequently driving under high speed or rapid acceleration deceleration K Frequently driving in stop and go conditions L Engine oil usage which is not recommended Mineral type Semi synthetic Lower grade spec etc Maintenance item Maintenance operation Maintenance intervals Driving condition Climate control air ...

Страница 495: ...e or change 1 Inspect drive belt tensioner idler and alternator pulley and if necessary correct or replace 2 Check the engine oil level and leak every 500 km 350 miles or before starting a long trip 3 The engine oil level should be checked regularly and maintained properly Operating with an insufficient amount of oil can damage the engine and such damage is not covered by warranty 4 Middle East in...

Страница 496: ...4 months Normal Maintenance Schedule Gasoline Engine except Europe Cont MAINTENANCE INTERVALS MAINTENANCE ITEM I Inspect and if necessary adjust correct clean or replace R Replace or change 4 Middle East includes India Iran Libya Algeria Sudan Morocco Tunisia and Egypt 5 Central South America includes Brazil etc 7 For your convenience it can be replaced prior to it s interval when you do maintenan...

Страница 497: ...s I I I I I I I I Driveshaft and boots I I I I Tire pressure tread wear I I I I I I I I Front suspension ball joints I I I I I I I I Bolt and nuts on chassis and body I I I I I I I I Air conditioner refrigerant I I I I I I I I Air conditioner compressor I I I I I I I I I Inspect and if necessary adjust correct clean or replace R Replace or change 7 For your convenience it can be replaced prior to ...

Страница 498: ...Valve clearance 10 I Exhaust system I I I I Trasnfer case oil 4WD 11 I I Rear differential oil 4WD 11 I I Propeller shaft 4WD I I I I I Inspect and if necessary adjust correct clean or replace R Replace or change 10 Inspect for excessive valve noise and or engine vibration and adjust if necessary We recommend that the system be checked by an authorized HYUNDAI dealer 11 Transfer case oil and diffe...

Страница 499: ...rica 2 5 000 km 3 000 miles or 6 months Air cleaner filter R Replace more frequently depending on the condition C E Spark plugs R Replace more frequently depending on the condition A B H I K Steering gear rack linkage and boots I Inspect more frequently depending on the condition C D E F G Front suspension ball joints I Inspect more frequently depending on the condition C D E F G Disc brakes and p...

Страница 500: ...mperature or less than 16 km 10 miles in freez ing temperature B Extensive engine idling or low speed driving for long distances C Driving on rough dusty muddy unpaved graveled or salt spread roads D Driving in areas using salt or other corrosive materials or in very cold weather E Driving in the heavy dust conditions F Driving in heavy traffic area G Driving on uphill downhill or mountain roads r...

Страница 501: ...g a qualified fuel EN590 or equivalent If the diesel fuel specifications don t meet the EN590 it must be replaced more frequently If there are some important safety matters like fuel flow restriction surging loss of power hard starting problem etc replace the fuel filter immediately regardless of maintenance schedule We recommend that you consult an authorized HYUNDAI dealer for details Normal Mai...

Страница 502: ... 168 192 Miles x 1 000 20 40 60 80 100 120 140 160 Km x 1 000 30 60 90 120 150 180 210 240 Engine coolant 6 At first replace at 210 000 km 120 000 miles or 10 years after that replace every 30 000 km 20 000 miles or 24 months 7 Battery condition I I I I I I I I Brake lines hoses and connections I I I I I I I I Parking brake if equipped I I I I I I I I Brake fluid R R R R R R R R Disc brakes and pa...

Страница 503: ... Climate control air filter R R R R R R R R Automatic transmission fluid No check No service required Exhaust system I I I I I I I I Trasnfer case oil 4WD 8 I I I I Rear differential oil 4WD 8 I I I I Propeller shaft 4WD I I I I I I I I I Inspect and if necessary adjust correct clean or replace R Replace or change 8 Transfer case oil and differential oil should be changed anytime they have been su...

Страница 504: ... engine oil filter R Replace every 15 000 km 10 000 miles or 12 months A B C D E F G H I J K L Air cleaner filter R Replace more frequently depending on the condition C E Steering gear rack linkage and boots I Inspect more frequently depending on the condition C D E F G Front suspension ball joints I Inspect more frequently depending on the condition C D E F G Disc brakes and pads calipers and rot...

Страница 505: ...s on the roof I Driving as patrol car taxi commercial car or vehicle towing J Frequently driving under high speed or rapid acceleration deceleration K Frequently driving in stop and go conditions L Engine oil usage which is not recommended Mineral type Semi synthetic Lower grade spec etc Maintenance item Maintenance operation Maintenance intervals Driving condition Climate control air filter R Rep...

Страница 506: ...correct or replace 2 Check the engine oil level and leak every 500 km 350 miles or before starting a long trip 3 The engine oil level should be checked regularly and maintained properly Operating with an insufficient amount of oil can dam age the engine and such damage is not covered by warranty 4 This maintenance schedule depends on fuel quality It is applicable only when using a qualified fuel E...

Страница 507: ...lines hoses and connections I I I I I I I I Parking brake I I I I I I I I Brake fluid I I I I I I I I Disc brakes and pads I I R I I R I I Steering gear rack linkage and boots I I I I I I I I Driveshaft and boots I I I I Tire pressure tread wear I I I I I I I I I Inspect and if necessary adjust correct clean or replace R Replace or change 5 For your convenience it can be replaced prior to it s int...

Страница 508: ...ditioner compressor I I I I I I I I Climate control air filter R R R R R R R R Automatic transmission fluid For Middle East I I I I Except Middle East No check No service required Exhaust system I I I I Trasnfer case oil 4WD 7 I I Rear differential oil 4WD 7 I I Propeller shaft 4WD I I I I I Inspect and if necessary adjust correct clean or replace R Replace or change 7 Transfer case oil and differ...

Страница 509: ...nths A B C D E F G H I J K L Air cleaner filter R Replace more frequently depending on the condition C E Steering gear rack linkage and boots I Inspect more frequently depending on the condition C D E F G Front suspension ball joints I Inspect more frequently depending on the condition C D E F G Disc brakes and pads calipers and rotors I Inspect more frequently depending on the condition C D E G H...

Страница 510: ...es in freez ing temperature B Extensive engine idling or low speed driving for long distances C Driving on rough dusty muddy unpaved graveled or salt spread roads D Driving in areas using salt or other corrosive materials or in very cold weather E Driving in heavy dust conditions F Driving in heavy traffic area G Driving on uphill downhill or mountain roads repeatedly H Towing a trailer or using a...

Страница 511: ...he diesel engine for several min utes and check the connections for any leakages We recommend you to have the fuel filter replaced by an authorized HYUNDAI dealer Vapor hose and fuel filler cap The vapor hose and fuel filler cap should be inspected at those inter vals specified in the maintenance schedule Make sure that a new vapor hose or fuel filler cap is cor rectly replaced Vacuum crankcase ve...

Страница 512: ...ions for leakage and damage Replace any damaged parts Engine coolant The coolant should be changed at the intervals specified in the mainte nance schedule Automatic transmission fluid Automatic transmission fluid should not be checked under normal usage conditions We recommend that the automatic transmission fluid is changed by an authorized HYUNDAI dealer accord ing to the maintenance schedule In...

Страница 513: ...ng wear limit refer to the HYUNDAI web site http service hyundai motor com Suspension mounting bolts Check the suspension connections for looseness or damage Retighten to the specified torque Steering gear rack linkage boots lower arm ball joint With the vehicle stopped and engine off check for excessive free play in the steering wheel Check the linkage for bends or dam age Check the dust boots an...

Страница 514: ...er s precautions 2 Be sure the vehicle is on the level ground in P Park with the parking brake set If possible block the wheels 3 Turn the engine on and warm the engine up until the coolant tem perature reaches a constant nor mal temperature 4 Turn the engine off remove the oil filler cap and pull the dipstick out Wait for 15 minutes for the oil to return to the oil pan 5 Wipe the dipstick clean a...

Страница 515: ...ic condi tions oil quality etc Therefore it is recommended that you inspect the engine oil level regu larly and refill it if necessary Use only the specified engine oil Refer to Recommended lubricants and capacities in chapter 8 Checking the engine oil level Diesel Engine NOTICE Range Required action A Recommend to contact an authorized HYUNDAI dealer B Do not refill engine oil C Normal You may ad...

Страница 516: ...uld be in the C range 7 If the level is in the D range add enough engine oil to bring the level up the range Use only the specified engine oil Refer to Recommended lubricants and capacities in chapter 8 To prevent damage to your engine Do not spill engine oil when adding or changing engine oil Wipe off spilled oil immediately The engine oil consumption may increase while you break in a new vehicle...

Страница 517: ...and filter If the recom mended engine oil and filter are not used replace it according to the maintenance schedule under severe usage conditions The purpose of the maintenance schedule for engine oil replace ment is to prevent oil deterioration and it is irrelevant to oil consump tion Check and refill engine oil reg ularly 7 38 Maintenance Used engine oil may cause irri tation or cancer of the ski...

Страница 518: ...slowly in small quanti ties Do not drive with no engine coolant It may cause water pump failure and engine seizure etc Checking the engine coolant level Check the condition and connections of all cooling system hoses and heater hoses Replace any swollen or deteriorated hoses The coolant level should be filled between MAX and MIN or F Full and L Low marks on the side of the coolant reservoir when t...

Страница 519: ...ness of the solution The electric motor for the cooling fan may continue to operate or start up when the engine is not running and can cause serious injury Keep hands clothing and tools away from the rotating fan blades of the cooling fan WARNING Never remove the radiator cap or the drain plug while the engine and radiator are hot Hot coolant and steam may blow out under pressure causing serious i...

Страница 520: ...Changing the engine coolant We recommend that coolant be changed by an authorized HYUNDAI dealer according to the Maintenance Schedule at the beginning of this chapter To prevent damage to engine parts put a thick towel around the radiator cap before refilling the coolant to prevent the coolant from overflow ing into engine parts such as the alternator NOTICE i Ambient Temperature Mixture Percenta...

Страница 521: ...ystem be checked by an authorized HYUNDAI dealer Information Use only the specified brake fluid Refer to Recommended lubricants and capacities in chapter 8 Information Before removing the brake filler cap read the warning on the cap if equipped Information Clean the filler cap before removing Use only DOT3 or DOT4 brake fluid from a sealed container i i i Do not allow brake fluid to come in contac...

Страница 522: ...owever use washer solvent with antifreeze characteristics in cold cli mates to prevent freezing NOTICE To prevent serious injury or death take the following safety precautions when using washer fluid Do not use engine coolant or antifreeze in the washer fluid reservoir Engine coolant can severely obscure visibility when sprayed on the wind shield and may cause loss of vehicle control resulting in ...

Страница 523: ...horized HYUNDAI dealer When the accumulated water is not drained at the proper timing water may permeate in the fuel filter damaging the major vehicle com ponents such as the fuel system Fuel filter cartridge replacement We recommend the fuel filter car tridge be replaced by an authorized HYUNDAI dealer according to the Maintenance Schedule at the begin ning of this chapter Filter replacement The ...

Страница 524: ... ment more often than the usual rec ommended intervals refer to Maintenance Under Severe Usage Conditions in this chapter Do not drive with the air cleaner filter removed This will result in excessive engine wear When removing the air cleaner filter be careful that dust or dirt does not enter the air intake or damage may result Use HYUNDAI genuine parts or the equivalent specified for your vehicle...

Страница 525: ...lace the filter according to the Maintenance Schedule Filter replacement 1 With the glove box open remove the stoppers on both sides 2 Remove the support strap 1 3 Remove the climate control air filter case while pressing the lock on right side of the cover 4 Replace the climate control air filter 5 Reassemble in the reverse order of disassembly Install a new climate control air fil ter in the cor...

Страница 526: ...s manually Use non specified wiper blades Information Commercial hot waxes applied by auto matic car washes have been known to make the windshield difficult to clean Information Wiper blades are a consumable item and normal wear of the wipers may not be covered by your vehicle warranty Blade replacement When the wipers no longer clean adequately the blades may be worn or cracked and require replac...

Страница 527: ...op wipe position 2 At this time you can lift the wipers off the windshield 3 Gently put the wipers back down onto the windshield 4 Turn the wipers to any ON position to return the wipers to the bottom resting position Blade replacement 1 Lift up the wiper blade clip Then lift up the wiper blade 2 While pushing the lock 1 pull down the wiper blade 2 3 Remove the wiper blade from the wiper arm 4 Ins...

Страница 528: ...g the center part into the slot in the wiper arm until it clicks into place 1 4 Make sure the blade assembly is installed firmly by trying to pull it slightly 5 Rotate back the blade assembly so that it aligns with the wiper arm 2 To prevent damage to the wiper arms or other components we recom mend that the wiper blades be replaced by an authorized HYUNDAI dealer OTM078057 OTM078058 7 28 ...

Страница 529: ...ghly combustible and may explode if ignit ed Keep batteries out of reach of children WARNING Batteries contain sulfu ric acid which is highly corrosive Do not allow acid to contact your eyes skin or clothing If acid gets into your eyes flush your eyes with clean water for at least 15 minutes and get imme diate medical attention If acid gets on your skin thoroughly wash the area If you feel pain or...

Страница 530: ...vel The electrolyte level should be between LOWER MIN and UPPER MAX When the electrolyte level is low add distilled or de mineralized water Never add sulfuric acids or other electrolyte Be careful not to spill distilled or de mineralized water over the battery surface or other adjacent components Also do not overfill the battery cells If not it may corrode the battery or other components Finally s...

Страница 531: ...e bat tery turn off all accessories and place the Engine Start Stop button to the OFF posi tion Keep all flames sparks or smoking materials away from the battery Always work outdoors or in an area with plenty of ventilation Wear eye protection when checking the battery during charging The battery must be removed from the vehicle and placed in a well ventilated area WARNING Watch the battery during...

Страница 532: ...eset after the battery has been dis charged or the battery has been dis connected Auto up down window Sunroof Trip computer Climate control system Driver position memory system Clock Audio system i AGM battery if equipped Absorbent Glass Matt AGM batteries are maintenance free and we recommend that the AGM battery be serviced by an authorized HYUNDAI dealer For charging your AGM battery use only f...

Страница 533: ...icle can be found in this manual and on the tire label located on the driver s side center pillar Always use a tire pressure gauge to measure tire pres sure Tires with too much or too little pressure wear unevenly causing poor han dling Check the pressure of the spare every time you check the pressure of the other tires on your vehicle WARNING Replace tires that are worn show uneven wear or are da...

Страница 534: ...ion can reduce tire life adversely affect vehicle handling and lead to sudden tire failure that could result in loss of vehicle control resulting in an accident Severe under inflation can lead to severe heat build up causing blowouts tread separation and other tire failures that can result in the loss of vehicle control resulting in an accident This risk is much higher on hot days and when driving...

Страница 535: ... as possible If you overfill the tire release air by pushing on the metal stem in the center of the tire valve Recheck the tire pressure with the tire gauge Be sure to put the valve caps back on the valve stems Without the valve cap dirt or moisture could get into the valve core and cause air leakage If a valve cap is missing install a new one as soon as possible Tire rotation To equalize tread we...

Страница 536: ...st tire life and best overall performance In most cases you will not need to have your wheels aligned again However if you notice unusual tire wear or your vehicle pulling one way or the other the alignment may need to be reset If you notice your vehicle vibrating when driving on a smooth road your wheels may need to be rebalanced Incorrect wheel weights can dam age your vehicle s aluminum wheels ...

Страница 537: ...ecom mended sizes could cause unusual handling characteris tics poor vehicle control or negatively affect your vehi cle s Anti Lock Brake System ABS resulting in a serious accident WARNING When replacing tires or wheels it is recommended to replace the two front or two rear tires or wheels as a pair Replacing just one tire can seriously affect your vehicle s handling If only replacing one pair of ...

Страница 538: ... when tread wear indicators appear To reduce the possibility of losing control slow down whenever there is rain snow or ice on the road Tire maintenance In addition to proper inflation correct wheel alignment helps to decrease tire wear If you find a tire is worn unevenly have your dealer check the wheel alignment When you have new tires installed make sure they are balanced This will increase veh...

Страница 539: ... Tire width in millimeters 60 Aspect ratio The tire s section height as a percentage of its width R Tire construction code Radial 18 Rim diameter in inches 105 Load Index a numerical code associated with the maximum load the tire can carry H Speed Rating Symbol See the speed rating chart in this section for additional information Wheel size designation Wheels are also marked with impor tant inform...

Страница 540: ...nt part of the DOT shows a plant code number tire size and tread pattern and the last four num bers indicate week and year manu factured For example DOT XXXX XXXX 1421 represents that the tire was produced in the 15th week of 2021 4 Tire ply composition and material The number of layers or plies of rub ber coated fabric in the tire Tire manufacturers also must indicate the materials in the tire wh...

Страница 541: ...as a tire graded 100 The relative performance of tires depends upon the actual conditions of their use however and may depart significantly from the norm due to variations in driving habits service practices and differences in road characteristics and climate These grades are molded on the sidewalls of passenger vehicle tires The tires available as standard or optional equipment on your vehicle ma...

Страница 542: ... to prevent a tire damage It is difficult to recognize a tire damage only with your eyes When there is a slight hint of a tire damage check and replace the tire to prevent the damage caused by air leak age When a tire is damaged while driving on a rough road off a road or over obstacles such as a pothole manhole or curb stone your warranty does not cover the damage The tire information is speci fi...

Страница 543: ...ame rating If the replacement fuse blows this indi cates an electrical problem Avoid using the system involved We recom mend that you immediately consult an authorized HYUNDAI dealer Information Three kinds of fuses are used blade type for lower amperage rating car tridge type and multi fuse for higher amperage ratings Do not use a screwdriver or any other metal object to remove fuses because it m...

Страница 544: ...nstrument panel fuse panels or in the engine compart ment fuse panel 7 Push in a new fuse of the same rating and make sure it fits tightly in the clips If it fits loosely we rec ommend that you consult an authorized HYUNDAI dealer In an emergency if you do not have a spare fuse use a fuse of the same rating from a circuit you may not need for operating the vehicle such as the cigarette lighter fus...

Страница 545: ...gine compartment securely install the fuse panel cover You may hear a clicking sound if the cover is securely latched If it is not securely latched electrical failure may occur from water con tact Multi fuse Main fuse If the multi fuse is blown it must be removed as follows 1 Turn the vehicle off 2 Disconnect the negative battery cable 3 Remove the fuse panel cover by pressing the tab and pulling ...

Страница 546: ...u can find the fuse relay label describ ing fuse relay names and ratings Information Not all fuse panel descriptions in this manual may be applicable to your vehicle It is accurate at the time of printing When you inspect the fuse box on your vehicle refer to the fuse box label i OLX2079027L OLX2078026L 7 46 ...

Страница 547: ...Sensor Driver IMS Control Module Power Tail Gate Unit Driver Door Module Driver Passenger Power Outside Mirror WithIMS MODULE10 MODULE 10 10A Front Console Switch Data Link Connector Rear A C Control Module Front Wireless Charger Blind Spot Collision Warning Unit LH RH Center Fascia Keyboard Audio MODULE7 MODULE 7 10A Head Lamp RH Head Lamp LH A BAG IND IND 10A Instrument Cluster IBU1 IBU 1 7 5A I...

Страница 548: ...Blower Motor E SHIFTER2 E SHIFTER 2 10A Electronic ATM shift button Switch SBW MODULE5 MODULE 5 7 5A Front Console Switch Crash Pad Switch Up IBU Fuel Pressure Sensor D4HC 4WD ECM IBU2 IBU 2 15A IBU SUNROOF2 2 20A Rear Sunroof Motor MODULE1 MODULE 1 7 5A IBU P WDW RH RH 20A Passenger Safety Power Window Module Passenger Power Window Switch Rear Power Window Switch RH Rear Safety Power Window Modul...

Страница 549: ... Relay Door Lock Unlock Relay SUNROOF1 1 20A Front Sunroof Motor E SHIFTER1 E SHIFTER 1 10A Electronic ATM shift button Switch SBW P WDW LH LH 25A Driver Safety Power Window Module Rear Power Window Switch LH Rear Safety Power Window Module LH MODULE3 MODULE 3 7 5A IBU MODULE6 MODULE 6 7 5A Center Fascia Keyboard Audio A V Navigation Head Unit Front Rear A C Control Module Electro Chromic Mirror A...

Страница 550: ...Ventilation Seat RH Control Module 2ND Seat RH Heater Control Module Wiper RR 15A Rear Wiper Relay Rear Wiper Motor AMP AMP 25A AMP ACC ACC 7 5A Center Fascia Keyboard IBU Audio A V Navigation Head Unit Front Wireless Charger 1ST USB Charger 1 Surround View Monitor Unit AMP PS P Seat PASS 30A Passenger Seat Manual Switch DR P Seat DRV 30A Driver Seat Manual Switch Driver IMS Control Module 7 50 ...

Страница 551: ...he fuse relay label describ ing fuse relay names and ratings Information Not all fuse panel descriptions in this manual may be applicable to your vehicle It is accurate at the time of printing When you inspect the fuse box on your vehicle refer to the fuse box label i OLX2078022 OLX2078028L 7 51 ...

Страница 552: ...FR Blower FRT 40A E R Junction Block RLY 3 ESP1 1 40A Multipurpose Check Connector RR DEFOG 40A E R Junction Block RLY 2 BATT2 2 50A ICU Junction Block IPS8 10 11 15 BATT3 3 50A ICU Junction Block Fuse F29 F38 F39 F48 F49 BATT4 4 50A ICU Junction Block Fuse F16 F17 F27 F36 F46 EPB P 60A ESP Control Module FUSE C FAN1 1 80A Not Used MDPS1 1 80A MDPS Unit 7 52 ...

Страница 553: ...E R Junction Block RLY 7 PTC1 PTC HEATER 1 50A E R Junction Block RLY 8 GLOW 80A Glow Relay Unit FUSE BATT1 1 50A ICU Junction Block Fuse IPS1 2 3 4 5 6 7 Long Short Term Load Latch Relay RR Blower1 1 RR 40A E R Junction Block RLY 9 BATT5 5 50A ICU Junction Block Fuse F4 F14 F23 F24 F33 F34 F44 TRAILER2 2 15A Not Used E Shifter1 E SHIFTER 1 20A E R Junction Block Fuse F37 SCU ECU6 E6 15A ECM C FAN...

Страница 554: ... Power Tail Gate Unit IG2 IG2 40A E R Junction Block RLY 5 PCB Block IG2 Relay TCU1 T1 15A TCM TRAILER3 3 15A Not Used 4WD 20A 4WD ECM FR Wiper2 2 FRT 10A IBU ECM E Shifter2 E SHIFTER 2 10A SCU RR Blower2 2 RR 10A Rear A C Control Module RR HTD 10A Driver Passenger Power Outside Mirror Front A C Control Module A C2 A C 2 10A Front A C Control Module Auto 7 54 ...

Страница 555: ...A Not Used DCU1 DCU 1 20A Not Used P OUTLET3 POWER OUTLET 3 20A Luggage Power Outlet DCU2 DCU 2 20A Not Used P OUTLET4 POWER OUTLET 4 20A 1ST Power Outlet P OUTLET2 POWER OUTLET 2 20A 2ND Power Outlet 1 ACC3 ACC 3 10A 1ST USB Charger 2 2ND USB Charger LH RH 3RD USB Charger LH RH P OUTLET1 POWER OUTLET 1 20A 2ND Power Outlet 2 Engine compartment fuse panel PCB Junction block Gasoline 3 8 GDI 7 55 ...

Страница 556: ...or Oil Pump Valve EGR Cooing Bypass Solenoid Valve E R Junction Block A C COMP Realy SENSOR4 S4 15A E R Junction Block RLY 4 Lambda Sensor 1 2 Electronic VGT Actuator PM Particulate Matter Sensor Cooling Fan Controller SENSOR3 S3 20A Rail Pressure Regulating Valve ESP3 3 10A Multipurpose Check Connector ESP Control Module ECU1 E1 20A ECM A C1 A C 1 10A PCB Block A C COMP Relay TCU2 T2 10A TCM SCU ...

Страница 557: ...it ECU3 E3 20A Fuel Pressure Regulating Valve ECU4 E4 10A ECM IGN COIL IGN COIL 20A Not Used DCU4 DCU 4 40A Not Used ACC1 ACC 1 40A PCB Block ACC1 Relay ACC2 ACC 2 40A PCB Block ACC2 Relay ECU5 E5 30A Engine Control Relay IG1 IG1 40A PCB Block IG1 Relay Engine compartment fuse panel PCB Junction block Gasoline 3 8 GDI 7 57 ...

Страница 558: ...15A Not Used DCU1 DCU 1 20A Not Used P OUTLET3 POWER OUTLET 3 20A Luggage Power Outlet DCU2 DCU 2 20A Not Used P OUTLET4 POWER OUTLET 4 20A 1ST Power Outlet P OUTLET2 POWER OUTLET 2 20A 2ND Power Outlet 1 ACC3 ACC 3 10A 1ST USB Charger 2 2ND USB Charger LH RH 3RD USB Charger LH RH P OUTLET1 POWER OUTLET 1 20A 2ND Power Outlet 2 Engine compartment fuse panel PCB Junction block Diesel 2 2 TCI 7 58 ...

Страница 559: ... 4 Oil Control Valve 1 2 3 4 Variable Intake Solenoid Valve 1 2 Oil Pressure Switch E R Junction Block A C COMP Realy SENSOR4 S4 15A E R Junction Block RLY 4 Cooling Fan Controller Ignition Coil 1 2 3 4 5 6 SENSOR3 S3 20A Not Used ESP3 3 10A Multipurpose Check Connector ESP Control Module ECU1 E1 20A ECM A C1 A C 1 10A PCB Block A C COMP Relay TCU2 T2 10A TCM SCU ECU2 E2 20A ECM Engine compartment...

Страница 560: ...6 10A Not Used ECU3 E3 20A ECM ECU4 E4 10A ECM IGN COIL IGN COIL 20A Not Used DCU4 DCU 4 40A Not Used ACC1 ACC 1 40A PCB Block ACC1 Relay ACC2 ACC 2 40A PCB Block ACC2 Relay ECU5 E5 30A Engine Control Relay IG1 IG1 40A PCB Block IG1 Relay Engine compartment fuse panel PCB Junction block Diesel 2 2 TCI 7 60 ...

Страница 561: ...A Not Used DCU1 DCU 1 20A Not Used P OUTLET3 POWER OUTLET 3 20A Luggage Power Outlet DCU2 DCU 2 20A Not Used P OUTLET4 POWER OUTLET 4 20A 1ST Power Outlet P OUTLET2 POWER OUTLET 2 20A 2ND Power Outlet 1 ACC3 ACC 3 10A 1ST USB Charger 2 2ND USB Charger LH RH 3RD USB Charger LH RH P OUTLET1 POWER OUTLET 1 20A 2ND Power Outlet 2 Engine compartment fuse panel PCB Junction block Gasoline 3 5 MPI 7 61 ...

Страница 562: ...lock RLY 4 Injector 1 2 3 4 5 6 SENSOR2 S2 10A Oxygen Sensor 1 2 3 4 Oil Control Valve 1 2 Variable Intake Solenoid Valve 1 2 Purge Control Solenoid Valve E R Junction Block A C COMP Realy SENSOR4 S4 15A E R Junction Block RLY 4 Cooling Fan Controller SENSOR3 S3 20A Not Used ESP3 3 10A Multipurpose Check Connector ESP Control Module ECU1 E1 20A ECM A C1 A C 1 10A PCB Block A C COMP Relay TCU2 T2 1...

Страница 563: ...3 E3 20A ECM ECU4 E4 10A ECM IGN COIL IGN COIL 20A Ignition Coil 1 2 3 4 5 6 Condenser 1 2 DCU4 DCU 4 40A Not Used ACC1 ACC 1 40A PCB Block ACC1 Relay ACC2 ACC 2 40A PCB Block ACC2 Relay ECU5 E5 30A Engine Control Relay IG1 IG1 40A PCB Block IG1 Relay Engine compartment fuse panel PCB Junction block Gasoline 3 5 MPI 7 63 ...

Страница 564: ...d outside and it does not indicate a problem with your vehicle When moisture condenses in the lamp it will be removed after driving with the headlamp on The removable level may differ depending on lamp size lamp position and environmental con dition However if moisture is not removed we recommend that your vehicle is inspected by an authorized HYUNDAI dealer Information The headlamp aiming should ...

Страница 565: ...touch the glass with bare hands Residual oil may cause the bulb to overheat and burst when lit A bulb should be operated only when installed in a headlamp If a bulb becomes damaged or cracked replace it immediately and carefully dispose of it OLX2078029 Handle halogen bulbs with care Halogen bulbs contain pressurized gas that will pro duce flying pieces of glass that could cause injuries if broken...

Страница 566: ...tor 8 Install the bulb cover by turning it clockwise Daytime running light position lamp Turn signal lamp If the LED lamp does not operate we recommend that you have the vehi cle checked by an authorized HYUNDAI dealer OLX2078031L Headlamp Low OLX2078032 Headlamp High Prior to working on a light firm ly apply the parking brake ensure that the ignition switch is in the OFF position and turn off the...

Страница 567: ...A bulb should be operated only when installed in a headlamp If a bulb becomes damaged or cracked replace it immediately and carefully dispose of it Lamps If the LED lamp does not operate we recommend that you have the vehi cle checked by an authorized HYUNDAI dealer OLX2078030 Handle halogen bulbs with care Halogen bulbs contain pressurized gas that will pro duce flying pieces of glass that could ...

Страница 568: ...hicle checked by an authorized HYUNDAI dealer Type A 1 Tail lamp 2 Tail Stop lamp 3 Turn signal lamp 4 Backup lamp Type B 1 Tail lamp 2 Stop lamp 3 Turn signal lamp 4 Tail lamp 5 Backup lamp OLX2078037L Type A Standard OLX2078037 Type B LED OLX2078033 OLX2088010L Rear fog lamp Rear combination lamp bulb replacement 7 68 ...

Страница 569: ...b align with the slots in the socket Pull the bulb out of the socket 7 Insert a new bulb by inserting it into the socket and rotating it until it locks into place 8 Install the socket into the assem bly by aligning the tabs on the socket with the slots in the assem bly Push the socket into the assembly and turn the socket clockwise 9 Reinstall the lamp assembly to the body of the vehicle Tail Stop...

Страница 570: ...HYUNDAI dealer License plate light bulb replacement 1 Using a flat blade screwdriver gently pry the lens cover from the lamp housing 2 Remove the bulb by pulling it straight out 3 Install a new bulb 4 Reinstall in the reverse order Interior light bulb replacement OLX2078038 OLX2078039 OLX2078040 Map lamp LED type OLX2078041 Room lamp LED type 7 70 ...

Страница 571: ...perate we rec ommend that the system be checked by an authorized HYUNDAI dealer OLF074069 Vanity mirror lamp OLX2078052L Luggage compartment lamp OLX2078042 Luggage compartment lamp LED OLX2078050L Map lamp OLX2078051L Room lamp Map lamp room lamp vanity mirror lamp and luggage compartment lamp 7 71 ...

Страница 572: ... or light housing 2 Remove the bulb by pulling it straight out 3 Install a new bulb into the socket 4 Align the lens tabs with the interior light housing notches and snap the lens into place Be careful not to damage the cover tab and plastic housing NOTICE OLX2078043 Glove box lamp 7 72 ...

Страница 573: ...age your vehicle s finish if not removed immediately Even prompt washing with plain water may not completely remove all these deposits A mild soap safe for use on painted surfaces may be used After washing rinse the vehicle thor oughly with lukewarm or cold water Do not allow soap to dry on the fin ish Do not use strong soap chemi cal detergents or hot water and do not wash the vehicle in direct s...

Страница 574: ...cause the failure of electrical cir cuits located in the engine com partment Never allow water or other liq uids to come in contact with electrical electronic compo nents inside the vehicle as this may damage them Matte paint finish vehicle if equipped Automatic car wash which uses rotating brushes should not be used as this can damage the sur face of your vehicle A steam cleaner which washes the ...

Страница 575: ...a tion Matte paint finish vehicle if equipped Do not use any polish protector such as a detergent an abrasive and a polish In case wax is applied remove the wax immedi ately using a silicon remover and if any tar or tar contaminant is on the surface use a tar remover to clean However be careful not to apply too much pressure on the painted area Finish damage repair Deep scratches or stone chips in...

Страница 576: ...off road driving and at the end of each winter Pay special attention to these areas because it is difficult to see all the mud and dirt It will do more harm than good to wet down the road grime without removing it The lower edges of doors rocker panels and frame members have drain holes that should not be allowed to clog with dirt trapped water in these areas can cause rusting Aluminum wheel maint...

Страница 577: ...icularly when temperatures are just above freezing In such conditions the corrosive material is kept in contact with the vehicle surfaces by moisture that is slow to evaporate Mud is particularly corrosive because it is slow to dry and holds moisture in contact with the vehicle Although the mud appears to be dry it can still retain moisture and promote corrosion High temperatures can also acceler ...

Страница 578: ...the atten tion of a qualified body and paint shop is recommended Bird droppings Bird droppings are highly corrosive and may damage painted surfaces in just a few hours Always remove bird droppings as soon as possible Don t neglect the interior Moisture can collect under the floor mats and vehicle peting to cause corrosion Check under the mats periodically to be sure the carpeting is dry Use partic...

Страница 579: ...equipped Features of seat leather Leather is made from the outer skin of an animal which goes through a special process to be available for use Since it is a nat ural product each part differs in thickness or density Wrinkles may appear as a natural result of stretching and shrinking depending on the temperature and humidity The seat is made of stretchable fabric to improve comfort The parts conta...

Страница 580: ...ing cream on a cloth and wipe the contaminated spot Wipe off the cream with a wet cloth and remove water with a dry cloth Beverages coffee soft drink etc Apply a small amount of neutral detergent and wipe until contami nations do not smear Oil Remove oil instantly with absorbable cloth and wipe with stain remover used only for natu ral leather Chewing gum Harden the gum with ice and remove gradual...

Страница 581: ...in this manual 1 Crankcase emission control system The positive crankcase ventilation system is employed to prevent air pollution caused by blow by gases being emitted from the crankcase This system supplies fresh filtered air to the crankcase through the air intake hose Inside the crankcase the fresh air mixes with blow by gases which then pass through the PCV valve into the induction system 2 Ev...

Страница 582: ...ide can be present with other exhaust fumes Therefore if you smell exhaust fumes of any kind inside your vehi cle have it inspected and repaired immediately If you ever suspect exhaust fumes are coming into your vehicle drive it only with all the windows fully open Have your vehicle checked and repaired immediately Do not operate the engine in con fined or closed areas such as garages any more tha...

Страница 583: ...n authorized HYUNDAI dealer Avoid driving with a very low fuel level If you run out of gasoline it could cause the engine to misfire and result in excessive loading of the catalytic converter Failure to observe these precautions could result in damage to the catalyt ic converter and to your vehicle Additionally such actions could void your warranties A hot exhaust system can ignite flammable items...

Страница 584: ... exceeds 60 km h 37 mph or when the engine rpm is between 1 500 and 2 500 with the gear in the 2nd position or above for approximate ly 25 minutes When the DPF Lamp continuously blinks or the warning message Check exhaust system illuminates in the above cases we recommend that you have the DPF system checked by an authorized HYUNDAI dealer When the vehicle is continuously driv en with the DPF Lamp...

Страница 585: ...system 8 6 Vehicle weight and luggage volume 8 6 Luggage volume 8 6 Recommended lubricants and capacities 8 7 Recommended SAE viscosity number 8 8 Vehicle identification number VIN 8 10 Vehicle certification label 8 10 Tire specification and pressure label 8 11 Engine number 8 11 Air conditioner compressor label 8 12 Declaration of conformity 8 12 Fuel label 8 13 Gasoline engine 8 13 Diesel engine...

Страница 586: ... 24 245 50 R20 1 708 67 24 Rear tread 245 60 R18 1 716 67 56 245 50 R20 1 716 67 56 Wheelbase 2 900 114 17 Item Gasoline 3 8 GDI Gasoline 3 5 MPI Diesel R2 2 Displacement cc cu in 3 778 230 55 3 470 211 75 2 199 134 19 Bore x Stroke mm in 96 x 87 3 78 x 3 43 92x87 3 62 x 3 43 85 4x96 3 34X3 77 Firing order 1 2 3 4 5 6 1 2 3 4 5 6 1 3 4 2 No of cylinders 6 V type 6 V type 4 In line ...

Страница 587: ...amp DRL Position lamp Type B LED LED Turn signal lamp LED LED Turn signal lamp Outside mirror LED LED Rear Rear combination lamp Tail Type A P21 5W 21 5 Rear combination lamp Tail Stop Type A P21 5W 21 5 Rear turn signal lamp Type A P21W 21 Rear combination lamp Stop Type B LED LED Rear combination lamp Tail Stop Type B LED LED Rear turn signal lamp Type B LED LED Back up lamp P21W 21 Rear fog lam...

Страница 588: ...40 35 11 13 79 94 107 127 245 50 R20 7 5J x 20 Compact spare tire T155 90 R18 4 0T x 18 4 2 420 60 8 4 Specifications Consumer information Light Bulb Bulb Type Wattage Interior lamp Map lamp Type A W8W 8 Map lamp Type B LED LED Room lamp Type A W8W 8 Room lamp Type B LED LED Luggage lamp Type A FESTOON 8 Luggage lamp Type B LED LED Sunvisor lamp Type A 5W 5 Sunvisor lamp Type B LED LED Glove box l...

Страница 589: ...s necessary to keep them properly inflated An air pressure generally decreases as you drive up to a high altitude area above sea level Thus if you plan to drive a high altitude area check the tire pressures in advance If necessary inflate them to a proper level Air inflation per altitude 10 kPa 1 km 2 4 psi 1 mile Do not exceed maximum inflation pressure shown on equipped tire sidewall NOTICE 1 LI...

Страница 590: ...2570 5665 2630 5798 2610 5754 2670 5886 8 Seater kg lbs 2610 5754 2645 5831 2630 5798 2660 5864 2670 5886 2690 5930 Luggage volume Item From 2nd row to luggage room From 3rd row to luggage room VDA MIN 704 L 24 86 cu ft 311 L 10 98 cu ft Items Weight of Volume Classification Refrigerant g oz 900 31 75 25 0 88 R 134a Compressor lubricant g oz 180 6 35 PAG Contact an authorized HYUNDAI dealer for mo...

Страница 591: ...n everyday driving but in a year s time they can offer significant cost and energy savings 3 Diesel Particulate Filter 4 If the ACEA A5 engine oil is not available in your country you are able to use API service SL ILSAC GF 3 ACEA A3 Lubricant Volume Classification Engine oil 1 2 drain and refill Recommends Gasoline Engine 3 5 MPI 5 7 l 6 02 US qt ACEA A5 B5 4 3 8 GDI 6 5 l 6 87 US qt ACEA A5 B5 4...

Страница 592: ...king or draining any lubricant This is especially important in dusty or sandy areas and when the vehicle is used on unpaved roads Cleaning the plug and dipstick areas will prevent dirt and grit from entering the engine and other mechanisms that could be damaged CAUTION Recommended SAE viscosity number Engine oil viscosity thickness has an effect on fuel economy and cold weather operating engine st...

Страница 593: ...e for SAE Viscosity Numbers Temperature C F 30 20 10 0 10 20 30 40 50 10 0 20 40 60 80 100 120 Diesel Engine Oil 5W 30 40 15W 40 10W 30 40 0W 30 40 20W 50 10W 30 15W 40 5W 30 5W 40 Gasoline engine oil 1 1 For better fuel economy it is recom mended to use the engine oil of a vis cosity grade SAE 5W 30 ACEA A5 However if the engine oil is not avail able in your country select the prop er engine oil ...

Страница 594: ...k side of the engine The VIN is also on a plate attached to the top of the left side dashboard The number on the plate can easily be seen through the windshield from outside The vehicle certification label attached on the driver s or front pas senger s side center pillar gives the vehicle identification number VIN VEHICLE IDENTIFICATION NUMBER VIN VEHICLE CERTIFICATION LABEL OLX2088002L Frame numb...

Страница 595: ... The tire label located on the driver s side center pillar gives the tire pres sures recommended for your vehicle The engine number is stamped on the engine block as shown in the drawing TIRE SPECIFICATION AND PRESSURE LABEL ENGINE NUMBER OLX2088003L OLX2088006L Gasoline engine 3 8 GDI OTM088007L Gasoline engine 3 5 MPI OLX2088004 Diesel engine ...

Страница 596: ... and refrigerant oil The radio frequency components of the vehicle comply with requirements and other relevant provisions of Directive 1995 5 EC Further information including the manufacturer s declaration of con formity is available on HYUNDAI web site as follows http service hyundai motor com CE0678 Example DECLARATION OF CONFORMITY IF EQUIPPED AIR CONDITIONER COMPRESSOR LABEL OTLE088010 ...

Страница 597: ...This symbol means usable fuel Do not use any other fuel C For further details refer to the Fuel Requirement in the Introduction chapter Diesel engine The fuel label is attached on the fuel filler door A Fuel Diesel B Identifiers for FAME containing Diesel type Fuels This symbol means usable fuel Do not use any other fuel C For further details refer to the Fuel Requirement in the Introduction chapt...

Отзывы: