


14
-
Move
This function allows you change the program of channels in the list:
Press
or
button firstly to move cursor to selected current program channel 1. And press
button to
confirm.
Then press
or
button firstly to move cursor to target program channel 2. And press
button to
confirm.
After setting press the MENU button to return to the root menu or exit menu setting.
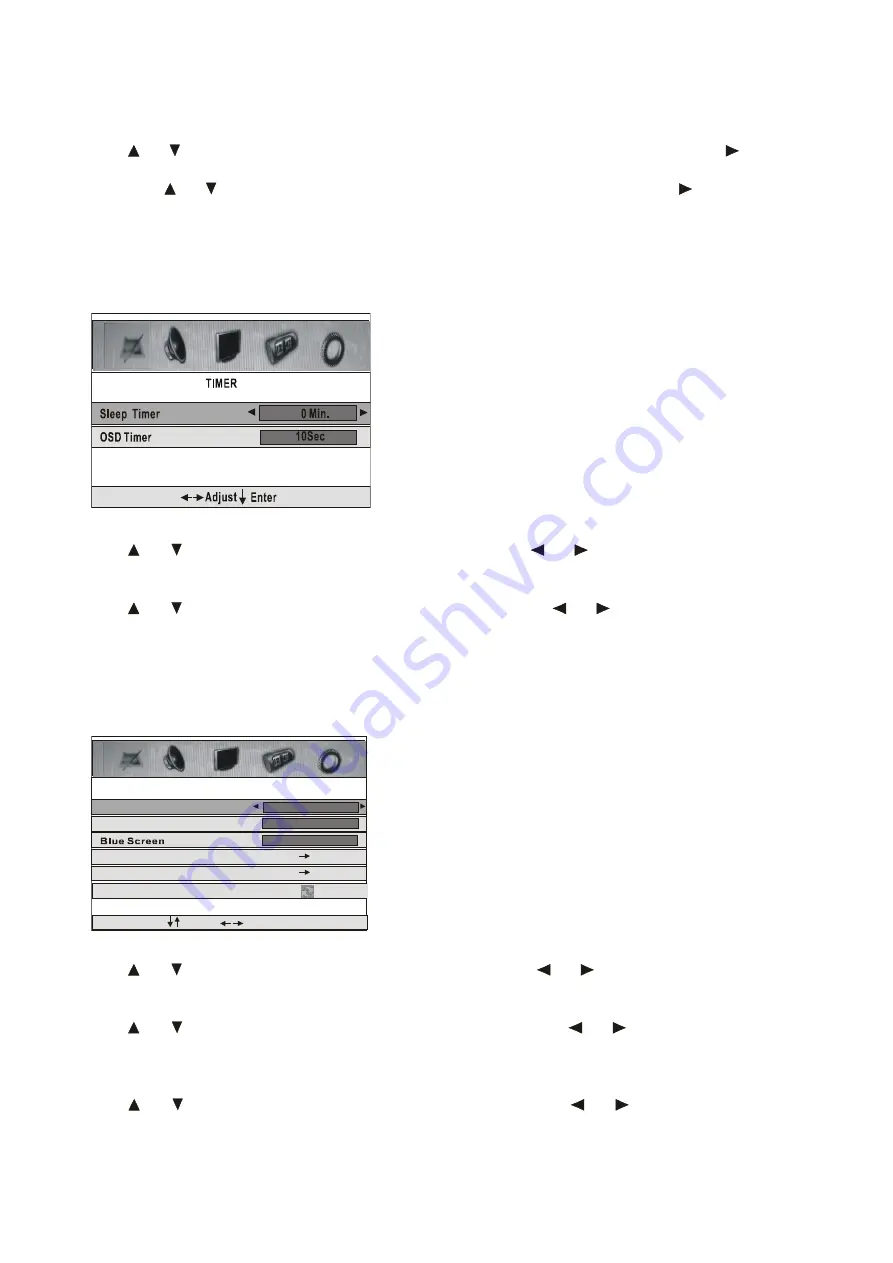
TIME SETTING
Press the MENU button on the remote control to select TIMER setting menu displayed on the screen as
below:
Sleep Timer
Press
or
button firstly to move cursor to this item, then use
or
button to select sleep time to let
unit to go in standby state automatically.
OSD Timer
Press
or
button firstly to move cursor to this item, then use
or
button to select OSD menu
display last time.
After setting press the MENU button to return to the root menu or exit menu setting.
FUNCTION SETTING
Press the MENU button on the remote control to select FUNCTION SETTINGS MENU displayed on the
screen as below:
Language
Press
or
button firstly to move cursor to this item, then use
or
button to select available OSD
menu language.
Video Size
Press
or
button firstly to move cursor to this item, then use
or
button to select the best
available LCD screen display aspect size which corresponds to your viewing requirements.
Note:
This available aspect size may be different in difference input source.
Blue Screen
Press
or
button firstly to move cursor to this item, then use
or
button to select On/Off.
Selecting On, it means the screen background colour could be in blue if there is no or weak signal.
Language
FUNCTION
English
FullScreen
On
Video Size
Child Lock
First Time Installation
Reset
Select
Adjust
Содержание H-LCD2209
Страница 1: ...H LCD2209 LCD TV Instruction manual...
Страница 18: ...18 18 19 21 21 22 24 26 27 30 30 31...
Страница 19: ...19 LCD HYUNDAI 20 50...
Страница 20: ...20 LCD 10 LCD LCD LCD 18 2 LCD...
Страница 25: ...25 1 5 AAA...
Страница 27: ...27 OSD 1 MENU 2 3 4 ENTER 5 MENU VGA PC NTSC VGA PC DNR DNR MENU...
Страница 28: ...28 AFT 1 2 OSD OSD X...
Страница 29: ...29 PIN 0000 ENTER ENTER ENTER...
Страница 30: ...30 VGA CH CH...


