Hyundai H-LCD2209 Скачать руководство пользователя страница 10

10

General operations

Press the POWER button on the unit or the remote control to switch on the power; the indication light
will be in blue color. Press the POWER button again to switch off the power, and the light will be in red
color.
The Picture setup, Sound setup, Previous channel can be memorized before you switch off the
TV/Monitor. The TV/Monitor will re-start under the previous state when you switch on it again.
Press the VOL - or VOL + button to adjust the volume output.
Press the SLEEP button to set the sleep time
Press the AV/TV button on the remote control to select the TV function mode. Press the CH- or CH+
button  to  select  the  previous  or  next  channels;  or  press  the  0-9  buttons  to  enter  a  channel  number
directly, or press the -/-- button until the screen display ‘-’ or ‘--’, then use the 0-9 numerical buttons to
enter a channel number from 1 to 99.
Press the      button on the remote control to select from the present channel and the previous
channel.
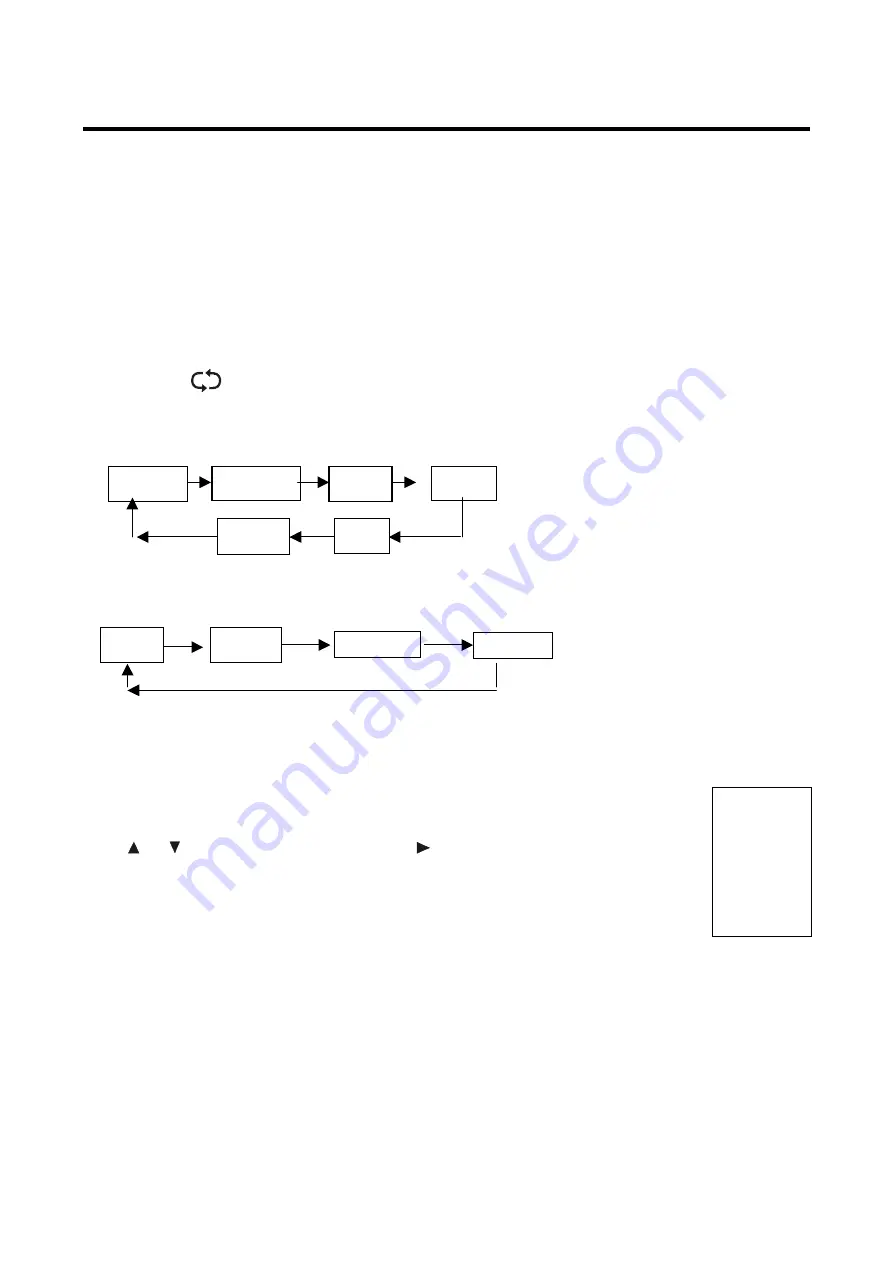
Press the PMODE button repeatedly to cycle through the available video picture modes from the below
6 types

Press  the  SMODE  button  to  repeatedly  to  cycle  through  the  available  sound  modes  from  the  below  4
types.

Press the MUTE button to cut off the sound output, press this button again to resume sound output.
Press the DISPLAY button to display the preset TV channel play information.

AV signal sources (DVD/VCR/CAMCORDER)

Press the AV/TV on the remote control, here will be a menu displayed on the screens right
figure:
Select the suitable input to pickup the AV signal.
Press

 or

  button to select source, then press

  button to confirm your selection.

TELETEXT

See decryption of the Teletext functions in Remote Control operation description (18th item).

TV
SCART
CVBS
S-VIDEO
VGA
HDMI

Music

Theatre

Personal

Voice

Standard

Personal

Movie

Sport

Game

Mild

Содержание H-LCD2209

Страница 1: ...H LCD2209 LCD TV Instruction manual...

Страница 2: ...ontents 2 Important safety precautions 3 General introduction 5 Accessories 5 Controls and connection 6 Remote control RC 8 General operations 10 OSD operations 11 Troubleshooting 16 The causes of int...

Страница 3: ...ease replace the AC outlet if the metal bolt cannot be inserted into the power socket completely or it cannot be fastened even when it was pushed in otherwise any accidents of shocks and fires would h...

Страница 4: ...all the signal cords behind of rear panel Cleaning Unplug the power cord from the AC outlet before cleaning the product Do not use liquid cleaners or aerosol cleaners and others use the special LCD Pa...

Страница 5: ...posite SCART VGA PC audio input Headphones out Progressive scan Teletext 99 channels memory Sleep timer Digital comb filter OSD menu in Russian and English languages Power supply 110 240V 50 60Hz Acce...

Страница 6: ...Left direction button 6 VOL Right direction button 7 CH Down direction button 8 CH Up direction button 9 Power button 10 DC input jack 11 HDMI jack 12 VGA jack 13 SCART jack 14 S video jack 15 Video j...

Страница 7: ...by the SCART cable Connect the video source to the S VIDEO input jack of the monitor by the S video cable Pretending that the video source has S video output jack Insert the AC power to the DC adaptor...

Страница 8: ...y information 10 CURSOR LEFT RIGHT UP DOWN buttons Press for OSD navigation 11 ENTER button Press to confirm selection or input data 12 EXIT button Press to exit from the current menu 13 MENU button P...

Страница 9: ...RC Use the RC by pointing it towards the RC sensor of the set Objects between the RC and sensor may prevent proper operation Note The illustration is for your reference only the remote sensor may loca...

Страница 10: ...al buttons to enter a channel number from 1 to 99 Press the button on the remote control to select from the present channel and the previous channel Press the PMODE button repeatedly to cycle through...

Страница 11: ...o adjust colour saturation Note This item is invalid in VGA PC mode and it will be shown in gray Tint Press or button firstly to move cursor to this item then use or button to adjust the tone of color...

Страница 12: ...f higher pitched sounds Balance Press or button firstly to move cursor to this item then use or button to adjust output between left and right speaker After setting press the MENU button to return to...

Страница 13: ...et channel s frequency one by one by or button Program Edit This item allows you to sort TV programs according to your preferences Press or button firstly to move cursor to this item then use button t...

Страница 14: ...t OSD menu display last time After setting press the MENU button to return to the root menu or exit menu setting FUNCTION SETTING Press the MENU button on the remote control to select FUNCTION SETTING...

Страница 15: ...n use or button to select corresponding country Language Press or button firstly to move cursor to this item then use or button to select corresponding language Delete Analog Program Press or button f...

Страница 16: ...ignal or the signal cord is improperly not connected Connect the audio signal cord properly Set the sound system properly The RC does not work Batteries are improperly installed or exhausted Make sure...

Страница 17: ...io input Yes HDMI Yes VGA Yes Russian OSD Yes Digital comb filter Yes Sleep timer Yes Quantity of channels 99 Teletext Yes Voltage input 110 240V 50 60Hz Note The LCD panel is a high technology produc...

Страница 18: ...18 18 19 21 21 22 24 26 27 30 30 31...

Страница 19: ...19 LCD HYUNDAI 20 50...

Страница 20: ...20 LCD 10 LCD LCD LCD 18 2 LCD...

Страница 21: ...21 22 56 16 10 1680x1050 300 1000 1 160 160 5 PAL SECAM BG DK I L NICAM RF HDMI S Video SCART VGA 99 110 240B 50 60 RCA...

Страница 22: ...22 1 2 3 AV TV 4 MENU 5 VOL Left 6 VOL Right 7 CH Down 8 CH Up 9 POWER 10 11 HDMI 12 VGA 13 SCART 14 S Video 15 16 17 18 19 20 10 11 12 13 14 16 17 20 15 18 19...

Страница 23: ...23 75 300 75 DVD VCDR CAMCORDER PC AUDIO L R PAL NTSC SECAM AV SCART DVD S Video S Video DVD S Video VGA VGA VGA HDMI HDMI 75 75 VHF UHF...

Страница 24: ...4 1 POWER 2 MUTE 3 4 LAST CHANNEL 5 SYSTEM 6 NICAM A2 NICAM 7 VOL VOL 8 CH CH 9 DISPLAY 10 11 ENTER 12 EXIT 13 MENU 14 PMODE 15 AV TV 16 SMODE 17 SLEEP 18 TEXT HOLD PGDN PGUP INDEX SIZE REVEAL SUBPAGE...

Страница 25: ...25 1 5 AAA...

Страница 26: ...26 POWER POWER POWER VOL VOL VOL VOL SLEEP SLEEP CH CH 0 9 0 9 1 99 PMODE PMODE SMODE SMODE MUTE MUTE DISPLAY DISPLAY AV TV AV TV TELETEXT 18 TV SCART CVBS S VIDEO VGA HDMI...

Страница 27: ...27 OSD 1 MENU 2 3 4 ENTER 5 MENU VGA PC NTSC VGA PC DNR DNR MENU...

Страница 28: ...28 AFT 1 2 OSD OSD X...

Страница 29: ...29 PIN 0000 ENTER ENTER ENTER...

Страница 30: ...30 VGA CH CH...

Страница 31: ...31 22 56 300 1000 1 160 160 5 1680x1050 LCD 16 10 PAL SECAM DK I BG L S Video RGB L R SCART HDMI VGA 99 110 240 50 60 LCD LCD...

Отзывы: