background image

5

Basic Operations

Powering On/Off

Method 1

Method 2

Adjusting the Volume

1.

Press  the

  key  on  the  remote  microphone 

speaker until the icon   is shadowed. 

2.

Press the

 key to lower the volume and press 

the

 key to increase it.

Selecting a Zone

A zone is a group of channels exhibiting the same 
property, which is programmed by your dealer and can 
facilitate convenient management over the channel. 
The radio supports 64 zones, each of which consists of 
up to 16 channels. 
To select a zone, do as follows: 
1.

Press  the

  key  on  the  remote  microphone 

s p e a k e r  u n t i l  Z O N E X X  (e.g.  Z O N E01)  i s 
shadowed. 

2.

Press the

 / 

 key to select a zone. 

Long press to power on/off 

Long press to power on/off 

Selecting a Channel

1.

Press  the

  key  on  the  remote  microphone 

speaker until CHXX (e.g. CH01) is shadowed. 

2.

Press the

 / 

 key to select a channel. 

If the Channel Notify feature is enabled by your dealer, 
the  radio  will  announce  the  channel  number  upon 
channel switching. 

Setting TX Power Level

This feature is to set the TX power level to high or low. 
High power can extend the signal coverage of the 
radio, enabling you to communicate with farther radios. 
Generally, we recommend you to adopt low power for 
battery saving. However, if you cannot communicate 
with radios located at a distant place with low power, 
please select high power. 
To set the TX power level, do as follows: 
1.

Press  the

  key  on  the  remote  microphone 

speaker until the TX power level Icon (e.g. 

) is 

shadowed. 

2.

Press the

 / 

 key to switch power level. 

Call Services

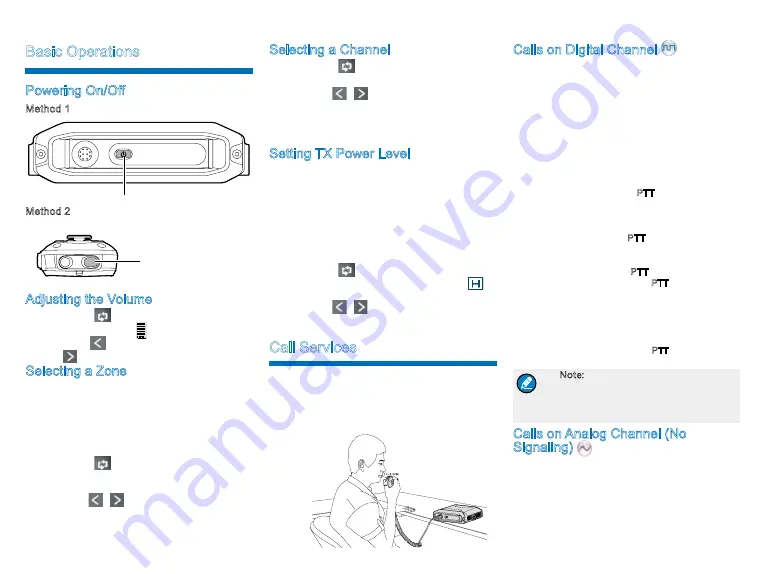
After  the  radio  is  powered  on,  you  can  make  and 
receive calls. To ensure optimal volume of the receiving 
radio,  keep  the  palm  microphone  about  2.5  to  5 
centimeters away from your mouth when transmitting. 

Calls on Digital Channel 

You can initiate a private call, group call or all call (your 

radio must be programmed to allow you to use the all 

call service) through the same operations on digital 

channel. 
When calling back, the radio will make a call to the 

calling party in private call and all call (your radio must 

be programmed to allow you to call back in an all call); 

but in group call, the radio will make a call to all parties 

involved. Here takes the private call between Radio A 

and Radio B as example: 
1. 

Radio A and B select the same digital channel. 

2. 

Radio A holds down the PTT key to initiate a call.

Radio A  may  preset  a  regular  private  call/group 

call/all call contact for each digital channel via the 

dealer. 

3. 

By  holding  down  the  PTT  key,  Radio A  can  talk 

to the microphone when the LED indicator on the 

radio glows red. 

4.

Radio A  releases  the  PTT  key  to  finish  talking.  

Radio A can hold down the PTT key to talk when 

the  LED  indicator  on  the  radio  is  glowing  orange.  

When  receiving,  the  LED  indicator  on  the  radio 

glows green. 

5. 

Radio B can receive the call without any operation. 

When receiving, the LED indicator glows green. 

6. 

Radio B can hold down the PTT key to talk when

the LED indicator on the radio is glowing orange. 

Note: The Call Hang Time (the duration 

of LED indicator glowing orange) is 

preset by your dealer. If neither party 

talk before this duration expires, the 

call will end. 

Calls on Analog Channel (No 

Signaling) 

On the analog channel without signaling, the calling 

operations are the same as that on the digital channel. 

The difference is that the called parties are all the 

users on the channel, rather than the preset contact for 

the channel. 
Please refer to the corresponding Feature Book for 

operation description on how to make and receive calls 

on the analog channel with signaling. 

Содержание MD652i

Страница 1: ... 0 L07157 Z07639 C10524 2013 Hytera Corp Ltd 9108 518057 400 830 7020 http www hytera com 2014 01 OWNER S MANUAL DIGITAL MOBILE RADIO 23456 Hytera Communications Corporation Limited Hytera Communications Corporation Limited ...

Страница 2: ...roduct This manual is helpful for you to quickly know how to use the product Please refer to the corresponding Feature Book for detailed features and operations This manual is applicable to the following product MD652i Digital Mobile Radio ...

Страница 3: ...n order to ensure user health experts from relevant industries including science engineering medicine and health work with international organizations to develop standards for safe exposure to RF radiation These standards consist of U n i t e d S t a t e s F e d e r a l C o m m u n i c a t i o n s Commission Code of Federal Regulations 47CFR part 2 sub part J American National Standards Institute ...

Страница 4: ...stallation Procedure 3 Status Indication 4 LCD Icon 4 LED Indicator 4 Basic Operations 5 Powering On Off 5 Adjusting the Volume 5 Selecting a Zone 5 Selecting a Channel 5 Setting TX Power Level 5 Call Services 5 Calls on Digital Channel 5 Calls on Analog Channel No Signaling 5 Features 6 Troubleshooting 6 Care and Cleaning 7 Optional Accessories 7 ...

Страница 5: ...with GPS feature The frequency band is marked on the label of antenna if not please refer to the label on the radio for frequency band information Unless otherwise specified the remote speaker microphone mentioned in this manual refers to that included in the item list Mounting Bracket Kit GPS Antenna Documentation Kit Radio Unit Remote Speaker Microphone Power Cord Fuse Hanger and Screws for Remo...

Страница 6: ... must work with a 13 6V 15 negative ground electrical system only And ensure to check the ground polarity and voltage of the vehicle power supply prior to installation Check how long the screws will extend from the bottom surface of the radio before installation Drill the mounting hole cautiously to avoid damage to the vehicle wiring and other parts Connect the antenna and power cord to the radio ...

Страница 7: ...ker microphone indicate the operation status of the radio LCD Icon Icon Name Icon Radio Status RSSI Icon More bars indicate better signal strength GPS Icon The GPS feature is enabled and valid GPS data is received The GPS feature is enabled but no valid GPS data is received Icon Name Icon Radio Status Scan Icon The radio is scanning The radio stays on a non priority channel The radio stays on Prio...

Страница 8: ... away from your mouth when transmitting Calls on Digital Channel You can initiate a private call group call or all call your radio must be programmed to allow you to use the all call service through the same operations on digital channel When calling back the radio will make a call to the calling party in private call and all call your radio must be programmed to allow you to call back in an all c...

Страница 9: ...may not match that of other members Set your TX RX frequency and signaling to the same as that of other members You may be too far away from the group members Move towards other members In digital mode there s RX indication on the radio but unable to communicate with other members The digital carrier may be received but may not be demodulated due to inconsistent ID with that of other members Sets ...

Страница 10: ... clean the keys and front case after long time use Do not use chemical preparations such as stain removers alcohol sprays or oil preparations so as to avoid surface case damage Make sure the product is completely dry before use Optional Accessories The following items are the main optional accessories for the radio For more infor mation of other accessories please consult your local dealer Caution...

Страница 11: ... 0 L07157 Z07639 C10524 2018 Hytera Corp Ltd 9108 518057 400 830 7020 http www hytera com 2018 01 OWNER S MANUAL DIGITAL MOBILE RADIO 23456 Hytera Communications Corporation Limited Hytera Communications Corporation Limited ...

Отзывы: