4.
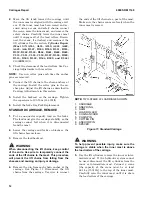
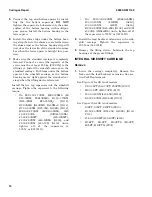
Replace the cylinder rod seals as follows:
a.
Clamp the cylinder in a soft-jawed vise. DO
NOT clamp on the cylinder shell.
b.
With the cylinder rod centered, unscrew the
retainer from each end of the cylinder. Slide
the retainers off the cylinder rod.
NOTE:
If new retainers that are already assembled
with seals are being installed, proceed to Step f.
c.
Remove the seals and O-ring from each re-
tainer with a brass O-ring tool. DO NOT
scratch the grooves.
WARNING
Cleaning solvents may be flammable and toxic
and can cause severe skin irritation. When using
cleaning solvents, always follow the solvent man-
ufacturer's recommended safety precautions.
d.
Clean the retainers and the cylinder rod with
cleaning solvent. Lubricate the new seals
and O-rings with hydraulic oil.
e.
Install the seals into the retainer grooves.
Form the seals into a "kidney" shape to ease
placement into the groove. Note the direction
of the rod seals. Pressure seals are instal-
led with the lip toward the pressure
side of the cylinder.
f.
Apply a film of hydraulic oil to the inside of
the retainers. Carefully slide them onto the
cylinder rod. Tighten the retainers to
165 N•m (122 lbf ft).
STANDARD CARRIAGE, INSTALL
1.
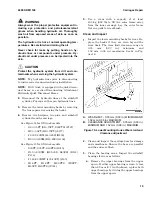
Use the hydraulic system of the lift truck or a
crane to raise the inner mast. If the hydraulic
system cannot be used, disconnect the lift cylin-
ders from the inner or intermediate mast. See
Lift Cylinders section. Connect a crane [the
capacity of the crane must be at least
681 kg (1501 lb)] to the top of the inner mast.
Carefully raise the inner mast until it is above
the load rollers of the carriage. Install safety
chains to secure the mast in its extended posi-
tion and disconnect the crane. See Safety Proce-
dures When Working Near Mast.
2.
Move the lift truck toward the carriage until
the inner mast is aligned with the carriage roll-
ers. If the inner mast has been raised and se-
cured using a crane and safety chains, connect
the crane, raise the inner mast, and remove the
safety chains. Carefully lower the inner mast
until it engages all of the load rollers. Discon-
nect the crane, if attached, and reconnect the
lift cylinders. See the Lift Cylinders section.
3.
Check the clearance of the load rollers. See Car-
riage Adjustments in this section.
NOTE:
Use new cotter pins each time the anchor
pins are removed.
4.
Connect the lift chains to the chain anchors at
the carriage. Install the cotter pins in the an-
chor pins. Adjust the lift chains as described in
Carriage Adjustments in this section.
5.
Install the backrest on the sideshift carriage.
Tighten the capscrews to 195 N•m (144 lbf ft).
6.
Install the forks. See Fork Replacement.
HANG-ON SIDESHIFT CARRIAGE,
INSTALL
1.
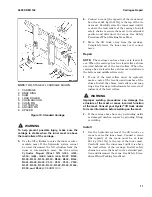
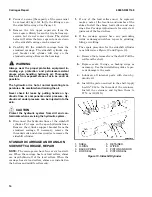
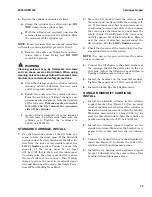
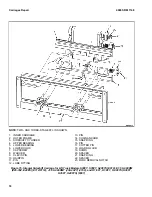
Install the sideshift cylinder in the cylinder
support bracket. See Figure 12. Use an equal
number of shims on both sides of the cylinder to
limit side-to-side movement within the bracket.
Maximum movement is 0.6 mm (0.024 in.). In-
stall the threaded rods to hold the cylinder in
position and tighten to 18 N•m (159 lbf in).
2.
Install the cylinder support bracket on the
standard carriage. Make sure the bracket is en-
gaged in the center notch in the top carriage
bar.
3.
Connect the hydraulic lines to the sideshift cyl-
inder. See Figure 12. Lubricate the ends of the
cylinder rod with multipurpose grease.
4.
Install the top bearing on the cylinder support
bracket. Lubricate only the outer surface of the
bearing with multipurpose grease.
4000 SRM 1148
Carriages Repair
15
Содержание J160
Страница 1: ...Hyster J160 J30ZT J35ZT J40ZT Forklift...


