


NH-2700 7. Appendix
7- 12
Error Code
Description
Trouble shooting
4004700
1 cassette mis-feed error (Separated rejection)
1. Check notes in 1 Cassette
2. Check Sensor(CS6) Poll
3. Check jam in 1 cassette and reload
4. Remove dust in CS1A, CS1B Sensor
5. Exchange 1 cassette box when there are many
error
4004800
Error if the number of dispensed notes is not
matched to the requested
1. Check CS13 sensor (note jam and dust)
2. Replace CS13 sensor
40049
(DISPENSE) Received the number of
requirement by “0”.
4004900
Error to dispense 0 sheets to be required
(Separated rejection
1. Check received command
2. Check communication cable
3. Check Cash Dispenser Firmware Version
4004A
(DISPENSE) Jam during dispensing.
4004A00
Error of note jam (Separated rejection)
1. Remove jammed notes on Cash Dispenser
return path
2. Remove dust in CS1~CS4 sensor
3. Install after rearranging notes in cassette
4004B00
Continuous 3 times error if note is long
(once tried, twice retried)=>Separated rejection
1. Check state of notes in reject box
2. Rearrange notes in cassette
3. Check Index of notes
4. Check foreign objects in the main motor encoder
slit
5. Replace the CS8 encoder slit sensor
4004C00
In case the number of notes detected outlet
sensor(CS13/ LS2) is more than that of notes
detected on CS1A,B sensor
1. Check CS1 sensor
2. Reconnect CS1 sensor
4004D
(DISPENSE) Cassette separation before
operation.
4004D00
Error of being removed 1st cassette before
separate rejection
1. Set cassette #1 correctly
2. Check the catcher inside cassette #1 guide
4004E00
Error of being removed 2nd cassette before
separate rejection
1. Set cassette #2 correctly
2. Check the catcher inside cassette #2 guide
40051
(DISPENSE) Received the required number of
notes 150 or more.
4005100
Received a request for over 150 notes
dispensing on the Cash Dispenser from the
upper unit.
1. Check the Cash Dispenser received command
2. Check the abnormal communication cable.
3. Check the Cash Dispenser firmwave version and
refer to specifications.
4005200
The remaining notes at the sensor in front of
the CST after dispense operation (CS1A,
CS1B)
1. Remove the remaining notes at a sensor in front
of the CST
2. Realign notes in the cassette
3. Check abnormal clutch.
4. Check abrasion of the cassette box pick unit.
Содержание NH-2700
Страница 1: ...NH 2700 Front Load Operator Manual Copyright 2010 Nautilus Hyosung Inc All right reserved...
Страница 5: ...NH 2700 1 Introduction 1 1 Chapter 1 Introduction...
Страница 9: ...NH 2700 2 Precautions for Safety 1 2 Chapter 2 Precautions for Safety...
Страница 13: ...NH 2700 3 Hardware Specifications 3 1 Chapter 3 Hardware Specifications...
Страница 24: ...NH 2700 4 Operating Instructions 4 1 Chapter 4 Operating Instructions...
Страница 34: ...NH 2700 4 Operating Instructions 4 11 Fig 4 12 Changing Battery 2...
Страница 58: ...NH 2700 4 Operating Instructions 4 35 NOTE THE BASIC MECHANISM OF RECEIPT PRINTER...
Страница 61: ...NH 2700 5 Operator Function 5 1 Chapter 5 Operator Function...
Страница 136: ...NH 2700 5 Operator Function 5 76 Touch Type...
Страница 139: ...NH 2700 5 Operator Function 5 79 5 7 6 3 1 SCREEN n Please press SCREEN n EN DISABLE button to set up SCREEN n...
Страница 203: ...NH 2700 5 Operator Function 5 143 5 13 2 9 RESULT After performing QUICK CONFIGURATION the result will be shown as below...
Страница 204: ...NH 2700 6 Installation 6 1 Chapter 6 Installation...
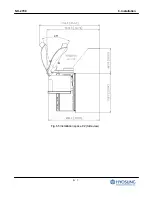
Страница 210: ...NH 2700 6 Installation 6 7 Fig 6 5 Installation space 2 Side view 45...
Страница 212: ...NH 2700 7 Appendix 7 1 Chapter 7 Appendix...
Страница 248: ...NH 2700 7 Appendix 7 37 2 Select SYSTEM SETUP menu 3 Select SYSTEM CONTROL menu...
Страница 321: ...NH 2700 7 Appendix 7 110 2 Press WELCOME ADVERTISEMENT button 3 Press WELCOME ADVERTISEMENT button...
Страница 322: ...NH 2700 7 Appendix 7 111 4 You can enable or disable Advertisement images to view by pressing SCREEN Key...
Страница 324: ...NH 2700 7 Appendix 7 113 2 Press ADVERTISEMENT button 3 Press TRANSACTION ADVERTISEMENT button...
Страница 334: ...NH 2700 7 Appendix 7 123 2 Press OPTIONAL FUNCTION 2 button 3 Press SCREEN SERVICES button...