Huvitz HBK-7000S Скачать руководство пользователя страница 32

32


Smart Blocker Operator

’s Manual -----------------------------------------------------------------


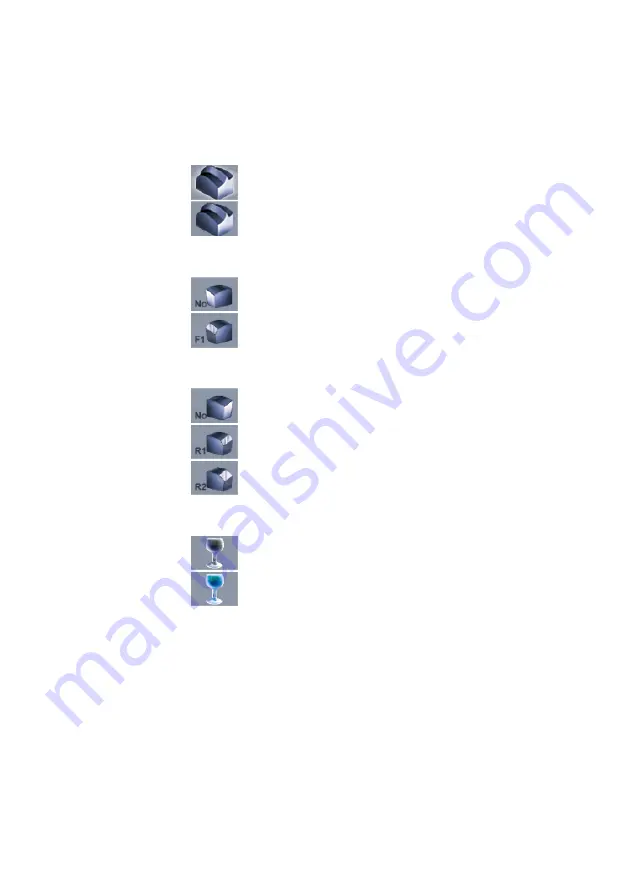
Polishing 


  selects polishing option on. 


  selects polishing option off. 


Safety Bevel 

– Front 


  selects no safety bevel. 


  selects normal safety bevel. 


Safety Bevel 

– Rear 


  selects no safety bevel. 


  selects normal safety bevel. 


  selects larger safety bevel than normal. 


Safety Mode 


  selects the safety mode option of edger off. 


  selects the safety mode option of edger on. 


For more  detailed informat

ion about edging options, refer to the Operator’s Manual of the 

Lens Edger. 


Содержание HBK-7000S

Страница 1: ...Smart Blocker Operator s Manual 1 Operator s Manual Smart Blocker HBK 7000...

Страница 2: ...ing from the use of the information contained herein HUVITZ reserves the right to make changes in its products or product specifications at any time and without prior notice and is not required to upd...

Страница 3: ...ent 14 4 Configurations 15 4 1 Main Body front view 15 4 2 Main Body rear view 16 4 3 Displays 18 5 Installation 21 5 1 Installation Procedure 21 5 1 1 Interfacing with Frame Reader 22 5 1 2 Interfaci...

Страница 4: ...shooting 34 7 1 The Smart Blocker does not start 34 7 2 The Lens Holder is stuck in its standby position and doesn t move to the center of the lens stage 34 7 3 The Smart Blocker doesn t receive any d...

Страница 5: ...er operator It is for this reason that the following safety notices have been placed appropriately within the text of this manual to highlight safety related information or information requiring speci...

Страница 6: ...ound is fastened to the chassis Protective earth connected to conductive parts of Class I equipment for safety purposes Disposal of your old appliance 1 When this crossed out wheeled bin symbol is att...

Страница 7: ...erate equipment with a wet hand Where the equipment is exposed to direct sunlight Where the temperature changes extremely Normal operating temperature range is from 10 to 35 Humidity is from 30 to 75...

Страница 8: ...quipment Don t plug the AC power cord into the outlet before the connection between instruments of the equipment is completed This can generate the defect Pull out the power cord with holding the plug...

Страница 9: ...rooms Humidity should be maintained between 30 and 75 for normal operation Do not expose the instrument to water splashes dripping water or sprayed water Do not place containers containing fluids liq...

Страница 10: ...and maintaining the equipment 11 Do not force cable connections If a cable does not connect easily be sure that the connector plug is appropriate for the receptacle socket If you cause any damage to...

Страница 11: ...facturer or field service technician for help 18 External equipment intended for connection to signal input signal output or other connectors shall comply with relevant IEC standard e g IEC 60950 for...

Страница 12: ...the frame shape especially for half rims and rimless frame with the Digital Pattern function If it is interfaced with the Huvitz HPE 7000 lens edger it also supports designing holes and notches for a...

Страница 13: ...Smart Blocker Operator s Manual 13 7 In addition to blocking function the operator can easily adjust the viewing angle of the display by pushing and pulling the display panel...

Страница 14: ...thinner benzene etc to clean the surface of the hardware instrument It may damage the instrument 4 Use only with correct type of power adaptor for the hardware instrument or the hardware instrument m...

Страница 15: ...LCD panel along with touch interface Displays live images of the working stage and various menu icons and input fields for designing en edging job And tilts between 45 to 65 degree for the viewing an...

Страница 16: ...Blocking Arm Provides the block holder and the handle for blocking Lens Leveler Balances the lens level with three level foots Block Holder Holds the lens block to be attached on the lens 4 2 Main Bod...

Страница 17: ...for other instruments or devices Edger1 port for the first lens edger Edger2 port for the second lens edger Tracer port for a Frame Reader Barcode port for a barcode reader Console port for future use...

Страница 18: ...des system menu functions Job menu is for creati ng saving or loading a job data Option menu is for setting system pr oviding options or executing optional functions Display menu is for ex Menu Bar Jo...

Страница 19: ...lects left side It refreshes the layout menu edging optio n menu and frame shape data on the live image area with the inform ation in current job of left side R L Sync This button turns on and off the...

Страница 20: ...age Area This area shows the live images of the lens stage where target lens is put for a blocking job On the live images guide drawing is displayed to help the operator position the target lens on th...

Страница 21: ...body on the work bench or on any stable table For the complete installation the Frame Reader and the Lens Edger to be interfaced with are required to be installed within the reach of its interface ca...

Страница 22: ...l interface cable to the TRACER port of the Smart Blocker Step 3 Connect the other side of the serial interface cable to either the EDGER 1 port or the EDGER 2 port of the Frame Reader Step 4 Turn on...

Страница 23: ...l interface cable to either the EDGER 1 port or the EDGER 2 port of the of the Smart Blocker Step 3 Connect the other side of the serial interface cable to the TRACER port or to the BLOCKER port of th...

Страница 24: ...the Smart Blocker with single Frame Reader and single Lens Edger like the figures below The other type is to interface is with one Frame Reader and two sets of Lens Edger NOTE Any model of Huvitz lens...

Страница 25: ...other is to start with a job data in the memory either in the internal memory or in the external SD memory 6 1 1 Starting a job with a frame data from Frame Reader When the Frame Reader finishes read...

Страница 26: ...Executing the job menu Touch the Job Load menu in the menu bar Then the Job Manager dialog is executed Browsing and selecting a job data In the Job Manager dialog job data are classified in three cat...

Страница 27: ...Smart Blocker Operator s Manual 27 Blocker if available Loading a job data Touch the button on the bottom of the Job Manager dialog it loads selected job data and opens it...

Страница 28: ...on both sides by the Frame Reader inputs bridge size value manually It is required to input the bridge size when a pattern or only one side of a frame is traced by the Frame Reader Optical Height OH...

Страница 29: ...with its near segment semicircular shape selects the type for a bi focal lens with its near segment circular shape selects the type for a progressive lens with specific marks printed on it 6 2 2 Input...

Страница 30: ...n in case the operator is determined that frame fitting is not affected by it In case the Smart Blocker is interfaced with a lens edger that supports drilling function the operator can design and add...

Страница 31: ...starting edging Lens Material selects a plastic lens for edging selects a poly carbonate lens for edging selects a high index lens for edging selects a glass or mineral lens for edging selects a triv...

Страница 32: ...vel selects normal safety bevel Safety Bevel Rear selects no safety bevel selects normal safety bevel selects larger safety bevel than normal Safety Mode selects the safety mode option of edger off se...

Страница 33: ...t side for designing blocking R L Synchronization selects the R L Synchronization option on This enables the Smart Blocker synchronize the value of right side and left side when the operator inputs la...

Страница 34: ...stage lift up to the top and then turn it 7 3 The Smart Blocker doesn t receive any data from the Frame Reader Check if the serial interface cable is connected and fixed firmly Check if the port of t...

Страница 35: ...is either Tracer or Blocker Otherwise turn off the instruments and change the port connection appropriately Check if the port of the Frame Reader where the Lens Edger is connected is either Edger 1 or...

Страница 36: ...ard Components Main Body 1 EA Touch Pen 1 EA SD Memory Card 1 EA Extra Lens Support for frame change 1 EA Power Cord 1 EA Interface Cable 9 pin DSub Serial 2m 1 EA Spare Fuse 250Vac T3 15AL 2 EA Opera...

Страница 37: ...instrument is damaged or malfunctioning contact Huvtiz or local distributor for service with the following information Name of the product HBK 7000 Serial number of the product refer to the 9 digit n...

Страница 38: ...cker Operator s Manual Write us at HUVITZ Co Ltd Huvitz B D 689 3 Geumjeong dong Gunpo si Gyeonggi do 435 862 Republic of Korea Tel 82 31 442 8868 Fax 82 31 442 8619 http www huvitz com e mail service...

Страница 39: ...9 5 mm Monocular PD 15 49 75 mm Optical Height 15 mm Layout Options Frame PD FPD Bridge size Optical Height Delta Y Box height Mix height Lens Type Single vision lens Bi focal lens semicircle circle P...

Страница 40: ...Polishing Supported Safety Bevel Front Single level Rear 2 levels Position Adjustment By offset Front Rear By percent Front By base curve Blocking Method Manual Mode Minimum 8 MB Position Accuracy Dia...

Страница 41: ...r Operator s Manual 41 Frame Reader 1 channel Lens Edger 2 channels Barcode Reader 1 channels Power Input AC 100 240V Frequency 50 60 Hz Consumption 35 W Dimensions Weight Dimension 220 W 250 D 377 H...

Страница 42: ...42 Smart Blocker Operator s Manual...

Отзывы: