background image

25 Sp

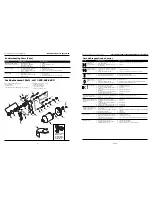
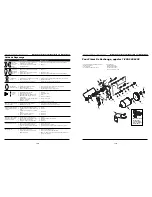
Lista De Repuestos

No. de 

Número

Ref.

Descripción

de Pieza

Ctd.

1

Anillo de seguridad

--

1

2

Arandela

1

3

Ensamblaje de la tapa de aire

DH795200AV 1

(Incluye el artículo 1)

4

Anillo retención

1

5

Boquilla de fluído

DH795300AV 1

6

Cuerpo de la pistola

No se aplica

1

7

Tuerca del empaque de fluido,
9 mm Hex.


1

8

Empaque de fluído


1

9

Ensamblaje del control de patrón

DH751800AV 1

10

Perilla de control de fluído

1

11

Resorte del sistema de control


1

de fluído

12

Aguja de fluído

PH01700AV

1

13

Cuerpo, control de fluido 8 mm Hex.

1

14

Anillo en O


15

Tapa de la válvula de aire

1

16

Resorte de la válvula de aire


1

17

Ensamblaje de la válvula de aire

1

18

Cuerpo de la válvula de aire, 

1

6 mm Hex.

19

Empaque de la válvula de aire


1

20

Tuerca del empaque de la 


1

válvula de aire

21

Entrada de aire 6,4 mm (1/4”) NPS,

DH795400AV 1

15 mm Hex.

22

Tapón de aire

DH795500AV 1 

23

Entrada de fluído, 9,5 mm 

DH795600AV 1

24

Gatillo

DH753300AV 1

25

Travesaño del gatillo

1

26

Empaque en E

1

27

Filtro a presión

PH015800AV

1

28

Ensamblaje de la tapa de gravedad PH015900AV

1

29

Tuerca de la tapa

1

30

Tapa a presión

1

31

Tapa del sistema de ventilación

1

32

Cuerpo del sistema de ventilación

1

33

Gancho para colgar la unidad

PH016400AV

1

JUEGOS DE PIEZAS DISPONIBLES PARA LA REPARACIÓN
Y EL MANTENIMENTO

Empaques/reacondicionamiento

DH750100AV 1

Empaques de fluído

DH750200AV 1

Mecanismo de control de fluído

DH750300AV 1

Válvula de aire

DH750400AV 1

Ensamblaje de la tapa del envase

PH016600AV

1

Nécessaire de capuchon d’air 
d’aiguille/buse de 1,6 mm

DH790100AV 1

Juego de tapa de prueba HVLP 
de 1,4 mm

DH790200AV 1

Juego de tapa de prueba HVLP 
de 1,6 mm

DH790300AV 1

No. de 

Número

Ref.

Descripción

de Pieza

Ctd.

Operating Instructions and Parts Manual

HVLP Gravity Feed Spray Gun

Preparation 

(Cont.)

paint.

5. The fluid control knob can be used

to finely adjust pattern consistency.

Before spraying the workpiece, practice
a few minutes on a cardboard target to
ensure the pattern size and consistency
are set correctly.

Operation

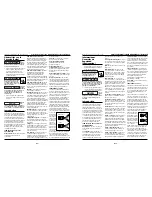
1. Begin spraying. Always keep the

gun at right
angles to the
work (See
Figure 8).

2. Keep the noz-

zle about 6 to 9
inches from the
work surface
throughout the
stroke and
always keep
the gun in
motion while
spraying.
Stopping gun movement in mid-
stroke will cause a build up of paint
and result in runs. Do not fan the
gun from side to side while paint-
ing. This will cause a build-up of
paint in the center of the stroke
and an insufficient coating at each
end (See Figure 9).

3. Trigger the gun properly. Start the

gun moving at the beginning of the
stroke 

BEFORE SQUEEZING THE

TRIGGER

and release the trigger

BEFORE STOPPING GUN MOVE-
MENT

at the end of the stroke. This

procedure will feather (blend) each
stroke with the next without show-
ing overlap or unevenness (See
Figure 10).

4. The amount of paint being applied

can be varied by the speed of the
stroke, distance from the surface
and adjustment of the fluid control
knob.

5. Overlap strokes just enough to

obtain an even coat (See Figure 11).

NOTE:

Two thin coats of paint will

yield better results and have less
chance of runs than one heavy layer.

6. Use a piece of cardboard as a shield

to catch overspray at the edges of
the work to protect other surfaces.
Use masking tape to cover other
areas if needed.

Maintenance

DAILY CLEAN-UP

Local codes may require specific clean-
ing methods and equipment. Follow
local codes and paint manufacturer’s
recommendations for the use and dis-
posal of spray materials and solvent.

Clean spray gun 
immediately after

use. Paint and other materials dry
quickly in the small passages rendering
gun useless due to the difficulty of
removing hardened paint from the pas-
sages inside the gun.

NOTE: 

In the instructions below, the

use of the word “solvent” refers to the
specific solvent for the material used
(example: lacquer thinner for lacquer,
etc.).

1. Remove and empty the canister;

NOTICE

then rinse with a solvent recom-
mended for the paint or other
material used.

2. Refill canister with clean solvent

and attach to the gun. Spray solvent
through the gun while shaking the
gun vigorously. Wipe the gun exte-
rior with a solvent soaked rag.
Repeat until the gun is clean.

3. Remove the air cap and soak in sol-

vent until clean. Use a small brush
for stubborn stains if necessary.
Toothpicks or small brushes may be
used to clean air passages; however,

NEVER USE METAL OBJECTS TO
CLEAN PRECISELY DRILLED 
PASSAGES. DAMAGED PAS-
SAGES WILL CAUSE IMPROPER 
SPRAYING.

4. Clean gaskets with a solvent soaked

rag. To prevent equipment damage,

DO NOT IMMERSE GASKETS OR
SPRAY GUN BODY IN 
SOLVENTS.

5. After using water to clean out

water based paints or materials,
spray mineral spirits through the
gun to prevent corrosion.

6. Use a non-silicone oil on all moving

parts when reassembling. Use
Vaseline

®

or light grease on all

threaded connections prior to 
storage.

7. Clean and flush gun thoroughly to

neutralize any contaminants corro-
sive to the spray gun.

PERIODIC CLEAN-UP

Due to improper cleaning and paint it
may be necessary to inspect and clean
the internal parts and the gun body. 

1. Examine openings in air cap and

fluid tip. If clogged, remove any o-
rings and soak the air cap or fluid
tip in solvent.

2. A brush or toothpick or something

similar may be used to dislodge the
dried paint from holes and pas-
sages. 

NEVER USE METAL

OBJECTS TO CLEAN PRECISELY
DRILLED PASSAGES. DAMAGED
PASSAGES WILL CAUSE IMPROP-
ER SPRAYING.

Figure 11

6 - 9”

Figure 8

Thin coat

Thin coat

Heavy coat

Figure 9

INCORRECT

6 - 9”

Pull

Trigger

Start
Stroke

Release
Trigger

End

Stroke

Figure 10

4

Manual de Instrucciones y Lista de Piezas 

Pistola Pulverizadora HVLP Alimentada por Gravedad

Содержание HDS790

Страница 1: ...P 40 psiG Garantía Limitada Pistolas Pulverizadoras Husky de Campbell Hausfeld 1 DURACION A partir de la fecha de compra por el comprador original tal como se especifica a continuación Productos Estándard Standard Duty Un año 2 QUIEN OTORGA ESTA GARANTIA EL GARANTE Campbell Hausfeld The Scott Fetzer Company 100 Production Drive Harrison Ohio 45030 Teléfono 800 543 6400 3 QUIEN RECIBE ESTA GARANTIA...

Страница 2: ...praying of large amounts of paint with out stopping for refills as with a canister It also allows using the spray gun at any angle without causing paint to drip Pattern Control Knob Used to form the proper pattern size and shape of paint as it is sprayed from the gun to the workpiece Pressure Feed Method of paint feed where a canister or paint tank is pressur ized to force paint to the gun Either ...

Страница 3: ...Observe the spray pattern on the target and adjust the fluid con trol knob until the desired pattern atomization is obtained See Figure 7 If the spray is too fine excessive over spray caused by too much air for the amount of paint being sprayed reduce the air pressure or open the fluid con trol to spray more material If the spray is too coarse spitting globs reduce the amount of material with the ...

Страница 4: ...each stroke with the next without show ing overlap or unevenness See Figure 10 4 The amount of paint being applied can be varied by the speed of the stroke distance from the surface and adjustment of the fluid control knob 5 Overlap strokes just enough to obtain an even coat See Figure 11 NOTE Two thin coats of paint will yield better results and have less chance of runs than one heavy layer 6 Use...

Страница 5: ... gun MUST BE well cleaned and lightly lubricated Operating Instructions and Parts Manual HVLP Gravity Feed Spray Gun Right or left heavy spray pattern Top or bot tom heavy spray pat tern Split spray pattern Center heavy spray pattern Sputtering spray Fluid leaking from packing nut Air leaking from air cap without pulling trigger Troubleshooting Chart Symptom Possible Cause s Corrective Action 1 Ho...

Страница 6: ... únicamente una punta no metálica 2 Límpiela 1 Límpiela 2 Límpiela y apriétela 3 Límpiela Use únicamente una punta no metálica 1 Cierre parcialmente el control de fluído 2 Aumente el nivel de fluído 3 Reduzca la presión de atomización 1 Ábralo un poco 2 Diluya el material hasta alcanzar la viscosidad adecuada 3 Aumente la presión de atomización 1 Añádale más material 2 Colóquelo más derecho 3 Apri...

Страница 7: ...pararla Para probar la aguja deslícela sobre una superficie plana Reemplácela si es necesario 4 Chequée y reemplace los anillos y sellos dañados Éstos se pueden limpiar pero no los debe sumerjir en solvente 5 Sáquele las tuercas que sostienen los empaques y reemplácelos SOLO si no puede eliminar la fuga de material después de apretar las tuercas Vea la Figura 5 No apriete demasiado estas tuercas y...

Страница 8: ...8 Limited Warranty Husky Spray Guns by Campbell Hausfeld 1 DURATION From the date of purchase by the original purchaser as follows Standard Duty Products One Year 2 WHO GIVES THIS WARRANTY WARRANTOR Campbell Hausfeld Scott Fetzer Company 100 Production Drive Harrison Ohio 45030 Telephone 800 543 6400 3 WHO RECEIVES THIS WARRANTY PURCHASER The original purchaser other than for purposes of resale of...

Страница 9: ...çu pour vaporiser tout matériau de viscosité légère à moyenne comme l émail la laque le polyuréthane la couche de finition d uréthane y compris couche de fondation couche claire et tous les apprêts Le pistolet pulvérisateur a des contrôles de fluides et de modèles Ce pistolet est fourni avec un godet d ali mentation par gravité de 600 ml Directives de Sécurité Ce manuel contient de l information t...

Страница 10: ...ional HVLP 10 Fr Généralités sur la Sécurité Suite Ne jamais diriger la pulvérisation vers soi même ni vers une autre personne Ceci peut causer des blessures graves 6 Toujours travailler dans un environ nement propre Ne pas diriger le pistolet vers la poussière ou le débris afin d éviter des blessures personnelles ainsi que le dommage à l objet de travail Ne pas utiliser une pression qui dépasse l...

Страница 11: ...empre trabaje en un área limpia ADVERTENCIA ADVERTENCIA ADVERTENCIA ADVERTENCIA PELIGRO MANUAL IN285700AV 3 04 2004 RECORDATORIO Guarde su comprobante de compra con fecha para fines de la garantía Adjúntela a este manual o archívela en lugar seguro Ver la Garantía en página 28 para información importante sobre el uso comercial de este producto Especificaciones m3 min Requerido 2 76 bar 0 25 Contin...

Страница 12: ...ravail dans le centre de service et dépendra de la disponabilité des pièces de rechange Cette Garantie Limitée s applique aux É U au Canada et au Mexique seulement et vous donne des droits juridiques précis L acheteur peut également jouir d autres droits qui varient d une Province d un État ou d un Pays à l autre 17 Fr Préparation Suite 3 Tourner le bouton de réglage de fluide complètement au sens...

Страница 13: ...liser un huile sans silicone sur les pièces mobiles Utiliser la Vasline ou la graisse légère sur les joints filetés et sur les raccords de tuyaux ENTREPOSAGE 1 Tourner le bouton de réglage de fluide du pistolet à la gauche afin de l ouvrir et de réduire la tension sur l aiguille 2 Le pistolet DOIT ÊTRE bien nettoyé et graissé lé gèrement Entretien Suite Pulvériser le solvant à travers le pis tolet...

Страница 14: ...cord d arrivée de fluide desserré 4 Embout de fluide siège desserré ou endommagé 5 Écrou de presse étoupe de l aiguille de fluide sec ou desserré 6 Évent d air obstrué 1 Écrou de presse étoupe desserré 2 Garniture usée ou sèche 1 Tige de soupape d air qui reste prise 2 Contaminant sur la soupape d air ou le siège 3 Soupape d air ou siège usé ou endom magé 4 Ressort de soupape d air cassé 5 Tige de...

Отзывы: