


INSTALLATION
19
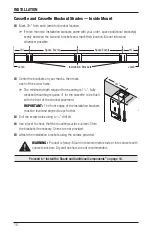
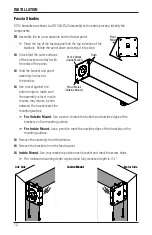
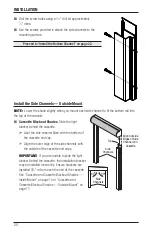
Install the Side Channels — Inside Mount
NOTE:
Lower the shade slightly when you mount each side channel to fit the bottom rail into
the top of the channel.
■
Foam tape has been provided to reduce light seepage. Apply to the jambs and the sill of
the mounting surface, if necessary. Caulk (not provided) can also be used to reduce light
seepage.
■
Position the side channel.
➤
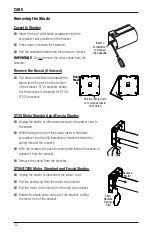
Cassette Blockout Only.
Slide the light blocker behind the cassette. The back of the
side channel is flush with the bracket.
➤
Fascia Shades.
The back of the side channel is flush with the bracket.
➤
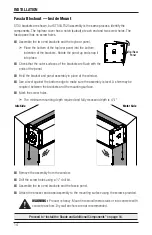
Ensure there isn’t a gap between the side channel and the sill. The side channel should
sit on the sill. Also, ensure the back of the side channel is flush with the bracket.
IMPORTANT:
If you are unable to slide the light blocker behind the cassette, the
installation bracket may be installed incorrectly. Ensure brackets are installed 3½" in from
each the end of the cassette. See “Cassette and Cassette Blockout Shades — Inside
Mount” on page 10 or “Cassette and Cassette Blockout Shades — Outside Mount” on
page 11.
Bracket
Light Blocker
Cassette Blockout
Fascia Blockout
The back of the side
channel is flush with
the bracket.
Side
Channel
Cassette
Fascia
Side
Channel


