64
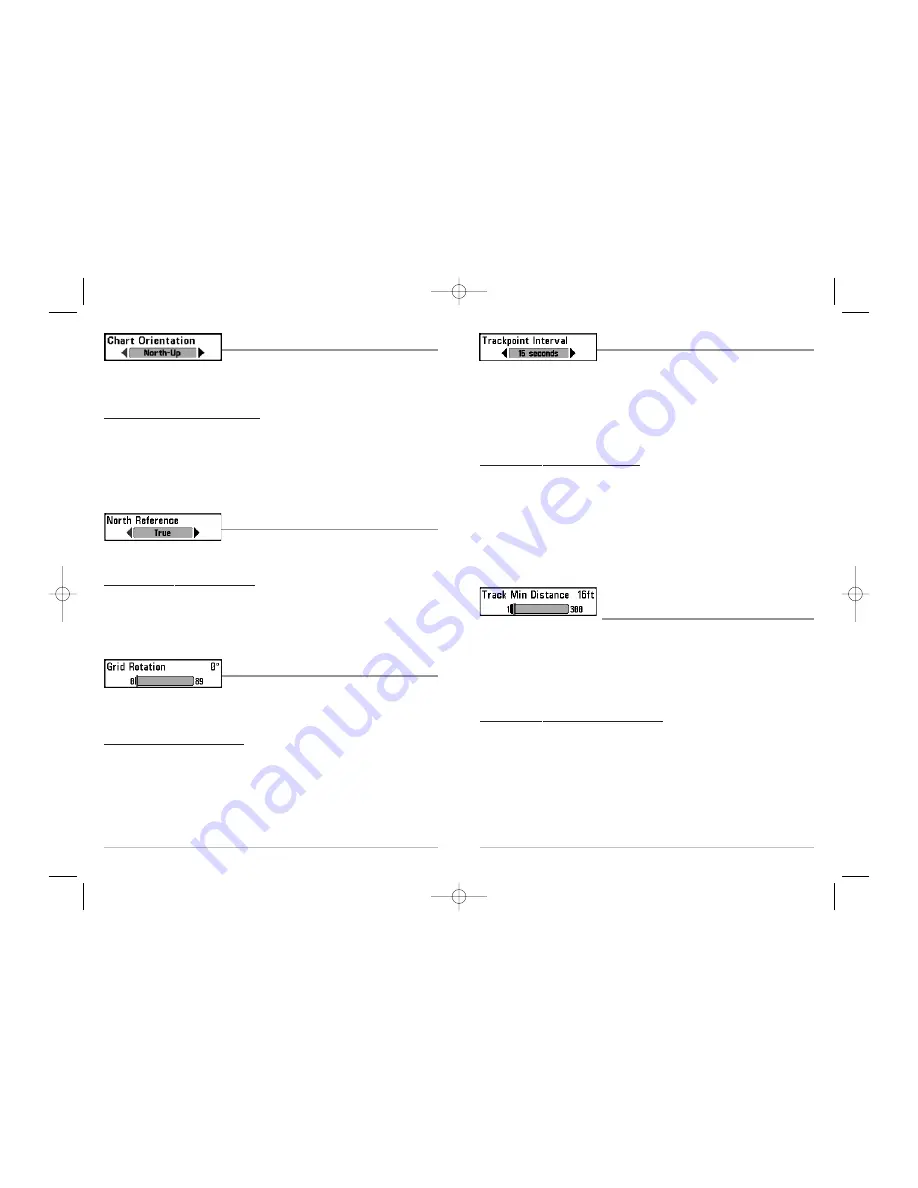
Trackpoint Interval
Trackpoint Interval
allows you to select the time period
between trackpoints. The current track can only contain up to 20,000 trackpoints, so
longer time periods cause the track to extend back further in time, but will be less
detailed.
NOTE:
Trackpoint Interval works in conjunction with Track Min Distance. Both conditions
must be met before a trackpoint is added to the current track.
To change the Trackpoint Interval setting:
1. Highlight Trackpoint Interval on the Navigation main menu.
2. Use the LEFT or RIGHT 4-WAY Cursor Control keys to change the Trackpoint
Interval setting. (1 second, 5 seconds, 10 seconds, 15 seconds, 30 seconds or 60
seconds, Default = 15 seconds)
NOTE:
During slow travel or drift, setting both Trackpoint Interval and Track Min Distance to
small values will allow you to increase the track resolution.
Track Min Distance
(Advanced)
Track Min Distance
allows you to set a minimum distance of travel before a trackpoint
is added to the track. The Track Min Distance menu choice is only available when User
Mode is set to Advanced (see
Setup Menu Tab: User Mode
).
NOTE:
Track Min Distance works in conjunction with Trackpoint Interval. Both conditions
must be met before a trackpoint is added to the current track.
To change the Track Minimum Distance setting:
1. Make sure you are in Advanced User Mode, then highlight Track Min Distance
on the Navigation main menu.
2. Use the LEFT or RIGHT 4-WAY Cursor Control keys to change the Track Min Distance
setting. (1 to 300 feet or 1 to 100 meters
[International Units only]
, Default = 16 ft, 5 m)
NOTE:
During slow travel or drift, setting both Trackpoint Interval and Track Min Distance to
small values will allow you to increase the track resolution.
63
Chart Orientation
Chart Orientation
allows you to select whether the
Chart and Combo Views should be drawn North-Up or
Course-Up.
To change the Chart Orientation setting:
1. Highlight Chart Orientation on the Navigation main menu.
2. Use the LEFT or RIGHT 4-WAY Cursor Control keys to change the Chart
Orientation setting. (North-Up, Course-Up, Default = North-Up)
NOTE:
The Chart Orientation setting does not apply to the Bird's Eye View.
North Reference
North Reference
allows you to have bearings displayed
with one of two orientations: True North or Magnetic North.
To change the North Reference setting:
1. Highlight North Reference on the Navigation main menu.
2. Use the LEFT or RIGHT 4-WAY Cursor Control keys to change the North Reference
setting. (True, Magnetic, Default = True)
Grid Rotation
Grid Rotation
allows you to set the orientation of the
trolling grid in degrees, where a setting of 0° displays a standard North, South, East,
West alignment. See
Waypoints
for information on how to set a Grid.
To change the Grid Rotation setting:
1. Highlight Grid Rotation on the Navigation main menu.
2. Use the LEFT or RIGHT 4-WAY Cursor Control keys to change the Grid Rotation
setting. (0° to 89°, Default = 0°)
531450-1_A - 383c_Eng.qxd 11/18/2005 2:37 PM Page 70