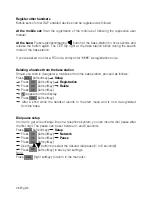
background image

English 29

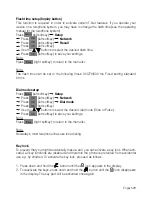
Flash time setup (Inquiry button)

This  function  is  required  in  order  to  activate  certain  T-Net  features.  If  you  operate  your 

device on a telephone system, you may have to change the flash time (see the operating 

manual for the telephone system).

Press 

Menu

 (left softkey) 


Setup 

 Press 

OK

 (left softkey) 


Network

 Press 

OK

 (left softkey) 


Recall

 Press 

OK

 (left softkey)

 Use the 

 buttons to select the desired flash time.

 Press 

OK

 (left softkey) to save your settings.

Note:

Press 

Back

 (right softkey) to return to the menu list.

Note:

The flash time can be set to the following times: 90/270/600 ms. Fixed setting standard 


90 ms.

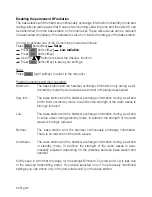
Dial mode setup

Press 

Menu

 (left softkey) 


Setup 

 Press 

OK

 (left softkey) 


Network

 Press 

OK

 (left softkey) 


Dial mode

 Press 

OK

 (left softkey)

 Use the 

 buttons to select the desired dial mode (Tone or Pulse) 

 Press 

OK

 (left softkey) to save your settings.

Note:

Press 

Back

 (right softkey) to return to the menu list.

Note:

Nowadays, most telephone lines use tone dialing.

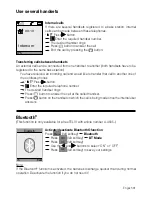
Key lock

To prevent that you might accidentally make a call, you can activate a key lock. When acti-

vated, all key functions are disabled and therefore the phone is protected from accidental 

use e.g. by children. To activate the key lock, proceed as follows:


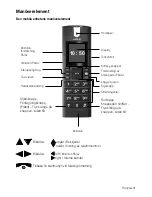
1.  Press down and hold the    button until the   icon appears in the display.

2.  To reactivate the keys, press down and hold the 

  button until the   icon disappears  

  in the display. The key pad will be activated once again.

Содержание freeTEL III

Страница 1: ...isning ES Instrucciones de servicio Sladdlös telefon med ljudförstärkare Cordless telephone with amplifier Teléfono sin hilos con amplificador audiométrico Página 70 Sida 36 Page 2 Operation Instructions freeTEL III ...

Страница 2: ...surface Lay the connecting cable accident proof Never expose the telephone to the following sources of influence heaters direct sunlight moisture other electrical devices Protect your telephone from damp dust aggressive fluids and vapors Plug the connection cord into the corresponding jack Only connect approved accessories Never open the base station or handset yourself Safety instructions ...

Страница 3: ... number 13 Calling from the phone book 13 View name number of a contact entry 14 Changing the name number of an entry in the phone book 14 Storing a telephone number from the redial 15 Delete name number in phone book 15 Delete all entries in phone book 15 Call number display General 16 How it works 16 Reading and calling entries 17 Saving an entry in the phone book 17 Delete entry from the teleph...

Страница 4: ...colour of splash screen 26 Change background colour of menu lists 27 Register a handset 27 Register other handsets 28 Deleting a handset from the base station 28 Dial pause setup 28 Flash time setup 29 Dial mode setup 29 Key lock 29 Disabling the permanent RF radiation 30 Use several handsets Internal calls 31 Transferring calls between handsets 31 Bluetooth Activate deactivate Bluetooth function ...

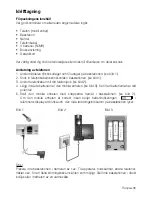
Страница 5: ...he telephone socket for your telephone line see figure 2 4 Place the two batteries into the handset and replace the battery cover see figure 3 Please ensure that the batteries are inserted properly 5 Place the handset and keypad facing forward into the base station see figure 2 Once the handset is correctly inserted the battery display starts to flash on the tele phone display and the red charge L...

Страница 6: ...dset and a warning signal is sounded If the telephone is not charged now the handset switches off automatically due to low battery Personal Preferences phonebook redial lists etc are preserved even if the batteries are discharged or removed Range The telephone s radio range can vary between 50 and 300 m The radio signals for trans mission can be disrupted by a variety of factors The maximum range ...

Страница 7: ...plification On Off Headphone jack Headset jack Number keys Softkeys Control keys Disconnect Hash key Keypad lock on off press key long see Page 29 Star key Inquiry button Flash press key long see Page 29 Redial 10 50 Scroll up Message down Call number display Scroll left Microphone On Off right Internal calls Return to the start menu in the event of an input error ...

Страница 8: ...8 English Base station controls Charge indicator Ringer volume setting Paging button Connection socket for special accessories vibrating pad or modules ...

Страница 9: ... the texts in the display Button In stand by mode In the menu Open main menu Diverse functions left Open phonebook Diverse functions right English 9 Range display Battery charge indicator Designation of upper control key Indication that speakerphone is activated Softkeys Display Menu Names Handset 1 Designation of the left softkey Designation of the right softkey 10 50 ...

Страница 10: ...one line using the keys or Press OK left softkey to save your settings Making calls 1 4 7 2 5 8 3 6 9 0 1 Enter the required telephone number max 20 digits If you enter a wrong digit press to clear it 2 Press The number is dialed 3 End the call by pressing the button again Terminate dialling To terminate the dialling process press the key or place the handset back into the base station or desktop ...

Страница 11: ...n be increased or lowered in five 4 dB increments by pressing the buttons Press to activate additional amplification key lights up in red and to activate tone control You can also raise treble or bass tones in increments of 10 dB using the tone control slide switch on the left side of the housing Press again to deactivate additional amplification and tone control key is no longer lit up Note The a...

Страница 12: ...cter digit left of the cursor Insert new character new digit left of the cursor When entering date and time etc overwrite character with dark background Using the phone book Up to 100 entries can be stored with a name and telephone number in the phone book Once a telephone number has been stored the call can be placed by pressing just a few keys Each name can be up to 12 characters in length and t...

Страница 13: ...ess Names right softkey 2 Select the desired entry using the keys or use the search function If you are looking for an entry starting with a W for instance press number 9 W 3 Press the key to retrieve the number of the desired contact Note At least one entry has to be stored in the telephone directory in order to select or call an entry directly via Names right softkey If this is not the case you ...

Страница 14: ... entry in the phone book Press Names right Softkey Select the desired entry with the keys Press Option left softkey Edit Press OK left softkey Navigate to the desired position in the name using the keys and when the blinking cursor is shown on the display Delete the character right of the cursor using Clear left softkey or insert a new character using the keypad Press the button Navigate to the de...

Страница 15: ... from the redial list Delete name number in phone book Press Names right softkey Select the desired entry with the keys Press Option left softkey Delete Press OK left softkey appears on the display Press OK left softkey to delete the entry There is another possibility to delete a phone book entry Follow the procedure shown below Press Menu left softkey Phone book Press OK left softkey Find Press O...

Страница 16: ...t your network provider 3 The caller has applied for CLI at his network provider How it works During a call the number or if stored in the telephone directory the name of the caller is shown on the display Conditions 1 You have applied at your network provider for the transfer of the caller number CLIP to your display 2 The caller has applied at this network provider that his number is transmitted...

Страница 17: ...hrough the entries using the keys Press Option left softkey Store Press OK left softkey 4 7 2 5 8 3 6 9 0 1 Enter the required name max 12 digits Press the button to navigate to the number or directly Press OK left softkey to save the changes Delete entry from the telephone number list Press the button The last call will be shown at first entry in the call list Navigate through the entries using t...

Страница 18: ...ft softkey Navigate through the entries using the keys Press Option left softkey to get to the menu for more functions Store Delete or Delete all or Press Back right softkey to return to the menu list Telephone number list of outgoing calls Press Menu left softkey Outgoing call Press OK left softkey Navigate through the entries using the keys Press Option left softkey to get to the menu for more f...

Страница 19: ...matically terminated once the maximum recording duration of 2 min utes is reached Note The 1st outgoing message is only played in Answer Record mode and the 2nd outgoing message is only played in OGM only mode Listening to an outgoing message OGM Press Menu left softkey TAM Press OK left softkey OGM Press OK left softkey Select desired message OGM 1 or OGM 2 using the keys Press OK left softkey Pl...

Страница 20: ...e answering machine switches on after 4 rings Answer 6 ing The answering machine switches on after 6 rings Answer 8 ring The answering machine switches on after 6 rings Procedure for defining the Answer 2 ring setting for example Press Menu left softkey TAM Press OK left softkey Ans Ring Press OK left softkey Select desired function Answer 2 ring using the keys Press OK left softkey to save your s...

Страница 21: ...essage during playback press Clear right softkey Note For better separation of the recorded messages in new and old messages New message or Old message is shown on the display Deleting all old messages Press button to select the menu Message Delete old Press OK left softkey appears on the display Press OK left softkey to delete the messages Recording a memo You can record a memo which is played as...

Страница 22: ... 3 6 9 0 1 Once you hear your message text enter remote query PIN via the keypad You will hear a signal tone to confirm your entry Now you can operate the answering machine via the keypad of the other telephone Note If you have entered the wrong remote query PIN the call is terminated Listen to messages and manage Play back recorded messages Press key For pause Press key For re recording Press key...

Страница 23: ...memo Press key Terminate recording Press key Set answering machine mode Set Answer 2 ring Press key then key Set Answer 4 ring Press key then key Set Answer 6 ring Press key then key Set Answer 8 ring Press key then key Set Announce Only Press key then key Set Answer off Press key then key Note The deactivated answering machine can be activated via remote control as follows 4 7 2 5 8 3 6 9 0 1 Dia...

Страница 24: ... Press OK left softkey Language Press OK left softkey Use the and buttons to select the desired language Press OK left softkey to save your settings Note Press Back right softkey to return to the menu list Automatic call acceptance If the function is activated simply take the handset from the base station without having to press the Press Menu left softkey Setup Press OK left softkey Handset Press...

Страница 25: ... Handset Press OK left softkey Key tone Press OK left softkey Use the and buttons to select ON or OFF Press OK left softkey to save your settings Note Press Back right softkey to return to the menu list Changing the handset name You can change the Handset 1 text on your handset to your own personal text Press Menu left softkey Setup Press OK left softkey Handset Press OK left softkey Handset name ...

Страница 26: ...hen the handset is in the base station Press Menu left softkey Setup Press OK left softkey Handset Press OK left softkey Clock Press OK left softkey Use the and buttons to select ON or OFF Press OK left softkey to save your settings Note Press Back right softkey to return to the menu list Change background colour of splash screen You can select which background colour the splash screen should have...

Страница 27: ...et supplied with the base station is already registered You don t need to register this handset Press Menu left softkey Setup Press OK left softkey Registration Press OK left softkey Register new Press OK left softkey appears on the display Press OK left softkey Enter the RC code 1111 Press OK left softkey Please wait appears on the display Press registration paging button at the base station for ...

Страница 28: ...obile set from the base station proceed as follows Press Menu left softkey Setup Press OK left softkey Registration Press OK left softkey Delete Press OK left softkey appears on the display Press OK left softkey After a short while the handset returns to the start menu and is now de registered from the base Dial pause setup In order to get an exchange line on a telephone system you can insert a di...

Страница 29: ...s Dial mode setup Press Menu left softkey Setup Press OK left softkey Network Press OK left softkey Dial mode Press OK left softkey Use the buttons to select the desired dial mode Tone or Pulse Press OK left softkey to save your settings Note Press Back right softkey to return to the menu list Note Nowadays most telephone lines use tone dialing Key lock To prevent that you might accidentally make ...

Страница 30: ...during a call In standby mode the radio waves are almost completely deactivated Very low The base station and the handset exchange information during a call and within limits in standby mode In addition the strength of the radio waves is strongly reduced Low The base station and the handset exchange information during a call and to some extent during standby mode In addition the strength of the ra...

Страница 31: ...less phones INT Press button 4 7 2 5 8 3 6 9 0 1 Enter the required telephone number The desired handset rings Press button to answer the call at the called handset Press button on the handset on which the call is being made once the internal user answers This function is only available for a freeTEL III with article number A 4605 Activate deactivate Bluetooth function Press Menu left softkey Blue...

Страница 32: ... port with a 2 5 mm socket for connecting a headset for instance Standard headphone port with a 3 5 mm socket for connecting a headphone for instance The following special accessories can be connected to the base station Vibrating pillow Flash module General Make sure that the telephone cable is undamaged and correctly inserted Disconnect any other accessories extension cable and other telephones ...

Страница 33: ...ted to an extension Procedure for resetting the telephone to the ex factory status 1 Press Menu left softkey 2 Now use the keypad to enter the following code 4 6 1 5 3 0 5 3 appears on the display 4 Press OK left softkey Please wait appears on the display 5 After about 2 seconds appears on the display and the freeTEL III returns to the start menu Now the telephone has been reset to the default set...

Страница 34: ...ber of the device in all correspondence Environmental note Waste disposal Disposal of used electrical and electronic equipment applicable in the countries of the European Union and in other European countries which operate a separate collection system for these devices The symbol on the product or its packaging indicates that this product should not be treated as normal household waste It should b...

Страница 35: ...Hz 150mA Secondary 7 2V DC 500 mA Handset NiMH AAA size 1 2V 700 mAh Power consumption approx 7 W Service life Standby up to 100 hrs Talk time up to 10 hrs Dimensions WxHxD Base station 116 x 138 x 86 mm Handset 178 x 51 x 33 mm Weight Base station approx 224 g Handset approx 175 g with batteries CE symbol This telephone satisfies the following EU directives 2011 65 EG RoHS directive 2004 108 EG E...

Страница 36: ...era anslutningskabeln så att ingen olycksfallsrisk uppstår Utsätt aldrig telefonen för påverkan genom värmekällor direkt solljus fuktighet andra elektriska apparater Skydda din telefon mot väta damm aggressiva vätskor och ångor Anslut endast anslutningskabeln till härför avsedda uttag Anslut endast godkänt tillbehör Låt bli att öppna basstationen eller den mobila enheten själv Säkerhetsinstruktion...

Страница 37: ...anteckningen i telefonboken 47 Spara namn nummer 47 Uppringning från telefonkatalogen 47 Titta på ett namn nummer i telefonboken 48 Ändring av en telefonkatalogposts namn nummer 48 Spara telefonnummer från återuppringningen 49 Radering av namn nummer i telefonkatalogen 49 Radera alla anteckningar i telefonboken 49 Telefonnummerindikering Allmänt 50 Funktionssätt 50 Avläsning och uppringning av pos...

Страница 38: ...undsfärg 60 Ändra menylistornas bakgrundsfärg 61 Inloggning av mobil enhet 61 Anmäla andra mobilenheter 62 Utloggning av den mobila enheten på basstationen 62 Inställning av uppringningspaus 62 Inställning av flashtid 63 Inställning av uppringningsmetod 63 Knappspärr 63 Frånkoppling av de permanenta radiosignalerna 64 Användning av flera mobila enheter Interna samtal 65 Förmedling av samtal mellan...

Страница 39: ...efonkabeln till ditt telefonjack se bild 2 4 Lägg in båda batterierna i den mobila enheten se bild 3 Se till att batterierna har rätt polaritet 5 Ställ den mobila enheten med knapparna framåt i basstationen se bild 2 Om den mobila enheten är korrekt insatt börjar batteriindikeringen i telefonens display att blinka och den röda laddningsindikatorn på basstationen lyser Bild 1 Obs Placera inte basst...

Страница 40: ...nd När batterierna är nästa urladdade visas symbolen på den mobila enhetens dis play och en varningssignal hörs Om telefonen inte laddas upp nu kopplas den mobila enheten automatiskt från vid låg batterispänning tills den åter ställs på basstationen Räckvidd Telefonens radioräckvidd kan variera mellan 50 och 300 m Radiosignalerna för överfö ringen kan försämras pga olika faktorer Den maximala räck...

Страница 41: ... På Av Headsetanslutning Siffertangenter Softkey knappar Styrknapp Lägg på luren Rutknapp Knappspärr till från Tryck länge på knappen sidan 63 Stjärnknapp Förfrågningsknapp Flash Tryck länge på knappen sidan 63 Återuppringning 10 50 Bläddra uppåt Beskjeder nedåt Visning av telefonnummer Bläddra left Mikrofon På Av right Interna samtal Tillbaka till startmenyn vid felaktig inmatning ...

Страница 42: ...42 Français Basstationens manöverelement Laddningsin dikering Inställning av ringsignalens ljudstyrka Paging knapp Anslutning för specialtillbehör som vibrationskudde och utvidgningsmoduler ...

Страница 43: ... ovanför på displayen Knapp I stand by funktion I menyn Öppna huvudmenyn diverse funktioner vänster Öppna telefonboken diverse funktioner höger Räckvidds indikering Batteriladdnings indikator Beteckning övre styrknapp Indikering för påkopplad handsfreefunktion Softkey knappar Displayindikeringar Meny Namn Handset 1 Beteckning vänster softkey knapp Beteckning höger softkey knapp 10 50 ...

Страница 44: ...en eller stänger av en Tryck på OK vänster softkey knapp för att spara dina inställningar Uppringning 1 4 7 2 5 8 3 6 9 0 1 Mata in det önskade telefonnumret max 20 siffror En felaktig inmatning kan rade ras med knappen 2 Tryck på knappen Numret rings upp 3 Samtalet avslutas igen genom att trycka på knappen Avbryta uppringning För att avbryta en uppringning trycker du på knappen eller också ställe...

Страница 45: ...as in under ett samtal med pilknap parna på den mobila enhetens framsida Genom att trycka på knapparna ökas resp minskas lurens ljudstyrka i fem steg på vardera 4 dB Med knappen kan en tillsatsförstärkning kopplas på knappen lyser rött och tonkontrollen aktiveras Med tonkontrollen skjutreglage på vänstra sidan av höljet kan man dessutom öka höga resp låga toner med 10 dB För att åter koppla av til...

Страница 46: ...ikrofonen igen Gå med knapparna och till felstället om du ser en blinkande skrivmarkör på displayen Ta bort tecknet siffran till vänster om skrivmarkören med Radera höger softkey knapp Sätt in det nya tecknet den nya siffran till vänster om skrivmarkören Om du skriver in datum och tid etc skriver du över tecknet med mörk bakgrund Användning av telefonbok I telefonbok kan upp till 100 poster sparas...

Страница 47: ...ryck på Namn höger softkey knapp 2 Välj önskad anteckning med knapparna eller använd sökfunktionen Om du t ex söker en post med begynnelsebokstaven W trycker du på siffertangenten 9 W 3 Tryck på knappen för att ringa upp önskad person Remarque För att kunna välja en anteckning direkt med Namen höger softkey knapp och för att ringa upp personen med detta namn måste det finnas minst en anteckning sp...

Страница 48: ...s namn nummer Tryck på Namn höger softkey knapp Välj en ny anteckning med knapparna Tryck på Option vänster softkey knapp Redigera Tryck på OK vänster softkey knapp Gå med knapparna och till önskat ställe i namnet när den blinkande skrivmar kören visas på displayen Ta bort bokstaven till vänster om skrivmarkören med Radera eller lägg till en ny bok stav med hjälp av knappsatsen Tryck på knapp Gå m...

Страница 49: ...nummer i telefonkatalogen Tryck på Namn höger softkey knapp Välj en ny anteckning med knapparna Tryck på Option vänster softkey knapp Ta bort Tryck på OK vänster softkey knapp visas på displayen Tryck på OK vänster softkey knapp för att ta bort en anteckning För att kunna ta bort en anteckning i telefonboken har du ytterligare en möjlighet Gör det som beskrivs nedan Tryck på Meny vänster softkey k...

Страница 50: ...efonnumret på den som ringer upp dig visas 2 Du har beställt CLIP hos ditt telebolag 3 Den som ringer upp dig har beställt CLIP hos sitt telebolag Funktionssätt Om du rings upp visas telefonnumret på den som ringer upp dig på displayen och om per sonen i fråga är antecknad i din telefonbok också namnet Förutsättning 1 Du har hos ditt telebolag beställt att numret på den som ringer upp dig CLIP ska...

Страница 51: ... Tryck på knapp för att komma numret eller dirket Tryck på OK vänster softkey knapp för att spara dina inställningar Radera en anteckning på telefonnummerlistan Tryck på knapp Den senaste uppringningen visas först på telefonnummerlistan Med knapparna kan du gå upp och ner på listan Tryck på Option vänster softkey knapp Ta bort Tryck på OK vänster softkey knapp visas på displayen Tryck på OK vänste...

Страница 52: ...listan Tryck på Option vänster softkey knapp för att komma till stället där du kan välja ytterligare funktioner Spara Ta bort eller Ta bort allt eller Tryck på Zurück höger softkey knapp för att komma tillbaka till menylistan Telefonnummerlista för utgående samtal Tryck på Meny vänster softkey knapp Utg samtal Tryck på OK vänster softkey knapp Med knapparna kan du gå upp och ner på listan Tryck på...

Страница 53: ...troll Anmärkning Inspelningen av texten avslutas automatiskt om max inspelningstid på 2 minuter har upp nåtts Anmärkning Det 1 a röstmeddelandet avspelas endast i Svar Record läget och det 2 a röstmedde landet endast i svara bara läget Høre en melding Tryck på Meny vänster softkey knapp tel svarare Tryck på OK vänster softkey knapp text Tryck på OK vänster softkey knapp Välj önskad text text 1 ell...

Страница 54: ...ign Telefonsvararen kopplas på efter 8 ringsignaler För att t ex aktivera inställningen TS 2 sign gör du som beskrivs nedan Tryck på Meny vänster softkey knapp tel svarare Tryck på OK vänster softkey knapp svara efter Tryck på OK vänster softkey knapp Välj önskad inställningen TS 2 med knapparna Tryck på OK vänster softkey knapp för att spara dina inställningar Ställa in PIN koden för fjärravfrågn...

Страница 55: ...dera höger softkey knapp Anmärkning För att du lättare ska kunna skilja på gamla och nya meddelanden visas på displayen Nytt meddel resp Gamla meddel Radering av gamla meddelanden Tryck på knapp för att välja menyn Meddel radera gamla Tryck på OK vänster softkey knapp visas på displayen Tryck på OK vänster softkey knapp för att ta bort en meddeland Inspelning av en minnesanteckning påminnelse noti...

Страница 56: ...har spelat in för inkommande samtal Skriv in din PIN kod för fjärravfrågning med hjälp av knappsatsen Du hör en ljudsignal som bekräftelse Nu kan du använda telefonsvararen med hjälp av knappsatsen på den andra telefonen Anmärkning Om du har skrivit in fel PIN kod för fjärravfrågningen frånskiljs ledningen Lyssna på och förvalta meddelanden Spela upp inspelade meddelanden Tryck på knapp För paus T...

Страница 57: ...nspelning Tryck på knapp Avsluta inspelningen Tryck på knapp Ställa in funktionen telefonsvarare Ställ in TS 2 sign Tryck på och sedan på knapp Ställ in TS 4 sign Tryck på och sedan på knapp Ställ in TS 6 sign Tryck på och sedan på knapp Ställ in TS 8 sign Tryck på och sedan på knapp Ställ in Endast text Tryck på och sedan på knapp Ställ in TS av Tryck på och sedan på knapp Anmärkning Om din telef...

Страница 58: ...napparna kan du växla mellan menyspråket Tryck på OK vänster softkey knapp för att spara dina inställ ningar Anmärkning Tryck på Bakåt höger softkey knapp för att komma tillbaka till menylistan Automatisk samtalsmottagning Om funktionen är aktiverad behöver du bara ta upp din mobilenhet från basstationen utan att behöva trycka på knappen för att lyfta på luren Tryck på Meny vänster softkey knapp i...

Страница 59: ...oftkey knapp knappton Tryck på OK vänster softkey knapp Med knapparna och kan du växla mellan inställningar Av eller På Tryck på OK vänster softkey knapp för att spara dina inställningar Anmärkning Tryck på Bakåt höger softkey knapp för att komma tillbaka till menylistan Ändring av den mobila enhetens namn Du kan ändra den mobila enhetens namn Handset 1 till en egen text Gör då som följer Tryck på...

Страница 60: ...ster softkey knapp inställning Tryck på OK vänster softkey knapp mobildel Tryck på OK vänster softkey knapp klocka på av Tryck på OK vänster softkey knapp Med knapparna och kan du växla mellan inställningar På eller Av Tryck på OK vänster softkey knapp för att spara dina inställningar Anmärkning Tryck på Bakåt höger softkey knapp för att komma tillbaka till menylistan Ändra startbildskärmens bakgr...

Страница 61: ...s in Anmärkning Den till basstationen medlevererade mobila enheten är redan inloggad Denna mobila en het behöver inte loggas in Tryck på Meny vänster softkey knapp inställning Tryck på OK vänster softkey knapp anmälan Tryck på OK vänster softkey knapp ny anmälan Tryck på OK vänster softkey knapp visas på displayen Tryck på OK vänster softkey knapp Mata in RC koden 1111 Tryck på OK vänster softkey ...

Страница 62: ...vänster softkey knapp anmälan Tryck på OK vänster softkey knapp ta bort Tryck på OK vänster softkey knapp visas på displayen Tryck på OK vänster softkey knapp Efter kort tid går mobilenheten tillbaka i startmenyn och är nu inte längre anmäld hos basstationen Inställning av uppringningspaus Du kan ställa in en uppringningspaus efter den första siffran för aktivering av en linje på en telefonanläggn...

Страница 63: ...ngsmetod Tryck på Meny vänster softkey knapp inställning Tryck på OK vänster softkey knapp nätverk Tryck på OK vänster softkey knapp ringfunkt Tryck på OK vänster softkey knapp Med knapparna eller kan du växla mellan uppringningsmetod ton eller puls Tryck på OK vänster softkey knapp för att spara dina inställningar Anmärkning Tryck på Bakåt höger softkey knapp för att komma tillbaka till menylista...

Страница 64: ...Softkey Taste drücken um die Auswahlliste ohne Änderung zu verlassen Möjliga funktioner och hur de fungerar Minimal basstationen och mobilenheten byter bara ut informationer när telefonen används I standby stängs radiostrålningen av nästan helt Mycket låg basstationen och mobilenheten byter bara ut informationer när telefonen används och i viss omfattning även i standby Dessutom reduceras radio st...

Страница 65: ...n det önskade numret på mobila enheten Önskad mobila enheten ringer Tryck på knappen på den uppringande mobila enheten när den interna anknyt ningen har svarat Samtalet avslutas igen genom att trycka på knappen Denna funktion finns bara för en freeTEL III med artikelnummer A 4605 Bluetooth funktion På Av Tryck på Meny vänster softkey knapp Bluetooth Tryck på OK vänster softkey knapp BT funktion Tr...

Страница 66: ...enhet med freeTEL III freeTEL III är försedd med Standard headsetanslutning med ett 2 5 mm jackuttag t ex för anslutning av en headset 3 5 mm audioutgångsuttag t ex för anslutning av en hörlur eller liknande Dessutom kan följande specialtillbehör anslutas till basstationen Vibrationskudde Blixtmodul Allmänt Övertyga dig om att telefonkabeln är oskadd och korrekt ansluten Ta bort eventuell extrautr...

Страница 67: ...fonnumret Gör som följer för att återställa telefonen till fabrikens leveranstillstånd 1 Tryck på Meny vänster softkey knapp 2 Mata nu in koden 4 6 1 5 3 0 5 med knapparna 3 visas på displayen 4 Tryck på OK vänster softkey knapp Vänta visas på displayen 5 Efter ca 2 Sekunden sekunder visas på displayen och de freeTEL III återvänder till startmenyn Telefon är nu återställd till fabriksinställningen...

Страница 68: ...t måste alltid också anges Miljöinformation Avfallshantering Avfallshantering av begagnade elektriska och elektroniska apparater ska använ das i länder som ingår i den europeiska unionen och andra europeiska länder med ett separat uppsamlingssystem för dessa apparater Symbolen på produkten eller dess förpackning hänvisar till att denna produkt inte får be handlas som normala hushållssopor utan mås...

Страница 69: ...rt 7 2V DC 500 mA Mobil enhet NiMH storlek AAA 1 2V 700 mAh Effektförbrukning Driftstid ca 7 Watt Driftstid Beredskap standby upp till 100 tim Samtalstid upp till 10 tim Mått BxHxD Basstation 116 x 138 x 86 mm Mobil enhet 178 x 51 x 33 mm Vikt Basstation ca 224 g Mobil enhet ca 175 g med batterier CE märkning Cet appareil est conforme aux exigences des directives communautaires ci après 2011 65 CE...

Страница 70: ...e de conexión de forma que no pueda ocasionar accidentes No exponga nunca el teléfono a las siguientes influencias Fuentes de calor radiación directa del sol humedad otros equipos eléctricos Proteja el teléfono de la humedad del polvo y de los líquidos y vapores agresivos Conecte los cables de conexión solo en las hembras previstas Conecte únicamente accesorios autorizados Jamás Abra la estación b...

Страница 71: ...agenda 80 Asignación de las teclas 80 Ver el nombre número de una entrada de la agenda telefónica 81 Almacenar un nombre número 81 Llamar desde la agenda 81 Modificar nombre número de una entrada de la agenda 82 Almacenar un número de teléfono desde la repetición de la última llamada 83 Almacenar un número de teléfono desde la repetición de la última llamada 83 Eliminación de nombre número de la a...

Страница 72: ...ualización de la hora 94 Cambiar color de fondo de la pantalla de inicio 94 Cambiar color de fondo de las listas de menú 95 Registro del terminal 95 Registrar otros componentes del teléfono inalámbrico 96 Dar de baja al terminal de la estación base 96 Configurar la pausa de marcación 96 Configurar el tiempo flash 97 Configurar el procedimiento de marcación 97 Bloqueo de las teclas 97 Apagar la rad...

Страница 73: ...nchufe del teléfono de la conexión telefónica véase Imagen 2 4 Introduzca las dos pilas en el terminal y coloque la tapa de las pilas véase Imagen 3 Asegúrese de la correcta polaridad de las baterías 5 Coloque el terminal en la estación base con el teclado mirando hacia delante véase Imagen 2 Cuando el terminal está bien colocado empieza a parpadear la indicación de las pilas que hay en el display...

Страница 74: ...casi descargadas se muestra el icono en el display del terminal y suena una señal de aviso Si el teléfono no se recarga en ese momento el termi nal se desconecta automáticamente cuando la tensión de las pilas es muy baja hasta que se vuelve a colocar en la estación base Alcance El alcance del teléfono puede variar entre 50 y 300 m Las radioseñales de la transmisión pueden verse influidas por difer...

Страница 75: ...s blandas Tecla de control Colgar el auricular Tecla almohadilla bloqueo de teclas con des mantener la tecla pulsada unos segundos ver página 97 Tecla asterisco Botón de localización Flash mantener la tecla pulsada unos segundos ver página 97 Repetición de la última llamada 10 50 Desplazarse hacia arriba Mensajes hacia abajo Indicación de número de llamada Desplazarse izquierda Micrófono CON DESC ...

Страница 76: ...76 Espan ol Elementos de mando de la estación base Indicación de carga Ajuste del volumen del timbre Tecla paging Conexión para almoha da vibratoria o módulos suplementarios accesorio especial ...

Страница 77: ...rece en pantalla Tecla En modo Standby En el menú Abrir menú principal diversas funciones izquierda Abrir agenda telefónica diversas funciones derecho Indicación de alcance Indicación de carga de las pilas Nombre de la tecla de control superior Indicación de función de manos libres conectado Teclas blandas Indicaciones de pantalla Menú Nombre Handset 1 Nombre de la tecla blanda izquierda Nombre de...

Страница 78: ...empo automática del cable de teléfono Pulse OK tecla blanda izquierda para guardar su configuración Llamar 1 4 7 2 5 8 3 6 9 0 1 Introduzca el número de teléfono que desee máx 20 dígitos Es posible borrar una entrada errónea con la tecla gelöscht werden 2 Pulse la tecla Se marca el número 3 La llamada finaliza pulsando la tecla Cancelar Marcar Para cancelar una marcación pulse la tecla o ponga de ...

Страница 79: ...a con las teclas de flecha situadas en la parte frontal del terminal Pulsando las teclas se puede aumentar o reducir el volumen del auricular en cinco niveles de 4 dB cada uno Con la tecla se conecta la amplificación adicional la tecla se ilumina en rojo y se activa el control de tono Además con el control de tonos interruptor deslizante situado en el lado izquierdo de la carcasa puede aumentar en...

Страница 80: ...tf tecla blanda derecha el carácter el número a la izquierda de la marca de escritura Introduzca un nuevo carácter número a la izquierda de la marca de escritura Si introduce la fecha y la hora etc sobrescriba el carácter con fondo oscuro Uso de la agenda En la agenda se pueden almacenar hasta 100 entradas con nombre y número de teléfono Una vez guardado un número de teléfono el establecimiento de...

Страница 81: ... 1 Pulse Nombre tecla blanda derecha 2 Seleccione la entrada deseada con las teclas o utilice la función de búsque da Si p ej busca una entrada con la letra inicial W pulse la tecla 9 3 Para llamar el número del interlocutor deseado pulse la tecla Observación Mediante Nombre tecla blanda derecha seleccione directamente una entrada para poder llamar es necesario que como mínimo haya una entrada gua...

Страница 82: ...ificar nombre número de una entrada de la agenda Pulse Nombre tecla blanda derecha Seleccione la entrada deseada con las teclas Pulse Option tecla blanda izquierda Editar OK Pulse OK tecla blanda izquierda Con las teclas y navegue hasta el nombre deseado cuando se visualice una marca de escritura parpadeante en la pantalla Con Borrar borre la letra a la izquierda de la marca de escritura o introdu...

Страница 83: ...ición de llamada Eliminación de nombre número de la agenda Pulse Nombre tecla blanda derecha Seleccione la entrada deseada con las teclas Pulse Option tecla blanda izquierda Borrar Pulse OK tecla blanda izquierda aparece en pantalla Pulse OK tecla blanda izquierda para borrar la entrada Para poder borrar una entrada de la agenda telefónica tiene otra opción Siga los siguien tes pasos Pulse Menú te...

Страница 84: ... llamadas Se ve el número de la persona que llama 2 Ha encargado CLIP a su proveedor 3 La persona que llama ha encargado CLI a su proveedor Funcionamiento En una llamada se visualiza el número en pantalla o si este está guardado en la agenda telefónica el nombre de la persona que llama Requisitos 1 Ha encargado a su proveedor que el número de la persona que llama se visualice en pantalla CLIP 2 La...

Страница 85: ...bre que desee máx 12 dígitos Pulse tecla para desplazarse hasta el número o directamente Pulse OK tecla blanda izquierda para guardar los cambios Borrar la entrada de la lista de números Pulse tecla La última llamada es la primera que se visualiza en la lista de números Navegue con las teclas por las entradas Pulse Option tecla blanda izquierda Borrar Pulse OK tecla blanda izquierda aparece en pan...

Страница 86: ...uierda Navegue con las teclas por las entradas Pulse Option tecla blanda izquierda para acceder a la selección de más funciones Almacé Borrar o Borrar todo o Pulse Atrás tecla blanda derecha para regresar a la lista del menú Rufnummernliste der abgehenden Anrufe Pulse Menú tecla blanda izquierda Llamada sal Pulse OK tecla blanda izquierda Navegue con las teclas por las entradas Pulse Option tecla ...

Страница 87: ... La grabación finalizará automáticamente cuando se alcance la duración de grabación máxima de 2 minutos Observación El 1er mensaje sólo se reproduce en el modo Contestar Grabar y el 2º sólo en el modo Sólo mens Escuchar un mensaje Pulse Menú tecla blanda izquierda Contestador Pulse OK tecla blanda izquierda Mens contest Pulse OK tecla blanda izquierda Seleccione el propio mensaje deseado Mens cont...

Страница 88: ...se conecta después de 6 tonos de llamada 8 tonos El contestador automático se conecta después de 8 tonos de llamada Para activar p ej la configuración 2 tonos proceda de la manera que se describe a continuación Pulse Menú tecla blanda izquierda Contestador Pulse OK tecla blanda izquierda Descolg tras Pulse OK tecla blanda izquierda Seleccione el configuración deseado 2 tonos Pulse OK tecla blanda ...

Страница 89: ...te su reproducción pulse Entf tecla blanda derecha Observación Para diferenciar mejor entre los mensajes grabados antiguos y nuevos en la pantalla se visualiza Nuevo mens o Antiguo mens Borrar todos los mensajes antiguos Pulse tecla para se seleccionar el menú Mensajes Borrar antig Pulse OK tecla blanda izquierda aparece en pantalla Pulse OK tecla blanda izquierda para borrar todas los mensajes Gr...

Страница 90: ...ucha su propio mensaje introduzca el PIN para consulta remota mediante el teclado Se oye un tono de señal para la confirmación Puede controlar el contestador automático mediante el teclado del otro teléfono Observación En caso de que haya introducido un PIN para consulta remota errónea se cortará la conexión Escuchar y administrar mensajes de voz Reproducir mensajes grabados Pulsar tecla Para una ...

Страница 91: ... nota de voz Pulsar tecla Finalizar grabación Pulsar tecla Configuración del modo de contestador automático Configurar 2 tonos Pulsar tecla luego tecla Configurar 4 tonos Pulsar tecla luego tecla Configurar 6 tonos Pulsar tecla luego tecla Configurar 8 tonos Pulsar tecla luego tecla Configurar Solo m cont Pulsar tecla luego tecla Configurar Apagar cont Pulsar tecla luego tecla Observación Se puede...

Страница 92: ...K tecla blanda izquierda Seleccione la idioma deseada con las teclas Pulse OK tecla blanda izquierda para guardar su configura ción Observación Pulse Atrás tecla blanda derecha para regresar a la lista del menú Aceptación automática de llamadas Si la función está encendida tome el teléfono inalámbrico de la estación base cuando reciba una llamada sin tener que pulsar la tecla Pulse Menú tecla blan...

Страница 93: ...Tono tecla Pulse OK tecla blanda izquierda Seleccione CON o DESC deseada con las teclas y Pulse OK tecla blanda izquierda para guardar su configuración Pulse Atrás tecla blanda derecha para regresar a la lista del menú Modificar el nombre del terminal Puede cambiar el texto del nombre del terminal Handset 1 por un texto personal Para ello proceda de la siguiente manera Pulse Menú tecla blanda izqu...

Страница 94: ...estación base Pulse Menú tecla blanda izquierda Ajustes Pulse OK tecla blanda izquierda Terminal Pulse OK tecla blanda izquierda Reloj on off Pulse OK tecla blanda izquierda Seleccione CON o DESC deseada con las teclas y Pulse OK tecla blanda izquierda para guardar su configuración Observación Pulse Atrás tecla blanda derecha para regresar a la lista del menú Cambiar color de fondo de la pantalla ...

Страница 95: ...ón base ya está registrado No tiene que efectuar ningún registro para este terminal Pulse Menú tecla blanda izquierda Ajustes Pulse OK tecla blanda izquierda Registro Pulse OK tecla blanda izquierda Nuev registr Pulse OK tecla blanda izquierda aparece en pantalla Pulse OK tecla blanda izquierda A continuación introduzca el código RC 1111 Pulse OK tecla blanda izquierda Pulse la tecla registro loca...

Страница 96: ...proceda como sigue Pulse Menú tecla blanda izquierda Ajustes Pulse OK tecla blanda izquierda Registro Pulse OK tecla blanda izquierda Borrar Pulse OK tecla blanda izquierda aparece en pantalla Pulse OK tecla blanda izquierda Después de un corto período de tiempo la parte posterior del auricular en el menú Inicio y es ahora la base de dado de baja Configurar la pausa de marcación Para obtener línea...

Страница 97: ...0 ms Configuración no modificable de 90 mseg Configurar el procedimiento de marcación Pulse Menú tecla blanda izquierda Ajustes Pulse OK tecla blanda izquierda Red Pulse OK tecla blanda izquierda Modo marcado Pulse OK tecla blanda izquierda Seleccione la procedimiento de marcación Marcad tonos o Marcad puls deseada con las teclas Pulse OK tecla blanda izquierda para guardar su configuración Observ...

Страница 98: ...n base y el teléfono inalámbrico sólo intercambian información durante una llamada En el modo Standby la transmisión por radio está casi apagada por completo Muy reducido La estación base y el teléfono inalámbrico intercambian información duran te una llamada y en poca cantidad durante el modo Standby Adicional mente se reduce notablemente la potencia de la transmisión por radio Reducido La estaci...

Страница 99: ...lamada INT Pulse la tecla 4 7 2 5 8 3 6 9 0 1 Introduzca el número de teléfono que desee El teléfono suena Acepte la llamada con la tecla La llamada finaliza pulsando la tecla Esta función sólo está disponible en un freeTEL III con el número de artículo A 4605 Encender apagar la función Bluetooth Pulse Menú tecla blanda izquierda Bluetooth Pulse OK tecla blanda izquierda Modo BT Pulse OK tecla bla...

Страница 100: ...es una hembra para auriculares con una hembrilla de trinquete de 3 5 mm p ej para conectar un auricular o similar Adicionalmente podrán conectarse los accesorios siguientes al estación base almohada vibratoria módulo de destellos Generalidades Asegúrese de que el cable del teléfono no está dañado y de que está enchufado cor rectamente Retire el equipamiento adicional que pudiera haber cable de pro...

Страница 101: ...el teléfono al estado de suministro de fábrica proceda de la siguiente manera 1 Pulse Menú tecla blanda izquierda 2 Geben sie nun über das Tastenfeld den Code 4 6 1 5 3 0 5 ein 3 erscheint im Display 4 OK linke Softkey Taste drücken Im Display erscheint Bitte warten 5 Nach ca 2 Sekunden erscheint im Display und das freeTEL III kehrt zum Startbild schirm zurück Das Telefon ist nun auf die Werkseins...

Страница 102: ...mite la tarjeta de la garantía debida mente cumplimentada y una fotocopia de la factura resguardo de compra del distribuidor especializado En todo caso se deberá indicar el número del equipo Indicación medioambiental eliminación Eliminación de equipos eléctricos y electrónicos usados de aplicación en los países de la Unión Europea y en otros países europeos con un sistema colector separado para es...

Страница 103: ...cundario 7 2V DC 500 mA Terminal NiMH AAA grandes 1 2V 700 mAh Absorción de potencia Aprox 7 vatios Tiempo de funcionamiento Disponibilidad en espera hasta 100 horas Tiempo de conversación hasta 10 horas Dimensiones anchura x altura x profundidad Estación base 116 x 138 x 86 mm Terminal 178 x 51 x 33 mm Peso Estación base aprox 224 g Terminal aprox 175 g mit Akkus Símbolo CE Este aparato cumple lo...

Страница 104: ...9 0 Fax 49 0 76 21 9 56 89 70 E mail info humantechnik com Tel 41 0 61 6 93 22 60 Fax 41 0 61 6 93 22 61 E mail info humantechnik com Tel 33 0 3 89 44 14 00 Fax 33 0 3 89 44 62 13 E mail sms audiofr com Hoorexpert BV Gildenstraat 30 NL 4143 HS Leerdam Humantechnik GmbH Im Wörth 25 D 79576 Weil am Rhein Humantechnik GHL AG Rastatterstrasse 9 CH 4057 Basel SMS Audio Electronique Sàrl 173 rue du Géné...

Отзывы: