

13
14
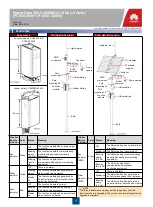
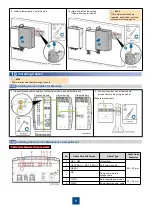
Power-On Commissioning
13
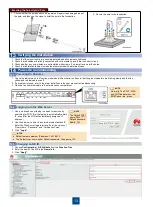
Verifying the Installation
1. Check the indicators on the function module and lithium batteries. Ensure that the green indicators are blinking slowly and that the
yellow and red indicators are off.
2. If a problem is found, refer to the alarm definitions in the user manual for troubleshooting.
3. Observe the board indicators in the maintenance compartment.
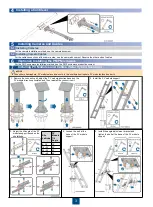
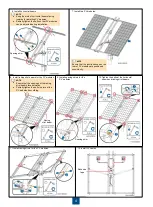
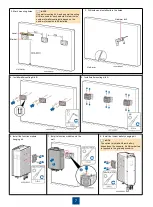
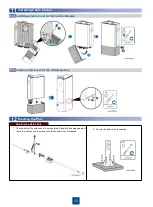
1. Check whether the pole needs to be repainted. Repaint the damaged area of
the pole, and then use the crane to hoist the pole to the foundation.
2. Secure the pole to the foundation.
Powering On Modules
14.1
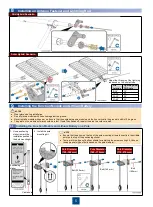
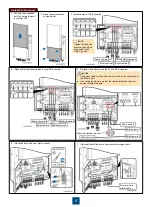
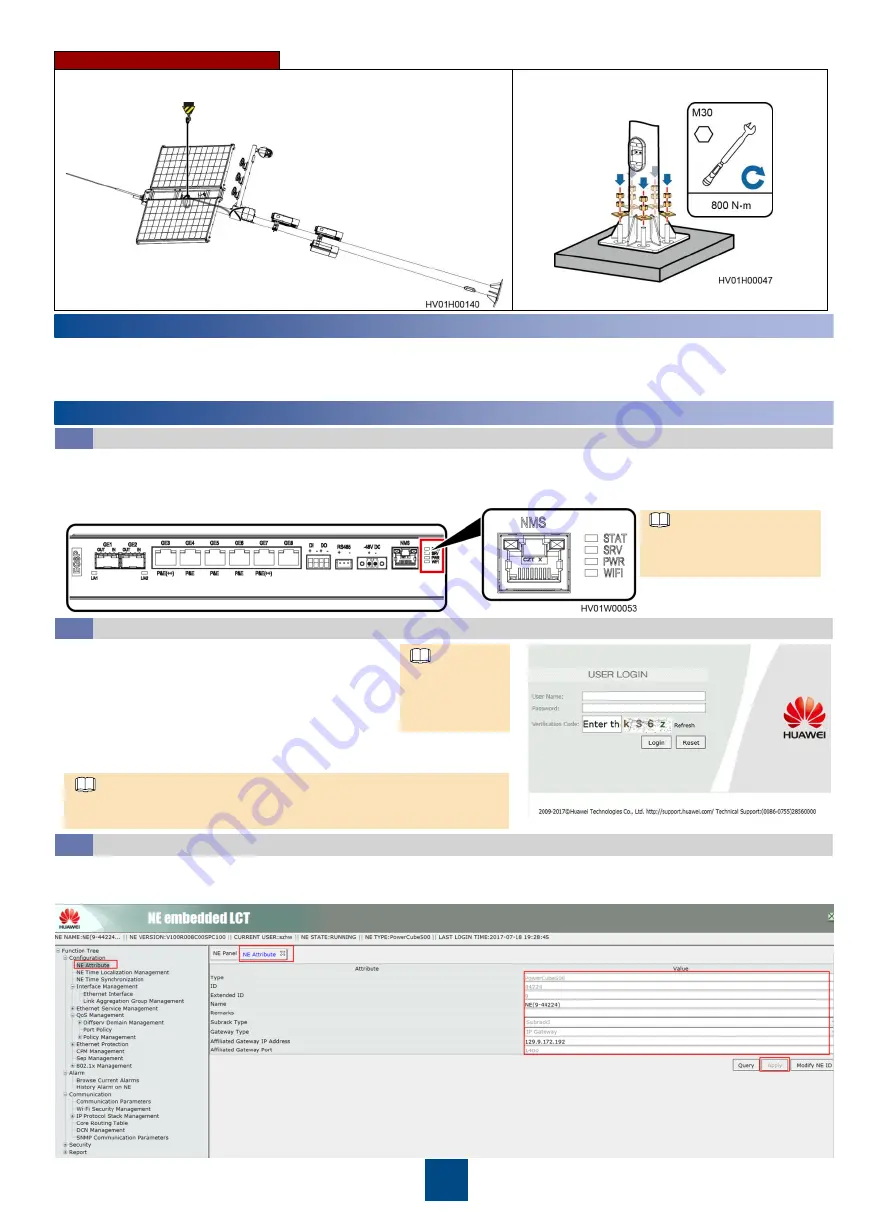
Logging In to the Web Server
14.2
Normally, The STAT, PWR,
and WIFI indicators on the
EG8P panel are: green.
1. Use a mobile phone or laptop to search for devices by
searching for WIFI. (Set the laptop to automatically obtain
IP, even after the WIFI will automatically assign an IP
address.)
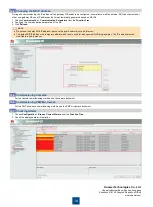
Changing an NE ID
14.3
1. Choose
Configuration
>
NE Attribute
from the
Function Tree
.
2. Enter the name of the NE in the
Name
field.
3. Click
“Apply”
.
Erecting the Solar Hybrid Pole
NOTE
Default network element IP address: 192.168.1.1.
The Default user name: szhw. Default password: Changeme_123.
NOTE
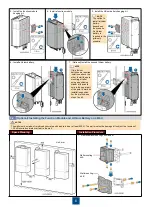
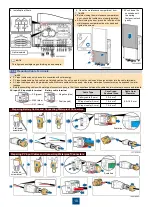
1. Check that the mounting kits are securely installed and all screws are tightened.
2. Check that all cables are reliably connected with correct polarity and there is no short circuit.
3. Check whether any screw holes are not installed with screws. If so, install screws at the holes.
4. Check that all idle cable holes in modules are protected with waterproof caps.
2. Use the browser to enter the network element default IP,
Enter the Web Server login interface, Enter the values of
“User Name”, “Password”, and “Verification Code”.
3. Click
“Login”
.
NOTE
The Default WIFI
name: RMn-******.
Default password:
Modify_123.


