


18
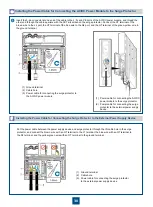
Tighten the screws using a Phillips screwdriver
After the core wires are installed, ensure that each core wire is securely installed after being dragged with a torque of
30
N•m and all copper wires are inserted in the connector terminal socket.
Connect the NEG(
–) terminal of the blue core wire to the
negative electrode (
–) of the connector, and the RTN(+)
terminal of the black or brown core wire to the positive
electrode (+) of the connector. Then, use a Phillips
screwdriver to tighten the screws.
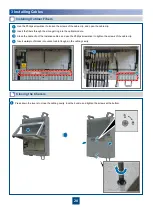
Prepare power cables
c
Installing Power Cables
d
Use the Phillips screwdriver to loosen the
screws of the cable clip, and open the cable clip.
Remove the waterproof block.
Insert the power cables through the silica gel
ring to the power cable troughs.
Close the cable clip of power cables, and use
the Phillips screwdriver to tighten the screws of
the cable clip
.
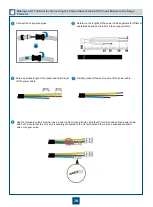
Installing the Optical Module
e
Pull the ring of the optical module downwards, insert the optical module into the port of the OSN 810, and pull the ring of the
optical module upwards.
3 Installing Cables


