132
8.
Configure the RADIUS server:
a.
Add a user account on the server. (Details not shown.)
b.
Configure the authentication, authorization, and accounting settings. (Details not shown.)
Verifying the configuration
1.
From the navigation tree, select
Security
>
Authentication
>
RADIUS
.
2.
Verify the configuration of RADIUS scheme
rs1
.
3.
From the navigation tree, select
Security
>
Authentication
>
ISP Domains
.
4.
Verify the configuration of ISP domain
dm1
.
5.
Use the configured user account to pass portal authentication.
6.
From the navigation tree, select
Security
>
Access Control
>
Portal
.
7.
Verify that the number of online users is not 0 on VLAN-interface 100.
Cross-subnet portal authentication configuration example
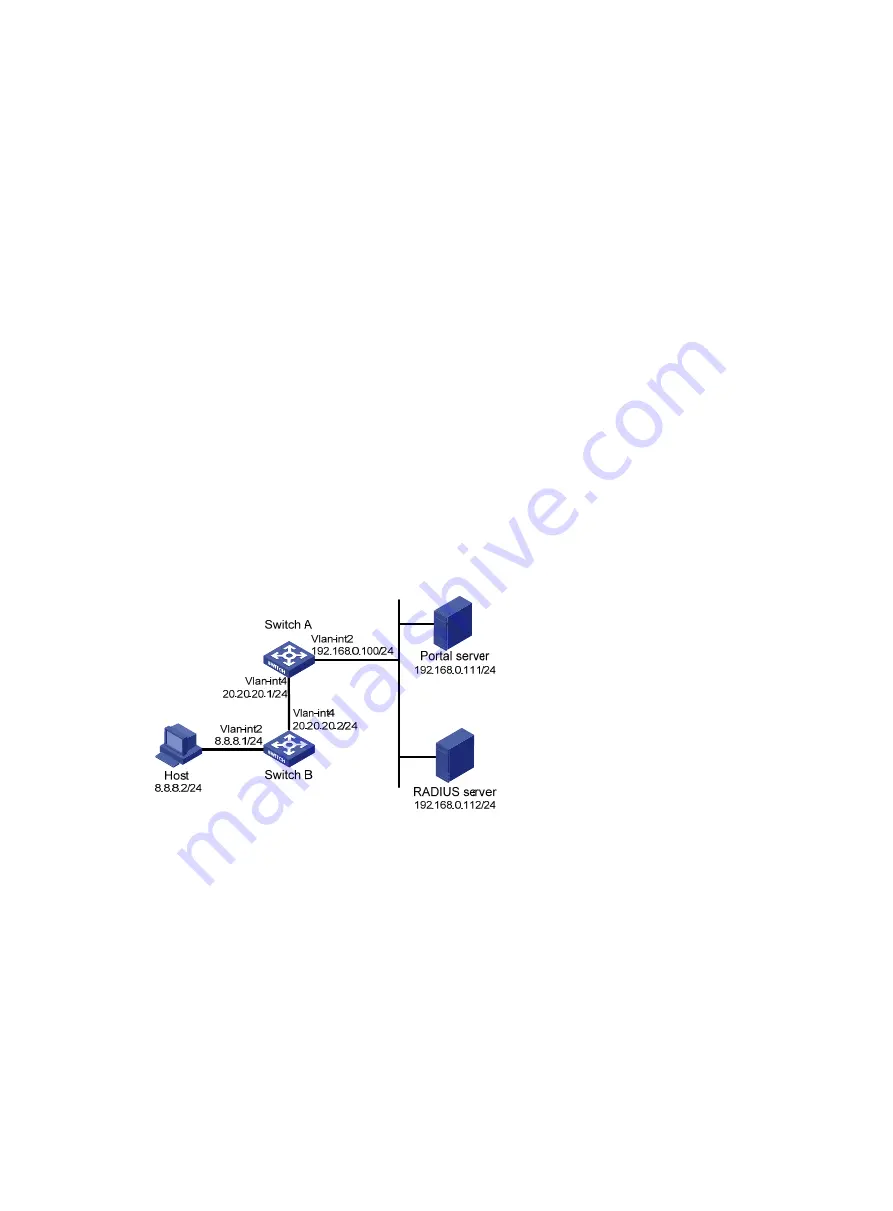
Network requirements
As shown in
, Switch A supports portal authentication. The host accesses Switch A through
Switch B. A portal server acts as both a portal authentication server and a portal Web server. A
RADIUS server acts as the authentication/accounting server.
Configure Switch A for cross-subnet portal authentication. Before passing the authentication, the
host can access only the portal Web server. After passing the authentication, the user can access
other network resources.
Figure 47 Network diagram
Configuration procedure
1.
Configure the portal server. (Details not shown.)
2.
Configure a RADIUS scheme on Switch A:
a.
From the navigation tree, select
Security
>
Authentication
>
RADIUS
.
b.
Add RADIUS scheme
rs1
.
c.
Configure the primary authentication server:
−
Set the IP address to
192.168.0.112
.
−
Set the authentication port number to
1812
.
−
Set the shared key to
radius
.
−
Set the server state to
Active
.
d.
Configure the primary accounting server:


