


The rack rails are marked for easy identification. The left rack rail is marked "L" and the right rack
rail is marked "R." To install the rack rails:
1.
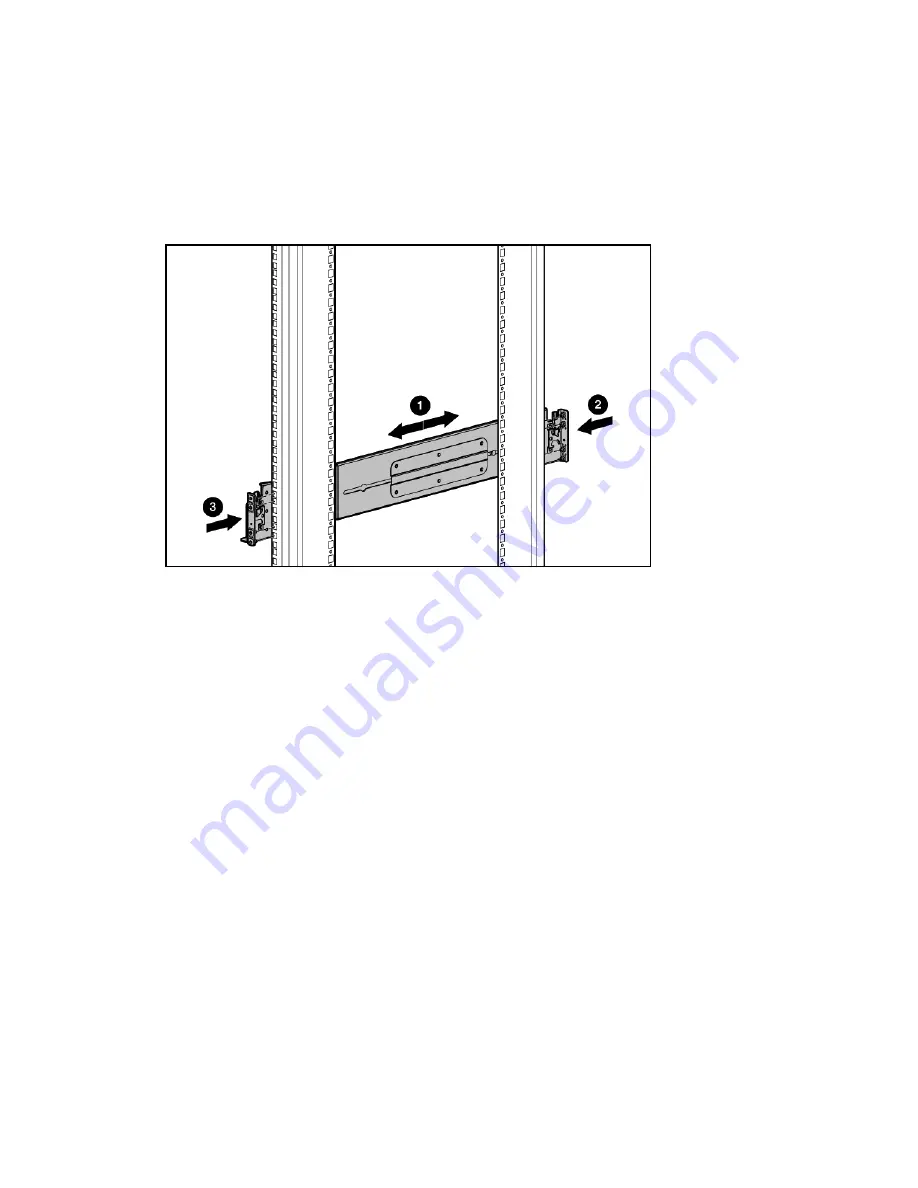
Begin with the left rack rail. Align the end of the rail with the rear rack column.
2.
Slide the rack rail closed until the end of the rail is locked in place, wrapping behind the rear
rack column.
3.
Slide the front end of the rail to the rack front column. When fully seated, the rack rail will
lock into place.
Figure 4 Installing the rails
4.
Repeat the procedure for the right rack rail.
5.
Insert the eight locking nuts for the disk enclosure into the rack; two on each column. The nuts
are used to secure the thumbscrews on the front of the disk enclosure and the mounting brackets
that attach to the rear of the disk enclosure. To locate the correct position for the locking nuts,
count up 4U from the location of the rails (1). The nuts are placed on either side of the +4U
position on each rack column (2).
22
Installing and cabling the HP StoreOnce 4900 Backup system
Содержание StoreOnce 4900 Backup
Страница 47: ...Figure 20 Network configuration flowchart Before running net set wizard 47 ...
Страница 98: ...98 Configuring backup servers to work with HP StoreOnce ...
Страница 101: ...iSCSI Initiator optional VTL only 101 ...
Страница 116: ...Reboot the host Linux system and the connection will work again 1 16 Troubleshooting ...


