


HP StorageWorks DAT Tape Drives User Guide
37
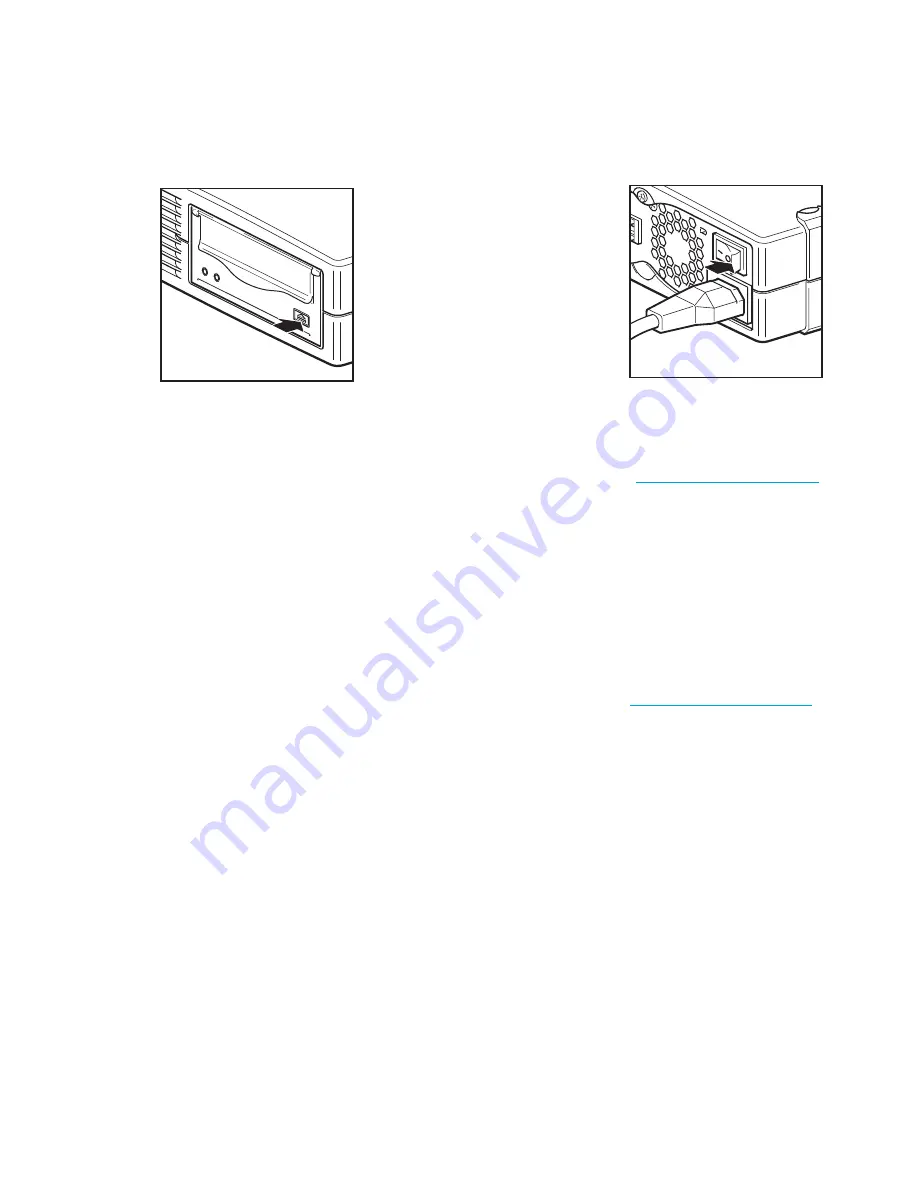
Recovery process. Release the button as soon as the Tape light and the Clean light on the front
panel flash alternately, which is the OBDR sequence.
Figure 19
Keeping eject button pressed down, power on in OBDR mode
Keyboard shortcut for HP ProLiant servers
There is no need to press the Eject button. Just power on your server and press the [F8] function key
during the Power On Self Test (POST). This invokes OBDR to restore your system. For more information
and specific instructions please refer to our World Wide Web site at
www.hp.com/go/obdr
.
3.
Follow the on-screen instructions to set up the operating system. Normally, you can accept the
default response to all the prompts, for example just press <Enter>.
4.
The LEDs will flash in OBDR mode (as described in step 2) while the tape drive restores your
operating system to a state where it can run a normal data restore.
5.
Once the operating system has been set up and rebooted, the Tape LED display on the tape
drive changes to constant green and you can remove the backup cartridge, if you wish. You are
now ready to run a normal data restore. Follow the normal process for your restore application.
If restore fails
If the restore fails for any reason, refer to our World Wide Web site (
www.hp.com/go/obdr
) and
do a search on OBDR for detailed troubleshooting information.
+
external drives only,
switch on tape drive before
server
Содержание StorageWorks DAT 24
Страница 26: ...Verify installation 26 ...
Страница 34: ...Use the correct media 34 ...
Страница 38: ...Using HP OBDR 38 ...
Страница 46: ...Troubleshooting 46 ...
Страница 48: ...Replacing an internal tape drive 48 ...