HP S1932 Скачать руководство пользователя страница 37


German Ergonomics Notice


HP products which bear the “GS” approval mark, when forming part of a system comprising HP brand
computers, keyboards and monitors that bear the “GS” approval mark, meet the applicable ergonomic
requirements. The installation guides included with the products provide configuration information. 
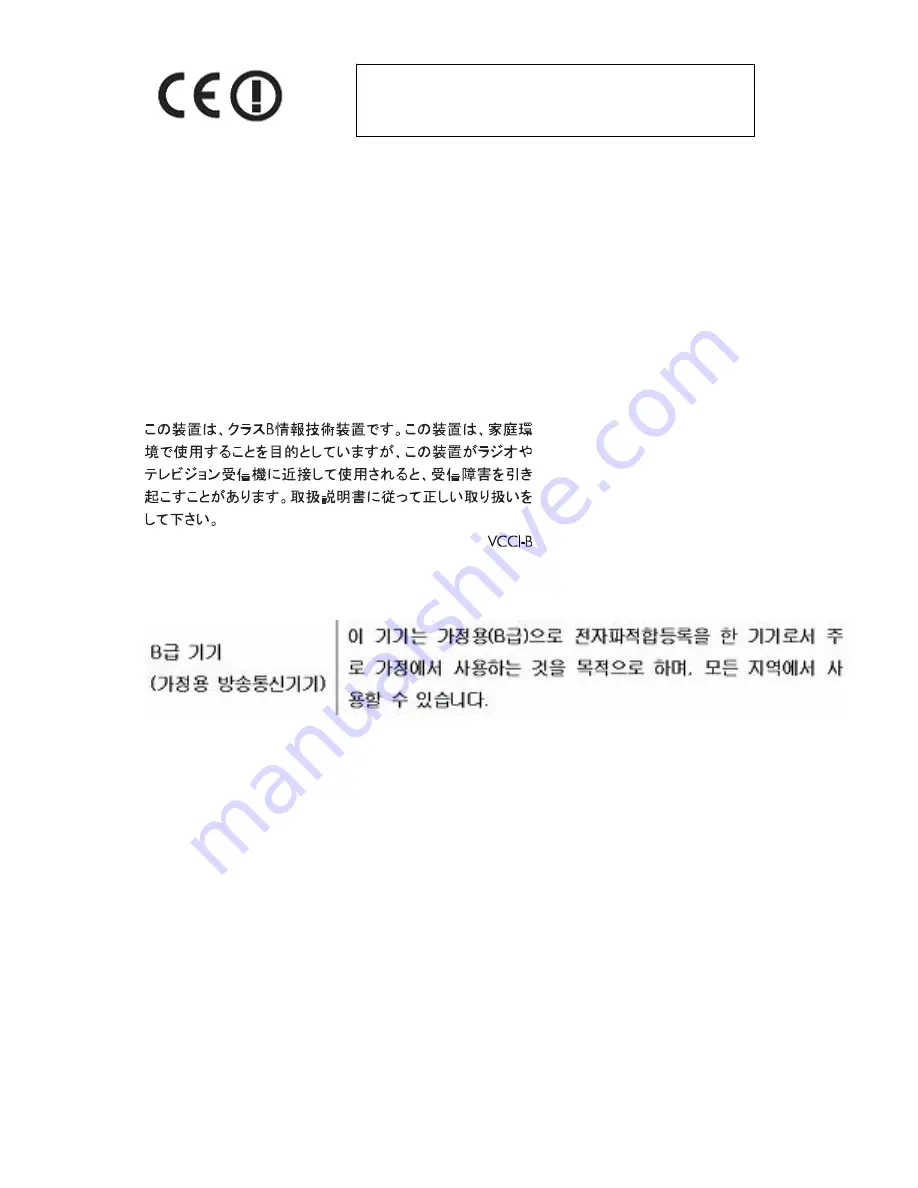
Japanese Notice


Korean Notice


Power Cord Set Requirements


The monitor power supply is provided with Automatic Line Switching (ALS). This feature allows the 
monitor to operate on input voltages between 100–120V or 200–240V. 

The power cord set (flexible cord or wall plug) received with the monitor meets the requirements for use
in the country where you purchased the equipment. 

If you need to obtain a power cord for a different country, you should purchase a power cord that is
approved for use in that country. 

The power cord must be rated for the product and for the voltage and current marked on the product's
electrical ratings label. The voltage and current rating of the cord should be greater than the voltage and
current rating marked on the product. In addition, the cross-sectional area of the wire must be a minimum
of 0.75 mm² or 18 AWG, and the length of the cord must be between 6 feet (1.8 m) and 12 feet (3.6 m).
If you have questions about the type of power cord to use, contact an authorized HP service provider.

A power cord should be routed so that it is not likely to be walked on or pinched by items placed upon
it or against it. Particular attention should be paid to the plug, electrical outlet, and the point where the 
cord exits from the product. 

31  Appendix C   Agency Regulatory Notices

ENWW


For


EU


non-harmonized


telecommunications 

products


(If


applicable,


a


4-digit


notified body 

number is inserted between CE and !).  


Please refer to the regulatory label provided on the product. 

The point of contact for regulatory matters is: 
 Hewlett-Packard GmbH, Dept./MS: HQ-TRE, Herrenberger Strasse 140, 71034 

Boeblingen, GERMANY. 
 

Содержание S1932

Страница 1: ...S1932 S2032 LCD Monitors User Guide ...

Страница 2: ...ranty statements accompanying such products and services Nothing herein should be construed as constituting an additional warranty HP shall not be liable for technical or editorial errors or omissions contained herein This document contains proprietary information that is protected by copyright No part of this document may be photocopied reproduced or translated to another language without the pri...

Страница 3: ...ecifications WARNING Text set off in this manner indicates that failure to follow directions could result in bodily harm or loss of life CAUTION Text set off in this manner indicates that failure to follow directions could result in damage to equipment or loss of information NOTE Text set off in this manner provides important supplemental information ENWW iii ...

Страница 4: ...iv About This Guide ENWW ...

Страница 5: ... Installing The Monitor 6 Adjusting The Tilt 13 4 Operating the Monitor CD Software and Utilities 14 Installing Drivers 14 Using the Auto Adjustment Function 15 Front Bezel Controls 16 Using the On Screen Display OSD 18 Identifying Monitor Conditions 20 Adjusting Screen Quality 21 Power Saver Feature 21 Appendix A Troubleshooting Solving Common Problems 22 Getting Support from hp com 23 Preparing ...

Страница 6: ...with the FCC Logo United States Only 29 Canadian Notice 30 Avis Canadien 30 European Union Regulatory Notice 30 German Ergonomics Notice 31 Japanese Notice 31 Korean Notice 31 Power Cord Set Requirements 31 Japanese Power Cord Requirements 32 Product Environmental Notices 32 Materials Disposal 32 Disposal of Waste Equipment by Users in Private Household in the European Union 32 Chemical Substances...

Страница 7: ...on or while moving from one side of the monitor to the other Tilt adjustment Removable pedestal and Video Electronics Standards Association VESA standard mounting holes for flexible mounting solutions including wall mounting Security lock slot for a locking security cable security cable sold separately Plug and Play capability if supported by your computer system On screen display OSD adjustments ...

Страница 8: ...e energy consumption HDCP High Bandwidth Digital Content Protection on DVI input select models Software and utilities CD containing the following Drivers Auto adjustment software Documents 2 Chapter 1 Product Features ENWW ...

Страница 9: ...r workstation setup posture and health and work habits for computer users and provides important electrical and mechanical safety information This guide is located on the Web at http www hp com ergo and or on the documentation CD if one is included with the monitor CAUTION For the protection of the monitor as well as the computer connect all power cords for the computer and its peripheral devices ...

Страница 10: ...ting of the products connected to the power cord does not exceed the rating of the power cord Look on the power label to determine the ampere rating Amps or A for each device Install your monitor near a power outlet that you can easily reach Disconnect the monitor by grasping the plug firmly and pulling it from the outlet Never disconnect the monitor by pulling the cord Do not allow anything to re...

Страница 11: ... You can substantially increase the life expectancy of the monitor by using a screen saver program and turning off the monitor when not in use Slots and openings in the cabinet are provided for ventilation These openings must not be blocked or covered Never push objects of any kind into cabinet slots or other openings Do not drop the monitor or place it on an unstable surface Do not allow anything...

Страница 12: ...Phillips screwdriver for preparing the monitor for wall mounting You may need a straight slot screwdriver to secure some cables Installing the Monitor You can install the monitor on a desktop or wall mount it Place the monitor in a convenient well ventilated location near your computer Connect the monitor cables after you have installed the monitor Preparing the monitor for desktop use 1 Set the m...

Страница 13: ...sition Preparing the monitor for wall mounting 1 Check the stability of the wall mounting fixture WARNING To reduce the risk of personal injury or of damage to the equipment check that the wall mounting fixture is adequately installed and secured before attaching the monitor Refer to the instructions supplied with the wall mounting fixture and check that it is capable of supporting the monitor 2 D...

Страница 14: ... stand showing release button circled Figure 3 4 Remove the stand from monitor 8 Chapter 3 Setting Up the Monitor ENWW 4 Press the release button as indicated first before removing the stand then follow the arrow direction to remove it ...

Страница 15: ...are compliant with the VESA standard for mounting flat panel monitors ENWW Installing The Monitor 9 5 Use the threaded holes to attach the wall mount bracket Use the four holes A B C and D to attach the swing arm or other mounting fixture to the back of the monitor with screws not supplied 7 Attach a swing arm or other mounting fixture Figure 3 5 The threaded holes ...

Страница 16: ...nalog Cable or DVI D Digital Cable Use a VGA video cable or a DVI D select models cable to connect your monitor to your computer 1 To connect the VGA cable provided with select models 2 To connect the DVI D cable provided with select models Connect one end of the DVI D video cable to the back of the monitor and the other end to the DVI D video connector on the computer You can use this cable only ...

Страница 17: ...t High definition content is available in many sources such as Blue ray Disc devices or HDTV air or cable broadcasts If you do not have an HDCP enabled monitor you will see a blank screen or a lower resolution picture when playing high definition protected content Your computer graphics card and monitor must both support HDCP to display protected content ...

Страница 18: ...inched by items that are placed upon it or against it Do not place anything on power cords or cables Arrange them so that no one may accidentally step on or trip over them Do not pull on a cord or cable See Technical Specifications Appendix B for additional information Figure 3 Connecting the power cable 2 Connect one end of the power cable to the monitor and the other end to a grounded electrical...

Страница 19: ...s follows 1 Face the front of the monitor and hold the base so that you do not topple the monitor while changing the tilt 2 Adjust the tilt by moving the top edge of the monitor either toward or away from you without touching the screen Figure 3 Tilt adjustment ENWW Adjusting the Tilt 13 ...

Страница 20: ... the Display Control Panel settings Refer to the Windows operating system documentation for more information NOTE You might need to install the digitally signed monitor drivers INF or ICM files manually from the CD in case of an installation error Refer to the Driver Software Readme file on the CD for instructions in English only Downloading updated drivers from the Internet To download the latest...

Страница 21: ... for a prolonged period of time 12 consecutive hours of non use To avoid burn in image damage on your monitor screen you should always activate a screen saver application or turn off the monitor when it is not in use for a prolonged period of time Image retention is a condition that may occur on all LCD screens To use the auto adjustment feature 1 Allow the monitor to warm up for 20 minutes before...

Страница 22: ...te forward through the OSD menu and decreases adjustment levels Select modes 3 Navigate backward through the OSD menu and increases adjustment levels Select modes 4 Open or select the OSD menu 5 Turn the monitor on or off The Power button is located on the bottom right side of the monitor 6 Power LED Front Bezel Controls Control buttons are located on the front bezel of the monitor 16 Chapter 4 Op...

Страница 23: ...ssing the Menu button for more than 10 seconds shall be a hot key to lock the OSD function Figure 4 The OSD function has been locked ENWW Front bezel control buttons 17 Pressing the OK Auto button for 5 seconds shall be a hot key for the Input Select select models Figure 4 4 Selecting input source Figure 4 3 Auto Adjust ...

Страница 24: ... you scroll down at the bottom of the selections The menu moves to the bottom if you scroll up at the top of the selections 4 To adjust the value of a selected item press the or button 5 Press OK Auto if you want to save the setting or exit the present menu to the previous menu 6 Press the OK Auto button to exit the OSD NOTE When a menu is displayed if the buttons are untouched for 10 seconds fact...

Страница 25: ...s the screen image to look sharper or soft Backlight Luminance of the LCD panel is adjusted R G and B video gain adjustment Image horizontal position adjustment 1 Pixel pitch Image vertical position adjustment 1 Pixel pitch Manual optimizes image by phase Manual optimizes image by clock Adjust the Color for 6500 9300 and User color Automatically optimizes the image to display the ideal setting Adj...

Страница 26: ...is not properly connected to the computer or monitor OSD Lock The OSD can be enabled or disabled by pressing and holding the Menu button on the front bezel for 10 seconds If the OSD is locked the warning message OSD Lock out appears for 3 seconds If the OSD is locked press and hold the Menu button for 10 seconds to unlock the OSD If the OSD is unlocked press and hold the Menu button for 10 seconds...

Страница 27: ...ure 4 Set the main Clock settings correctly first because the Focus settings depend on the main Clock settings When adjusting the Clock and Focus values if the monitor images become distorted continue adjusting the values until the distortion disappears To restore the factory settings access the OSD menu select Reset and then press OK Auto button Power Saver Feature When the monitor is in normal o...

Страница 28: ...is not centered Press the Menu button to access the OSD menu Select Picture and then select Horizontal Position or Vertical Position to adjust the position of the image Check Signal Cable appears on screen Connect the monitor VGA or DVI signal cable to the signal connector on the computer Be sure that the computer power is off while connecting the signal cable Input Signal Out of Range appears on ...

Страница 29: ...lling Drivers in the Operating the Monitor chapter for more information Monitor drivers are also available at http www hp com support Picture bounces flickers or wave pattern is present in the picture Move electrical devices that may cause electrical interference as far away from the monitor as possible Use the maximum refresh rate that your monitor is capable of at the resolution that you are usi...

Страница 30: ...mber Monitor serial number located on the back of monitor or in the OSD display in the Information menu Purchase date on invoice Conditions under which the problem occurred Error messages received Hardware configuration Name and version of hardware and software you are using Locating the Rating Label The rating label on the monitor provides the product number and serial number You may need these n...

Страница 31: ...fications Display Type TFT LCD active matrix Viewable Image Size 47 0 cm 18 5 in diagonal Tilt 5 to 20 Swivel Maximum Weight unpacked 2 7 Kg 5 95 lb Dimensions h x w x d 324 x 446 x 162 mm 12 8 x 17 6 x 6 4 in Maximum Graphics Resolution 1366 x 768 60 Hz Text Mode 720 x 400 Dot Pitch 0 30 x 0 30 mm Horizontal Frequency 30 to 64 kHz Vertical Frequency 50 to 76 Hz Environmental Requirements Temperat...

Страница 32: ...2 mm 13 5 x 18 8 x 6 4 in Maximum Graphics Resolution 1600 x 900 60 Hz Text Mode 720 x 400 Dot Pitch 0 3 x 0 3 mm Horizontal Frequency 30 to 72 kHz Vertical Frequency 50 to 75 Hz Environmental Requirements Temperature independent of altitude Operating Temperature 5 to 35 C 41 to 95 F Non Operating Humidity 20 to 60 C 29 to 140 F Relative Humidity non condensing Operating Humidity 20 to 90 Non Oper...

Страница 33: ...t Video Input Modes S2032 Model Preset Resolution Horizontal Frequency kHz Vertical Frequency Hz 27 Appendix B Technical Specifications ENWW 2 720 x 400 31 47 70 09 3 800 x 600 37 88 60 32 4 1024 x 768 48 36 60 00 5 1280 x 720 45 00 60 00 6 1280 x 960 60 00 60 00 8 1366 x 768 47 71 59 79 1 640 x 480 31 47 59 94 7 1280 x 1024 63 98 60 02 2 720 x 400 31 47 70 09 3 800 x 600 37 88 60 32 4 1024 x 768 ...

Страница 34: ... produce displays with fewer cosmetic imperfections and we will adjust guidelines as improvements are made For more information about your HP LCD Monitor refer to the HP Web site at http www hp com support Power Cord Set Requirements The monitor power supply is provided with Automatic Line Switching ALS This feature allows the monitor to operate on input voltages between 100 240V 50 60 Hz 1 5A The...

Страница 35: ...ving antenna Increase the separation between the equipment and the receiver Connect the equipment into an outlet on a circuit different from that to which the receiver is connected Consult the dealer or an experienced radio or television technician for help Modifications The FCC requires the user to be notified that any changes or modifications made to this device that are not expressly approved b...

Страница 36: ...ducts bearing the CE marking comply with the following EU Directives Low Voltage Directive 2006 95 EC EMC Directive 2004 108 EC Ecodesign Directive 2009 125 EC where applicable CE compliance of this product is valid if powered with the correct CE marked AC adapter provided by HP Compliance with these directives implies conformity to applicable harmonized European standards European Norms that are ...

Страница 37: ... and for the voltage and current marked on the product s electrical ratings label The voltage and current rating of the cord should be greater than the voltage and current rating marked on the product In addition the cross sectional area of the wire must be a minimum of 0 75 mm or 18 AWG and the length of the cord must be between 6 feet 1 8 m and 12 feet 3 6 m If you have questions about the type ...

Страница 38: ...Instead it is your responsibility to dispose of your waste equipment by handing it over to a designated collection point for the recycling or waste electrical and electronic equipment The separate collection and recycling of your waste equipment at the time of disposal will help to conserve natural resources and ensure that it is recycled in a manner that protects human health and the environment ...

Страница 39: ...iction of Hazardous Substances RoHS A Japanese regulatory requirement defined by specification JIS C 0950 2005 mandates that manufacturers provide Material Content Declarations for certain categories of electronic products offered for sale after July 1 2006 To view the JIS C 0950 material declaration for this product visit http www hp com go jisc0950 11363 2006 11363 2006 33 Appendix C Agency Regu...

Страница 40: ...Turkey EEE Regulation In Conformity with the EEE Regulation EEE Yönetmeliğine Uygundur ENWW Product Environmental Notices 34 ...

Отзывы: