Hardware Options Installation
Installing a Hard Drive into a Removable Media Bay
The server ships standard with four removable media bays. The top 5.25-inch bay is
occupied by an IDE CD-ROM drive. The remaining three 5.25-inch bays are
available for removable media devices. You can install three half-height devices, or
one full-height device and one half-height device, into these bays.
To install a hard drive using a drive tray:
Follow the steps in “Preparing the Server” in this chapter.
2.
Configure the device.
— For SCSI devices, set the SCSI ID on the drive. You must manually set the
SCSI ID on each device to a unique value in the range of 0 to 6 for each
SCSI bus. Refer to the documentation provided with the device for
instructions on how to set the SCSI ID.
— For IDE (ATAPI or ATA) devices, be sure that the jumper on the drive is set
to Cable Select (CS) so that the drive device ID is determined by the cable.
Refer to Chapter 4, “Cabling Guidelines,” for further information.
Locate the hard drive screws. Refer to Figure 3-9 for the location.
4.
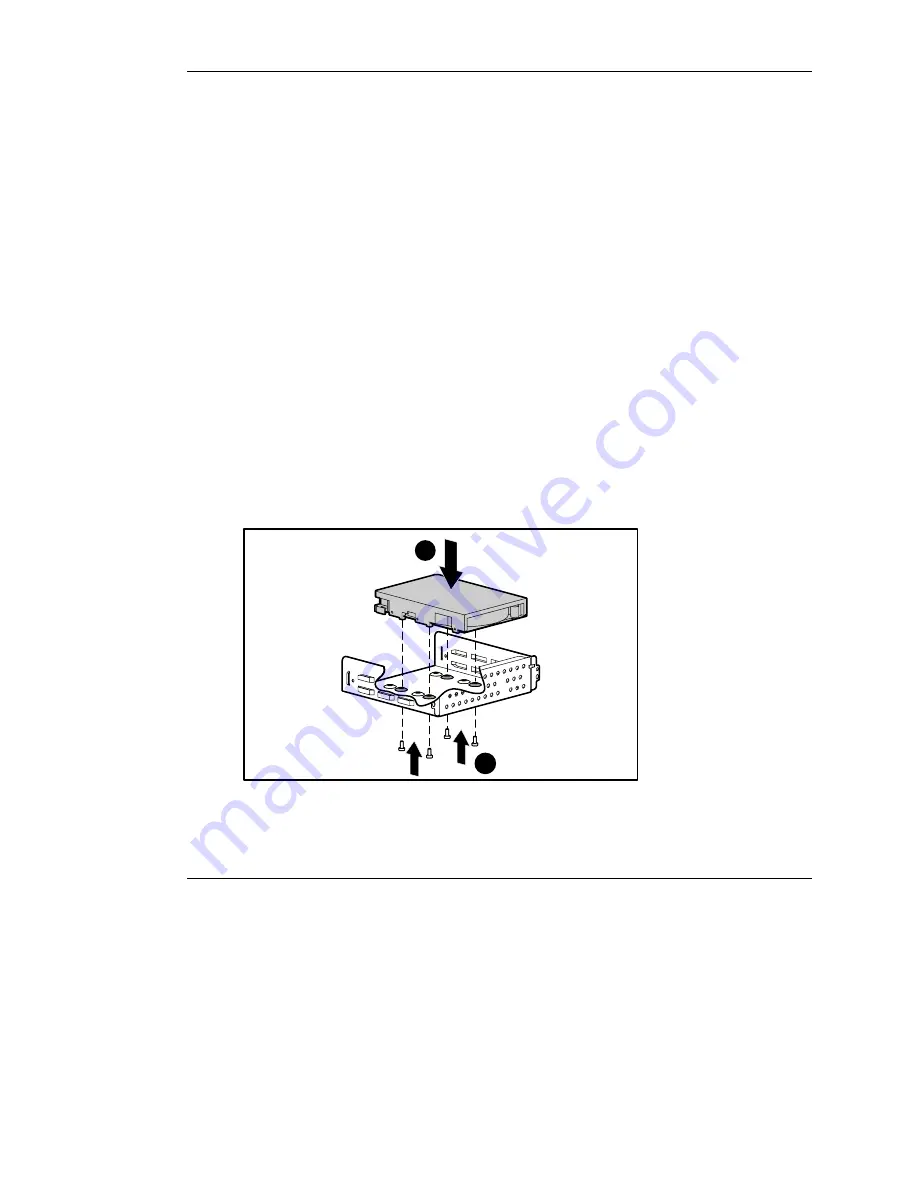
Set the drive into the drive tray (1).
5.
Tighten the four screws on the bottom of the drive tray to secure the drive to the
drive tray (2).
2
1
Figure 3-11: Installing a hard drive into a removable
media bay drive tray
3-14
HP ProLiant ML310 Server Setup and Installation Guide
HP CONFIDENTIAL
Writer: Ted Weiman File Name: d-ch3.doc
Codename: Son of Beast Part Number: 274431-002 Last Saved On: 11/22/02 1:58 PM


