


Hardware options installation 49
b.
Disconnect the power cord from the server.
3.
Do one of the following:
o
Extend the server from the rack (on page
14
).
o
Remove the server from the rack (on page
16
).
4.
Remove the access panel (on page
17
).
5.
Remove the PCI riser cage (on page
19
).
6.
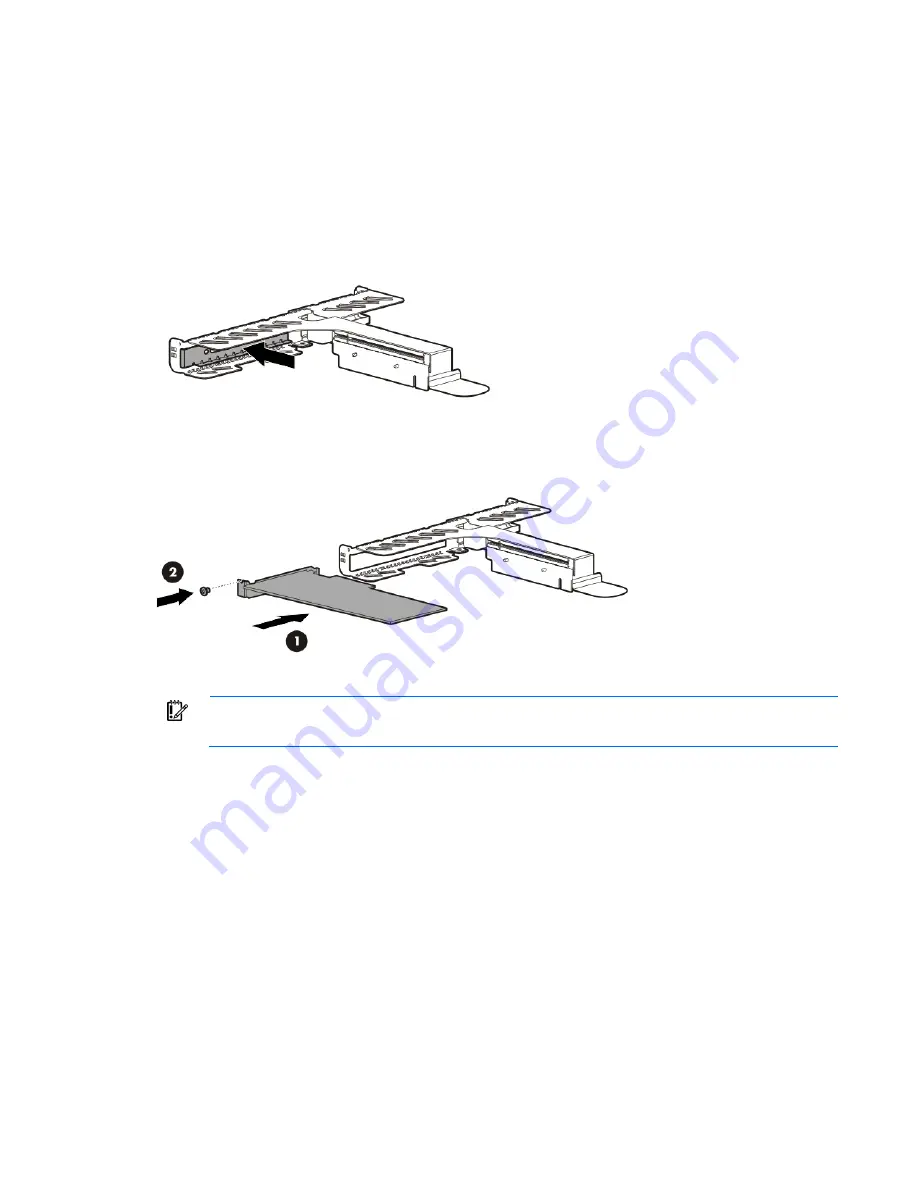
Identify the expansion slot compatible with the new option, and then remove the cover opposite that
slot.
7.
Verify that any switches or jumpers on the expansion board are set properly. For more information, see
the documentation that ships with the option.
8.
Install the expansion board. Verify that the board is firmly seated in the slot.
9.
Install the PCI riser cage (on page
20
).
IMPORTANT:
The server does not power up if the PCI riser cage is not seated properly.
10.
Connect all necessary internal cabling to the expansion board. For more information on these cabling
requirements, see the documentation that ships with the option.
11.
Install the access panel (on page
17
).
12.
Do one of the following:
o
Slide the server into the rack.
o
Install the server into the rack ("
Installing the server into the rack
" on page
26
).
13.
Connect all necessary external cabling to the expansion board. For more information on these cabling
requirements, see the documentation that ships with the option.
14.
Connect the peripheral devices to the server.
15.
Connect the power cord to the server.
16.
Connect the power cord to the power source.
17.
Power up the server (on page
14
).
Содержание ProLiant DL320e Gen8 v2
Страница 65: ...Cabling 65 Front I O board cabling ...
Страница 94: ...Support and other resources 94 ...
Страница 95: ...Support and other resources 95 ...


