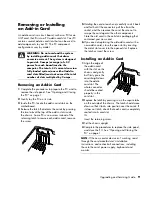
Replacing the Front Panel
1
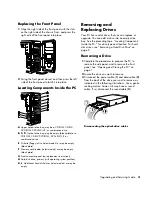
Align the right side of the front panel with the slots
on the right side of the chassis front, and press the
right side of the front panel into place.
2
Swing the front panel closed, and then press the left
side of the front panel to latch it into place.
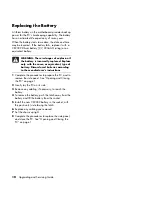
Locating Components Inside the PC
A
Upper optical drive bay; may be a CD-ROM, CD-RW,
DVD-ROM, DVD+RW/+R, or combination drive.
B, C, D
Optical drive bay; may be empty (blank plate) or a
CD-ROM, CD-RW, DVD-ROM, DVD+RW/+R, or
combination drive.
E
Diskette (floppy) drive (select models) or may be empty
(blank plate).
F
Memory card reader (select models) or may be empty
(blank plate).
G
Front connector panel (no replacement instructions).
H
Hard disk drive, primary (with operating system partition).
K, L
Additional hard disk drives (select models) or may be
empty.
Removing and
Replacing Drives
Your PC has several drives that you can replace or
upgrade. You can add a drive into an empty drive
bay. See the preceding topic, “Locating Components
Inside the PC,” for drive type and location. For hard
disk drives, see “Removing a Hard Disk Drive“ on
page 5.
Removing a Drive
1
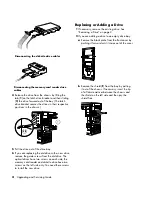
Complete the procedures to prepare the PC, to
remove the side panel, and to remove the front
panel. See “Opening and Closing the PC“ on
page 1.
2
Locate the drive you want to remove.
3
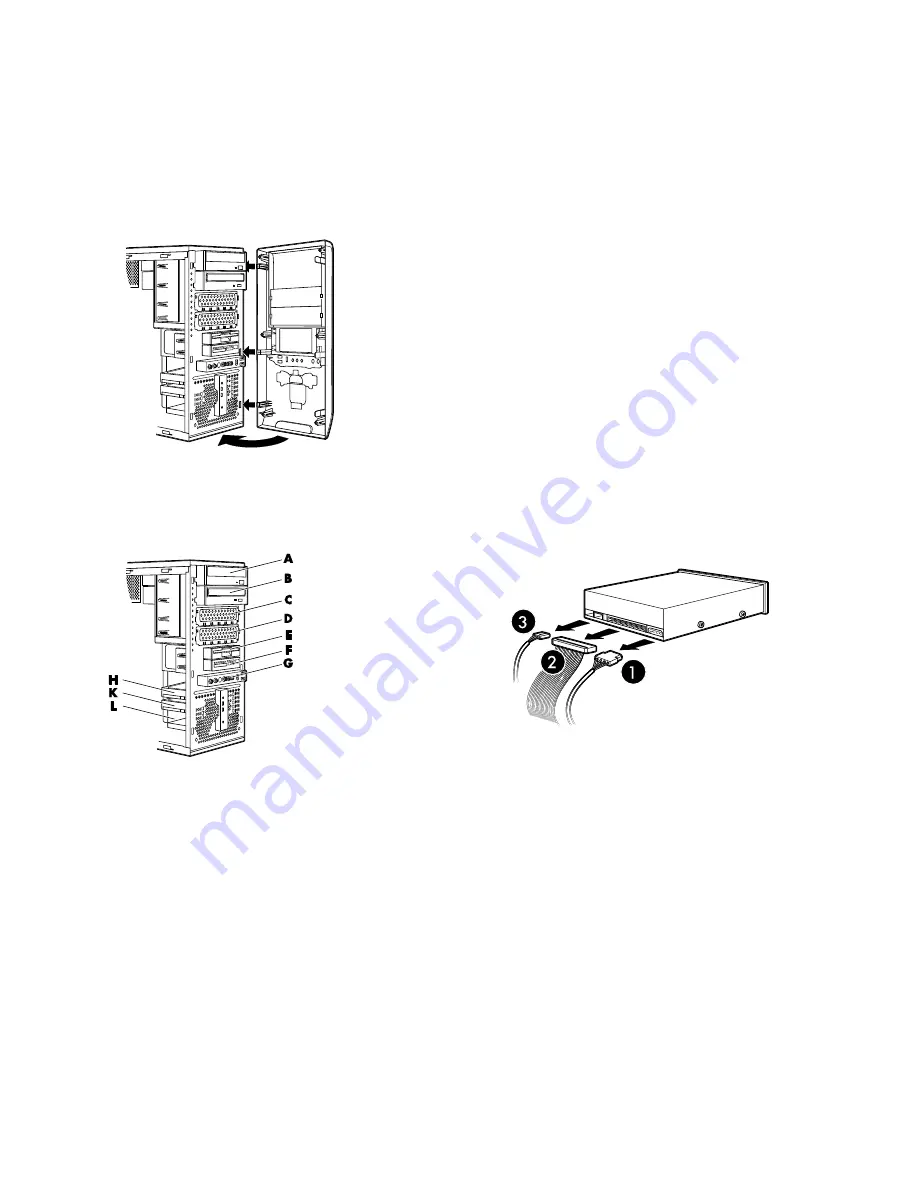
Disconnect the power cable (
1
) and data cable (
2
)
from the back of the drive you want to remove, as
indicated in the following illustrations. Use a gentle
rocking motion. Some units may have a sound
cable. If so, disconnect the sound cable (
3
).
Disconnecting the optical drive cables
Upgrading and Servicing Guide
3
Содержание Pavilion Ultimate d4900 - Desktop PC
Страница 1: ...Upgrading and Servicing Guide ...
Страница 4: ...iv Upgrading and Servicing Guide ...
Страница 15: ......
Страница 16: ...Part Number 5991 7205 ...


