Using optical drives (select models only)
Identifying the installed optical drive
▲
Select
Computer
>
More Applications
, and then select
Audio & Video
in the left pane.
A list of all the devices installed in your computer, including your optical drive, is displayed.
Inserting an optical disc
1.
Turn on the computer.
2.
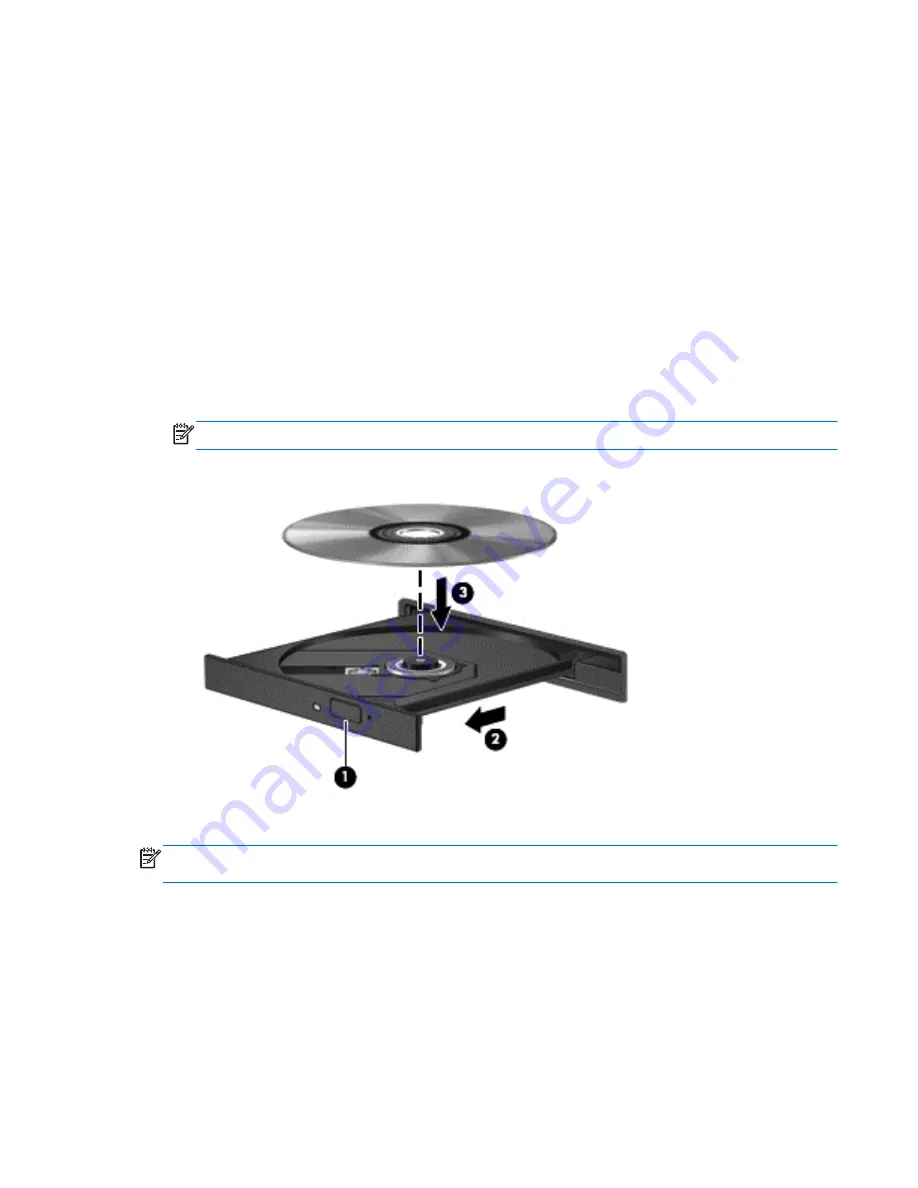
Press the eject button
(1)
on the drive bezel to release the disc tray.
3.
Pull out the tray
(2)
.
4.
Hold the disc by the edges to avoid touching the flat surfaces and position the disc label-side up
over the tray spindle.
NOTE:
If the tray is not fully accessible, tilt the disc carefully to position it over the spindle.
5.
Gently press the disc
(3)
down onto the tray spindle until the disc snaps into place.
6.
Close the disc tray.
NOTE:
After you insert a disc, a short pause is normal. If you have not selected a media player, an
AutoPlay dialog box opens. It prompts you to select how you want to use the media content.
Removing an optical disc
There are 2 ways to remove a disc, depending on whether the disc tray opens normally or not.
When the disc tray opens normally
1.
Press the release button
(1)
on the drive bezel to release the disc tray, and then gently pull out
the tray
(2)
until it stops.
Using optical drives (select models only)
47
Содержание Pavilion g4-1300
Страница 1: ...HP Notebook User Guide ...
Страница 4: ...iv Safety warning notice ...
Страница 10: ...x ...
Страница 19: ...Front Component Description Speakers 2 Produce sound Front 9 ...
Страница 99: ......


