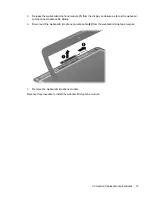
5.
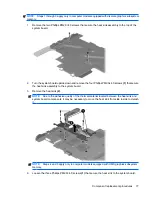
Remove the heat sink
(2)
.
NOTE:
Due to the adhesive quality of the thermal material located between the heat sink and
system board components, it may be necessary to move the heat sink from side to side to detach
it.
NOTE:
The thermal material must be thoroughly cleaned from the surfaces of the system board
(1)
,
(2)
, and
(3)
, and the heat sink components
(4)
each time the heat sink is removed. Thermal paste is
used on the processor and the heat sink section that services it. Thermal pads are used on the
Northbridge chip and the section of the heat sink that services it. Replacement thermal material is
included with the discrete thermal module kit (spare part number 517747-001) and the discrete memory
system board kit (spare part number 506763-001).
The following illustration shows the replacement thermal material locations for computer models
equipped with discrete graphics subsystem memory.
NOTE:
The thermal material must be thoroughly cleaned from the surfaces of the system board
(1)
and
(2)
, and the heat sink components
(3)
each time the heat sink is removed. Thermal paste is used
on the processor and the heat sink section that services it. Thermal pads are used on the Northbridge
chip and the section of the heat sink that services it. Replacement thermal material is included with the
UMA thermal module kit, spare part number 517746-001) and the UMA memory system board (spare
part number 506762-001), spare part kits.
78
Chapter 4 Removal and replacement procedures
Содержание Pavilion dv2
Страница 1: ...HP Pavilion dv2 Entertainment PC Maintenance and Service Guide ...
Страница 4: ...iv Safety warning notice ...
Страница 23: ...Service tag 15 ...
Страница 91: ...After either choice the computer restarts in Windows Using the Setup Utility 83 ...
Страница 111: ...Where used 2 screws that secure the power switch board to the base enclosure Phillips PM2 0x3 0 screw 103 ...
Страница 113: ...Where used 3 screws that secure the UMA heat sink to the bottom of the system board Phillips PM2 0 4 0 screw 105 ...
Страница 119: ...Where used 2 screws that secure the speaker module to the base component Phillips PM2 5 4 0 screw 111 ...
Страница 121: ...Where used 2 screws that secure the WLAN module to the bottom of the computer Phillips PM2 5x4 0 screw 113 ...
Страница 147: ......

