background image

HP Restricted

Template date: 09/2003

NAS 4000s and 9000s Installation Guide

DRAFT

29

Note:  

Once the Rapid Startup Wizard has been completed the 

Welcome page will become the default page. The hostname in the 

address bar may not on the refresh. The user should manually type 

the new hostname in the address bar of the browser.

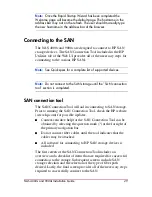
Connecting to the SAN

The NAS 4000s and 9000s are designed to connect to HP SAN 
storage devices. The SAN Connection Tool included in the HP 
Utilities tab of the Web UI provides all of the necessary steps for 
connecting to the various HP SANs.

Note:  

See Quickspecs for a complete list of supported devices.

Note:  

Do not connect to the SAN storage until the "SAN connection 

tool" section is completed.

SAN connection tool

The SAN Connection Tool will aid in connecting to SAN storage. 
Prior to running the SAN Connection Tool, check the HP website 
(www.hp.com) for possible updates.

Context-sensitive help for the SAN Connection Tool can be 
obtained by selecting the question mark (?) at the far right of 
the primary navigation bar.

Do not connect fiber cables until the tool indicates that the 
cables may be attached.

All software for connecting to HP SAN storage devices is 
included

The first screen of the SAN Connection Tool includes an 
overview and a checklist of items that are required for successful 
connection to the storage. Subsequent screens include SAN 
storage selection and the selection of the type of fiber path 
desired. Lastly, the final screen provides all of the necessary steps 
required to successfully connect to the SAN.

Содержание NAS 4000s

Страница 1: ...ed Template date 09 2003 hp StorageWorks NAS 4000s and 9000s Product Version 1 0 First Edition September 2003 Part Number 352402 001 This installation guide provides information about how to deploy the HP StorageWorks NAS 4000s and 9000s ...

Страница 2: ...tements accompanying such products and services Nothing herein should be construed as constituting an additional warranty HP shall not be liable for technical or editorial errors or omissions contained herein Compaq Computer Corporation is a wholly owned subsidiary of Hewlett Packard Company Microsoft MS DOS MS Windows Windows and Windows NT are U S registered trademarks of Microsoft Corporation I...

Страница 3: ...uipment symbols 9 Rack stability 11 Getting help 11 HP technical support 11 HP storage web site 12 HP authorized reseller 12 1 Product Overview 13 Intended audience 13 Product definition and information 14 Server hardware features for the 4000s and 9000s models 14 Server software features for the 4000s and 9000s models 15 Optional features for the 4000s and 9000s models 16 ...

Страница 4: ...ethod 21 Requirements 21 Procedure 21 Remote browser method using hostname 24 Requirements 24 Procedure 25 Direct attach method 26 Requirements 26 Procedure 26 Rapid startup wizard configuration 27 Requirements 27 Procedure 27 Connecting to the SAN 29 SAN connection tool 29 Configuring storage for non clustered configurations 30 Creating disk arrays 30 Verifying LUNs 30 Creating a volume 30 Creati...

Страница 5: ...fying connectivity and name resolution 38 Verifying domain membership 38 Setting up a cluster user account 38 About the quorum disk 39 Configuring shared disks 39 Verifying disk access and functionality 39 Install cluster service software 40 Configuring the first node 40 Adding nodes to a cluster 42 Geographically dispersed clusters 43 HP StorageWorks NAS software updates 44 Configuring physical d...

Страница 6: ...6 NAS 4000s and 9000s Installation Guide HP Restricted DRAFT Template date 09 2003 NAS 4000s and 9000s Installation Guide ...

Страница 7: ...s and 9000s Installation Guide DRAFT About this Guide About this Guide This installation guide provides information to help you Deploy the NAS 4000s Deploy the NAS 9000s About this guide topics include Conventions page 8 Rack stability page 11 Getting help page 11 ...

Страница 8: ...gs WARNING Text set off in this manner indicates that failure to follow directions in the warning could result in bodily harm or death Table 1 Document conventions Convention Element Blue text Figure 1 Cross reference links Bold Menu items buttons and key tab and box names Italics Text emphasis and document titles in body text Monospace font User input commands code file and directory names and sy...

Страница 9: ...ymbols The following equipment symbols may be found on hardware for which this guide pertains They have the following meanings Any enclosed surface or area of the equipment marked with these symbols indicates the presence of electrical shock hazards Enclosed area contains no operator serviceable parts WARNING To reduce the risk of personal injury from electrical shock hazards do not open this encl...

Страница 10: ...lies or systems marked with these symbols indicate the presence of multiple sources of power WARNING To reduce the risk of personal injury from electrical shock remove all power cords to completely disconnect power from the power supplies and systems Any product or assembly marked with these symbols indicates that the component exceeds the recommended weight for one individual to handle safely WAR...

Страница 11: ...the rack In multiple rack installations the racks are coupled Only one rack component is extended at any time A rack may become unstable if more than one rack component is extended for any reason Getting help If you still have a question after reading this guide contact an HP authorized service provider or access our web site http www hp com HP technical support Telephone numbers for worldwide tec...

Страница 12: ...revision level Detailed specific questions HP storage web site The HP web site has the latest information on this product as well as the latest drivers Access storage at http www hp com country us eng prodserv storage html From this web site select the appropriate product or solution HP authorized reseller For the name of your nearest HP authorized reseller In the United States call 1 800 345 1518...

Страница 13: ... HP StorageWorks NAS 4000s or 9000s The chapter also contains details concerning hardware configuration specifications Intended audience This guide assumes that you have knowledge of basic Microsoft cluster concepts Microsoft administrative procedures and file sharing protocols HP recommends that you obtain supplemental documentation relative to these topics prior to setting up the NAS 4000s or 90...

Страница 14: ...36 4 GB 10K U320 Universal hot pluggable hard drives for the mirrored operating system Two embedded NC7781 PCI X Gigabit NIC 10 100 1000 WOL Wake on LAN network interface controllers NIC Embedded Smart Array 5i controller with Battery Backed Write Cache IDE DVD ROM drive Redundant hot plug power supplies and fans Embedded Integrated Lights Out iLO port with license key in the country kit The follo...

Страница 15: ...luded with and supported are Microsoft Windows Storage Server 2003 Microsoft Clustering Support requires two NAS devices attached to the same SAN Fiber fabric and Microsoft Cluster Kit HP Array Configuration Utility ACU for MSA1000 only HP Secure Path 4 0 HP StorageWorks Platform Kits HP Insight Manager 7 Microsoft Services for Macintosh Microsoft Services for NetWare Microsoft Services for UNIX S...

Страница 16: ...ollowing optional features are available Additional memory up to 6 GB for the 4000s and 32 GB for the 9000s HP NICs Alacritech NICs HP tape drives 18 2 GB 36 4 GB 72 8 GB and 146 8 GB U320 Hot Plug hard drives HP SAN Fibre Channel Adapter for tape backup HP StorageWorks HBAs Note See Quickspecs for documented HBA and storage array support ...

Страница 17: ...n Guide DRAFT 2 Configuration Setup 2 This chapter provides information about preinitialization collecting information and configuring the HP StorageWorks NAS 4000s or NAS 9000s Details include three methods of system configuration and an overview of storage configuration ...

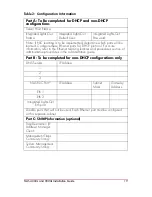
Страница 18: ...n or hardware connections refer to the quick reference and rack installation guide included in the shipping carton Collect information for configuration Choose a host name and collect general information before initializing the NAS device Collect the general information required to initialize the NAS device for both dynamic host configuration protocols DHCP and non DHCP configurations You will be ...

Страница 19: ...net ports for DHCP protocol For more information refer to the Ethernet teaming features and procedures section of administrative procedures in the administration guide Part B To be completed for non DHCP configurations only DNS Servers IP Address 1 2 3 NAS NIC Port IP Address Subnet Mask Gateway Address Eth 1 Eth 2 Integrated Lights Out Eth port Disable ports that will not be used Each Ethernet po...

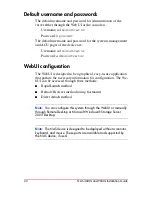
Страница 20: ...tor Password administrator WebUI configuration The WebUI is designed to be a graphical easy to use application that gathers the necessary information for configuration The We bUI can be accessed through three methods RapidLaunch method Remote Browser method using hostname Direct Attach method Note You can configure this system through the WebUI or manually through Remote Desktop or Microsoft Windo...

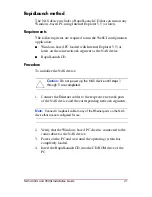
Страница 21: ...he NAS device RapidLaunch CD Procedure To initialize the NAS device Caution Do not power up the NAS device until steps 1 through 5 are completed 1 Connect the Ethernet cables to the respective network ports of the NAS device and the corresponding network segments Note Connect a loopback cable to any of the Ethernet ports on the NAS device that are not configured for use 2 Verify that the Windows b...

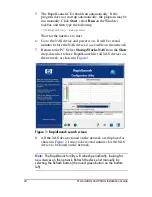
Страница 22: ... minutes before the NAS device is accessible on the network 7 Return to the PC Select StorageWorks NAS from the Show drop down list to have RapidLaunch list all NAS devices on the network as shown in Figure 1 Figure 1 RapidLaunch search screen 8 All the NAS devices found on the network are displayed as shown in Figure 2 It may take several minutes for the NAS device to be found on the network Note...

Страница 23: ...k Yes in the Security Alert dialog to accept the security certificate 11 Login to the WebUI This launches the WebUI configuration application Rapid Startup on the target HP StorageWorks NAS device as shown in Figure 4 Note The default login for the WebUI is Administrator and the password is hpinvent The WebUI uses the same login as the local administrator s account or an account with administrativ...

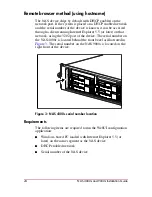
Страница 24: ...r 5 5 or later on that network using the 3202 port of the device The serial number on the NAS 4000s is located behind the front bezel as illustrated in Figure 3 The serial number on the NAS 9000s is located on the right front of the device Figure 3 NAS 4000s serial number location Requirements The following items are required to run the WebUI configuration application Windows based PC loaded with ...

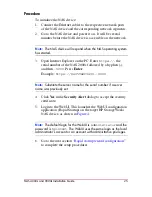
Страница 25: ...r of the NAS 2000s followed by a hyphen and then 3202 Press Enter Example https D4059ABC3433 3202 Note Substitute the server name for the serial number if a server name was previously set 4 Click Yes in the Security Alert dialog to accept the security certificate 5 Login to the WebUI This launches the WebUI configuration application Rapid Startup on the target HP StorageWorks NAS device as shown i...

Страница 26: ...ect the monitor mouse and keyboard directly to the rear panel connectors of the NAS device 3 Open Internet Explorer and click Yes in the Security Alert dialog to accept the security certificate This launches the WebUI configuration application Rapid Startup on the target StorageWorks NAS device as shown in Figure 4 If the WebUI does not launch connect to the LocalHost and login to the WebUI Note T...

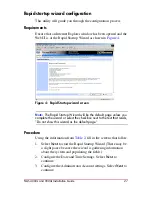
Страница 27: ...Note The Rapid Startup Wizard will be the default page unless you complete the wizard or select the checkbox next to the text that reads Do not show this wizard as the default page Procedure Using the information from Table 2 fill in the screens that follow 1 Select Next to start the Rapid Startup Wizard There may be a slight pause because the wizard is gathering information about the system and p...

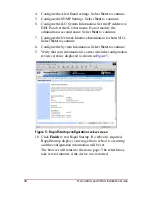
Страница 28: ... the Network Interface Information for both NICs Select Next to continue 8 Configure the System Information Select Next to continue 9 Verify that your information is correct when the configuration review screen is displayed as shown in Figure 5 Figure 5 Rapid Startup configuration review screen 10 Click Finish to exit Rapid Startup If a reboot is required Rapid Startup displays a message that a re...

Страница 29: ...he SAN connection tool section is completed SAN connection tool The SAN Connection Tool will aid in connecting to SAN storage Prior to running the SAN Connection Tool check the HP website www hp com for possible updates Context sensitive help for the SAN Connection Tool can be obtained by selecting the question mark at the far right of the primary navigation bar Do not connect fiber cables until t...

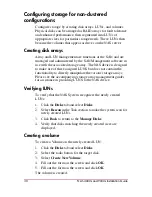
Страница 30: ...ed to make use of these assigned LUNS but does not contain the functionality to directly manipulate the various storage arrays Please see the accompanying storage array management guides for assistance in providing LUNS to the NAS device Verifying LUNs To verify that the NAS System recognizes the newly created LUNs 1 Click the Disks tab and select Disks 2 Select Rescan in the Task section to make ...

Страница 31: ...their files and folders 1 Click the Shares tab and select Shares 2 Click Shares to create a file share by designating a network share name and folder location a Click New and type a name and a path Note Check Create Folder if the directory does not exist b Set client types to designate the types of client computers that should be allowed access to the share c Click the appropriate Client Sharing f...

Страница 32: ...a Microsoft File Replication Services Place the NAS system in a domain highly recommended and required for cluster configurations Enable and establish space usage quotas Configure DFS Distributed File System or publish the NAS system s shares into an already existing DFS structure Enable additional protocols and create the associated file shares Adjust logging for system application and security e...

Страница 33: ...er describes the procedures required to configure the HP StorageWorks NAS 4000s or NAS 9000s on a SAN and those steps necessary to establish a cluster All documentation and tools are available online via the Web UI Documentation is repeated here and in the HP StorageWorks NAS 4000s and 9000s Administration Guide ...

Страница 34: ...k resources Note The version of Storage Manager Quota Management software located under the Shares tab that comes installed on the StorageWorks NAS is not supported in a cluster It must be uninstalled prior to creating the cluster The SRM uninstall tool is located in the Cluster Installation Guide under the Cluster tab in the WEBUI Once cluster installation has been completed follow the procedure ...

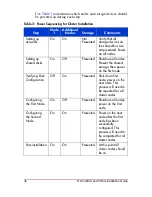
Страница 35: ...ess the shared storage devices at the same time until Cluster service is installed on at least one node and that node is online This can be accomplished through selective storage presentation SAN switch zoning or having only one node online at all times All software components listed in the SAN connection tool must be installed and the fibre cables attached to the HBA s before the cluster installa...

Страница 36: ...ng up shared disks On Off Presented Shutdown all nodes Present the shared storage then power on the first node Verifying Disk Configuration Off On Presented Shut down first node power on the next node This process will need to be repeated for all cluster nodes Configuring the First Node On Off Presented Shutdown all nodes power on the first node Configuring the Second Node On On Presented Power on...

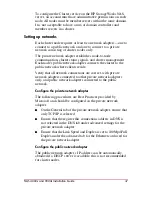
Страница 37: ...work where clients reside Verify that all network connections are correct with private network adapters connected to other private network adapters only and public network adapters connected to the public network Configure the private network adapter The following procedures are Best Practices provided by Microsoft and should be configured on the private network adapter On the General tab of the p...

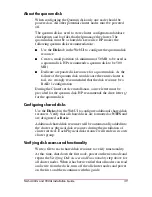
Страница 38: ...per subnet Rename the Local Area Network icons HP recommends changing the names of the network connections for clarity The naming will help you identify a network and correctly assign its role Verifying connectivity and name resolution To verify name resolution ping each node from a client using the node s machine name instead of its IP number Verifying domain membership All nodes in the cluster m...

Страница 39: ... resource be a RAID 1 configuration During the Cluster service installation a drive letter must be provided for the quorum disk HP recommends the drive letter Q for the quorum disk Configuring shared disks Use the Disk tab in the WebUI to configure additional shared disk resources Verify that all shared disks are formatted as NTFS and are designated as Basic Additional shared disk resources will b...

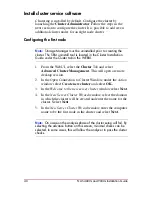
Страница 40: ...rom the WebUI select the Cluster Tab and select Advanced Cluster Management This will open a remote desktop session 2 In the Open Connection to Cluster Window under the Action window select Create new cluster and select OK 3 In the Welcome to the new server cluster window select Next 4 In the New Server Cluster Wizard window select the domain in which the cluster will be created and enter the name...

Страница 41: ...t be created with a NTFS partition at least 50 MB in size Use of DHCP addresses for network connections All Network adapters must be configured with static IP address in a cluster configuration Service for Macintosh and Service for Netware are not supported in a cluster configuration Dynamic Disks are not supported in a cluster configuration Errors will appear on a network adapter that is not conf...

Страница 42: ... selecting the Software Cluster Updates located at the bottom of the guide Adding nodes to a cluster Note Storage Manager must be uninstalled prior to adding nodes to a cluster The SRM uninstall tool is located in the Cluster Installation Guide under the Cluster tab in the WEBUI 1 Connect to the WebUI of a node that is a member of the cluster select the Cluster Tab and select Cluster Nodes 2 Ensur...

Страница 43: ... and then Finish to complete the cluster wizard 12 After the node has successfully joined the cluster present all additional storage LUNS to the node Please refer to the Cluster Storage Guide located in the Cluster Tab for additional information on adding and configuring additional physical disk resources 13 Select Cluster Cluster Installation Guide and run the update by selecting the Software Clu...

Страница 44: ...ysical disk resources into the cluster Physical Disks are created in the WEBUI by selecting the Disks link which is located under the Disks Tab Please refer to the Cluster Storage Guide located in the Cluster Tab for procedures on adding and configuring additional physical disk resources Configuring ip address resources for the virtual server name To configure an ip address resource follow the pro...

Страница 45: ...uster group 11 Once the resource is created it is necessary to bring it online In the Cluster Resources page select the resource and select Bring Online 12 Select OK on the Bring a Resource Online page to bring the new ip address resource online Configuring ip address resources for the virtual server name To configure an ip address resource follow the procedure listed below 1 Open the WEBUI select...

Страница 46: ...sh to create the network name for the cluster group 11 Once the resource is created it is necessary to bring it online In the Cluster Resources page select the resource and select Bring Online 12 Select OK on the Bring a Resource Online page to bring the new network name resource online Configuring file share resources To configure a file share resource follow the procedure listed below 1 Open the...

Страница 47: ...ork name the file share resource will not come online until the network name resource does 8 Select Next to continue Note The physical disk resource specified in this step must reside in the same cluster group as specified in the beginning of this wizard 9 Specify the share name and path and select Next to continue 10 Review the configuration and select Finish to create the share 11 Once the resou...

Страница 48: ...48 HP Restricted NAS 4000s and 9000s Installation Guide DRAFT Template date 09 2003 ...

Страница 49: ...40 Collecting information 18 Completing the system configuration 32 Configuration information 18 configuring file share resources 46 configuring physical disk resources 44 Connecting to the SAN 29 conventions document 8 equipment symbols 9 text symbols 8 Creating disk arrays 30 file shares 31 D Default passwords 20 username 20 default login 23 25 26 default page 27 DHCP 28 document conventions 8 E...

Страница 50: ...ation review screen illustrated 28 Rapid Startup wizard screen illustrated 27 RapidLaunch CD used for configuration 21 RapidLaunch device discovery screen illustrated 23 RapidLaunch search screen illustrated 22 S SAN connection tool 29 Security Alert 23 25 26 serial number location illustrated 24 shared disk configuring 39 SNMP Settings 28 software features 15 symbols in text 8 symbols on equipmen...

Отзывы: