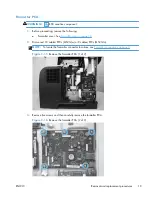
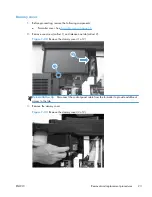

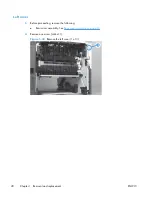


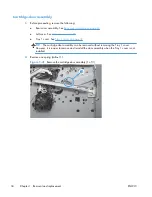


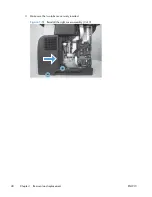
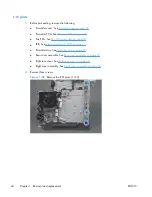
3.
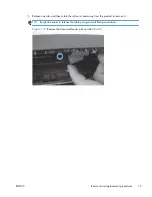
Grip the cover and pull it away from the product. Release the first tab (callout 1), and then release
the second tab (callout 2). Release the third tab (callout 3), if necessary, to separate the cover from
the product.
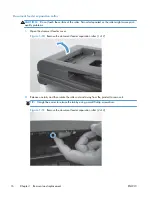
TIP:
The tab inside the tray cavity (callout 2) is located below the plastic tray rail. It might be
easier to slightly lift up the left side of the product, and use a small flat-tip screwdriver to release
this tab.
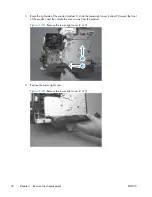
Figure 1-33
Remove the left cover (2 of 3)
1
2
3
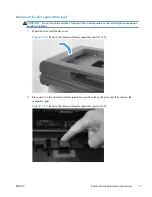
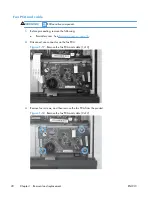
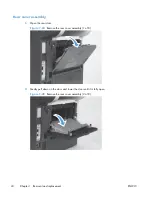
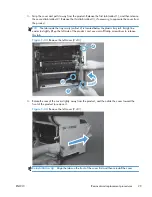
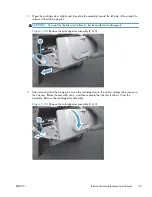
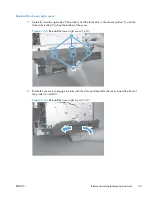
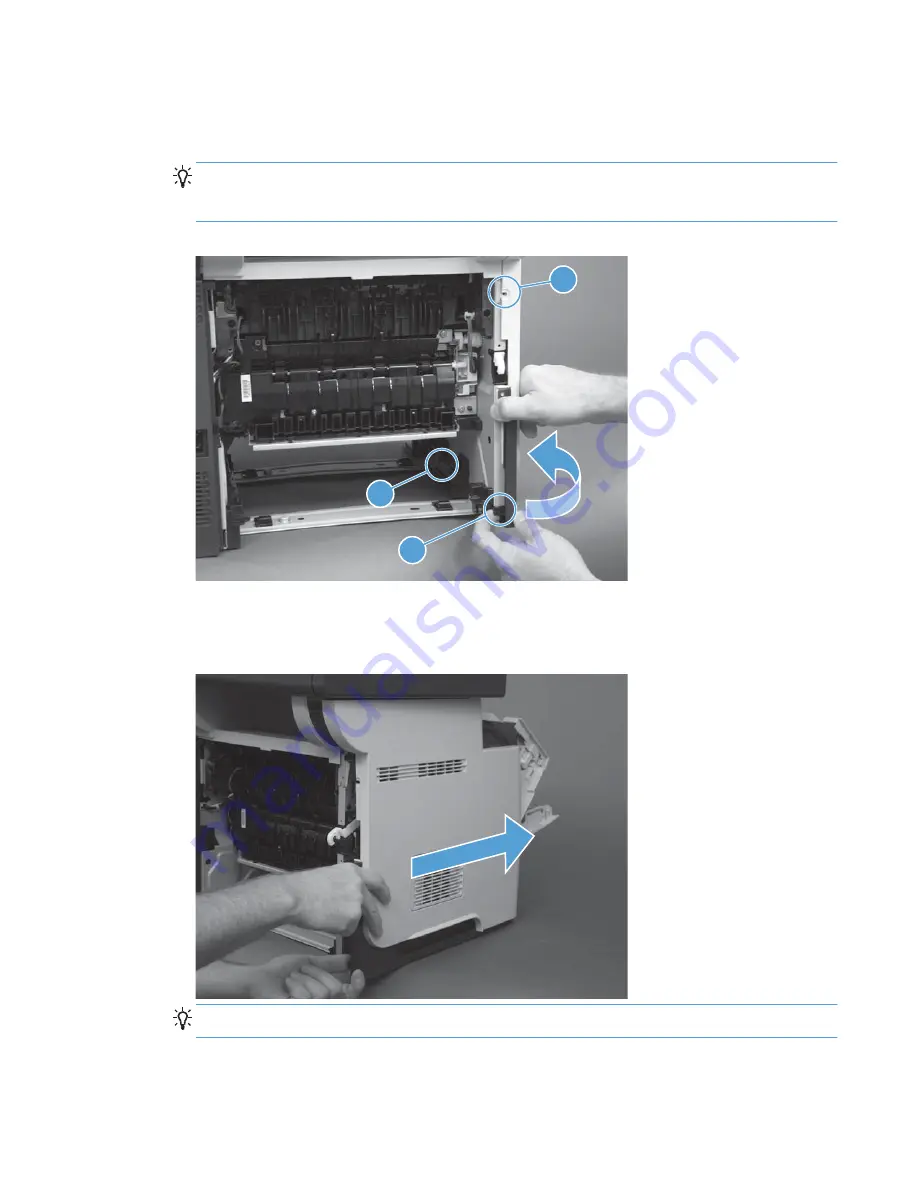
4.
Rotate the rear of the cover slightly away from the product, and then slide the cover toward the
front of the product to remove it.
Figure 1-34
Remove the left cover (2 of 3)
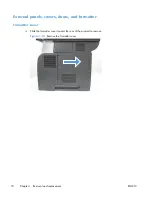
Reinstallation tip
Align the tabs on the front of the cover first and then reinstall the cover.
ENWW
Removal and replacement procedures
29
Содержание LaserJet Pro M521
Страница 1: ...LASERJET PRO MFP Repair Manual M521 2 ...
Страница 2: ......
Страница 3: ...HP LaserJet Pro MFP M521 Printer Repair Manual ...
Страница 6: ...iv Conventions used in this guide ENWW ...
Страница 10: ...viii ENWW ...
Страница 14: ...14 mm 4 Chapter 1 Removal and replacement ENWW ...
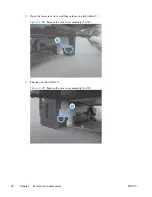
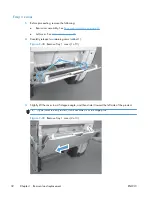
Страница 43: ...4 Remove the Tray 1 cover Figure 1 40 Remove Tray 1 cover 3 of 3 ENWW Removal and replacement procedures 33 ...
Страница 148: ...138 Chapter 1 Removal and replacement ENWW ...
Страница 155: ...ENWW Assembly locations 145 ...
Страница 160: ...Control panel and USB PCA assemblies Figure 2 5 Control panel assembly 3 1 2 4 150 Chapter 2 Parts and diagrams ENWW ...
Страница 162: ...Document feeder assemblies Figure 2 6 Document feeder assemblies 1 3 2 5 4 152 Chapter 2 Parts and diagrams ENWW ...
Страница 186: ...176 Chapter 2 Parts and diagrams ENWW ...
Страница 189: ......
Страница 190: ... 2012 Hewlett Packard Development Company L P www hp com A8P79 90904 A8P79 90904 A8P79 90904 ...