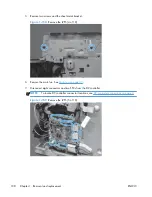

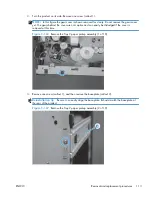
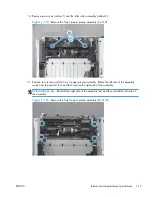

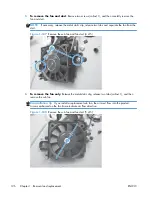

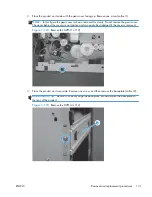

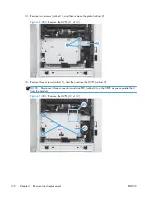

3.
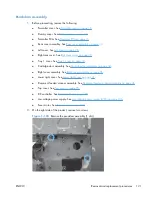
On the left side of the product, remove two screws.
Figure 1-181
Remove the pendulum assembly (2 of 4)
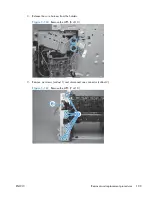
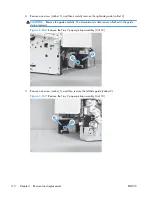
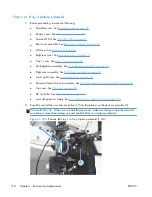
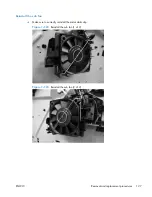
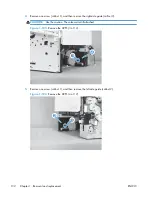
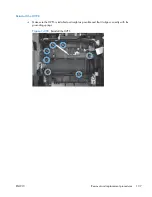
4.
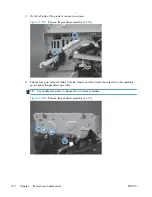
Release four wire harness holders from the chassis and then rotate the output bin roller assembly
up to expose the pendulum assembly.
TIP:
Use needle-nose pliers to release the wire harness holders.
Figure 1-182
Remove the pendulum assembly (3 of 4)
122
Chapter 1 Removal and replacement
ENWW
Содержание LaserJet Pro M521
Страница 1: ...LASERJET PRO MFP Repair Manual M521 2 ...
Страница 2: ......
Страница 3: ...HP LaserJet Pro MFP M521 Printer Repair Manual ...
Страница 6: ...iv Conventions used in this guide ENWW ...
Страница 10: ...viii ENWW ...
Страница 14: ...14 mm 4 Chapter 1 Removal and replacement ENWW ...
Страница 43: ...4 Remove the Tray 1 cover Figure 1 40 Remove Tray 1 cover 3 of 3 ENWW Removal and replacement procedures 33 ...
Страница 148: ...138 Chapter 1 Removal and replacement ENWW ...
Страница 155: ...ENWW Assembly locations 145 ...
Страница 160: ...Control panel and USB PCA assemblies Figure 2 5 Control panel assembly 3 1 2 4 150 Chapter 2 Parts and diagrams ENWW ...
Страница 162: ...Document feeder assemblies Figure 2 6 Document feeder assemblies 1 3 2 5 4 152 Chapter 2 Parts and diagrams ENWW ...
Страница 186: ...176 Chapter 2 Parts and diagrams ENWW ...
Страница 189: ......
Страница 190: ... 2012 Hewlett Packard Development Company L P www hp com A8P79 90904 A8P79 90904 A8P79 90904 ...