


2.
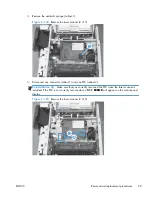
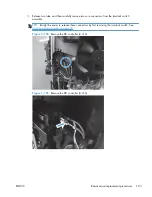
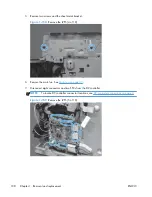
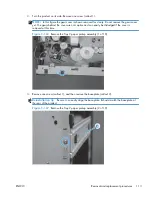
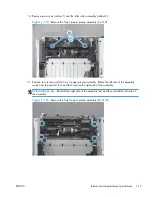
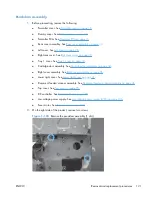
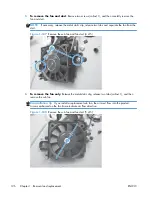
Turn the product on its side. Remove one screw (callout 1).
NOTE:
In this figure the gear cover is shown removed for clarity. Do not remove the gear cover
yet. The gears behind the cover are not captive and can easily be dislodged if the cover is
removed at this time.
Figure 1-166
Remove the Tray 2 paper pickup assembly (1 of 10)
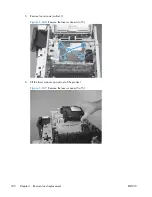
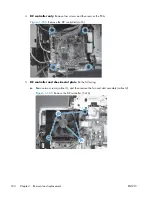
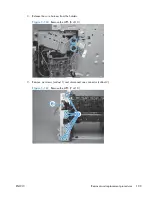
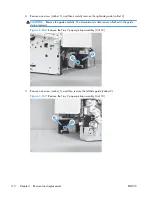
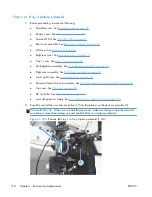
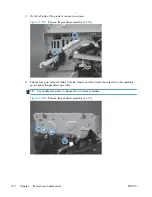
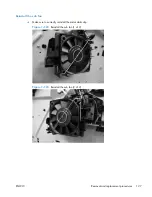
3.
Remove one screw (callout 1), and then remove the base-plate (callout 2).
Reinstallation tip
Be sure to correctly align the base-plate. It should match the base-plate at
the rear of the product.
Figure 1-167
Remove the Tray 2 paper pickup assembly (2 of 10)
2
ENWW
Removal and replacement procedures
113
Содержание LaserJet Pro M521
Страница 1: ...LASERJET PRO MFP Repair Manual M521 2 ...
Страница 2: ......
Страница 3: ...HP LaserJet Pro MFP M521 Printer Repair Manual ...
Страница 6: ...iv Conventions used in this guide ENWW ...
Страница 10: ...viii ENWW ...
Страница 14: ...14 mm 4 Chapter 1 Removal and replacement ENWW ...
Страница 43: ...4 Remove the Tray 1 cover Figure 1 40 Remove Tray 1 cover 3 of 3 ENWW Removal and replacement procedures 33 ...
Страница 148: ...138 Chapter 1 Removal and replacement ENWW ...
Страница 155: ...ENWW Assembly locations 145 ...
Страница 160: ...Control panel and USB PCA assemblies Figure 2 5 Control panel assembly 3 1 2 4 150 Chapter 2 Parts and diagrams ENWW ...
Страница 162: ...Document feeder assemblies Figure 2 6 Document feeder assemblies 1 3 2 5 4 152 Chapter 2 Parts and diagrams ENWW ...
Страница 186: ...176 Chapter 2 Parts and diagrams ENWW ...
Страница 189: ......
Страница 190: ... 2012 Hewlett Packard Development Company L P www hp com A8P79 90904 A8P79 90904 A8P79 90904 ...