background image

2-28

Removal and Replacement

HP OmniBook 900


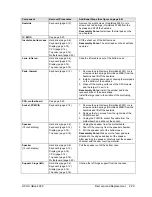
Table 2-9. Removing Top Case Components

Component

Removal Procedures

Additional Steps (See figure on page 4-2)

Case, top

See page 2-18.

Keyboard

See page 2-12.

Support, touch-pad

Hard drive (page 2-6).
Keyboard (page 2-12).
Display (page 2-16).
Top case (page 2-18).

1. Remove the screw holding the support plate to the

top case.

2. Slide the support plate to the side and lift it out.
Reassembly Notes: Make sure the touch pad is
seated properly before installing the support plate.
Press down on the support plate while sliding it into
place. Make sure it is held down at the left and right
edges.
Check the action of the click buttons before installing
the top case.

Touch pad

Hard drive (page 2-6).
Keyboard (page 2-12).
Display (page 2-16).
Top case (page 2-18).

1. Remove the screw holding the support plate to the

top case.

2. Slide the support plate to the side and lift it out.
3. Lift out the touch pad and its flex cable.
Reassembly Notes: Make sure the touch pad is
seated properly before installing the support plate.
Press down on the support plate while sliding it into
place. Make sure it is held down at the left and right
edges.
Check the action of the click buttons before installing
the top case.


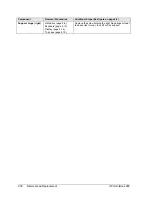
Table 2-10. Removing Bottom Case Components

Component

Removal Procedures

Additional Steps (See figure on page 4-2)

Case, bottom

See page 2-20.

CPU module

See page 2-14.

Door, module bay
connector

Hard drive (page 2-6).
Keyboard (page 2-12).
Display (page 2-16).
CPU (page 2-14).
Top case (page 2-18).
Motherboard (page 2-20).

Peel the rubber door from the bottom case.
Reassembly Notes: Position the new door in the
center of the opening before sticking it onto the bottom
case.

Doors, PCMCIA

Hard drive (page 2-6).
Keyboard (page 2-12).
Display (page 2-16).
Top case (page 2-18).

Flex each door until one side tab releases.
Reassembly Notes: See the figure on page 2-23.

Fan
(12-inch display)

Keyboard (page 2-12).

Fan
(13-inch display)

Hard drive (page 2-6).
Keyboard (page 2-12).
Display (page 2-16).
Top case (page 2-18).

Caution: Do not spin the fan blade with your finger.
Pressure on the fan blade can damage the bearings.
1. Remove the eight screws (OmniBook 900†) or six

screws and two springs (OmniBook 900B) from the
heatsink and lift off the heatsink.

2. Remove the two screws (12-inch display) or one

screw (13-inch display) holding the fan.

3. Unplug the fan cable from the motherboard and lift

out the fan.

Reassembly Notes: The opening in the side of the fan
faces the vent in the bottom case.

Содержание HP OmniBook 900

Страница 1: ... HP OmniBook 900 Service Manual ...

Страница 2: ...rmission of Hewlett Packard Company except as allowed under the copyright laws The programs that control this product are copyrighted and all rights are reserved Reproduction adaptation or translation of those programs without prior written permission of Hewlett Packard Co is also prohibited Portions of the programs that control this product may also be copyrighted by Microsoft Corporation SystemS...

Страница 3: ... Providers Only 2 14 Removing the Display Assembly HP Authorized Service Providers Only 2 16 Removing the Top Case HP Authorized Service Providers Only 2 18 Removing the Motherboard or Bottom Case HP Authorized Service Providers Only 2 20 Removing the BIOS IC HP Authorized Service Providers Only 2 24 Removing Other Components HP Authorized Service Providers Only 2 26 3 Troubleshooting and Diagnost...

Страница 4: ...and Parallel Loopback Connectors 3 14 Figure 4 1 Exploded View 4 2 Figure 4 2 Display Components 4 6 Tables Table 1 1 OmniBook 900 Models 1 1 Table 1 2 Product Comparisons 1 2 Table 1 3 Activating Power Modes 1 4 Table 1 4 Main Status Lights Motherboard 1 5 Table 1 5 Keyboard Status Lights Motherboard 1 5 Table 1 6 Fn Hot Keys 1 6 Table 1 7 System Interrupts 1 7 Table 1 8 System Memory 1 7 Table 1...

Страница 5: ...8 Table 3 6 BIOS Setup Menus and Parameters 3 24 Table 4 1 OmniBook Replaceable Parts 4 3 Table 4 2 Assembly Component Breakdown 4 7 Table 4 3 Accessory Replaceable Parts 4 7 Table 4 4 Part Number Reference 4 9 Table 5 1 OmniBook 900 LCD Guidelines TFT 5 3 Table 5 2 Obsolete Repair Parts 5 5 ...

Страница 6: ...r Comments HP External Web http www hp com omnibook http www europe hp com omnibook European mirror No usage restriction HP US Reseller Web http partner americas hp com Restricted to Authorized Resellers only HP Asia Pacific Channel Support Centre for DPSP Partners http www hp com au Restricted to DPSP Partners only America Online Keyword HP Call 800 827 6364 for membership within the US CompuServ...

Страница 7: ...57A F1769xB Pentium III 450 MHz 64 MB F1770xB Pentium III 500 MHz 13 3 inch XGA TFT 12 GB F1744B This table lists only base product configurations custom configurations are not included For the products listed x suffix means N NT NV or NG for Windows NT 4 0 installed marketing distinction only or W WT WV WG or WR for Windows 95 98 installed marketing distinction only Intel Mobile Pentium II or Mob...

Страница 8: ...o 16M colors XGA Zoomed Video enabled AGP or PCI local bus video 256 bit graphics controller with 8 4 or 2 5 MB internal video RAM Up to 16M colors XGA Zoomed Video enabled PCI local bus video 128 bit graphics controller with 2 MB internal video RAM Up to 64K colors XGA 16M colors SVGA Zoomed Video enabled Operating System Windows 95 Windows 98 or Windows NT 4 0 preinstalled Windows 95 Windows 98 ...

Страница 9: ...nt View Figure 1 2 OmniBook Side View Figure 1 3 OmniBook Rear View Infrared port Audio jacks Microphone Keyboard status lights Power button Kensington lock slot Parallel port Pointing stick Serial port Touch pad Video out Docking port Click buttons above and below the touch pad PC Card slots PC Card eject buttons Latch PS 2 port USB port System off button Speaker Battery External module bay conne...

Страница 10: ...are maintained Your current work session continues at turn on any key or pointer action Press Fn S not Windows 98 or 2000 or allow time out Press any key or move a pointing device to display the current session Instant On Suspend Low power stopped state Lower power state than Standby Everything is off or in a low power state Network devices are off Your previous work session resumes at turn on For...

Страница 11: ...pter is connected battery is full or stopped charging Blinking green light AC adapter is connected battery is charging No light AC adapter is not connected or battery is not present The keyboard status lights located above the keyboard indicate the states of the keyboard locks These lights are on the motherboard Table 1 5 Keyboard Status Lights Motherboard Meaning Caps Lock Caps Lock is active Key...

Страница 12: ...andby mode Windows 95 Windows NT or Suspend mode Windows 98 Not supported under Windows 2000 Fn ScrLk Toggles Scroll Lock on and off Fn UP ARROW Fn DOWN ARROW Increases and decreases the sound volume Resetting the OmniBook 1 Use a pen or a straightened paper clip to push the system off button on the left side of the OmniBook The switch is on the motherboard or Press and hold the blue power button ...

Страница 13: ... and CardBus assigned by Windows driver Video Controller OmniBook 900B 11 Free 12 Pointing device 13 Numeric data processor 14 Internal hard disk primary IDE controller 15 Internal CD ROM drive secondary IDE controller Models called 900 in this manual have no marking in the serial number whereas models called 900B have 900 B after the serial number Table 1 8 System Memory 00000 9FFFF System memory...

Страница 14: ...E0 3E1 PCMCIA controller 3F0 3F5 Floppy controller 3F6 Internal hard disk primary IDE controller 3F7 Floppy controller 3F8 3FF COM1 serial port Models called 900 in this manual have no marking in the serial number whereas models called 900B have 900 B after the serial number Table 1 10 DMA Channels 0 Sound record OmniBook 900 only Free OmniBook 900B only 1 Sound playback 2 Floppy drive 3 LPT1 ECP ...

Страница 15: ... 900B ATI Mobility M graphics accelerator with 4 MB video RAM 2x AGP graphics capability Power Rechargeable 6 cell lithium ion battery with LED charge level gauge 11 1 Vdc Battery life up to 3 4 hours typical varies with type of usage and model Fast battery recharge 80 in 1 hour 100 in 1 5 2 hours Low battery warning Suspend resume capability 60 watt ac adapter 100 to 240 Vac 50 to 60 Hz input 19 ...

Страница 16: ...Guide OmniBook Recovery CD included Centralized worldwide BIOS and driver update service Security Features User and administrator passwords System hard drive and docking passwords PC identification displayed at boot DMI accessible electronic serial number Kensington MicroSaver lock slot Environmental Limits Operating temperature 5 to 35 C 41 to 95 F Operating humidity 20 to 90 percent RH 5 to 35 C...

Страница 17: ...External module bay F1746A B 10 12 GB second hard drive module Power Options F1454A 60 watt ac adapter F1455A 75 watt auto airline power adapter F1705A Lithium ion battery F1706A Battery charger external 8120 6312 8120 6313 8120 6314 8120 6316 8120 6317 8120 8367 8120 8373 8120 8452 8120 8699 Replacement power cord Australia Replacement power cord U S Canada Taiwan Replacement power cord Europe Re...

Страница 18: ...et PC Card by 3Com Docks F1451A Port replicator tray page 4 7 F1452A Mini dock tray page 4 7 F1453A Monitor stand short for F1451A and F1452A F1468A Docking module bay adapter F1477A Docking system and monitor stand tall tray page 4 7 Models called 900 in this manual have no marking in the serial number whereas models called 900B have 900 B after the serial number ...

Страница 19: ...modules As a substitute for a functional block diagram see the table on page 1 14 it lists the roles that the replaceable modules play in each of the functional subsystems PCMCIA Cards CPU Module Hard Disk Drive Battery Keyboard pointing stick RAM Board LCD Module Top Case microphone Motherboard PCA BIOS IC External Module Bay Fan Speaker Touch Pad PCMCIA Socket Figure 1 4 Replaceable Module Diagr...

Страница 20: ...roller Hard disk mechanism Floppy drive Motherboard Floppy disk module Floppy disk controller Floppy disk mechanism Keyboard Motherboard BIOS IC Keyboard Keyboard controller Keyboard BIOS Key switches Pointer Motherboard BIOS IC Keyboard Top case Keyboard controller pointing stick controller PS 2 output Keyboard BIOS Pointing stick sensor Touch pad sensor controller PS 2 output Audio Motherboard S...

Страница 21: ...or table starting on page 2 28 Drive hard disk page 2 6 Fan table starting on page 2 28 Foot page 2 9 Heatsink table starting on page 2 28 Hinge display page 2 27 IC BIOS page 2 24 Insulator bottom case table starting on page 2 28 Keyboard page 2 12 Latch display page 2 27 LCD module page 2 10 Lens infrared table starting on page 2 28 Overlay serial number page 2 23 Pads thermal table starting on ...

Страница 22: ...l Phillips screwdriver 1 preferably magnetized Fine Phillips screwdriver 0 4 mm thin wall hex driver or 5 32 inch Small plastic blade for prying such as an angled plastic tweezers Pointed knife or probe Small flat blade screwdriver 4 0 4 5 mm flat blade screwdriver IC PLCC removal tool similar to OK Industries EX 5 Table 2 3 Recommended Screw Torques Screw Thread Size Torque kgf cm Torque lbf in M...

Страница 23: ...ment 2 3 Removing the Battery User Replaceable Required Equipment None Removal Procedure 1 Unplug the ac adapter if present 2 Slide the battery s front panel to the right 3 Pull the battery out of the bay Figure 2 1 Removing the Battery ...

Страница 24: ...to the front of the battery For a 12 inch display use the flat battery panel for a 13 inch display use the curved battery panel To remove a panel slide it open then twist the upper edge of the panel off the battery Figure 2 2 Installing a Battery Panel Make sure the front panel of the battery is open before inserting the battery ...

Страница 25: ...and remove the battery 2 Put your finger above the F8 key and slide the keyboard screw cover to the left about 3 mm 1 8 inch then lift off the cover 3 Remove the two screws holding the keyboard above the F1 and HOME keys If your screwdriver has a fat shaft protect or remove the right hinge cover 4 Lift up the keyboard tab above the F1 key about 10 mm 1 2 inch then free the snap at the center of th...

Страница 26: ...ble 2 5 Hard Disk Drive Replacement Part Numbers Description Part Number Exchange OmniBook Part Number 900B 900 Drive hard disk 4 3GB 9 5mm IBM 0950 3409 F1711 69100 Drive hard disk 4 3GB 8 45mm Toshiba 0950 3410 F1386 69102 Drive hard disk 6 0GB 9 5mm IBM 0950 3710 F1711 69106 Drive hard disk 6 4GB 9 5mm IBM 0950 3442 F1711 69101 Drive hard disk 12GB 9 5mm IBM 0950 3711 F1660 69105 These hard dri...

Страница 27: ...re installing a new hard drive that does not have a cover you can remove the cover parts from the old hard drive Remove the two screws from the case then lift the plastic tab and remove the plastic cover and metal shield from the hard disk drive Carefully pry the connector off the end of the hard disk drive Work alternately at each end so that the connector slides off evenly Figure 2 5 Installing ...

Страница 28: ...o replace the top case bottom case and install a HDD bracket above the hard disk slot Service note 900 14 Creating a Hibernate Partition 1 Connect an external module bay and CD ROM drive to the OmniBook If you do not have an OmniBook CD ROM module or external module bay you must attach another type of CD ROM drive 2 Plug in the ac adapter 3 Insert the Recovery CD in the CD ROM drive 4 Shut down an...

Страница 29: ...sert a small flat blade screwdriver under the cover and pry it loose To replace firmly press the adhesive side of the cover into the recess Cover hinge Put your finger above the F8 key and slide the keyboard screw cover to the left about 3 mm 1 8 inch then lift off the cover Open the display fully Push in at the bottom front of the cover to unsnap it from the top case Cover keyboard screw Put your...

Страница 30: ...identify the type of LCD module see the marking printed on the LCD flex cable where it plugs into the base it may be on the top or bottom of the cable Models called 900 in this manual have no marking in the serial number whereas models called 900B have 900 B after the serial number Required Equipment Small Phillips screwdriver Small flat blade screwdriver Pointed knife or probe Removal Procedure 1...

Страница 31: ...ewdriver to release the connector from the LCD module 8 For a 13 inch display remove the LCD module a Close but don t latch the display then lift off the display case b Loosen and then pull the flex cable out of the connector c Remove four screws two each on the right and left edges of the LCD module Figure 2 6 Removing the LCD Module Bumper oval Screw cover Screw M2 5 5mm Screw M3 4mm LCD flex ca...

Страница 32: ...nt Small Phillips screwdriver Probe or tweezers Removal Procedure 1 Unplug the ac adapter if present and remove the battery 2 Put your finger above the F8 key and slide the keyboard screw cover to the left about 3 mm 1 8 inch then lift off the cover 3 Remove the two screws holding the keyboard above the F1 and HOME keys If your screwdriver has a fat shaft protect or remove the right hinge cover 4 ...

Страница 33: ... the front section of the top case Fold the keyboard back into place Slip its front tabs into the slots then snap the back edge into place Push the keyboard toward the back as you tighten the two screws This helps engage the tab at the back center of the keyboard Keyboard Keyboard screw cover Screw M2 5 4mm Keyboard flex cable Pointing stick flex cable ...

Страница 34: ...screws OmniBook 900 or six screws and springs OmniBook 900B from the heatsink and lift off the heatsink Caution Do not spin the fan blade with your finger Pressure on the fan blade can damage the bearings Caution OmniBook 900 Follow these precautions to prevent damage to the CPU connector Use only a non metallic tool for releasing the CPU module A metal tool may damage the motherboard Do not raise...

Страница 35: ... damage to the CPU connector Place the CPU module on the connector carefully Use the screw holes as a guide Place your fingers on top of the CPU module above the left and right ends of the connector Do not push at other locations Press firmly at the left end while holding down the right until the left engages Then press down the right down while holding the left Press firmly until the CPU module s...

Страница 36: ...t are missing or damaged Removing the Display Assembly HP Authorized Service Providers Only Required Equipment Small Phillips screwdriver Removal Procedure 1 Unplug the ac adapter if present and remove the battery 2 Remove the keyboard page 2 12 3 Open the display fully and remove the covers from the display hinges Push in at the bottom front of the covers 4 Unplug the display power wires from the...

Страница 37: ...ly Notes For a 12 inch display the flex cable wraps around the post only about 1 2 turn For a 12 or 13 inch display insert the display power wires into the notch in the top case before installing the hinge cover Hinge covers 2 Display power cable Screw M2 5 4mm Display flex cable Screw M2 5 8mm ...

Страница 38: ...e bottom of the unit remove the five screws 12 inch display or six screws 13 inch display from the front half of the case 7 On the top of the unit remove the three screws along the back of the top case 8 Remove the six screws 12 inch display or five screws 13 inch display holding the top case to the motherboard and bottom case 9 Near the docking connector press down on the inner edge of the top ca...

Страница 39: ... the tab at the front of the top case then lower the top case onto the bottom case It may be easier to plug in the touch pad flex cable while you are lowering the top case onto the bottom case rather than waiting until after the top case is fully installed Top case Microphone cable Touch pad cable Heatsink Screw M2 5 8mm Screw M2 5 5mm 13 inch display only Screw M2 5 8mm Screw M2 5 5mm Screw M2 5m...

Страница 40: ... Motherboard or Bottom Case HP Authorized Service Providers Only Exchange Information When returning a bad motherboard to HP describe the symptoms on a piece of paper and attach it to the part do not use tape Required Equipment Small Phillips screwdriver 4 mm thin wall hex driver or 5 32 inch If necessary grind the sides of a standard driver Removal Procedure 1 Unplug the ac adapter if present and...

Страница 41: ... motherboard forward until it comes out of the bottom case Figure 2 11 Removing the Motherboard PCMCIA socket Motherboard Speaker cable Speaker Bottom case CPU support OB 900B only Infrared lens Fan cable Fan Hard drive door Screw M2 5 8mm Right hinge support Screw M2 5 4mm Screw M2 5 4mm Mylar insulator Standoff M2 ...

Страница 42: ...serial number label When lowering the motherboard into the bottom case make sure the audio jack grounding tabs do not catch on the bottom case Make sure the speaker and fan wires are not trapped under the motherboard Note If you installed a new motherboard with a new BIOS IC the IC contains only enough basic programming to boot the OmniBook After installing the motherboard you must reprogram the I...

Страница 43: ...f a serial number has already been stored you must call an HP support center to change it 4 Run KYB_SEL EXE from one of these sources It may be present on the hard disk or Recovery CD in OmniBook Drivers Hputils Get a copy from the Reseller website see page vi 5 Select the keyboard layout for the unit being repaired Installing a New Serial Number Label If you do not have a master file that creates...

Страница 44: ... vi follow the directions provided Required Equipment Small Phillips screwdriver IC PLCC removal tool similar to OK Industries EX 5 Removal Procedure Caution Remove all power before removing or installing the BIOS IC Otherwise the IC could be damaged 1 Unplug the ac adapter if present and remove the battery 2 Put your finger above the F8 key and slide the keyboard screw cover to the left about 3 m...

Страница 45: ...IC or motherboard could be damaged Press down firmly on the IC with your thumb to ensure a proper connection Fold the keyboard back into place Slip its front tabs into the slots then snap the back edge into place Push the keyboard toward the back as you tighten the two screws This helps engage the tab at the back center of the keyboard Reprogram the IC by programming the BIOS see the note above IC...

Страница 46: ... Fine Phillips screwdriver for display latch only 4 mm thin wall hex driver or 5 32 inch for bottom case components Small plastic blade for prying such as an angled plastic tweezers for bottom case components Removal Procedure 1 Unplug the ac adapter if present and remove the battery 2 Remove the additional assemblies and follow the special steps indicated in the tables below Components are separa...

Страница 47: ...mbly Notes Insert the display power cable into the notch in the top case before installing the hinge cover Case display 12 inch display Keyboard page 2 12 Display page 2 16 LCD module page 2 10 1 Remove the screws holding the hinge arms then lift out the hinges 2 Unsnap the flex cable tube from the display case Lift out the flex cable 3 Remove the two screws holding the display latch then lift out...

Страница 48: ...he left and right edges Check the action of the click buttons before installing the top case Table 2 10 Removing Bottom Case Components Component Removal Procedures Additional Steps See figure on page 4 2 Case bottom See page 2 20 CPU module See page 2 14 Door module bay connector Hard drive page 2 6 Keyboard page 2 12 Display page 2 16 CPU page 2 14 Top case page 2 18 Motherboard page 2 20 Peel t...

Страница 49: ... next to it Reassembly Notes Install the smaller pad in the recessed area of the same shape Install the larger pad in the middle of the protruding area PCA motherboard See page 2 20 Socket PCMCIA Keyboard page 2 12 1 Remove the eight screws OmniBook 900 or six screws and two springs OmniBook 900B from the heatsink and lift off the heatsink 2 Remove the two screws from the right side of the PCMCIA ...

Страница 50: ...Removal Procedures Additional Steps See figure on page 4 2 Support hinge right Hard drive page 2 6 Keyboard page 2 12 Display page 2 16 Top case page 2 18 Remove the screw holding the right hinge support near the back right corner then lift out the support ...

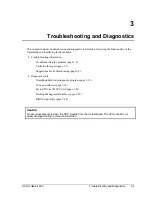
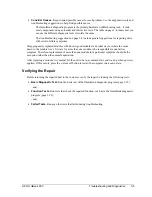
Страница 51: ...rmation Troubleshooting the problem page 3 2 Verifying the repair page 3 3 Suggestions for troubleshooting page 3 4 Diagnostic tools OmniBook hardware diagnostic program page 3 12 Power on self test page 3 18 Sycard PCCtest 450 PC Card page 3 21 Desktop Management Interface page 3 22 BIOS Setup utility page 3 24 Caution Do not unnecessarily remove the CPU module from the motherboard The CPU connec...

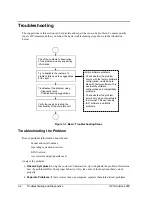
Страница 52: ...m differs from proper behavior Also take note of the functions that do work properly Separate Problems If there is more than one symptom separate them into distinct problems Check the customer s description of the problem and any supporting information Try to duplicate the customer s problem Also see the suggestions at the right Troubleshoot the problem using Diagnostic tools Troubleshooting sugge...

Страница 53: ...olate the cause down to the module level It is rare for more than one module to be responsible for one failure symptom Therefore replacement of more than one module for a particular symptom should be the exception rather than the normal expectation After replacing a module it is normal for the unit to be in a confused state and lock up when power is applied If this occurs press the system off butt...

Страница 54: ...ibes AssetTools Pointer Tests Misc menu Describes AssetTools Configures Audio Tests System Misc menus Configures Serial Tests Misc menu Describes AssetTools Configures Parallel Tests Misc menu Describes AssetTools Configures Infrared Tests Misc menu Describes AssetTools Configures PS 2 port Tests KBD Misc menus USB Tests USB or System menu Describes AssetTools Docking port Tests using docks PCMCIA...

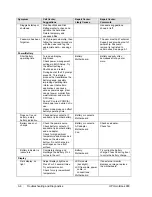
Страница 55: ...boot replace LCD module If monitor shows activity but BIOS does not complete replace CPU module If monitor is blank replace CPU module replace motherboard If power status light and display turn on BIOS completes but OS does not start from hard disk or from floppy drive replace CPU module then motherboard If OS starts from floppy drive reload hard drive replace hard drive Does not boot on battery b...

Страница 56: ...tor from www intel com and monitor CPU load Some PC cards PCMCIA draw power even while not in use Heavy modem use can affect battery operating time Battery Motherboard Battery capacity often decreases after a year or more Does not run on battery empty battery indication Check battery contacts If available try another battery Battery or contacts Motherboard Battery does not charge Check the power s...

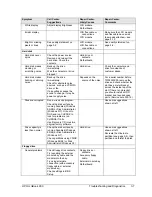
Страница 57: ...Depends on the source of the noise For a serial number before TW92500000 remove the drive and check whether the slot has a metal bracket across the inside top of the slot If there is no bracket you should install a HDD bracket and required case parts Service note 900 14 Files are corrupted Run a virus scan program Check the disk surface by running Scandisk Windows 95 98 or Disk Administrator Windo...

Страница 58: ...Pad driver support using Add Remove Program In Mouse Properties select the IBM TrackPoint driver from the track point directory under OmniBook Drivers Keyboard assembly Motherboard Click button doesn t work Touch pad Top case Motherboard Touch pad General problems Check settings in Control Panel Check pointing stick settings in Control Panel The IBM TrackPoint driver can redefine touch pad operati...

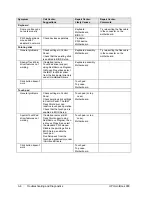
Страница 59: ... it should not be muted in recording panel Note The microphone should normally be muted in the master output panel Top case microphone Motherboard Check operation using external microphone Serial Parallel General problems Check settings in BIOS Setup Check settings in Control Panel and in Windows NT Diagnostics Motherboard Use loopback connector during test see page 3 14 Infrared General problems ...

Страница 60: ... look for bent pins inside the PCMCIA socket If both slots have problems replace the motherboard If only one slot has a problem try replacing the PCMCIA socket AC adapter Does not power the OmniBook Try another ac adapter if available AC adapter Motherboard The ac adapter is not repairable it must be replaced Miscellaneous Clock loses time Plug in ac adapter for 24 hours to charge backup battery M...

Страница 61: ... Thermal connections If computer slows after a period of continuous activity check thermal connections and parts see the previous symptom Accessories Docking product I O problems Check that ac power is connected Check settings in BIOS Setup Try using the corresponding OmniBook port Docking product Motherboard Test the corresponding OmniBook ports while undocked The port replicator and mini dock ar...

Страница 62: ...and Advanced The tests are designed to run after the system reboots This ensures that the computer will be in a predictable state so the diagnostic program can properly test the hardware components The tests are non destructive and are intended to preserve the state of the computer The OmniBook reboots when you exit the program so drivers can be loaded Creating a Diagnostic Floppy Disk If you need...

Страница 63: ... F3 to exit 7 Run the advanced tests Press F2 to open the advanced test screen 8 Select and run the appropriate tests Tests are not listed if no such hardware is detected Press the following keys to run tests ENTER Runs the highlighted test F5 or SPACE Marks or unmarks the highlighted test F6 Marks or unmarks all tests in the current menu F7 Marks or unmarks all tests in all menus F10 Runs all mar...

Страница 64: ...gs Replace the motherboard 0075h 0076h Reset the system Replace the motherboard 0077h Replace the motherboard 0078h Bad CMOS checksum Reset the system then run BIOS Setup and check settings Replace the motherboard 0079h Replace the motherboard 0083h 0086h Replace the BIOS IC Replace the motherboard 0087h Replace the motherboard 0088h Replace the BIOS IC Code Suggestions 008Ah Replace the motherboa...

Страница 65: ...sk Code Suggestions 02CCh Run BIOS Setup and check the hard disk type Replace the hard disk or the motherboard 02EEh For the performance test run BIOS Setup and temporarily select a drive type that has more than 200 cylinders 02F1h Recreate the Hibernate partition then run FDISK to partition the hard disk 02F2h Run FDISK to make one partition active If necessary recreate the Hibernate partition th...

Страница 66: ...also occurs for an external headphone replace the motherboard Otherwise check the speaker connection replace the speaker If it occurs only for an external headphone replace the motherboard 08D0h 08F3h Replace the motherboard Code Suggestions 9003h 9004h See Microphone Tests near end of table 9018h 901Ah See NMA Sound Tests near end of table Video Tests 0900h 0920h Replace the motherboard 8000h 901...

Страница 67: ... up replace the motherboard Code Suggestions 900Ah Rerun the test For the two unit test make sure the IR ports on the reflector and test computers are lined up Replace the motherboard 900Ch Rerun the test Make sure the IR ports on the reflector and test computers are lined up Restart the reflector unit Replace the motherboard Video Tests 8000h If the test fails with an external monitor must suppor...

Страница 68: ... If the BIOS detects a terminal error condition it halts POST after issuing a terminal error beep code up to four groups of 1 to 4 short beeps The beep code indicates the POST routine in which the terminal error occurred The BIOS also issues a beep code one long tone followed by two short tones during POST if the video configuration fails no card installed or faulty or if an external ROM module do...

Страница 69: ...ot incomplete Default configuration used Previous POST did not complete successfully POST loads default values and offers to run Setup If the failure was caused by incorrect values and they are not corrected the next boot will likely fail This error is cleared the next time the system is booted 0281 Memory Size found by POST differed from CMOS Memory size found by POST differed from CMOS 02B0 Disk...

Страница 70: ...Enter Setup and see if fixed disk and drive A are properly identified Parity Check 1 nnnn Parity error found in the system bus BIOS attempts to locate the address and display it on the screen If it cannot locate the address it displays Parity is a method for checking errors in binary data A parity error indicates that some data has been corrupted Parity Check 2 nnnn Parity error found in the I O b...

Страница 71: ... website http www sycard com Configuration headers PC Card 16 bit and CardBus 32 bit which attach to the card You will also need CardBus extender card to avoid wear on the Sycard PCMCIA connector The Sycard PCCextend 70 extender card is an example The Sycard PCCtest 450 provides the following tests See the Sycard documentation for details about running the tests PCMCIA PC Card 16 bit test PCT450 v...

Страница 72: ... Setup To install the DMI from the OmniBook Recovery CD or from floppy disks 1 If you do not have a CD ROM drive create installation floppy disks On any computer with a CD ROM drive copy the DMI software from the dmi directory of the Recovery CD under omnibook drivers to four or more floppy disks for example copy the contents of the disk1 subdirectory to disk 1 2 Start Windows if it is not already...

Страница 73: ... program that accesses this information you can access the DMTF FTP server ftp dmtf org or the DMTF web pages at the http www dmtf org Contents of the DMI Package The DMI software and associated documentation is supplied preinstalled on the OmniBook s hard disk drive Since the information accessed by the DMI software is specific to a particular computer it must be installed on each computer separa...

Страница 74: ...urrent BIOS version Detected automatically System Time Sets the time using 24 hour format Values set take effect immediately System Date Sets the date using mm dd yy English or dd mm yy format Floppy Drive Sets the floppy drive type Detected and set automatically Internal Hard Disk Sets the hard disk drive type and various parameters Detected and set automatically Quiet Boot When enabled hides sum...

Страница 75: ...ss Sets the I O address 378h Interrupt Sets the interrupt IRQ7 DMA channel For ECP mode sets the DMA channel DMA3 OmniBook 900 Audio Sets how the audio system is configured by the BIOS specified or automatic Enabled SB I O address Sets the Sound Blaster I O address 220h WSS I O address Sets the Windows Sound System I O address 530h AdLib I O address Sets the AdLib synthesizer I O address 388h Inte...

Страница 76: ...ffects a hard disk drive in the plug in module bay 2 minutes Time out on AC Sets whether power management time outs occur while the ac adapter is connected Disabled Power Button Mode Sets the action of the blue power button when pressed for less than 4 seconds Suspend Lid Switch Mode Sets the action when the OmniBook lid closes Turn Off LCD Resume on Serial Ring Sets whether the system resumes fro...

Страница 77: ...placeable Parts This chapter contains an exploded view of the OmniBook and the following lists of parts OmniBook replaceable parts page 4 3 Assembly component breakout page 4 7 Accessory replacement parts page 4 7 Part number reference page 4 9 ...

Страница 78: ...4 2 Replaceable Parts HP OmniBook 900 Figure 4 1 Exploded View Display components see page 4 5 ...

Страница 79: ...ay 13 F1770 60907 9 Case HDD kit F1711 60904 Yes 10 Case top 12 F1769 60960 10 Case top 13 F1770 60913 Connector HDD F1711 60975 11 Cover display screw lower F1711 60914 Yes 12 Cover hinge left right pair F1770 60902 Yes 13 Cover keyboard screw F1770 60903 Yes 14 CPU 300MHz Pentium II mini cartridge 1821 4833 F1711 69103 14 CPU 366MHz Pentium II mini cartridge 1821 4834 F1711 69104 14 CPU 400MHz P...

Страница 80: ... 5182 5171 22 Keyboard UK English 5182 5173 22 Keyboard US English 5182 5165 Label regulatory F1711 60929 23 Latch display 12 w stiffener F1711 60979 23 Latch display 13 F1770 60901 24 LCD module 12 IBM F1711 60939 F1711 69039 24 LCD module 12 Mitsubishi F1711 60972 F1711 69072 24 LCD module 13 LG F1770 60921 F1770 69021 24 LCD module 13 Unipac F1770 60920 F1770 69020 Lens infrared F1711 60928 Ove...

Страница 81: ... 13 F1770 60914 37 Support hinge right 12 F1711 60911 37 Support hinge right 13 F1770 60915 38 Support touch pad F1711 60960 Tape Kapton roll F1391 60963 39 Touch pad with cable F1711 60921 See Table 4 2 for components These hard drives are the preferred drives at the time of publication Drives shipped in units are subject to change without notice For current information about preferred and approv...

Страница 82: ...4 6 Replaceable Parts HP OmniBook 900 Figure 4 2 Display Components Note 12 inch display shown For a 13 inch display the flex cable and mountings differ ...

Страница 83: ...le Parts Description Part Number Exchange User OmniBook Part Number Repl 900B 900 Adapter ac 60W 0950 2790 Yes Adapter ac 60W 0950 3634 Yes Adapter auto plug from airline 5182 5131 Yes Adapter auto airline 75W F1455 80003 Yes Adapter docking module bay F1468 60901 Yes Adapter PS 2 Y F1469 80001 Yes Assembly external module bay F1711 60901 Yes Battery panels set of two F1770 60904 Yes Battery w pan...

Страница 84: ...es Monitor stand tall F1477 60936 Yes Port replicator F1451 60901 Yes RAM board 32MB PC100 SODIMM 1818 7950 Yes RAM board 64MB PC100 SODIMM 1818 7951 F1660 69103 Yes RAM board 128MB PC100 SODIMM 1818 7952 F1660 69104 Yes Tray docking D OB900 with docking system F1477 60958 Yes Tray standard D OB900 with port replicator mini dock F1452 60909 Yes ...

Страница 85: ...F1770 69101 CPU 500MHz Pentium III uPGA 5182 5131 Adapter auto plug from airline Yes 5182 5165 Keyboard US English 5182 5166 Keyboard International English 5182 5167 Keyboard Canadian 5182 5168 Keyboard German 5182 5169 Keyboard Spanish 5182 5170 Keyboard French 5182 5171 Keyboard Swiss 5182 5172 Keyboard Swedish 5182 5173 Keyboard UK English 5182 5174 Keyboard Italian 5182 5175 Keyboard Danish 51...

Страница 86: ... Yes F1473 80003 Cable external FDD Yes F1474 80001 Drive CD ROM module Yes F1477 60936 Monitor stand tall Yes F1477 60958 Tray docking D OB900 Yes F1580 60956 Screw M3 6mm F1629 60911 Screw M3 4mm F1642 12001 Software CD Mediamatic MPEG SW F1653 80001 Drive DVD module Yes F1706 60901 Charger battery external Yes F1711 60901 Assembly external module bay Yes F1711 60904 Case HDD kit Yes F1711 60905...

Страница 87: ...0 60929 Recovery CD Greek OB900 W95 98 F1760 60930 Recovery CD Turkish OB900 W95 98 F1760 60931 Recovery CD English OB900 W95 98 F1760 60932 Recovery CD German OB900 W95 98 F1760 60933 Recovery CD Spanish OB900 W95 98 F1760 60934 Recovery CD French OB900 W95 98 F1760 60935 Recovery CD Norwegian OB900 W95 98 F1760 60936 Recovery CD Swedish OB900 W95 98 F1760 60937 Recovery CD Finnish OB900 W95 98 F...

Страница 88: ...8 F1769 60943 Recovery CD Italian W95 98 F1769 60944 Recovery CD Czechoslovakia W95 98 F1769 60945 Recovery CD French NT4 F1769 60948 Recovery CD English NT4 F1769 60949 Recovery CD German NT4 F1769 60950 Recovery CD Spanish NT4 F1769 60951 Recovery CD Norwegian NT4 F1769 60952 Recovery CD Swedish NT4 F1769 60953 Recovery CD Finnish NT4 F1769 60954 Recovery CD Danish NT4 F1769 60955 Recovery CD It...

Страница 89: ...70 69021 LCD module 13 LG F1770 60923 Cable display flex 13 LG These drives are the preferred drives at the time of publication Drives shipped in units are subject to change without notice For current information about preferred and approved drives for these products see the latest version of service note HDD 01 Models called 900 in this manual have no marking in the serial number whereas models c...

Страница 90: ......

Страница 91: ...ctual and current owner This requires a sales receipt showing the unit serial number and owner s name or a written statement from the owner attesting that he or she is the owner of the unit The statement can be a fax copy of the document The fact that the unit is in the hands of an HP representative on behalf of the customer is not evidence of ownership In addition HP will not remove the password ...

Страница 92: ...n DOS in Windows or in some other application or combination of applications that is where you should make the determination Self test is not a normal operating condition and is not a sufficient tool to interpret display quality 2 Use the table below to determine whether the display should be considered for replacement These are the only conditions in this guideline that may call for a replacement...

Страница 93: ...7 or more single dark dots 3 or more double bright dots 3 or more double dark dots 7 or more total bright dots 7 or more total dark dots 11 or more total bright and dark dots Any occurrence of triple bright dots or triple dark dots Any occurrence of 3 bright dots within 20 mm Any occurrence of 3 dark dots within 20 mm Mechanical Imperfections Spots b Lines c Polarizer scratches d Polarizer dents b...

Страница 94: ...more lines 0 3 mm long 7 or more scratches 0 30 mm long 7 or more dents 0 0 5 mm avg dia Any spot or dent over 0 5 mm avg dia Any line over 3 mm long Any scratch over 30 mm long Definitions of imperfections a Bright or dark dot A subpixel red green or blue dot that is stuck on or off b Spot A point on the display that appears dark or bright and does not change in size Caused by foreign circular ma...

Страница 95: ...MB 1818 7952 1818 7952 RAM board 128MB F1711 60902 F1770 60905 Battery lithium ion New part has two front panels F1711 60912 F1770 60903 Cover keyboard screw F1711 60916 F1771 60979 Latch display 12 IBM F1711 60917 F1711 60978 Case display 12 IBM F1711 60920 F1769 60960 Case top 12 F1711 60922 F1769 60910 Case bottom 12 New part requires new top case F1711 60926 F1769 60907 Fan 12 F1711 60937 F177...

Страница 96: ......

Страница 97: ......

Страница 98: ...1 Product Information 2 Removal and Replacement 3 Troubleshooting and Diagnostics 4 Replaceable Parts 5 Reference Information Part Number F1770 90001 Printed in U S A 12 99 ...

Отзывы: