4.
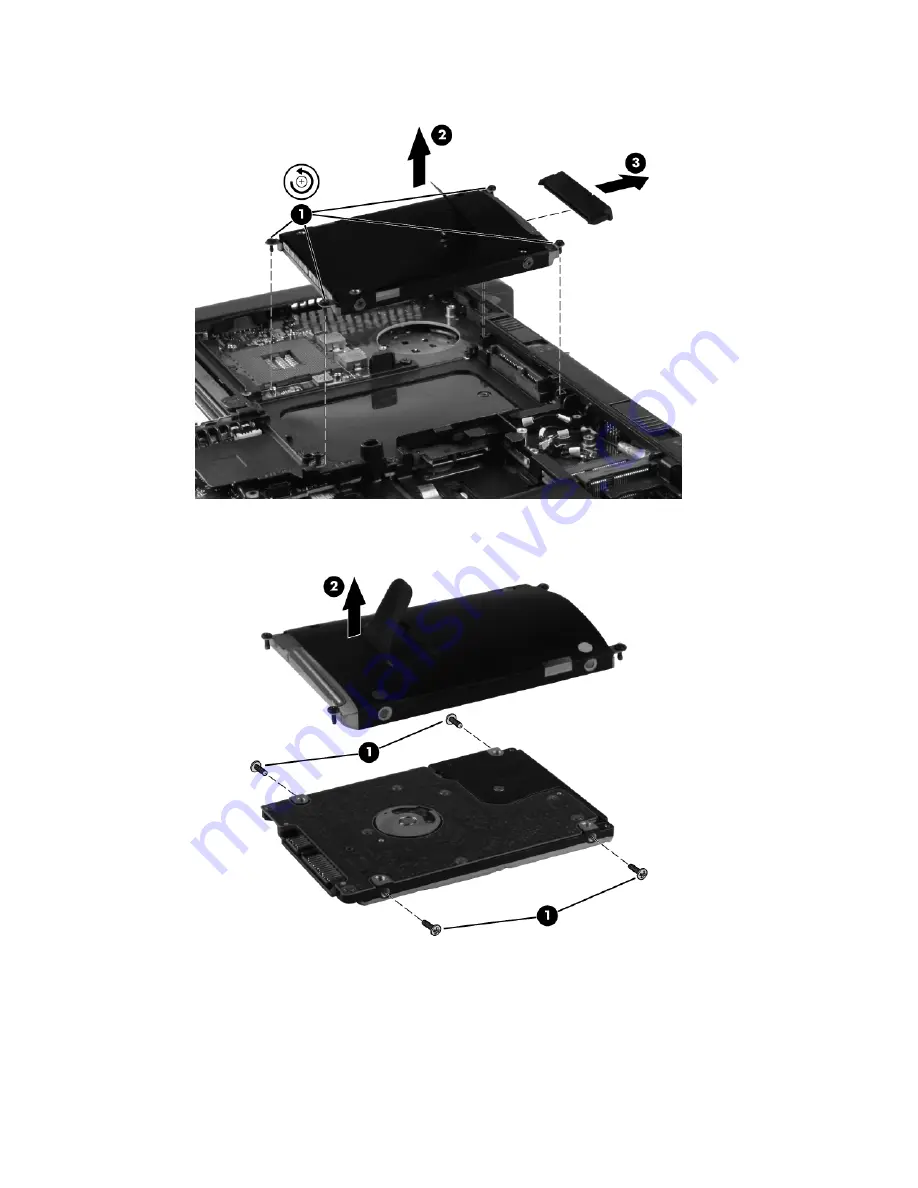
If it is necessary to replace the drive connector, remove the connector
(3)
from the drive.
5.
If it is necessary to replace the drive bracket, remove the two Phillips M3.0x3.0 screws
(1)
on
each side of the drive, and then lift the bracket
(2)
away from the drive.
Reverse this procedure to reassemble and install the drive.
Component replacement procedures
61
Содержание EliteBook 2560p
Страница 1: ...HP EliteBook 2560p Notebook PC Maintenance and Service Guide ...
Страница 4: ...iv Safety warning notice ...
Страница 8: ...viii ...
Страница 27: ...Computer major components Computer major components 19 ...
Страница 76: ...10 Remove the base enclosure 7 68 Chapter 4 Removal and replacement procedures ...
Страница 111: ...6 Select Repair your computer 7 Follow the on screen instructions Windows Vista 103 ...


