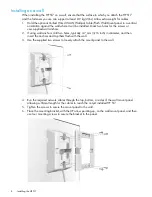
Remove product from packaging
Inspect the package contents and verify that they are free from defects. The package contains:
•
HP 517 Unified Walljack
•
Mounting bracket
•
Ethernet jumper cable
•
Screws
•
Documentation
Installing on an electrical box
Before you begin, run the required network cables through the bottom of the electrical outlet box
on which you are installing the HP 517. Be sure to provide enough cable length to reach the HP
517.
NOTE:
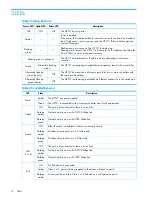
The HP 517 is shipped with two pairs of mounting screws. The two shorter mounting
screws are for a standard NEMA-WD6 (US) electrical box. The two longer mounting screws are
for a BS 4662 (worldwide) electrical outlet box.
1.
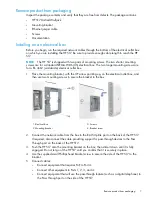
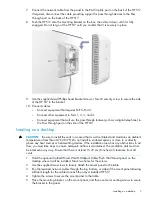
Place the mounting bracket, with the UP arrow pointing up, on the electrical outlet box, and
then use two mounting screws to secure the bracket to the box.
3. Screws
1. Electrical box
4. Bracket screw
2. Mounting bracket
2.
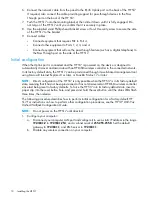
Connect the network cable from the box to the RJ-45 Uplink port on the back of the HP 517.
If required, also connect the cable providing support for pass-through devices to the Pass
Through port on the back of the HP 517.
3.
Push the HP 517 onto the mounting bracket on the box, then slide it down until it is fully
engaged. Do not let go of the HP 517 until you confirm that it is securely in place.
4.
Use the supplied small Phillips head bracket screw to secure the side of the HP 517 to the
bracket.
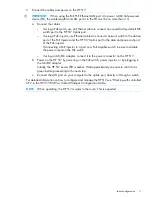
5.
Connect cables:
•
Connect equipment that requires PoE to Port 4.
•
Connect other equipment to Ports 1, 2, 3, and 4.
•
Connect equipment that will use the pass-through feature (such as a digital telephone) to
the Pass Through port on the side of the HP 517.
Remove product from packaging
7


