maintain your hp digital copier
40
hp digital copier series
4
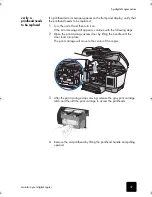
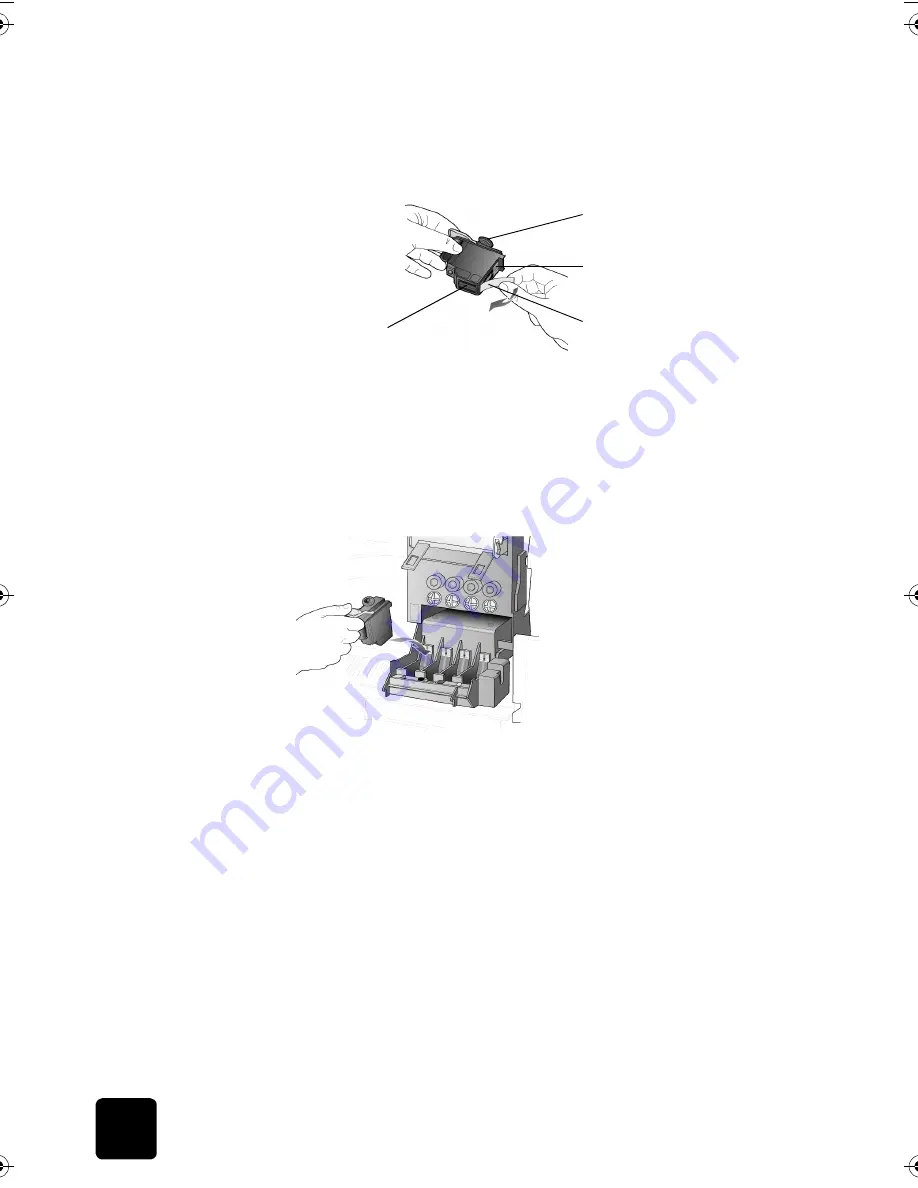
Remove the new printhead from its packaging and, being careful to
touch only the black plastic, gently remove the plastic tape.
Caution!
Do not touch the copper contacts, the printhead
tower, or the ink nozzles.
removing the plastic tape from the printhead
5
Match the color on the top of the printhead to the color on the
printhead carriage.
6
Push the new printhead firmly down into the appropriate slot using the
printhead handle. Do not touch the printhead tower, and do not
remove the printhead handle.
7
Move the print carriage latch down, and make sure the loops catch
the hooks. Snap the latch into place, then close the print carriage
access door.
8
After the message appears in the front-panel display, press
Enter
to
align the printheads.
handle ink
cartridges
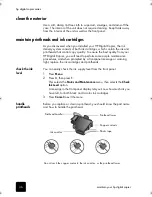
Before you replace or clean ink cartridges, you should know the part names
and how to handle them.
Plastic tape
Printhead tower
Copper contacts
Ink nozzles
GwenRG.book Page 40 Thursday, January 31, 2002 5:20 PM
Содержание 510 - Notebook PC
Страница 1: ...hp digital copier series reference guide 510 610 ...
Страница 12: ...get help 6 hp digital copier series ...
Страница 20: ...load originals and paper 14 hp digital copier series ...
Страница 58: ...maintain your hp digital copier 52 hp digital copier series ...
Страница 94: ...technical information 88 hp digital copier series ...
Страница 99: ...93 hp digital copier warranty on copier 80 warranty upgrades 80 ...
Страница 100: ...index 94 hp digital copier ...
Страница 101: ......

