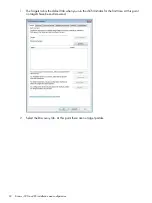
6.
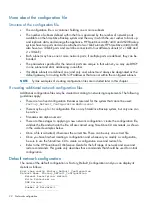
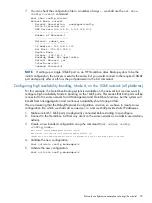
You can check the configuration file using:
net show config current
Network Name: current
Network Description: onegigportconfig
Write Protected: no
DNS Servers:16.110.135.51 16.110.135.52
----------------------
Number of Networks:2
----------------------
Network: subnet_one
----------------------
IP Address: 192.168.1.100
Net Mask: 255.255.255.0
Domain Name:
Gateway: 192.168.1.1
Bonding Mode: Not applicable
Default Network: yes
Interfaces:eth0
Command Successful
----------------------
Network: subnet_two
----------------------
IP Address: 192.168.2.100
Net Mask: 255.255.255.0
Domain Name:
Gateway: 192.168.2.1
Bonding Mode: Not applicable
Default Network: no
Interfaces:eth1
Command Successful
Example 3: Adding the 10GbE network (4400 Series only)
For this example, we are assuming you have already created a new configuration file to configure
HA bonding on 1GbE ports and called it
bondedports
. The subnet name already configured is
bond_net1
. We are going to modify it to add a second subnet for the 10GbE network and bond
the 10GbE ports, using network bonding mode 6. We shall call the second subnet
bond_net2
1.
Make sure both 10 GbE ports are physically connected before starting to re-configure.
2.
Connect to the StoreOnce CLI from any client on the same network as admin user (Admin,
admin) and display the port details.
net show ports
3.
Add a new subnet called
bond_net2
to the
bondedports
configuration file.
net add subnet <existingconfig> subnet <newsubnetname> [subnet parameters]
#net add subnet bondedports subnet bond_net2 default no
nl
ipaddr 192.168.2.100 netmask 255.255.255.0 gateway 192.168.2.1
nl
domain mycompany.local bonding 6 port eth4,eth5
4.
Validate the new configuration.
#net validate config bondedports
5.
Activate the new configuration.
#net activate config bondedports
Network configuration examples not using the wizard
27


