Connecting to a Display
11
Wireless via HoverCast
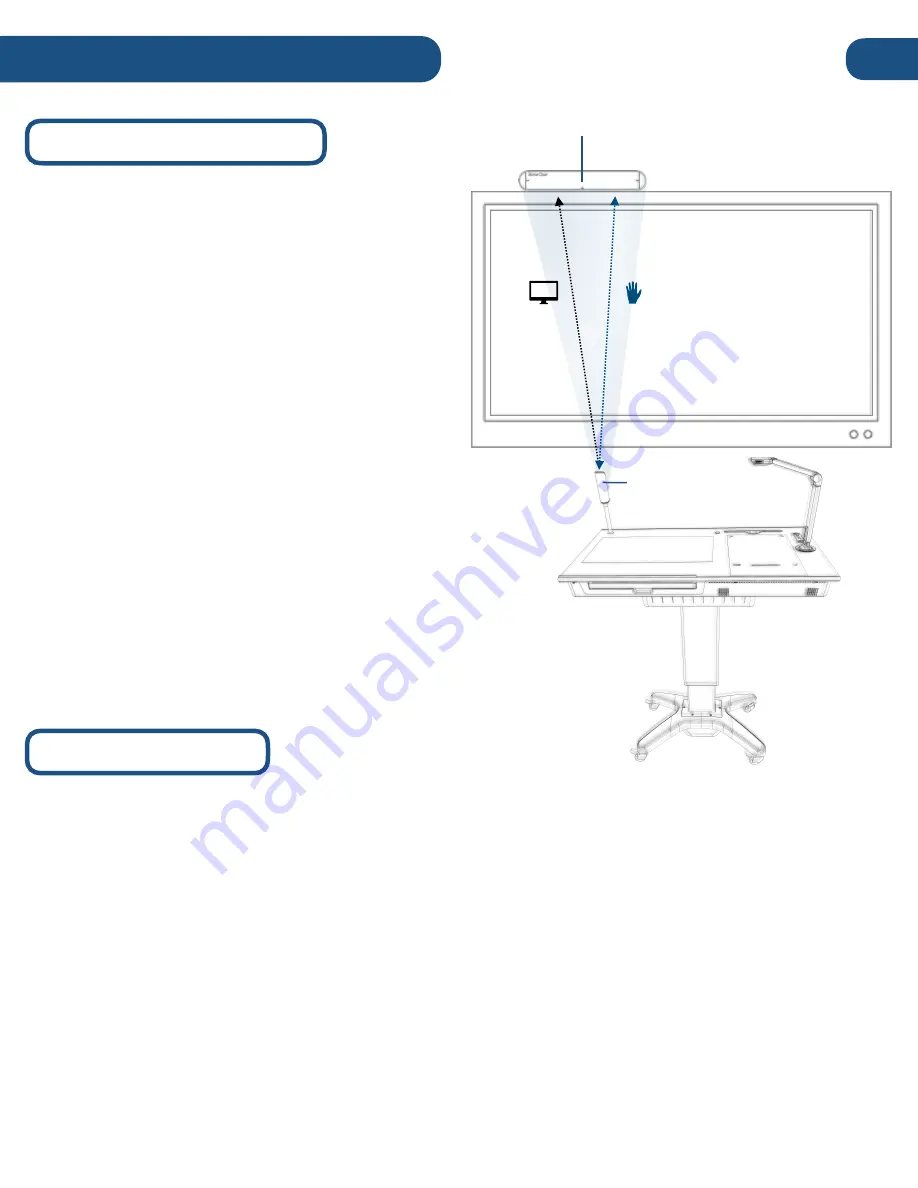
The Pilot comes equipped with a wireless HDMI
transceiver system
called
HoverCast
. Composed
of a
transmitter
and
receiver
pair: The
Transmitter
(built onto the Pilot) sends the Pilot's computer
image and on-screen annotations to the HoverCast
Receiver
connected to the display, which serves as
a large screen monitor for the Pilot. When used in
combination with an
interactive flat panel, the
HoverCast
also
sends
annotations made on the
Panel back to
the
Pilot
.
The HoverCast transceivers are
factory-paired
, so it is possible
for multiple
Pilot and
HoverCast
enabled displays to operate in
close proxiimity without interference.
The Pilot's
HoverCast
does not require a WiFi signal to function, wireless HDMI
operation does not affect internet bandwidth. The ideal tested
range between the HoverCast transceivers is 30 feet.
HoverCast Set-Up
1)
Mount
the
Receiver
:
Place
the
HoverCast
receiver
on
the top or side of
the display
and secure it
in place using the thumbscrew on the back side of the unit.
The receiver can also be placed next to a
projector or wherever
the optimum location is deemed to be
. The receiver must be within
transmission
range
.
2) Connect HDMI and USB:
Using the supplied cables, make HDMI and USB connections between the
HoverCast receiver and Display. Some IFP's may have multiple touch USB inputs, be sure to connect
to the one associated with the HDMI input you are using.
3) Connect Power
: Connect the HoverCast power adapter and plug into an available power outlet.
4) Power the HoverCast Reciever:
Press the power button on back of the HoverCast receiver to
power on.
Touch
Signal
HDMI
Signal
Reciever
Transmitter
Содержание Pilot 3
Страница 1: ...Pilot 3 User s Manual...
Страница 4: ...PAGE INTENTIONALLY LEFT BLANK...


