15
J. Startup
WARNING
1. All parts are factory-adjusted. Improper
adjustments may adversely affect safety,
performance, component life, and warranty
coverage.
2. If the icemaker is turned off, wait for at least
3 minutes before restarting the icemaker to prevent
damage to the compressor.
3. To prevent damage to the water pump, do not
leave the control switch in the "WASH" position for
extended periods of time when the water tank is
empty.
4. On remote air-cooled model, the icemaker should
have power for a minimum of 4 hours prior to
startup to prevent compressor damage.
5. At startup, confirm that all internal and external
connections are free of leaks.
1) Open the water supply line shut-off valve(s).
2) Remove the front panel.
3) Move the control switch on the control box to the "ICE"
position.
4) Replace the front panel in its correct position.
5) Turn on the power supply, and allow the icemaker to
operate for a total of 10 minutes.
6) Turn off the power supply, then remove the front panel.
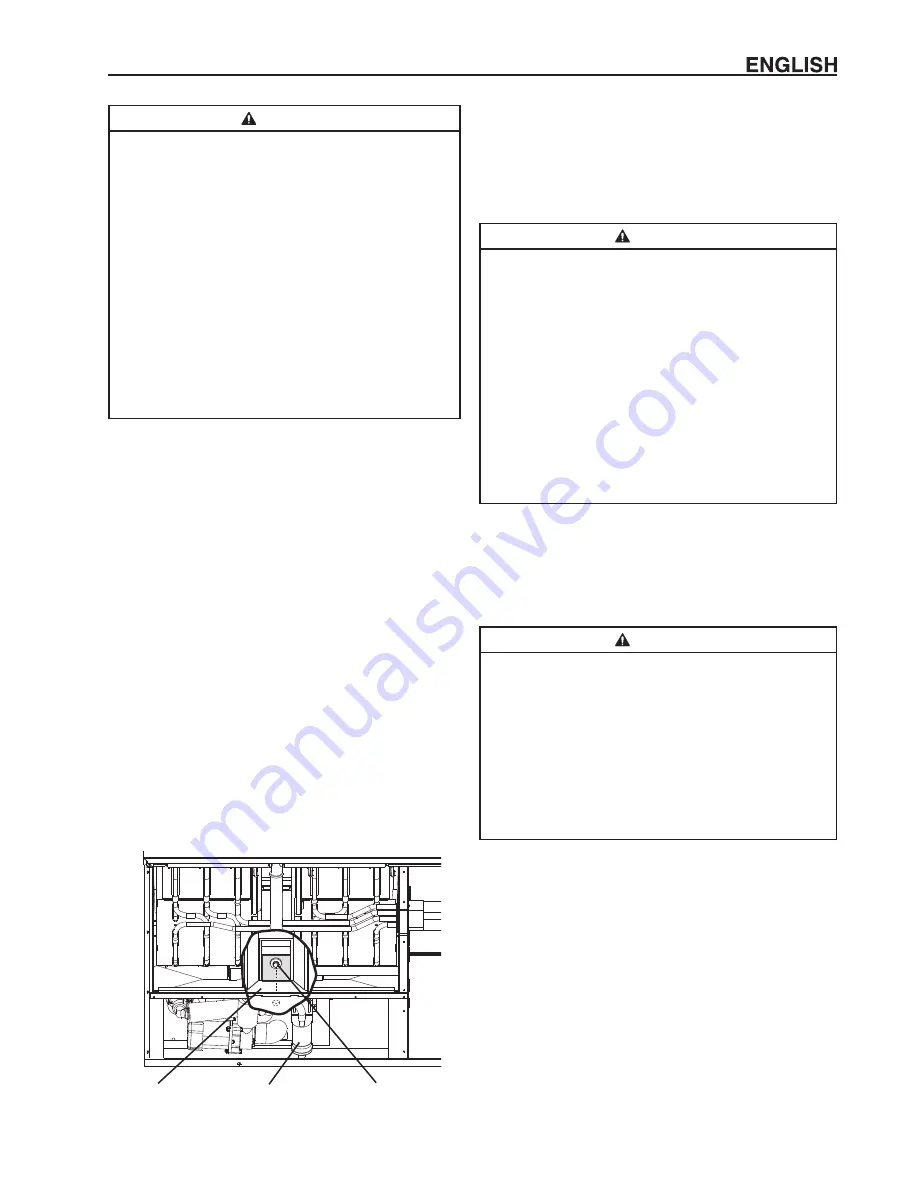
7) Remove the insulation panel. Remove the drain plug
located on the lower front part of the ice chute. See
Fig. 20. Allow the water tank to drain.
8) Replace the drain plug, insulation panel, and front panel
in their correct positions. Be careful not to cross thread
the drain plug.
9) Clean the storage bin liner using a neutral cleaner.
Rinse thoroughly after cleaning.
10) Turn on the power supply to start the automatic
icemaking process.
11) To confirm bin control operation, press and hold the
bin control's actuator paddle during the first 5 minutes
of the freeze cycle. The icemaker should shut down in
approximately 15 seconds.
12) On water-cooled model, confirm proper condenser drain
outlet/return outlet temperature as outlined in "I.H.2.
Water-Cooled Condenser."
Drain Plug
Ice Chute
Fig. 20
II. Cleaning and Maintenance Instructions
This icemaker must be cleaned and maintained in
accordance with the documentation and labels provided
with the icemaker. Consult with your local distributor about
cleaning and maintenance service. To obtain the name and
phone number of your local distributor, contact your nearest
Hoshizaki Service office (listed in the Instruction Manual
and at www.hoshizaki.com).
WARNING
1. Except as specified below, only qualified service
technicians should attempt to service this icemaker.
2.
CHOKING HAZARD:
Ensure all components,
fasteners, and thumbscrews are securely in place
after any cleaning or maintenance is done to the
unit. Make sure that none have fallen into the
storage bin.
3. This appliance must not be cleaned by use of a
water jet.
4. To prevent possible damage, do not clean the
plastic parts with water above 104°F (40°C) or in a
dishwasher.
5. The storage bin is for ice use only. Do not store
anything else in the storage bin.
A. Cleaning and Sanitizing Instructions
Performed by Qualified Service Technician
Hoshizaki recommends cleaning and sanitizing this unit at
least once a year. More frequent cleaning and sanitizing,
however, may be required in some existing water
conditions.
WARNING
1. To prevent injury to individuals and damage to the
icemaker, do not use ammonia type cleaners.
2. Carefully follow any instructions provided with the
bottles of cleaning and sanitizing solution.
3. Always wear liquid-proof gloves and goggles to
prevent the cleaning and sanitizing solutions from
coming into contact with skin or eyes.
4. To prevent damage to the water pump seal, do not
operate the icemaker with the control switch in the
"WASH" position when the water tank is empty.
1. Cleaning Procedure
1) Dilute 27 fl. oz. (800 ml) of Hoshizaki "Scale Away" with
5 gal. (19 l) of warm water.
2) Remove all ice from the evaporator and the storage bin.
Note: To remove cubes on the evaporator, turn off the
power supply and turn it back on after 3 minutes.
The harvest cycle starts and the cubes will be
removed from the evaporator.
3) Turn off the power supply.
4) Remove the front panel, then remove the insulation
panel by first removing the thumbscrew, lifting up the
panel slightly and pulling it towards you.
5) Remove the drain plug located on the lower front part of
the ice chute. See Fig. 20. Allow the water tank to drain.
6) Replace the drain plug in its correct position. Be careful
not to cross thread it.
Float Switch Assembly
Содержание KM-1301S J-E Series
Страница 35: ...35 Intentionally Left Blank ...


