Hoshizaki IM-65LE-Q Скачать руководство пользователя страница 6

4

4. SERVICE DIAGNOSIS

This  service  manual  provides  specific  information  for  IM-65LE-Q  only.  For  any  other 

information, please refer to the service manual for the standard model IM-65LE.
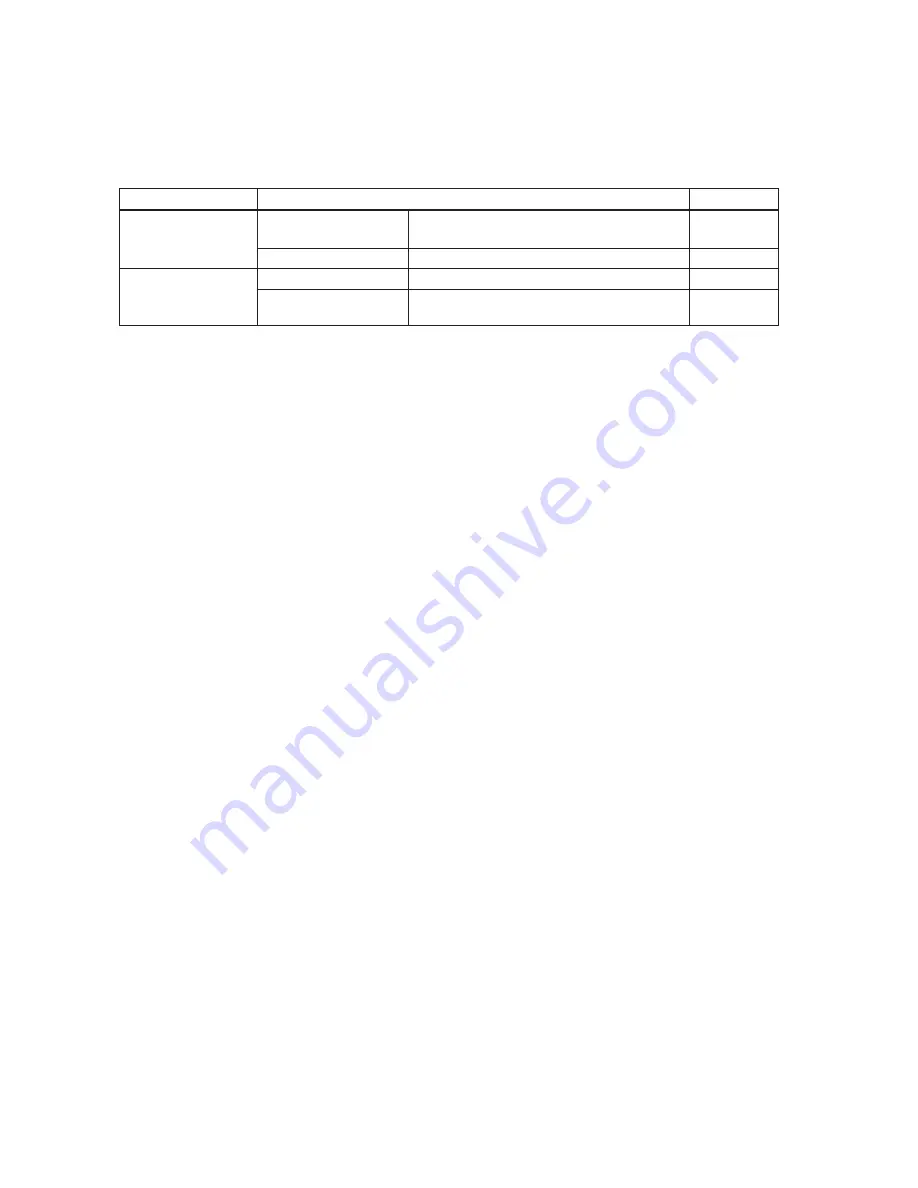
PROBLEM

POSSIBLE CAUSE

REMEDY

[1] Deformed ice. a) Water Pan

  Lower Evaporator

1. Upper and Lower Evaporators not 

aligned.

1. Readjust.

b) Lower Evaporator 1. Coating damaged, removed or worn. 1. Replace.

[2] Cam Arm will 

not stop at a 

proper position.

a) Micro Switch (A)

1. Open circuit or moisture inside.

1. Replace.

b) Micro Switch (B)

1. Open circuit or moisture inside.

1. Replace.

Содержание IM-65LE-Q

Страница 1: ...NO E1AH 806 ISSUED MAY 8 2010 REVISED HOSHIZAKI SELF CONTAINED CUBER MODEL IM 65LE Q SERVICE MANUAL ...

Страница 2: ...GRAM 2 3 DIP SWITCH SETTING 3 4 SERVICE DIAGNOSIS 4 5 ADJUSTMENT OF MICRO SWITCH 5 This service manual provides specific information for IM 65LE Q only For any other information please refer to the service manual for the standard model IM 65LE i ...

Страница 3: ...ating position ACM and CM stop State 4 When water plate releases ice WV closes and water plate starts to open further State 5 When water plate fully opens and S1 moves to left arm down position HV opens When 3 minutes passes after CM stops in state 2 CM restarts State 6 Cube control thermistor senses temperature higher than defrost setting water plate starts to close and water supply begins State ...

Страница 4: ...2 2 WIRING DIAGRAM ...

Страница 5: ...3 3 DIP SWITCH SETTING Dip Switch No Volume Setting Freeze VR DSW 1 A Defrost VR DSW 2 4 Dimple Range DSW 3 4 Water Supply DSW 4 0 Code Setting 1 DSW 5 9 Code Setting 2 DSW 6 7 ...

Страница 6: ...model IM 65LE PROBLEM POSSIBLE CAUSE REMEDY 1 Deformed ice a Water Pan Lower Evaporator 1 Upper and Lower Evaporators not aligned 1 Readjust b Lower Evaporator 1 Coating damaged removed or worn 1 Replace 2 Cam Arm will not stop at a proper position a Micro Switch A 1 Open circuit or moisture inside 1 Replace b Micro Switch B 1 Open circuit or moisture inside 1 Replace ...

Страница 7: ...tuator by pushing up the lever too much 3 After adjustment check for proper operation To adjust the Micro Switch B 1 Push the loosely fit Switch Bracket fully to the left 2 Turn the Actuator Motor Arm to position the roller of the Micro Switch B as shown above 3 Push the Switch Bracket fully to the right until the Micro Switch B trips with a click sound Then lock the Switch Bracket in that positio...

Отзывы: