


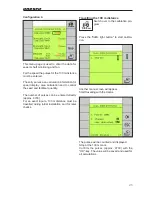


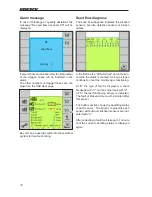


Setting the sensitivity
On the third page the sensitivity can be set with
the + and - keys (1) in 10 steps.
The setting depends on grain size, type and
quantity of seed.
Setting
The setting must be made during placement and
at normal working speed.
The sensitivity is thereby matched to the seed
quantity. Deviations are indicated by means of
an alarm.
During sowing regulate the sensitivity (2) up with
the + key (1), until the first sensors are reported
blocked.
Then reduce the sensitivity, until no blockage
is reported.
Normally 1 to 2 stages are sufficient. The further
you regulate down, the more quantity deviations
will be accepted, until the alarm will respond.
1
2
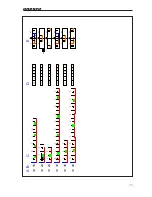
Seed flow monitoring
Seed flow monitoring is switched on as soon as
the sensitivity is set to 1 or higher.
The display of the first work page shows the
seed flow monitoring with the symbol (3).
During sowing the symbol is permanently vis-
ible. If the work signal fails, e.g. when turning
and no grains are blown through, the symbol
will flash.
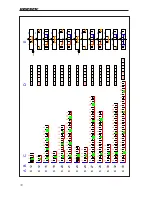
On the third page all sensors will then be re-
ported as blocked.
3


